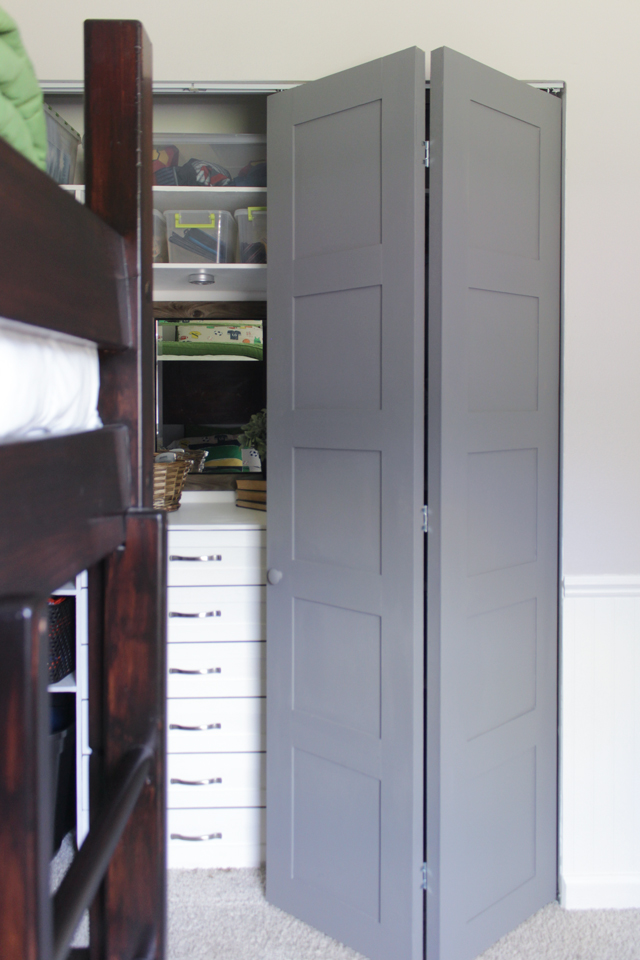
With our boys’ closet makeover reveal reveal a couple weeks ago, I promised I would share how I converted flush bifold closet doors into Craftsman Style 5 Panel Closet Doors. It is super simple and makes a huge difference in the way the doors look.
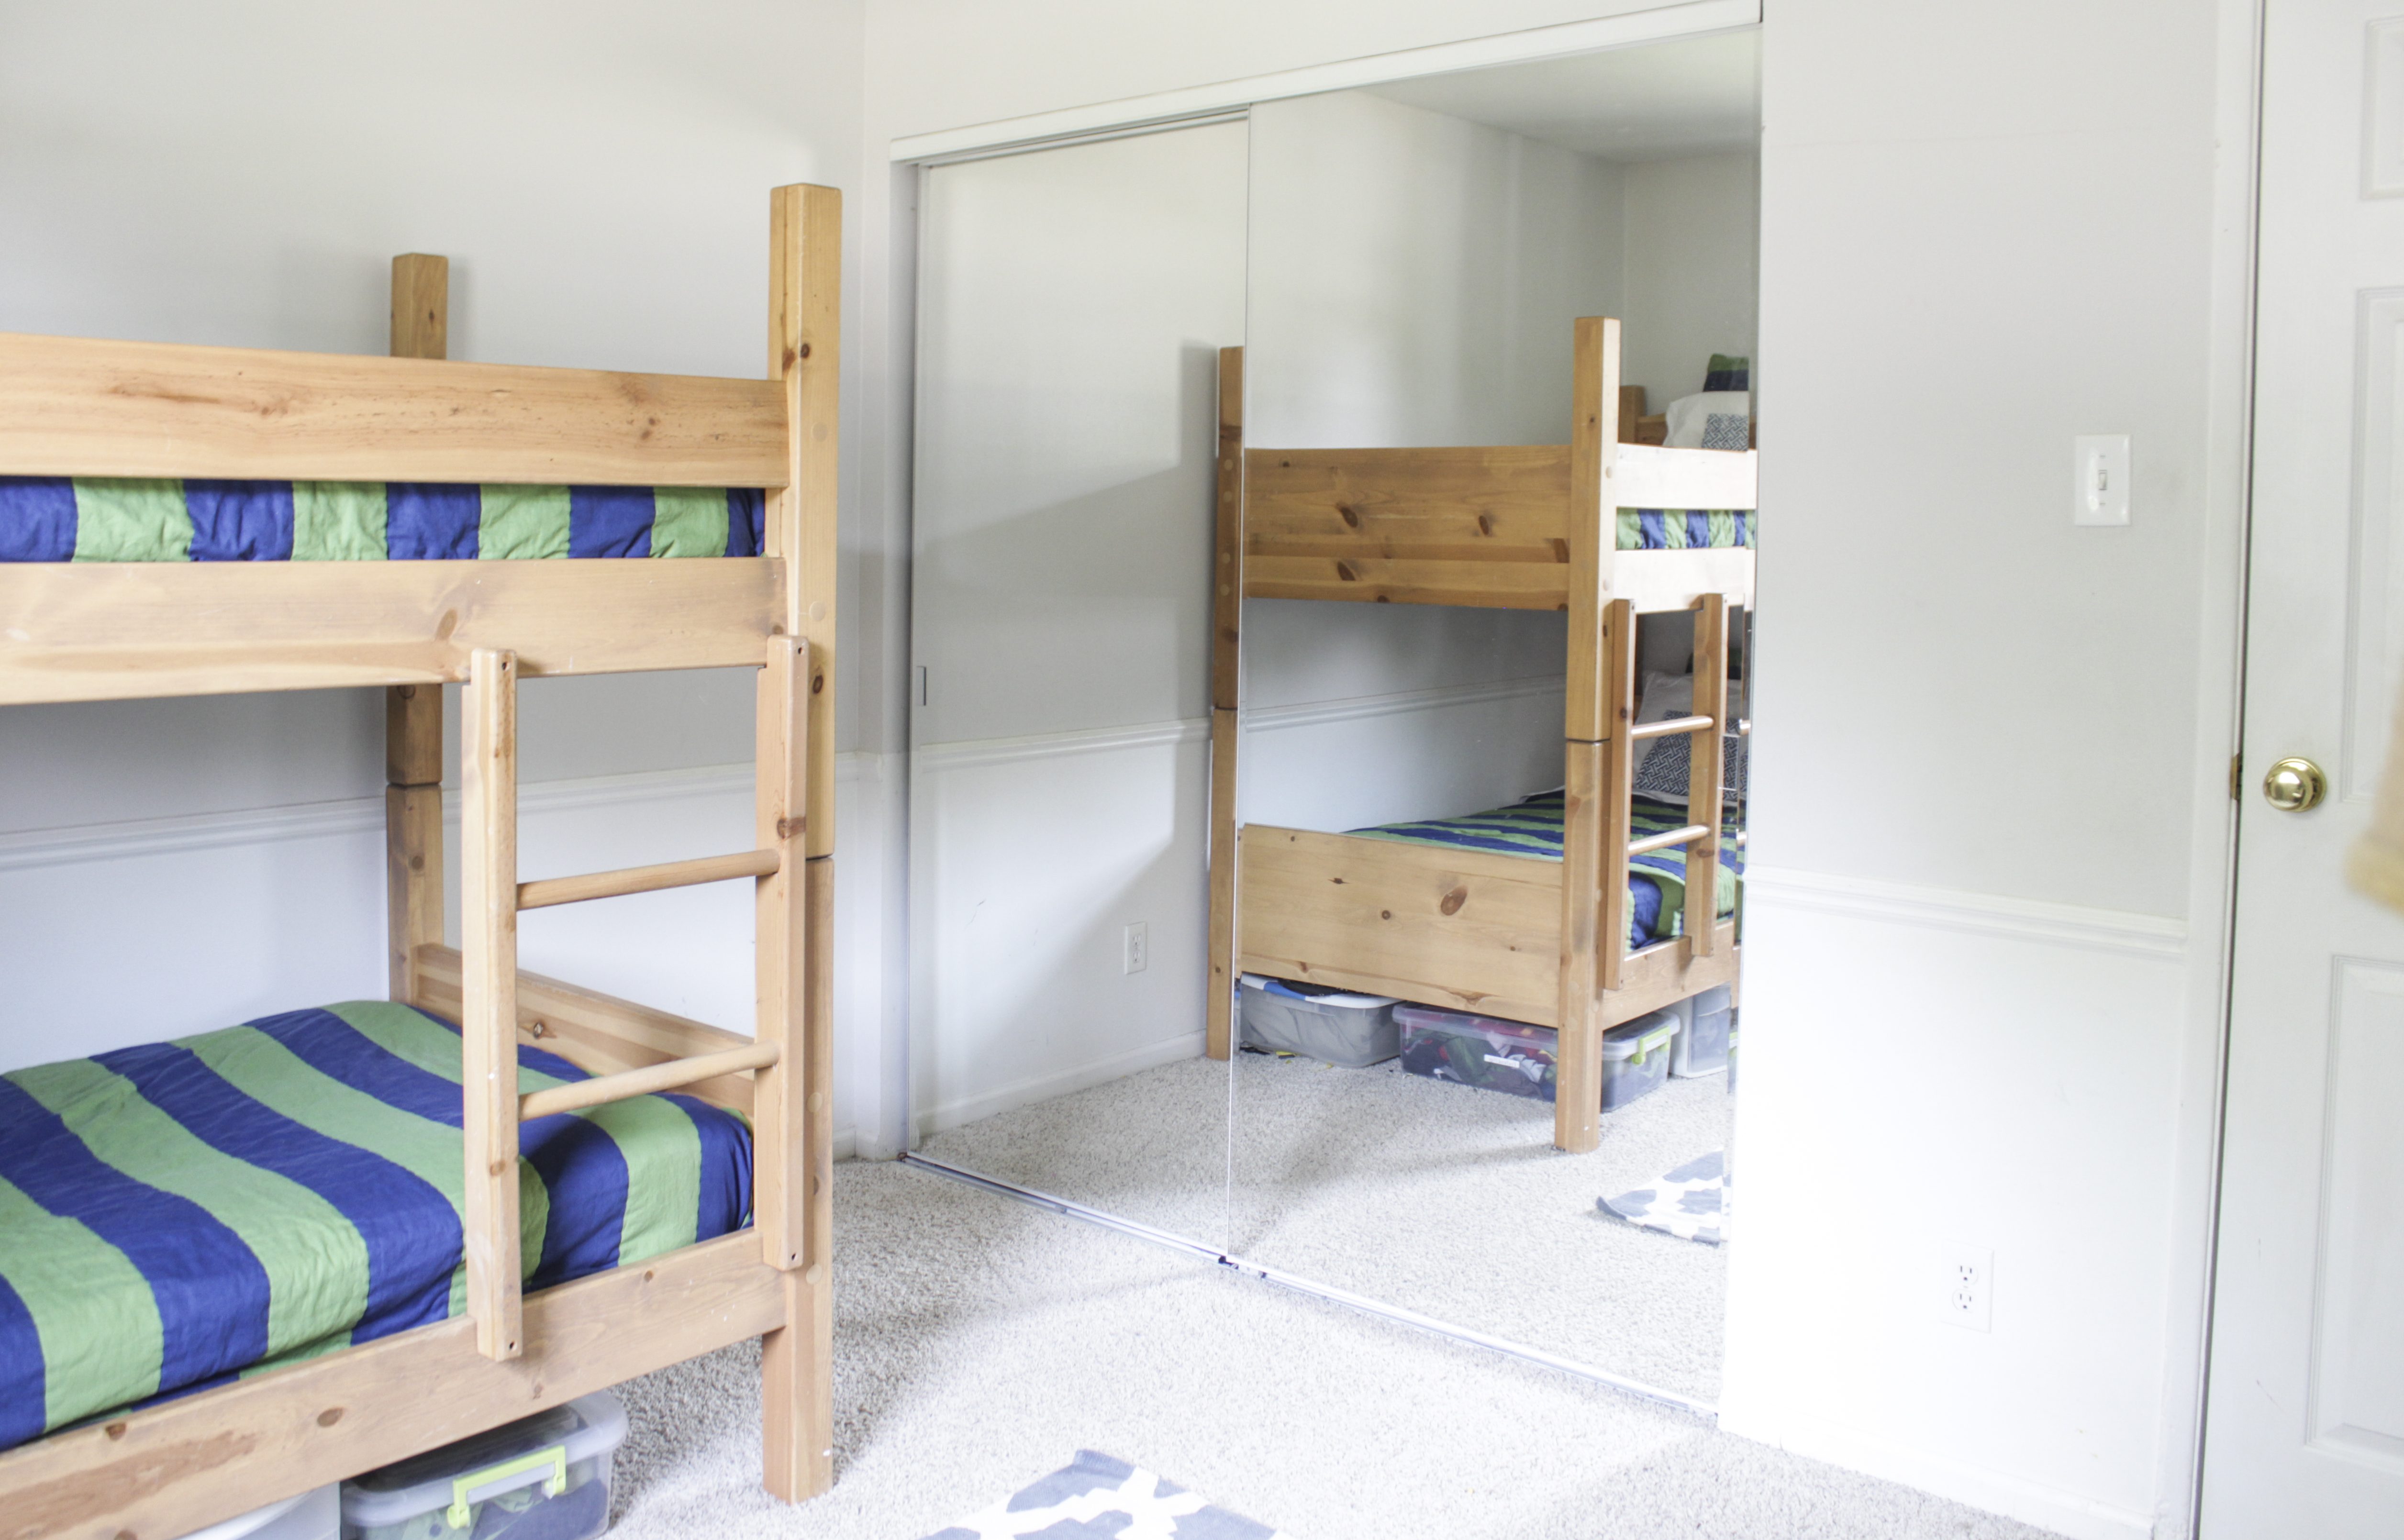
We previously had sliding mirror doors which only leaves half the closet accessible at a time. Bi-folds were the way to go, but the 6 panels doors carried at most home improvement stores was lacking style in my opinion. I wanted something Craftsman style. So I bought the cheapest doors available, the flat panel bi-folds, and made my own!
Before:
FYI, my closet was 1/4 inch shy of the standard 6 foot width opening, but two of these standard 3′ wide doors fit perfect with plenty of room on each side. I was worried the standard doors wouldn’t fit and I would have to buy custom, but I took a gamble and bought them anyway. I was surprised how perfect they were and I would say these would even fit in a 71 1/2″ opening. If you are still really close to that, you could even shave off a 1/4″ on each door if you really needed to, with a circular saw. I also installed them completely in the closet, getting the position right before I made them over, because I wanted to make sure I wasn’t messing with the fit after I had the paint job all perfect.
Supplies you will need for a standard 6′ wide closet:
2- 3′ wide bi-fold flat panel hollow core closet doors (found at most home improvement stores)
1- 4’x8′ sheets of 1/4″ underlayment plywood
Liquid nails adhesive
1″ nails, 18 gauge
Wood filler
White interior caulk
220 grit sandpaper
Tools Needed:
Measuring tape
Table Saw
Brad nailer
Orbital Sander
Caulk gun
Putty spatula
Step 1: Rip Plywood and Cut Strips
Cut down plywood into 8′ long strips that are 3 1/2″ wide. You should have a total of 13 strips. Cut 8 strips @ 78 7/8″. Then cut 24 – 10 3/4″ pieces (3 strips).

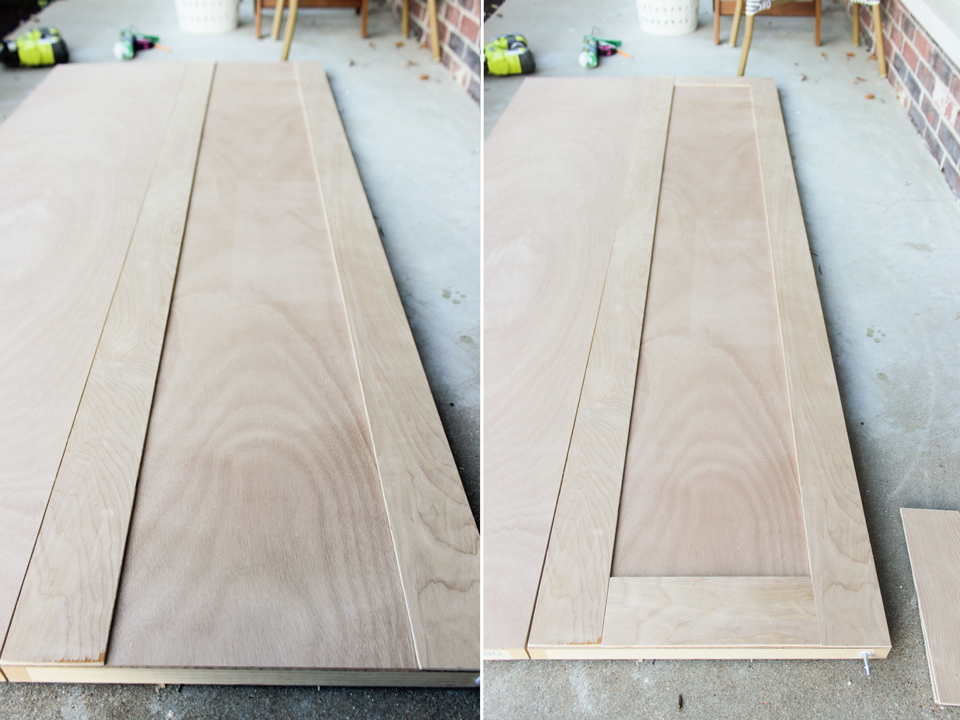
Step 2: Dry Fit Strips on Door
Working on one side of the door at a time, lay out 2 of the long strips on either side of the door. Place a short strip at the very top and bottom, sitting flush with the edge.
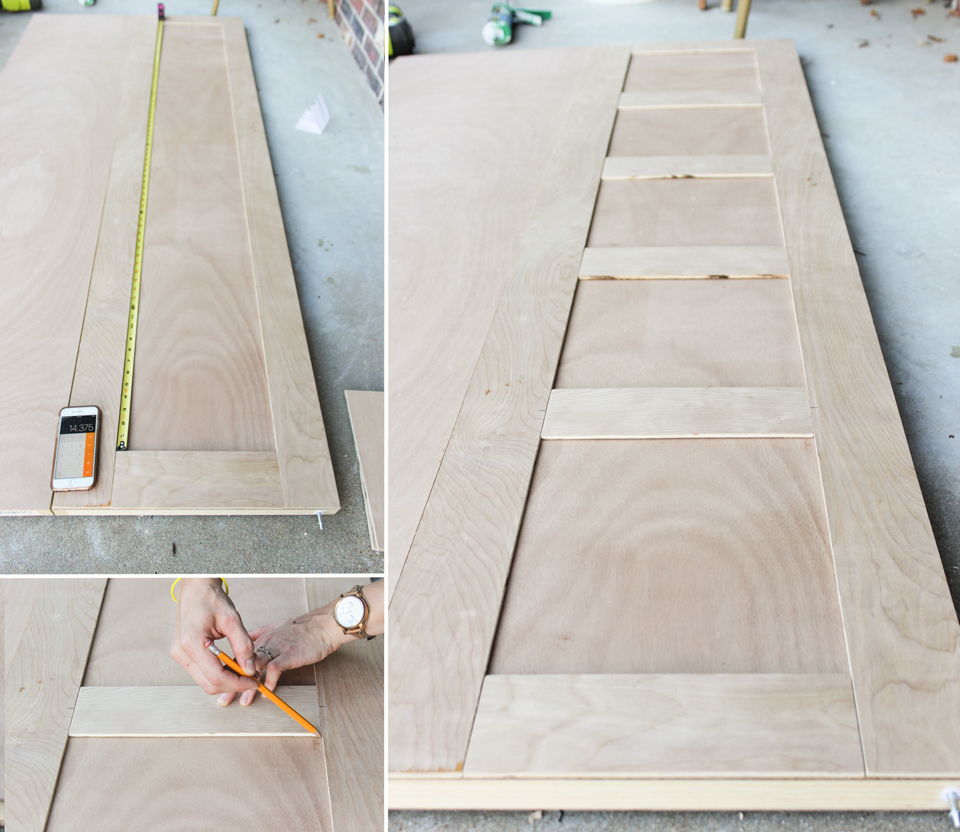
If you measure between the top and bottom strips, you will see the distance is 71 7/8″. Divide that by 5 to get the center marks of where each horizontal strip will go to create the 5 panels. Measure and mark from between the top and bottom strips, every 14 3/8″. Place the remaining 4 horizontal strips in between the top and bottom strips, making sure the center lines up with the marks made. Trace the outline of each piece with a pencil.
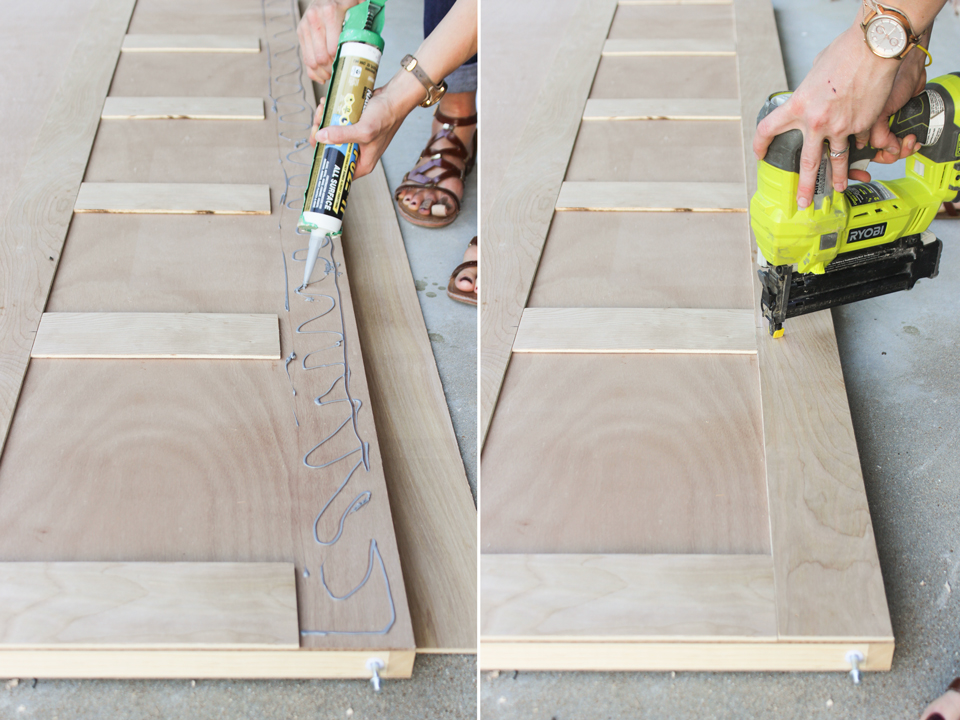
Step 3: Glue & Nails Strips Down
Remove one side strip at a time and apply liquid nails to the door where the strip would sit. Place the side strip back into place and secure with 1″ nails. Repeat with the other side, then the top and bottom strips, then the middle strips.
Step 4: Fill Holes & Edges, Then Paint
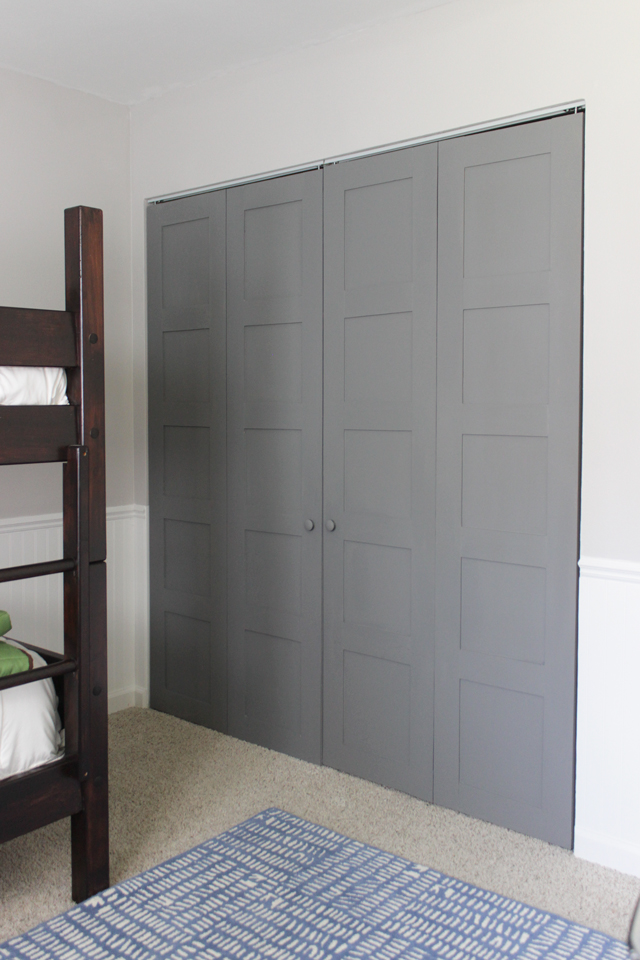
Fill nail holes and seams with wood filler. Let dry and sand smooth. Run a thin bead of caulk along all the edges of the inside panels (where the strips mean the door) and smooth out with a damp finger. Let dry completely, then paint the front and back of the door with 2 coats of paint. I used a color nearly identical to BM Kendall Charcoal in Matte.
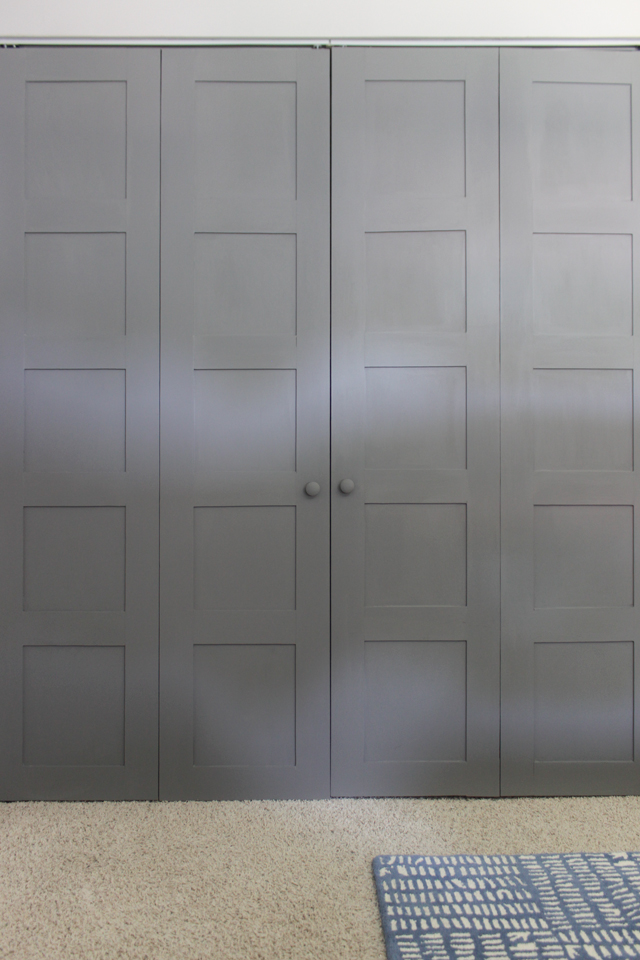
These turned out like everything I wanted and I love how they have a bit of a vintage look, but the clean lines are still a bit modern– exactly the style of the boys’ room.
Just so you know, I spent about $100 on 2 bi-fold doors, $12 on the underlayment, and around $10 for liquid nails and wood filler. I already had the nails, caulk and paint, so that put both of these doors at $120. Pretty good deal, no?
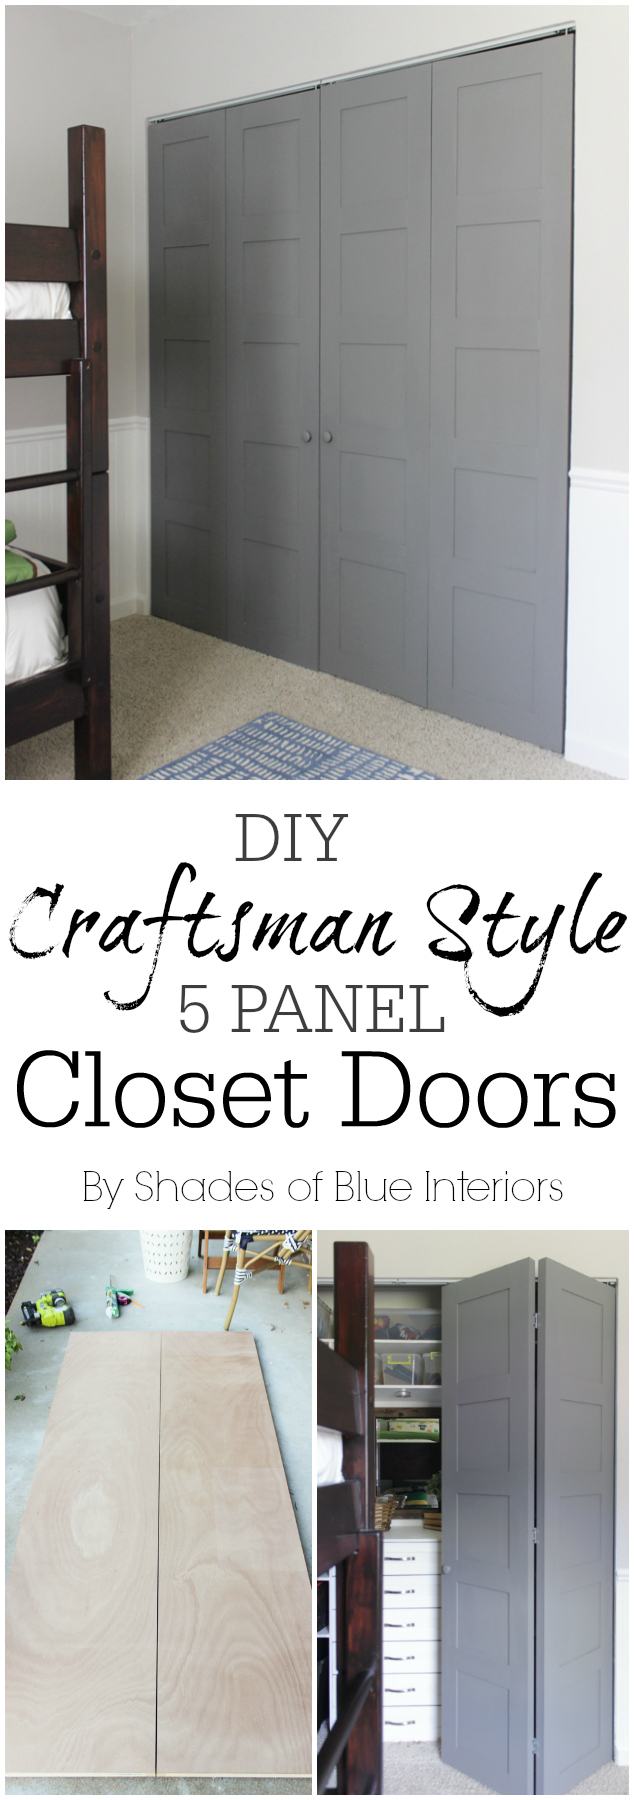
If you liked this tutorial, be sure to pin it! 🙂
These are so great!! I have been trying to figure out how to rework by girls’ existing (sliding) closet doors but you have me thinking starting from scratch may be the way to go!
My guest room just has regular sliding closet doors, but I would love to try this DIY with them! Adds the perfect amount of character and detail 🙂
Would this DIY work for regular swing doors as well? I am tired of our flush doors throughout the house (bedroom doors and closet bifolds) but too cheap to replace them all! Love how yours turned out!
Yes Amy! Super simple and cheap upgrade
Yes but you’d need to cut the door jam back the thickness of the plywood that you added to the door so that it would still close. So adding 1/4 inch to the door would require cutting 1/4 in off on the top and sides of your door jam.
Yes, but that would only be the case if the plywood was added to the side of the swing doors that hit the door jam. Many swing closet doors open out and wouldn’t hit a jam, so this addition would work without needed to cut down the jam.
Just discovered you through Southern Hospitality. I love this. I have original 1955 Luan doors in my house that were trimmed to accommodate the carpet. They are also in bad shape, chips, scratches, holes, etc. I’ve ripped out the carpet to expose the hardwood floors, but now all my doors are 2″ too short. I didn’t want to spend 1200+ on new doors, this is perfect!
This is a great look for a GREAT price. I’m going to trying doing this and also put mirrors between the panels. Maybe antiqued mirrors if I’m feeling it. I’ve been looking on Home Depot’s website for those bifold doors. Could you share which ones you bought?
Where did you find flat doors?? I can’t find them for the life of me 🙁
Home Depot has them for $50 per door (unless you order a custom size)
WEwhat would the estimated cost of materials be for an 8’x8′ wall of FYI doors, approx 5 0 doors/panels across? And please, how many hours of Labor?
I just purchased the materials for this. I want to try using wood glue instead of nails and construction adhesive. I am a bit unsure about nailing into a hollow door… so wood glue might work better.
Also the plywood strips here might be able to hide some of the imperfections caused by trimming the door.
I am using flat Jenn Weld doors and I think I have to trim 1/4 inch from each of the 4 panels.
Your welcome to do whatever makes you more comfortable. I’ve built these doors twice (one for my boys’ room and again for my bedroom) and didn’t have any problems– the nails don’t go all the way through so it isn’t an issue. Just know with wood glue and adhesive it will require A LOT of time waiting for drying time, and lots of clamps. I had to trim off about 1/4″ from my doors on the top and bottom (for my bedroom closet) and it didn’t cause any imperfections. However, I an see if you were to trim width there might be some issues. Good luck!
Thanks for the post and for the reply! I bought 2 of the jenn weld doors and it looks like I can trim off 1/4 inch from left and right without redrilling any holes. So it’s a less severe solution than actually chopping up the door.
Since the modification makes the door thicker I will probably have to trim off an additional 1/16 from the corner of the door itself (before gluing) and then maybe 2/16 from the plywood strip that is glued to that edge. If I do it at a 60 degree angle it should not be too visible and will give the extra clearance I need for my opening (which is unfortunately less than 48 inches.
I am getting 2 more sets today … I will let you know how this turns out.
I have been wanting to update some of my doors and this is perfect! I have existing flat bi-fold doors for my laundry area coming in from the garage but next to them is my odd-sized pantry door. I had looked into the cost of replacing the pantry door with a Craftsman style but it was going to have to be a custom order. This may save me a few hundred bucks!
I have metal doors I am trying to do this with. Anyone try that and if so does just using liquid nail or construction adhesive work to hold the wood in place?
Question: what did you use and where did you buy the system to put these door on the sliding rails. Youknow those pins at the bottom and top of those doors. Those pins keep the door in place and going.?
I’ve just updated my pantry doors to craftsman. We are a little concerned that putting the door handle where the two doors come together wouldn’t open the doors effectively. I see that you’ve done that. Any problems opening the doors?
Yes. Don’t do what I did. I had to take them off and put them back on where they fold in the middle.
Just wondering if you had any problems with the doors gliding easy or any other problems with the extra weight of the wood on the doors?