It has been awhile since I showed a proper furniture reveal, so I thought I’d do that today!
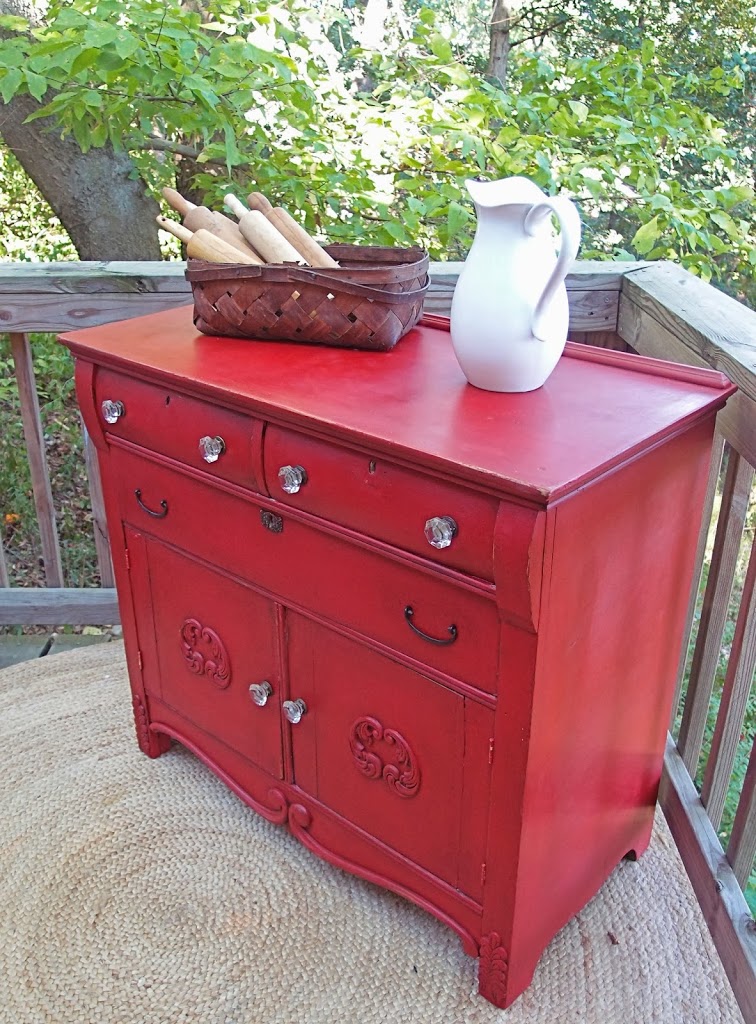
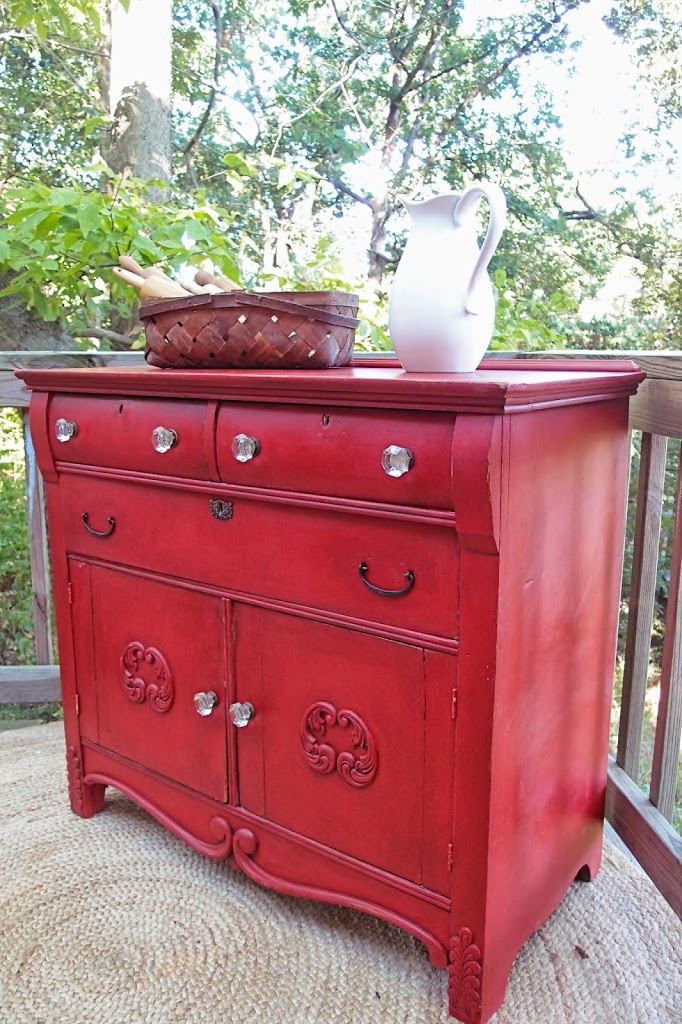
Say hello to this cute red country cabinet that might be my most favorite furniture piece ever!

I feel like I might have said that before… 🙂 This cabinet was in SUCH terrible shape before-hand and I spent a week just doing repairs. Some people might think that it wouldn’t be worth it. But she has ORIGINAL glass knobs for heaven’s sake! I had to give my best effort at least!
Ok, so here is the deal on this red cabinet. Most of the repairs I had done before on previous projects. Except this one had adorable wood applique on the legs and door fronts that had some parts missing! I normally remove wood applique that has pieces broken off or missing. But I really didn’t want to do that! So I thought about it for a couple days and still couldn’t figure out a solution.
Then I slept on it.
And I had a dream of how to fix my wood applique dilemma!
I’m not even joking. I dreamt the solution and woke up in the middle of the night and remembered every detail. Then the next morning I still remembered it and got right to work.
I know we all have our different beliefs, but I truly believe God is involved in every detail of our lives and cares about what we care about. He gave me that inspiration, I have no doubt in that.
So now, I’m going to pass on that inspiration and hopefully it will help someone else out there!
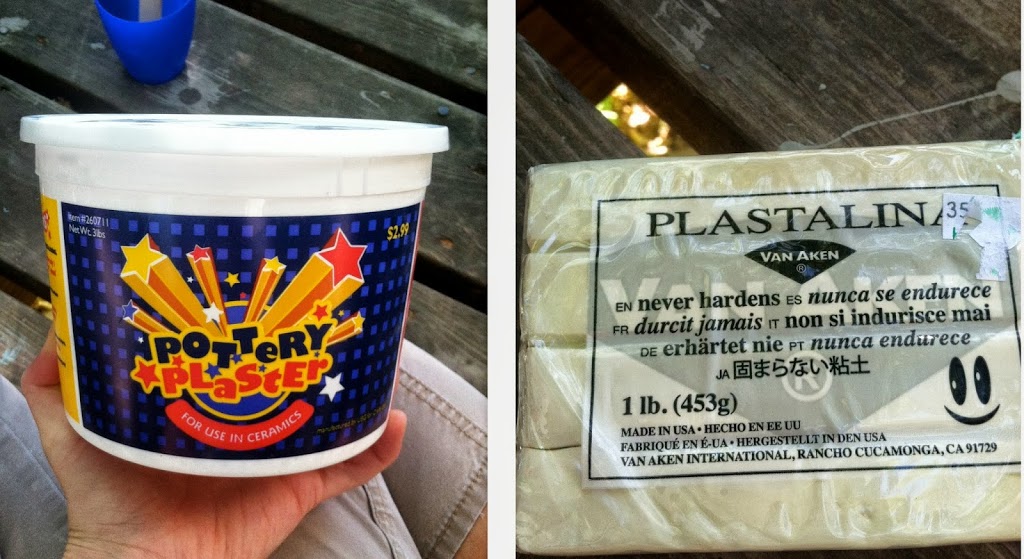
Ok, it basically requires two items: sculpy clay (or something similar) and plaster of paris.
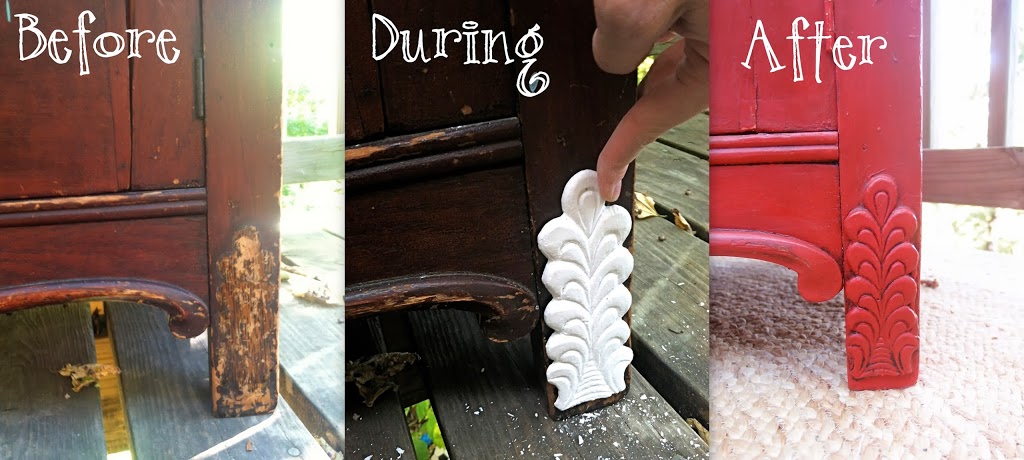
1- Using the clay, make a mold of the applique that is complete (in my case, the other leg).
2- Fill it with mixed plaster (2 parts plaster powder with 1 part water) and let it dry completely (30 min).
3- Carefully remove clay so you don’t break the plaster. Make sure the plaster doesn’t feel cold or slightly
damp still… it can break easier if it isn’t completely dry.
4- Using something sharp (I used old scissors but you can use a knife), carve around edges, cleaning up the
design, and also on the bottom, making it completely flat so it will be flush against the furniture.
5- Wait 24 hours before gluing the plaster applique with epoxy glue. I laid the cabinet on it’s back, so I
didn’t need to clamp it down.

Before of door front:
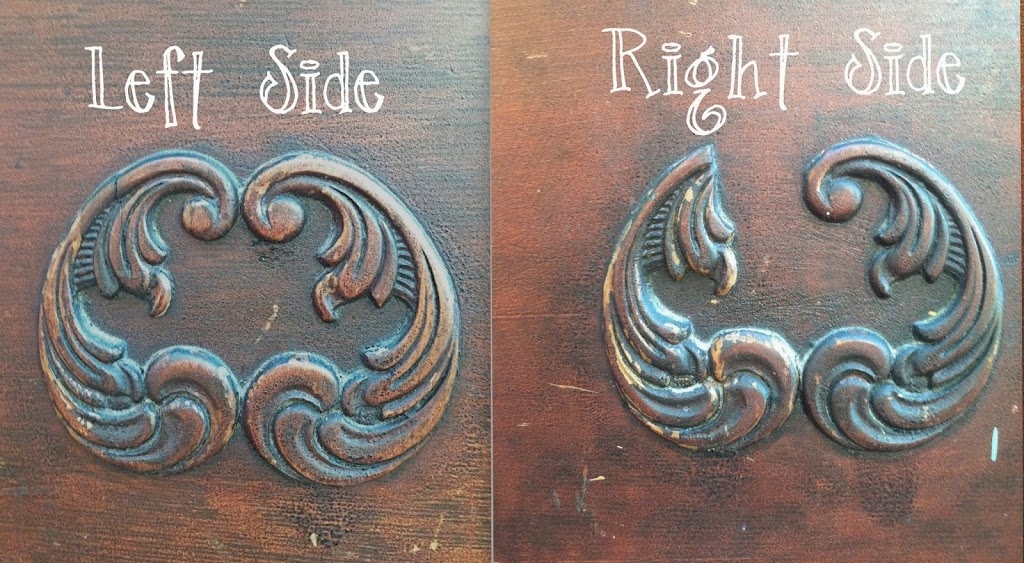
After (repaired side):
I also had to repair a hack job someone did when removing the locking mechanism on one of the top drawers. I used layers of wood filler and sanded it smooth:

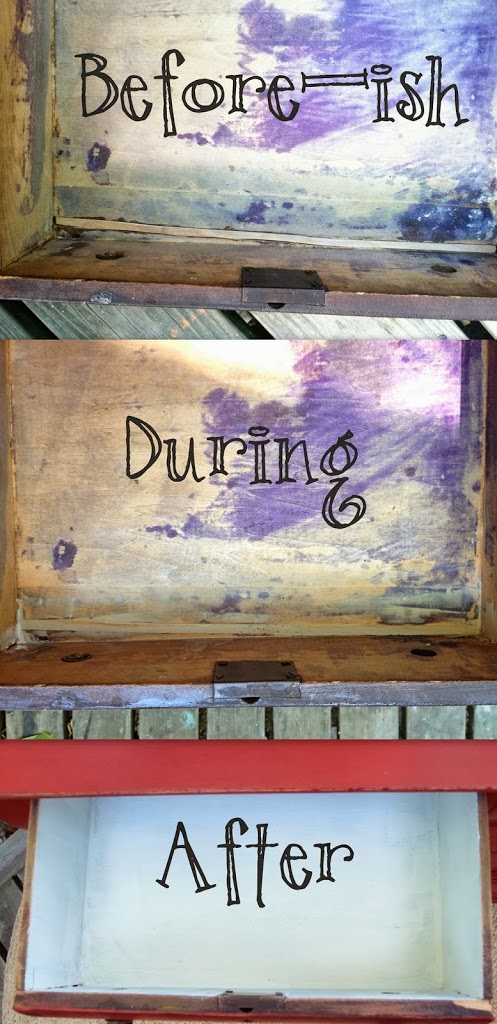
Another repair I did that was new-ish for me was the inside of a drawer. Someone had glued the drawer bottom into the side grooves, so it couldn’t ever be replaced without ruining the drawer completely. Only problem was there was a slice of wood missing that wasn’t even a straight slice! I took some paper and made a template by placing it over the missing slice, tracing the shape I would need, and then transferring that shape to a new piece of 1/4 inch plywood, so I could cut out the exact shape with a jigsaw. I sanded the new wood slice a little and got it to fit pretty snug (top picture below). Then I used wood filler to fill in the crevices (middle picture below). Lastly, I painted the interior of the entire cabinet with oil-based Zinsser Primer, to seal off stains and smells.
I also had to make some repairs to the doors. They were cracked, loose and one of the hinges were missing.

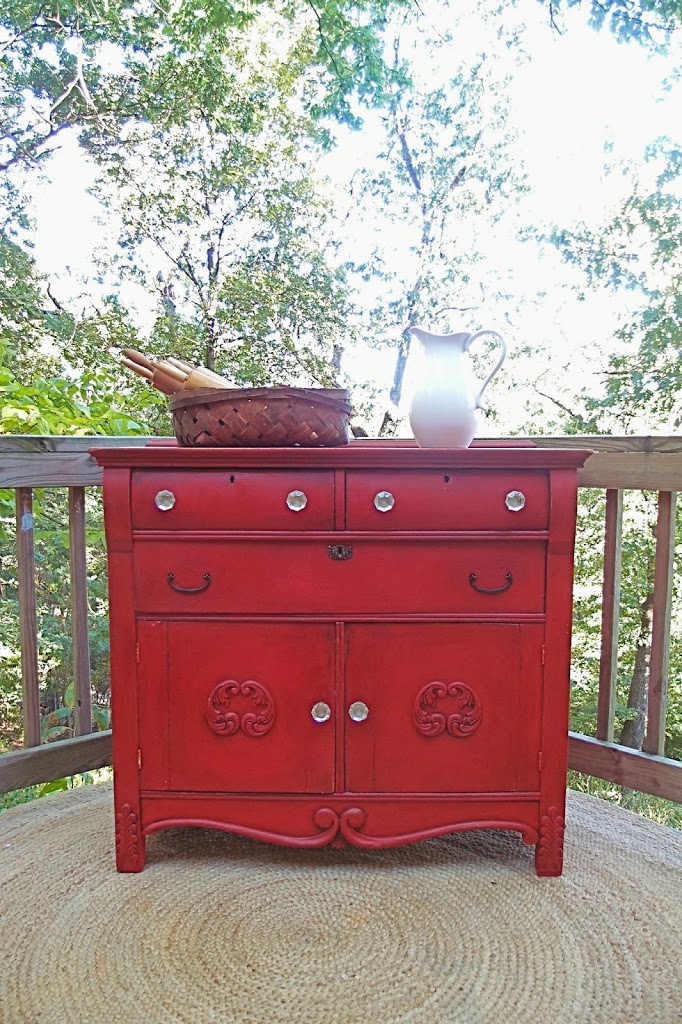
Now, on to the full reveal!
I LOVE the back of the inside of the cabinet! (Isn’t there a name for that? I totally spaced)


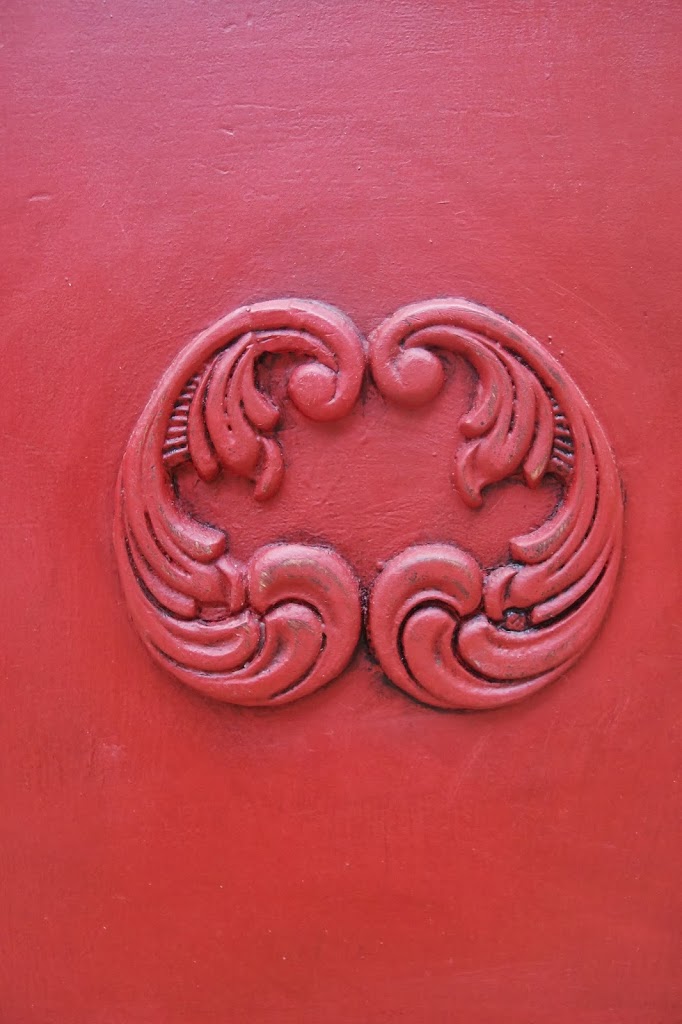
I used Emperor’s Silk with Dark Wax.

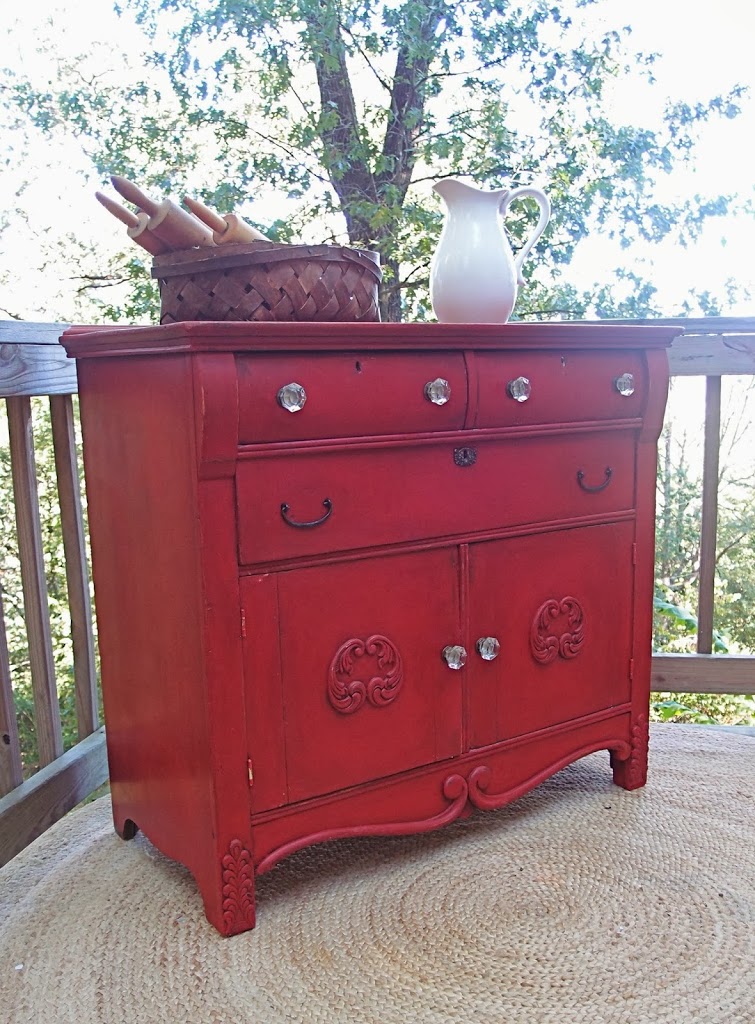
And again… from the front:
First of all you ROCK! You did a fabulous job with the repairs and the red you chose is just perfect for the piece! Secondly I recently tried a very similar technique to replace missing appliqués but my plaster pieces kept breaking, I guess I will have to try again when I’m not in a hurry! I’m very impressed,
thank you soooooooo much for the how-to-repair an applique! i’ve been searching for this answer and asking and the one’s who know how don’t typically like to share, turns out it’s not such a secret after all!!!!!!! so thanks a billion!!!!!
Too Cute!!! You did a great job on this – the color is stunning!
I’ve had a piece in my garage for a year now because I wasn’t sure what to do about missing applique pieces. Now I do! Thanks 🙂 Love the red on the buffet!
I’ve heard of doing this before, but never with furniture. Genius! Thanks for the good ideas!
This is awesome. This is really amazing. I think you some artistic side. You converted an old piece of cabinet into fabulous one. Love the color red paint.
You are A-MAZ-ING! I wouldn’t have known how to fix the appliques. This is such a great tip! Pinning and sharing. Love how this one came out! x
Your very patient Rachel. I probably would of walk away from this piece. It look amazing when I seen it at VMD! Love this piece more since I heard your story! Wonderful work.
Anne
What a great project and such a labor of love! Whoever gets this piece will never know how much time, patience and determination went into restoring it. And thank you for the great tutorial! Your explanation and pictures rock! I’m pinning this for future reference!
Robin
What a transformation! Simply beautiful!
Beautiful….love the red! I’ve been doing molds out of sculpey clay for years but fill mine with quik wood….will definitely give the plaster a try.
Now that is dedication! It turned out beautifully!
Lsia
nice post on interior designs the designs are very good.
interior designers in hyderabad
Seriously, this piece is fabulous! I really think that piece alone should have put a down payment on your new home. 😉 As always, I’m so impressed and definitely inspired. Love your writing style, too! If you’re not already working on at least an e-book, you should think about starting one. I know I’d buy it! Heck, I bet all of us would. (and then you could buy a house AND studio space.)
This my absolute all time favorite furniture redo ever!!!! It’s an amazing piece and you did and fantastic job on it !!!!
Fabulous job! The repair is inspiring and I have a couple of pieces that I can try it on. Hope it comes out as great as yours – thanks for the tips!
How ironic!! I just did a post on the type of repair—isn’t it wonderful to look at a piece and know you can fix it!! love your post!
OMG !!!!!! AWESOME !!!! I LOVE IT!!!!!!!!!!!!!!
Beautiful Job! That was a lot of work but so worth it. Thanks for sharing, Dee from My Painted Stuff.
This is a genius idea! Thanks so much for sharing it. I always just thought those little missing pieces were gone forever. Brilliant.
Wow! I’m blown away by this transformation. Linking to you in my weekend post here: http://daffodilsathome.com/2013/09/28/daffodils-weekend-links-11/
Brillant! I’m repairing an old dining room set (from the 30s) that has a number of the applique parts broken. This will definitely help out!!
I’m going to try it with a stainable wood filler
So you didn’t have to bake the clay? I’d like to do this to replace a missing chunk from a picture frame. Although someone above mentioned filling with quik wood. I’ll have to look into that.
Thank you for the tutorial. Its very hard to find information on repairing broken or missing appliques. I’m working on a piece myself and am having issues with the mirror image like the one you fixed on the door front. I see that you replicated the top where it curls and I’ve been working on mine but completely forgot that the applique needs to be reversed. Mine is very similar to yours where its curly and they are mirror images of each other. How did you make a mold of that and have it work out? Is it called a mirror mold, inverse mold, etc? I’m probably overthinking this or just overlooking something. Thanks!!
What a beauty! You did an amazing job and well worth the time you put into it.
What a transformation! Your pieces are amazing! Is this an Annie Sloan paint?
Yes it is Julie!
Thank you so much for posting these tips and the helpful pictures. I used your technique on my antique dresser and it worked fabulously. Keep up the great work and happy furniture refinishing!
I am so excited to do this. I have a antique cabinet the has very intercut detail that half of it is broken off. I can’t wait to do this. And I agree with you ❤️❤️❤️ He is there thank you
I love th is cabinet! especially the color! Thank you for showing me how to repair broken applicques. I gently pried them off, sanded and stained the doors so they are ready to glue back on but what should I do first? Glue/tiny tiny nails then put a finish on or finish the door then glue/gently tap tiny nails back in the appliques and put a finish on them? thanks!
Yes strong glue and use tape to hold it in place until it dries!