While standard floral arrangements in taller, vertical vases, are not going away, a trend has developed over the past several years of a arranging flowers in a lower and wide form. This newer shape or form, including the type of vessel that is used, is considered a new, modern way to arrange flowers. Today I’m going to show you how I create this type of gorgeous modern flower arrangement.
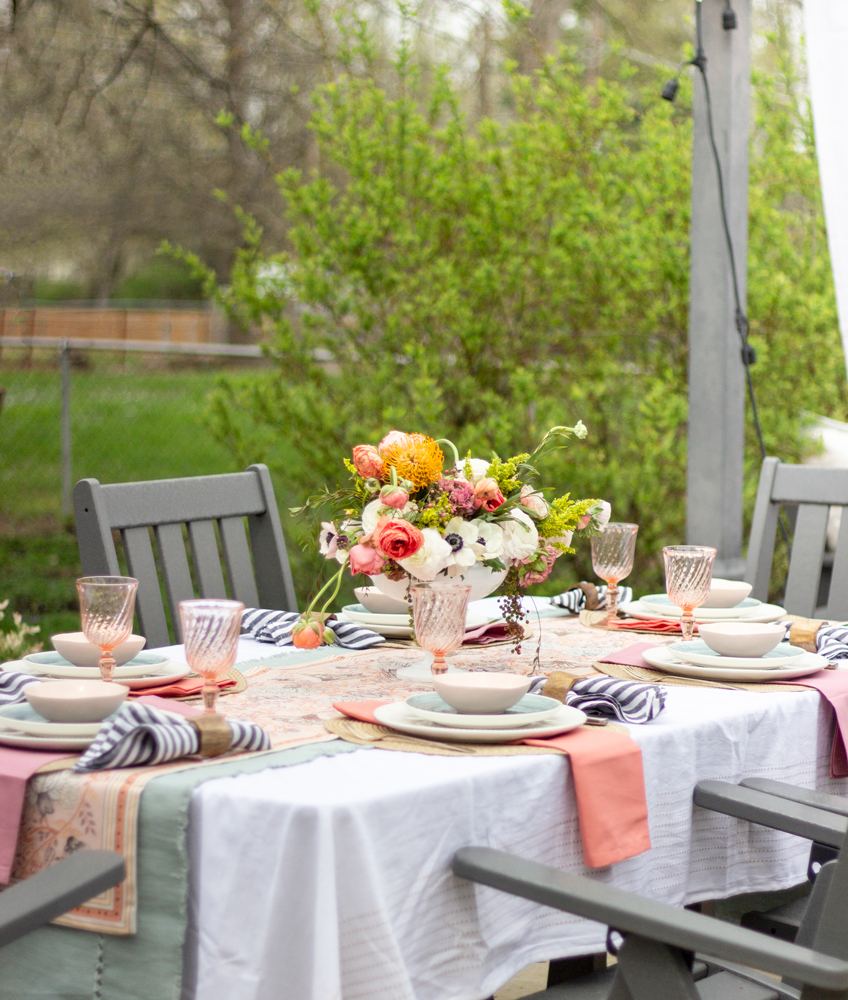
Last week I shared my Mother’s Day Table, featuring this same flower arrangement, and I will be walking you through the steps of how I created it, with each step, and my thought process for each part. While I am now a professional florist or floral artist, I have played around with flower arrangements a lot and found a process that works for me.

Last year for my Spring Home Tour, I included this modern flower arrangement I created, and received several requests for a tutorial. So today I’m going to do my best to share a step-by-step break down of how I put it together.
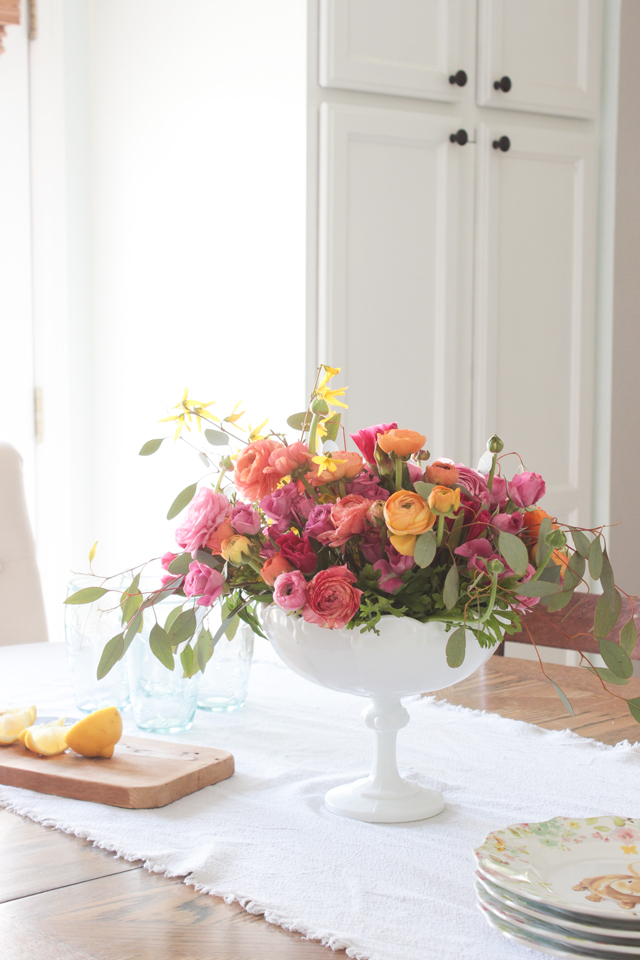
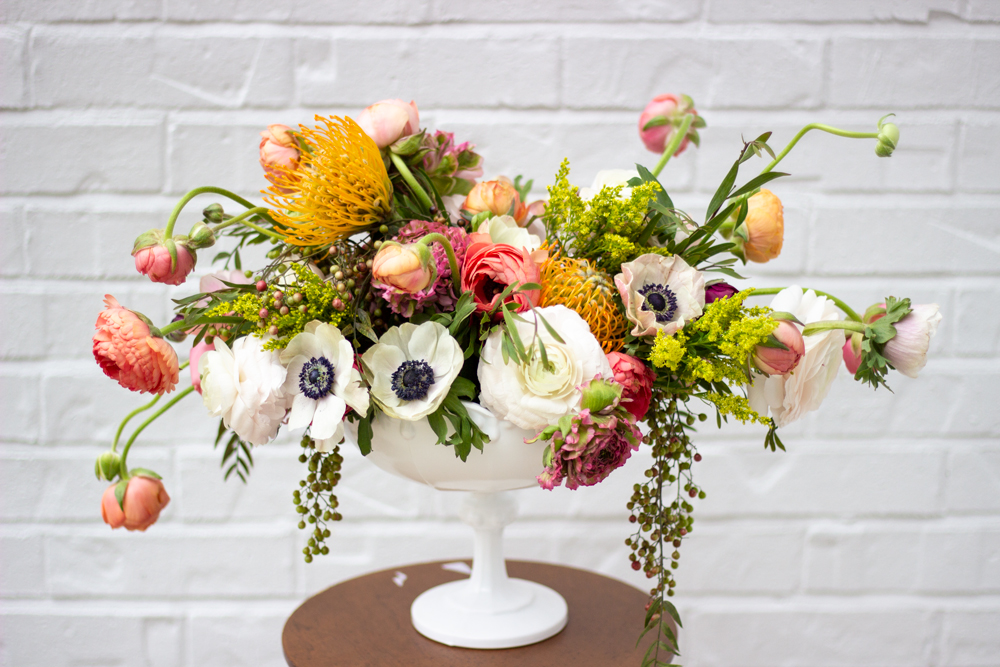
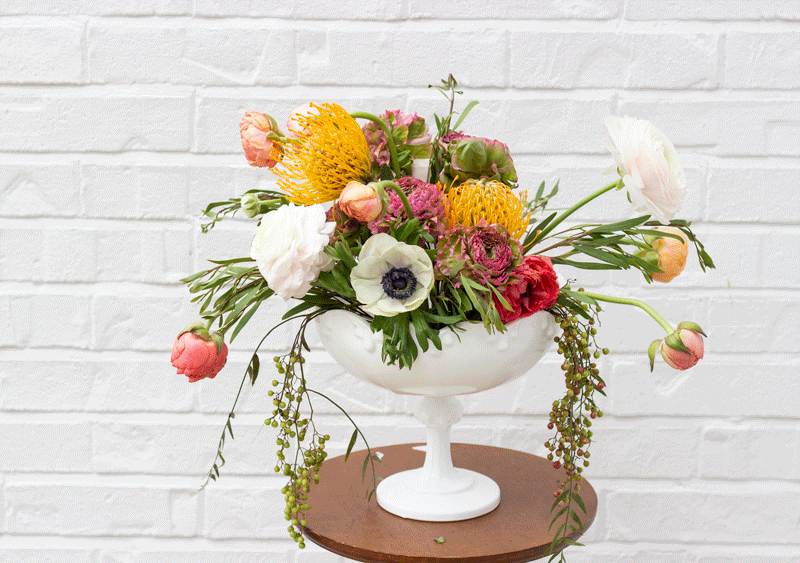
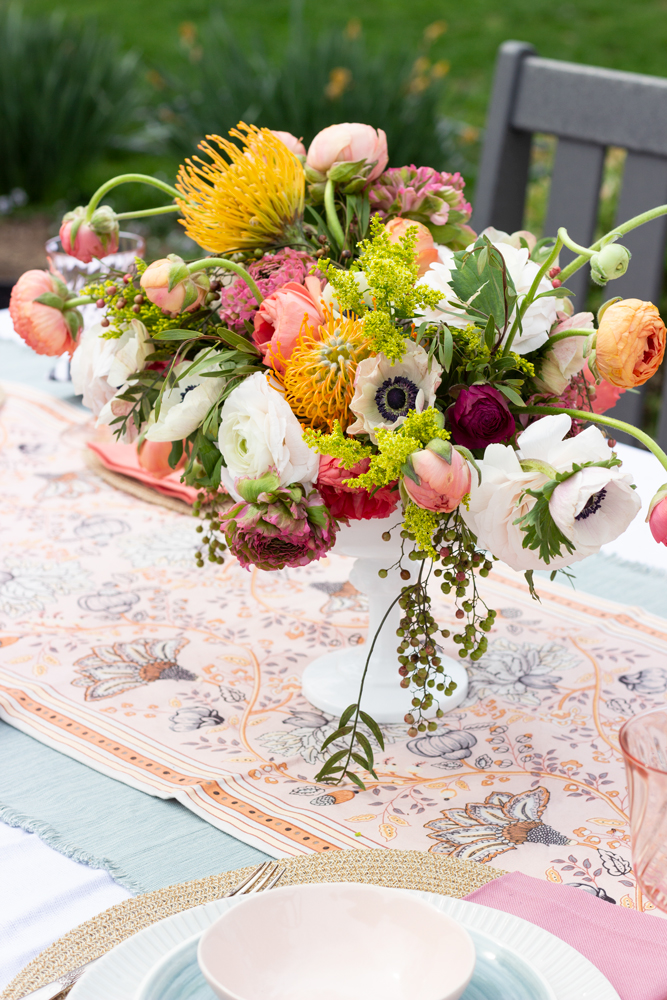
Here is the finished arrangement, where you can see the wide and low shape, and the variety of textures. The stems are cut shorter around the vessel, so the arrangement still looks full.
The key to making this work is using a flower frog. A flower frog placed in the base of the vessel allows the flower to stand upright or position at the exact angle you want without falling over. It also is perfect for ranunculus because they are a hollow stem flower and it allows the base to stay open and get plenty of water.
Flower frogs can be found at craft stores or where antiques are sold.

Flower frogs found here, here, and here.
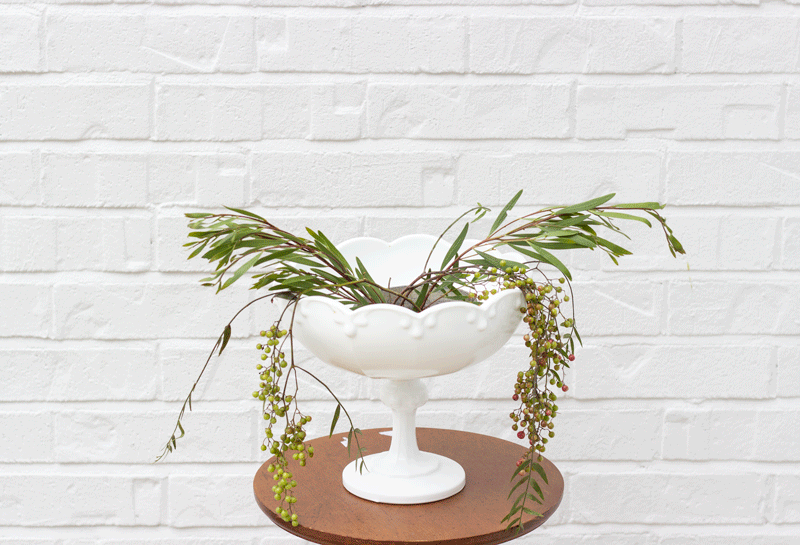
I used a vintage milk class compote, which is perfect for this type of modern flower arrangement. Any compote or footed pottery that has a short and squat shape, is going to be ideal to use.

Footed compote dishes or pedestal vessels can be found here, here, or here.
To start, I always put in most of my greenery first, making sure to have the longest pieces on the sides and keeping the upright greenery stems in the middle, a little shorter. I always try to visualize my final “goal” to be a kidney shape, so I add some, step back and make sure it fits in the ‘shape’ and then make adjustments/add more.
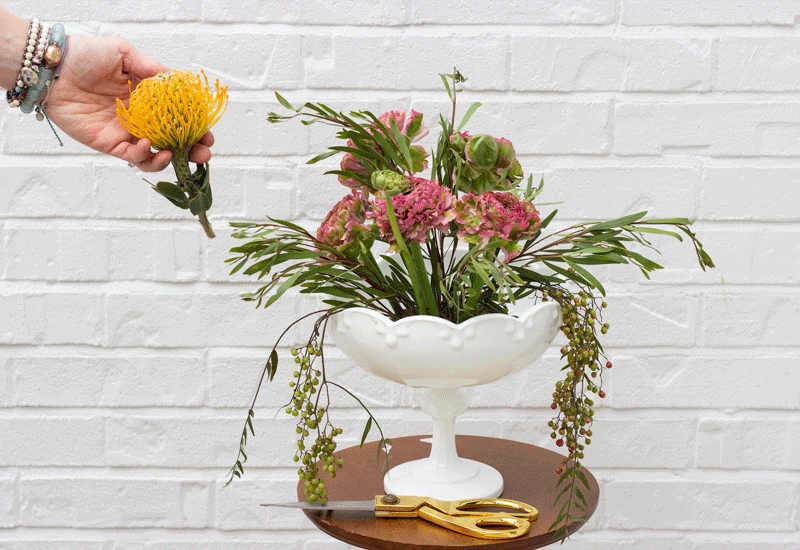
After I have greenery and a larger flower positioned at some varied heights in the middle area, I then add a couple unique or focal point flowers. These yellow ones have a great variety of texture compared to the round, soft look of the ranunculus.
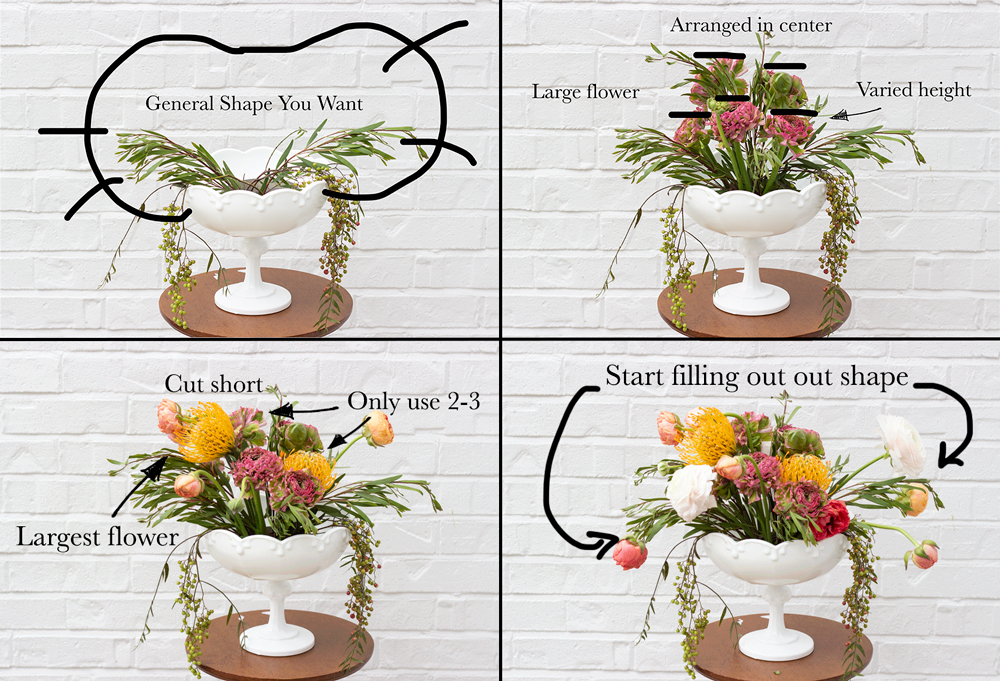
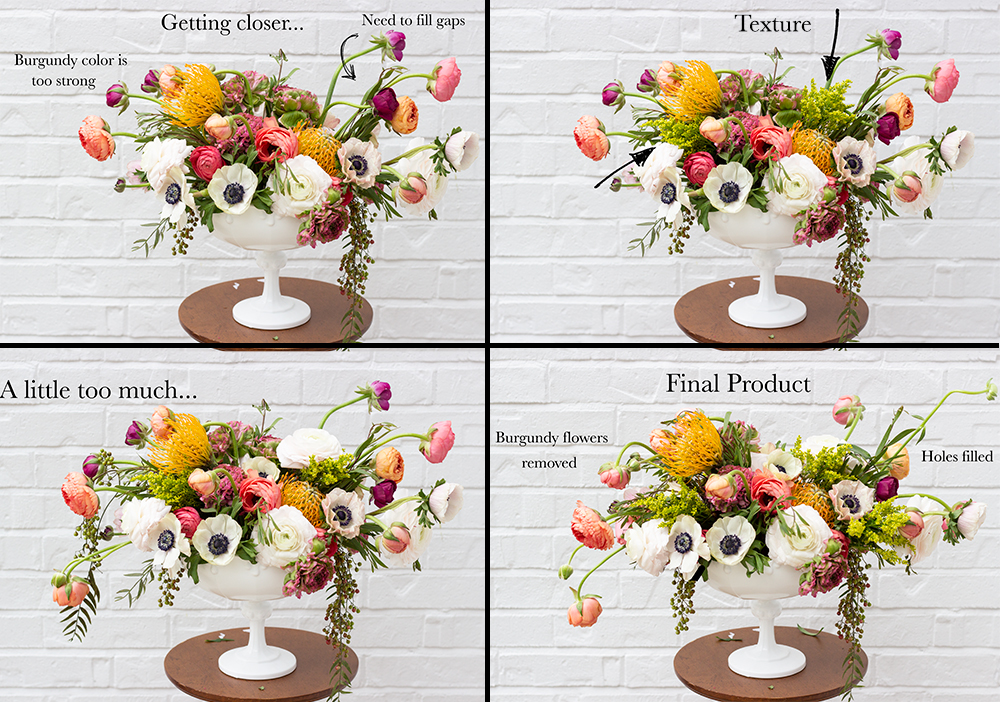
At this point, I want to continue to add more flowers, adding to the fullness, and stepping back to keep within the kidney shape. The inside of the anemones are very eye catching so I wanted to make sure and position them so the dark center of no more than 3 are visible at any angle.
Once a majority of my flowers are in the vessel or compote, I added some addition texture. I could have done this with more greenery, but I like the softness the yellow pillow flower adds, plus it fills in some dark spots or ‘holes’.
I also decided after I was almost done, that the burgundy flowers were a bit too much. They were pretty, but I wanted my flower arrangement to be mostly pinks, peaches, whites, and a bit of yellow. The burgundy was a bit too distracting for me, with how much it contrasted from the rest.

For this arrangement I sued ranunculus (in peaches, whites, and pinks), anemones, eucalyptus (greenery that I started out with), pepperberry (berry-looking greenery hanging down), and pincushion protea (big yellow spiny flower), and yellow aster.
I love how ‘unruly’ the finished product is!
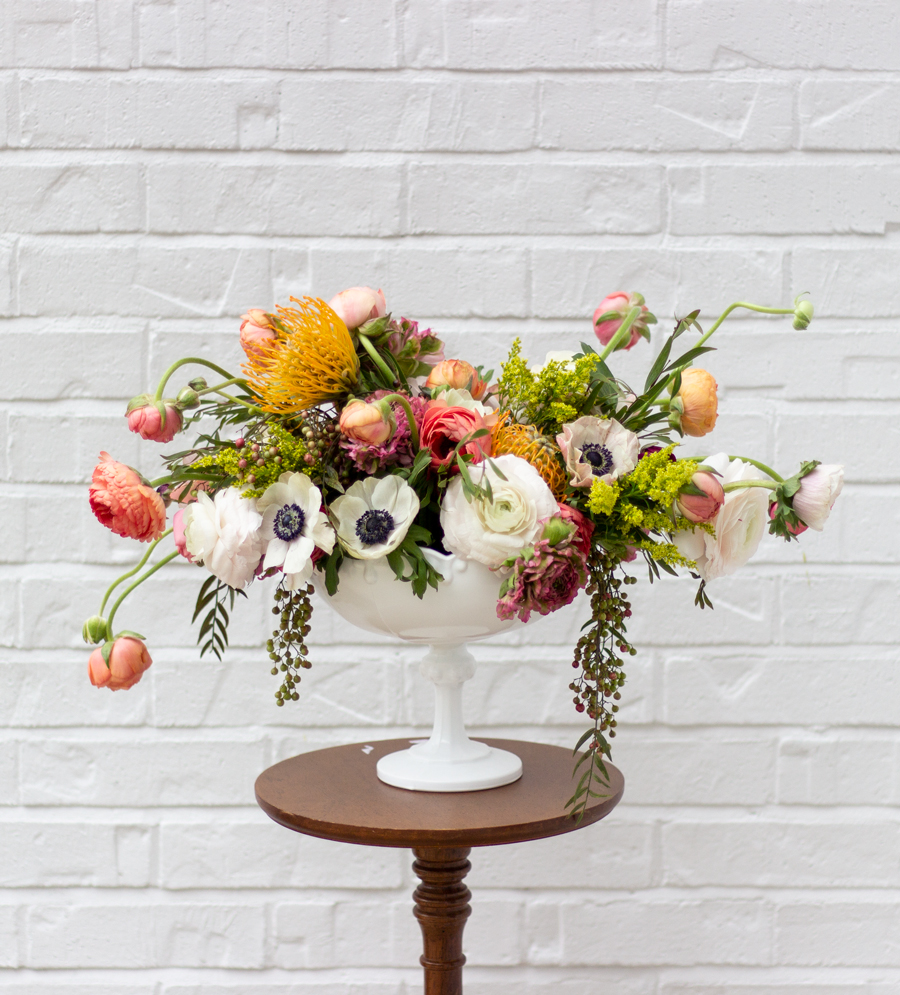
One of the great features of this type of modern flower arrangement, is that is can be a show-stopper on a tablescape, without blocking the view of the people across the table.
I hope you enjoyed learning about my process and maybe it will be helpful for those of you who would like to create your own gorgeous modern flower arrangement!
Thank you Rachel. I’m always a little lost when trying to arrange flowers. I really appreciate the step by step instructions. Can’t wait to try my hand at it.
Thank you SO much! I’ve never been able to put a flower arrangement together and make it look professional but I’m sure going to try now! I love this!
Love this! You did a great job of giving step by step directions. I love the finished look, thank you so much!
Love the tutorial! Still my favorite arrangement of all time!!!! You are so talented! Love your work!!!
This is one of the best tutorials I have ever seen, thank you!!
I’m looking for resources to DIY floral arrangements for my wedding this summer and I stumbled upon this piece after hours and hours of (failed) searching. This is EXTREMELY detailed and helpful! The mini videos were very helpful. The whole post was! Thanks so much!