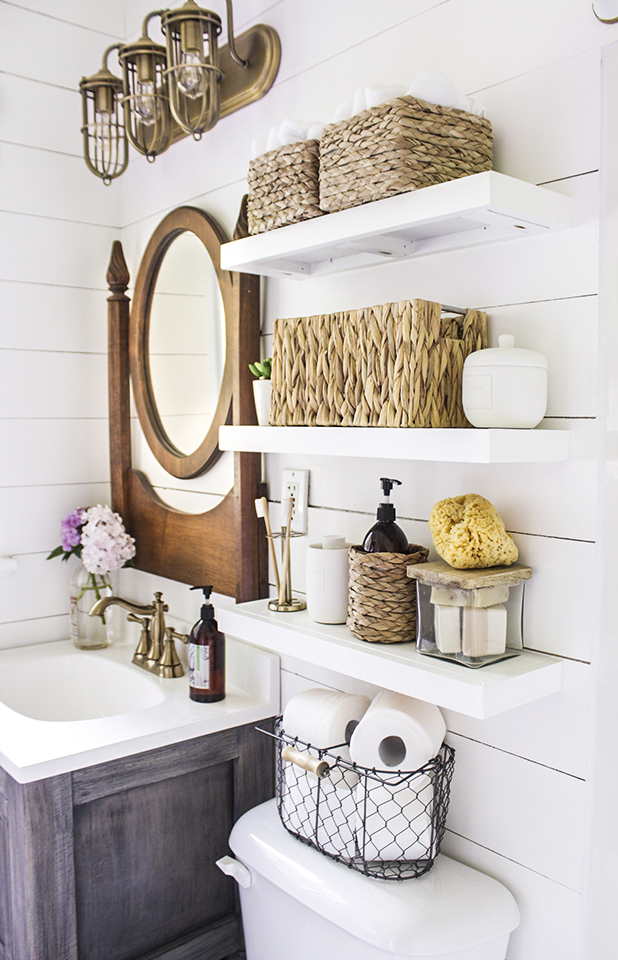
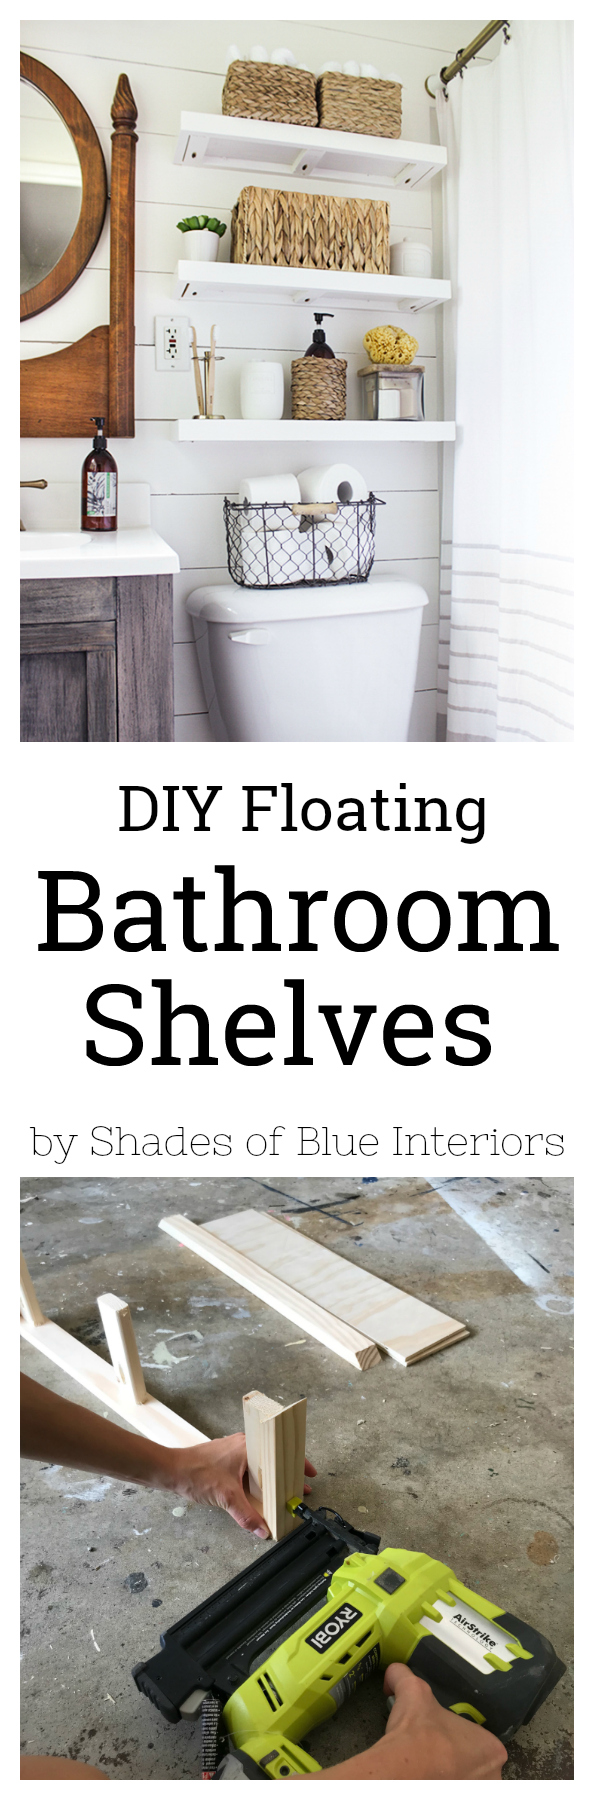
I’m sharing how to make 3 floating shelves that is ideal for a bathroom but could be used anywhere in your home. Materials cost around $20-$30 and you can customize them with stain, paint, or size.
This tutorial has been a long time coming. Ever since my master bathroom makeover a few years ago, I get asked about floating shelves on a regular basis. In the past I just referred people to this tutorial by Shanty 2 Chic, because it was the same basic idea. Finally I decided to show you exactly what I did (and a small improvement I made) and the measurements since I think they are pretty perfect for above a toilet!
Shelf dimenions: 22″ long x 6 1/2″ deep x 1 1/2″ thick
Tools I used:
Miter saw (although you could use a circular saw)
Cordless drill
Kreg Pocket Hole Jig (small version works great)
Cordless brad nailer (you could just use hammer and nails instead)
Shopping List:
3- 1×2 select pine (or whatever wood you want) @ 8′ (you only need two feet of that 3rd piece though)
1/4″ plywood @ 2′ x 4′
33- 1 1/4″ brad nails (18 gauge)
36- 3/4″ brad nails (18 gauge)
9- 1 1/4″ pocket hole screws
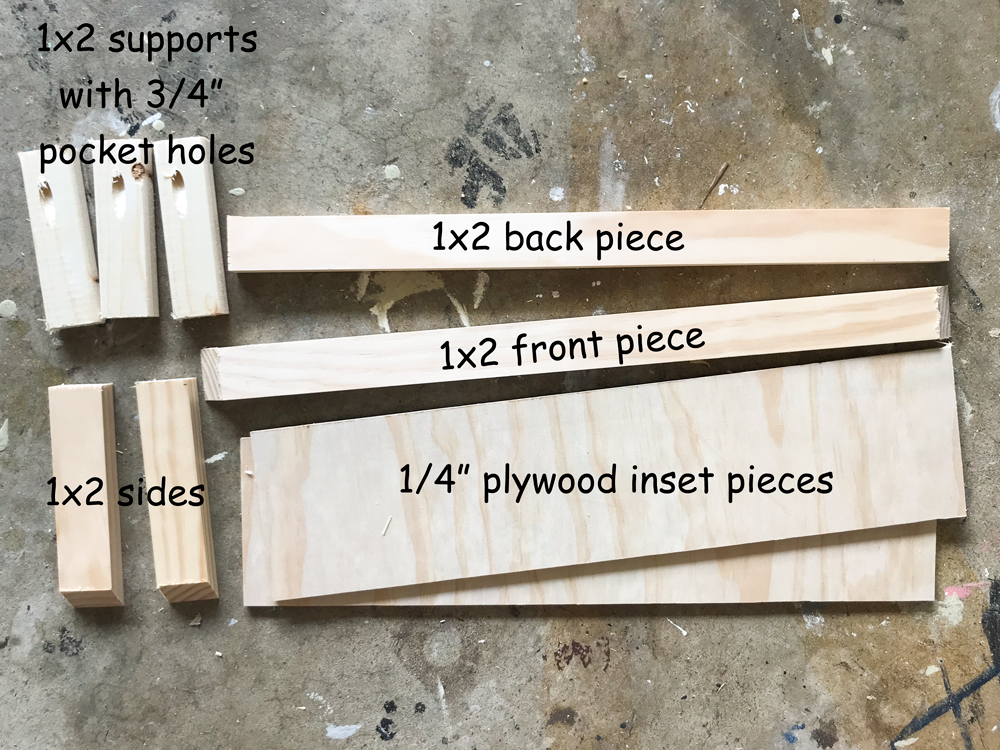
Cut List:
6- 1×2 @ 6 1/2″ with 45 degree mitered angle on one end so that the longest side is 6 1/2″ OR cut all of them at 5 3/4″ if you don’t want to miter the corners (sides)
3- 1×2 @ 22″ with both ends cut at 45″ angles so the long side is 22″ OR if no mitered corners then just the full length will be 22″ (front pieces)
3- 1×2 @ 20 1/2″ (back pieces)
9- 1×2 @ 5″ (supports)
6- 1/4″ plywood @ 20 1/2″ x 5″
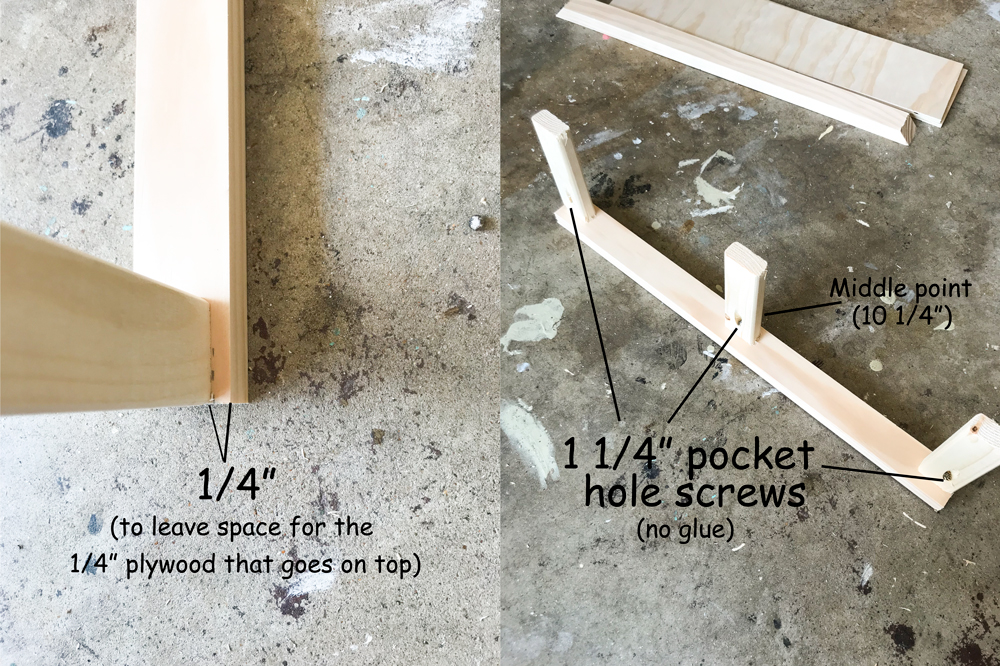
Step 1: Attach Supports to Back
One one long edge of the back piece, measure and mark 1/4″ down on either end and in the middle. Drill 3/4″ pocket holes in the support pieces and attach them to the back piece (at the marked points) using 1 1/4″ pocket hole screws. Do not use glue.
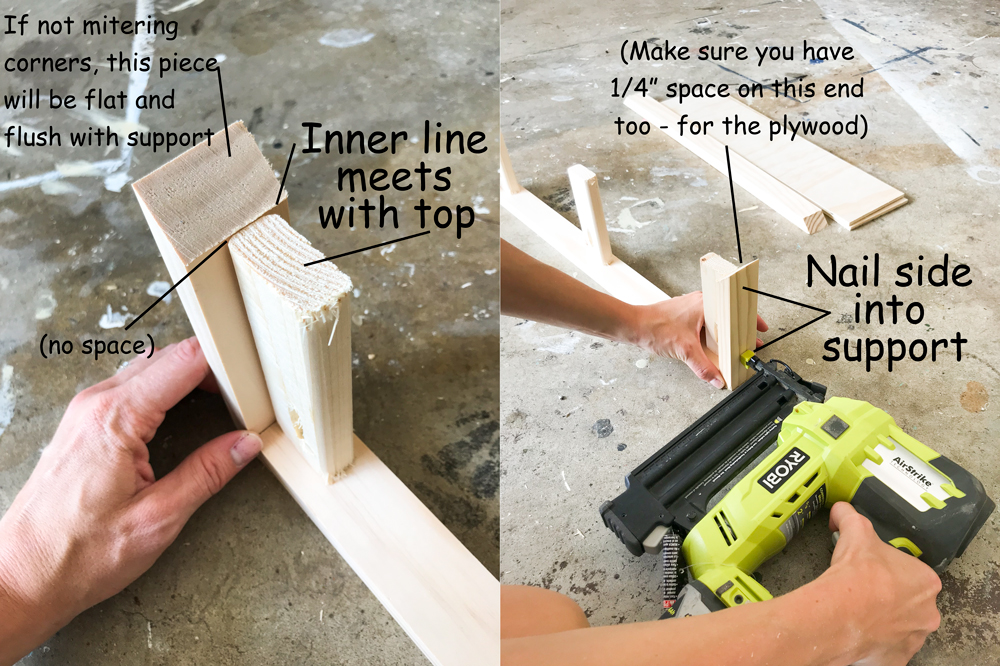
Step 2: Attach Sides
Place the side pieces along the side supports and make sure the inner line of the mitered side piece meets exactly with the top of the support. Trim off minute amounts if needed. If you are not mitering the corners, the side piece should be flush with the top of the support. Nail the side pieces into the supports, making sure you have that 1/4″ space on both ends of the support pieces.
Step 3: Attach Front & Top Inset
Place front piece so it sits on the ends of the sides and supports. Drive nails into the supports, and also down into the side pieces. Place the top inset into the recessed spot you created (with those 1/4″ spaces) of the shelf, and drive 3/4″ nails from the top of the plywood down into the supports.

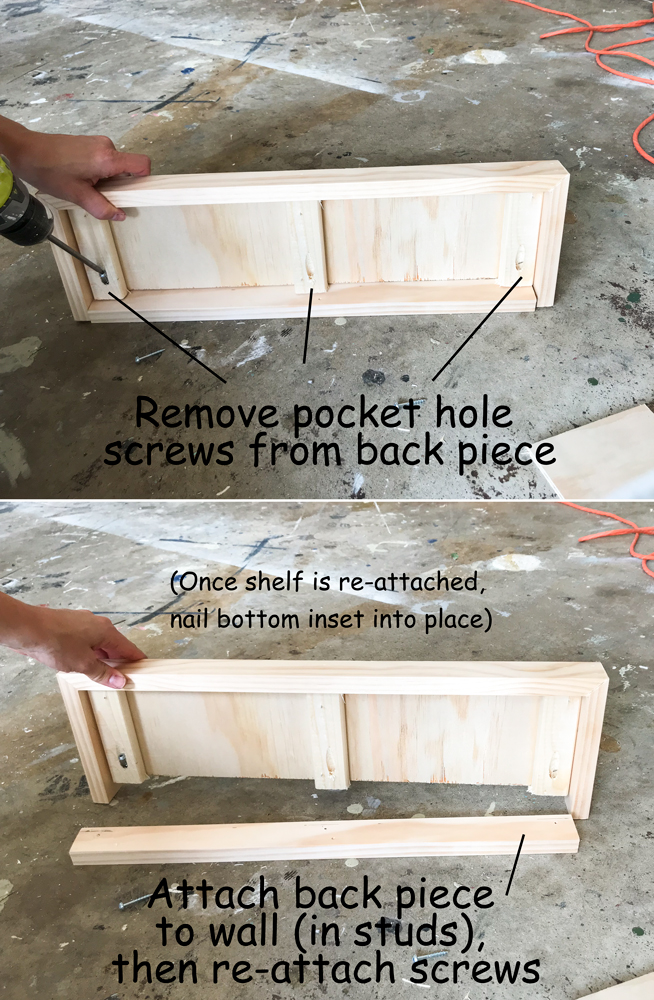
Step 4: Remove Screws and Attach to Wall
Remove the pocket hole screws from the supports so that the back piece comes loose. This will enable you to easily attach the back piece to the wall, into the studs, then once it is level, reattach the shelf with the pocket hole screws. Then take the bottom 1/4″ plywood insert and nail it on the underside of the shelf (this is the improvement of my original shelves where I didn’t have a bottom inset to cover my supports).
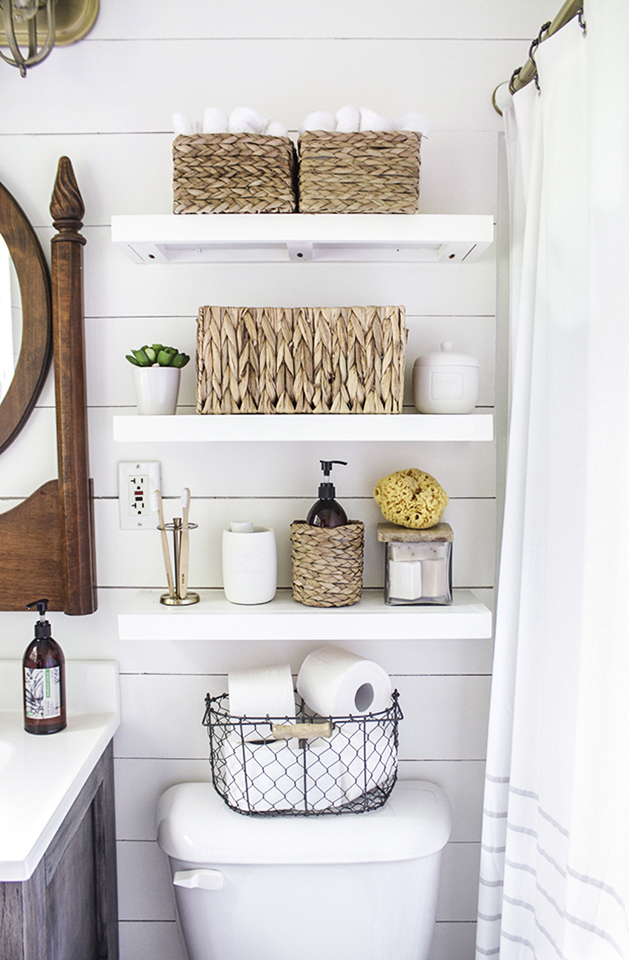
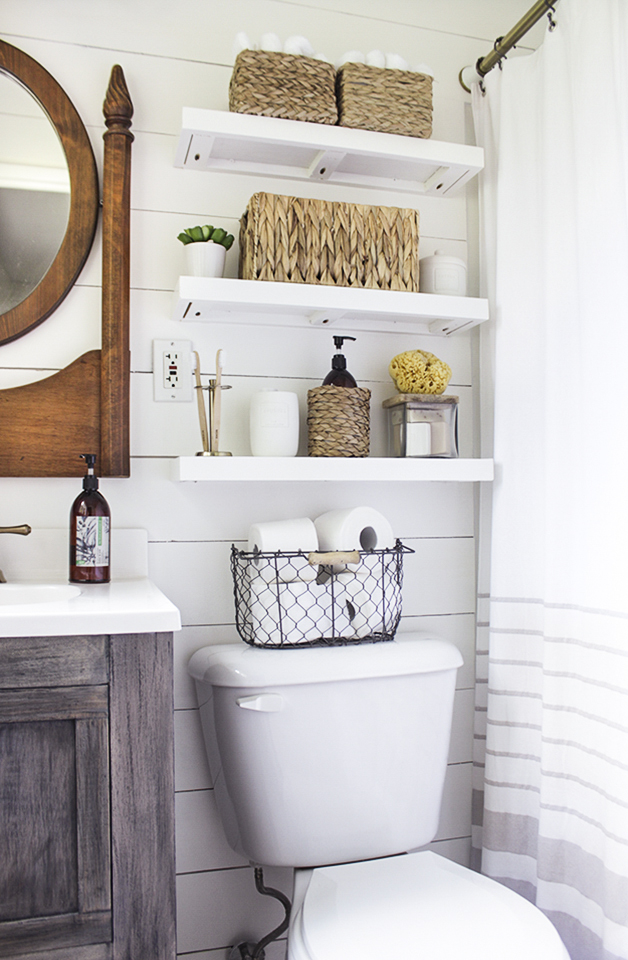
Finished product is so pretty! I love that the customization options are endless pretty much!
I think I will be staining these shelves for my sister’s bathroom and taking them with me this weekend as I head back up to Juneau for finish up her bathroom makeover!
Did you find this tutorial helpful? Share it!
This is exactly what I’ve been looking for for my bathroom. Thanks for the tutorial with the improvement.
OMG! I’ve been trying to figure out and understand floating shelves. You’ve made them look so easy! Thank you for sharing this post. Tagging this for day I finally commit to adding them in my bathroom too! x
Allison | Peplums & Pie
LOVE this look so much! Also, where is the basket from (that’s filled with toilet paper)?
HomeGoods!
Where did you purchase the mirror above the sink? It’s gorgeous. I need that for my newly remodeled bathroom.