This post is sponsored by Home Depot.
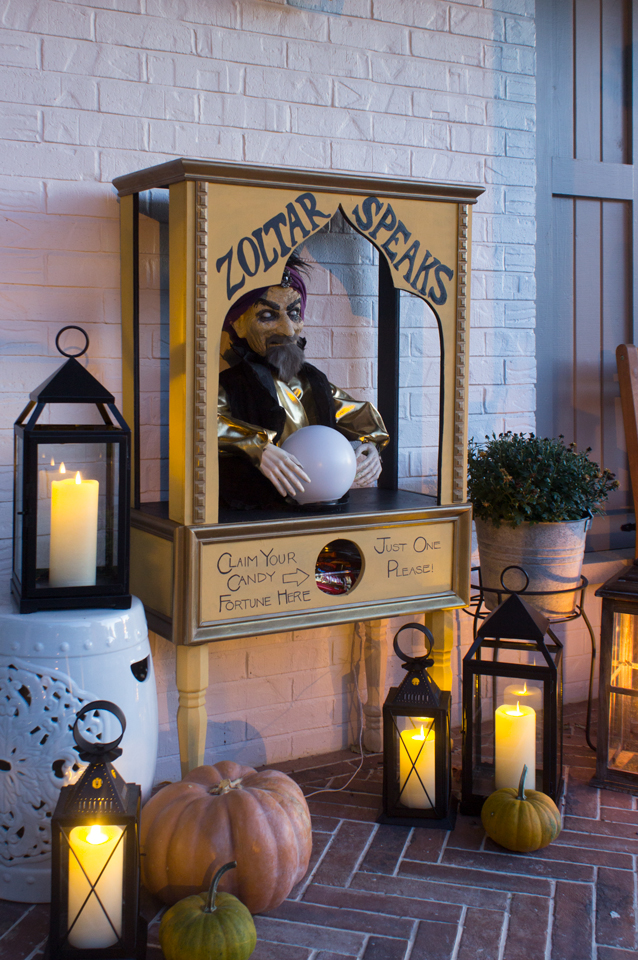
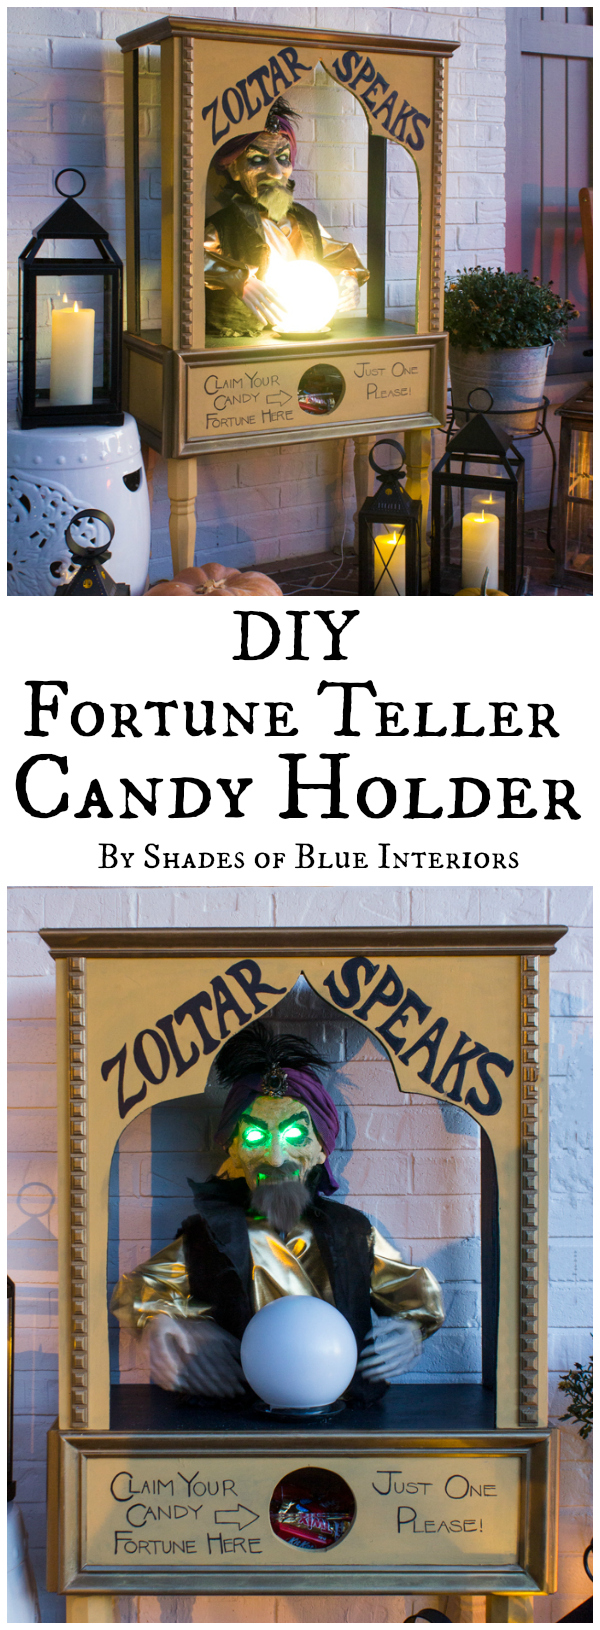
Today I’m excited to share with you this DIY Fortune Teller Candy Holder! This project is my creative version of the much simpler candy holder project that is taking place at your local Home Depot this week! It is the quarterly #DIHWorkshop and it is FREE!! Register here if you are interested in signing up!
This fortune teller candy holder was inspired by one of my favorite movies from the 80’s– “Big” starring Tom Hanks. A 12-year old boy goes to a carnival and makes a wish at an old arcade fortune teller machine called, ‘Zoltar Speaks’. That wish is to be ‘big’ and the next morning he wakes up as an adult! The movie is hilarious– if you haven’t seen it, then I highly recommend you fix that! 😉 The arcade fortune teller, Zoltar, is pretty creepy and I thought it would be fun to recreate it as a candy holder!


Instructions to build the DIY Fortune Teller Candy Holder
Tools Needed:
Cordless electric brad nailer
Cordless drill
Compound Miter saw
Jigsaw
1/4″ drill bit
Scissors
Wood glue
Wood filler
Shopping List:
1 full sheet 1/2″ plywood
1- 6′ long dental moulding trim
2- 8′ long base cap moulding trim
1 1/2″ nails & 1″ nails (18 gauge)
1- 8″ Color Changing Glow Ball Lamp
1- 6″ white acrylic globe light cover
1- 36″ Animated Witch with Glowing Eyes
4- 14″ long traditional pine legs
4- Heavy duty top plates for table legs
4- 1 1/2″ screws
Gold spray paint
Black paint
Mustard yellow paint
Skin colored craft paint (to paint witch’s face)
Gray or black faux fur (for beard)
Gold material for new shirt
Purple turban with feather and center jewel
Hot glue or super glue
Cut List:
3- 1/2″ plywood @ 12″ x 24″
2- 1/2″ plywood @ 12″ x 6″
1- 1/2″ plywood @ 23″ x 6″
1- 1/2″ plywood @ 24″ x 24″ with moroccan shape cut out of center
4- 1/2″ plywood @ 24″ x 3″
3- base cap moulding @ 24″ longest side (2 with 45 degree miter cut angles going in on both ends, and 1 with 45 degree bevel cuts going in on both ends)
6- base cap moulding @ 7″ longest side (45 degree miter cuts on both ends going in)
6- base cap moulding @ 12″ longest side (4 will have 45 degree miter cuts on both ends going in and 2 will have 45 degree bevel cuts on one end going in, and a flat cut on the other end)
2- dental moulding @ ~22″
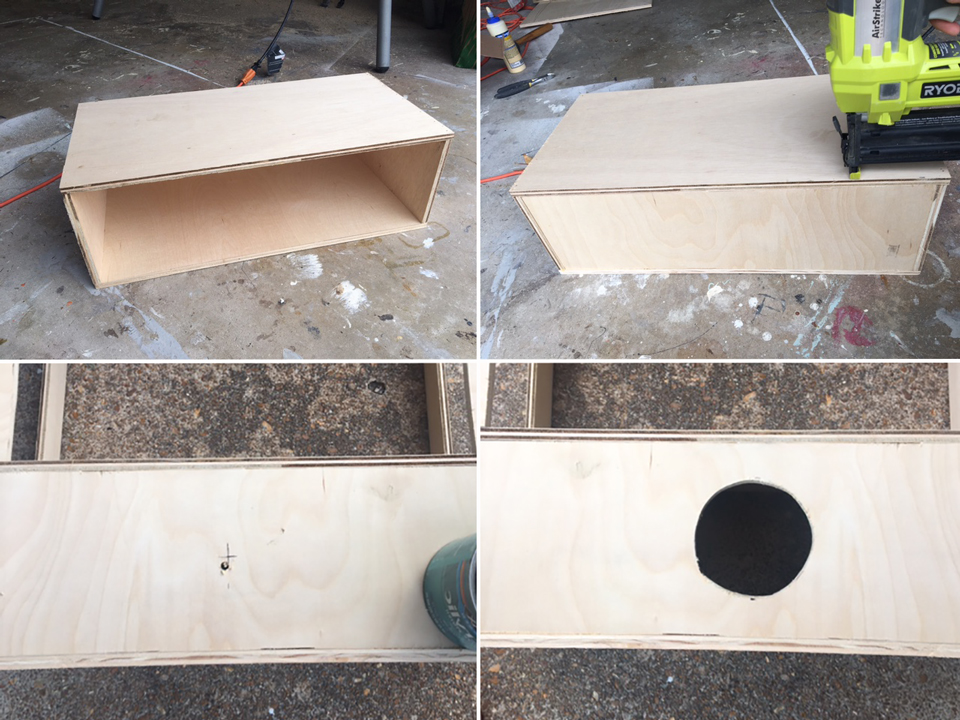
Step 1: Build Base
Build the base box by gluing and nailing the the 12″x6″ pieces of plywood in between 12″x14″ pieces of plywood. Then fit the 23″x6″ piece of plywood at the opening of one end of the box and nail it in place. Measure the center mark, drill a larger hole, and cut out a 4-5″ circle (I used a quart size paint can as a circle template).
Step 2: Build Top
With a few pieces of paper taped together that is exactly 12″ wide and about 24″ tall, draw half of the moroccan cut out shape. Cut out the shape and trace the outline of the cut-out on one side of the plywood, and then flip the paper over (mirror image) on the other side of the plywood and trace it. Cut out the shape with a jigsaw. Nail the plywood cut-out (face of fortune teller stand), to 2 of the 3″ wide plywood strips.
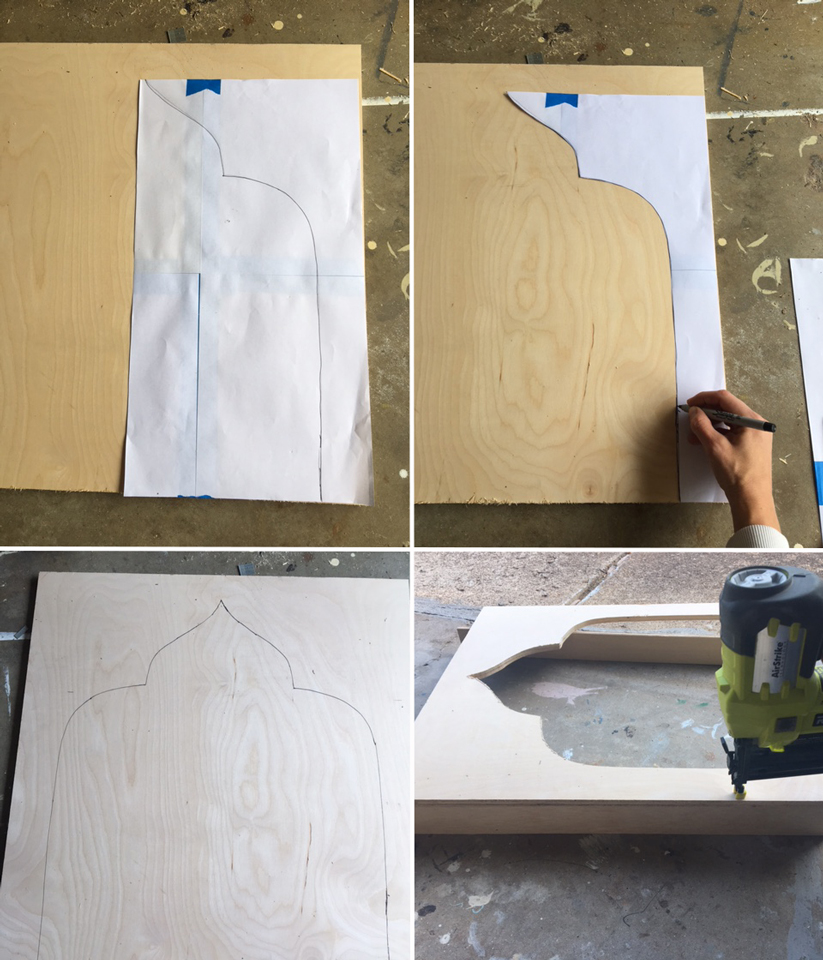
Step 3: Attach Top to Base & Add Trim
Once sides are attached to the face, nail the top plywood piece (12″ x 24″ to the face and sides. Nail the back 3″ plywood supports to the back end of the top piece, then toe-nail all 4 supports into the base unit.
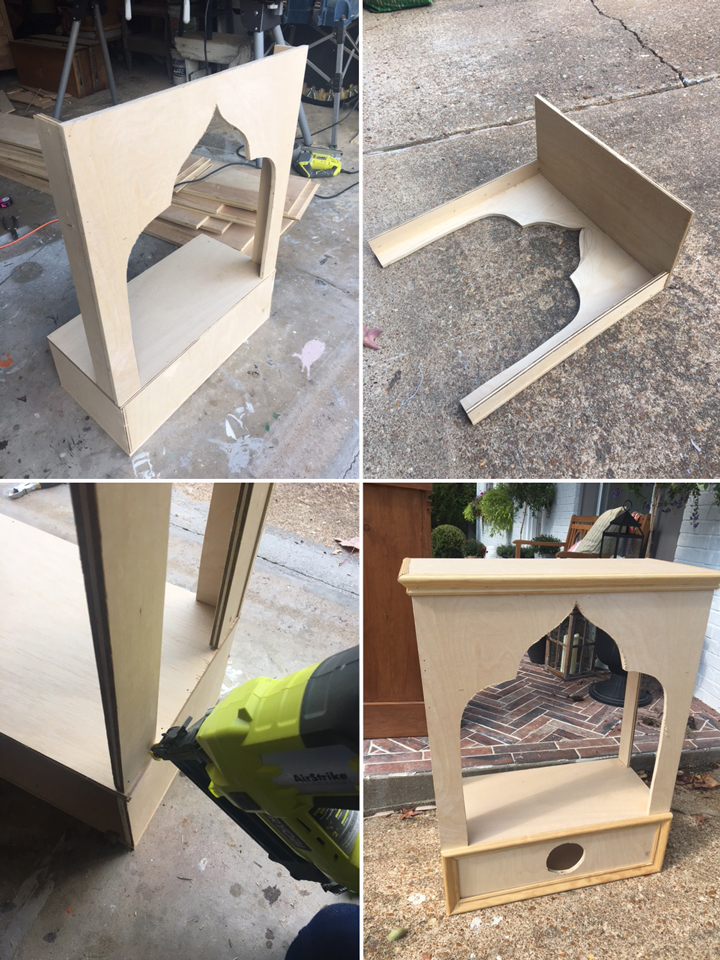
Add base cap moulding around base unit on 3 sides, and along top. This will cover plywood joints. Lastly (not pictured), attach dental trim on either side of the moroccan-shape opening, about 1/2″ from the edge using nails.
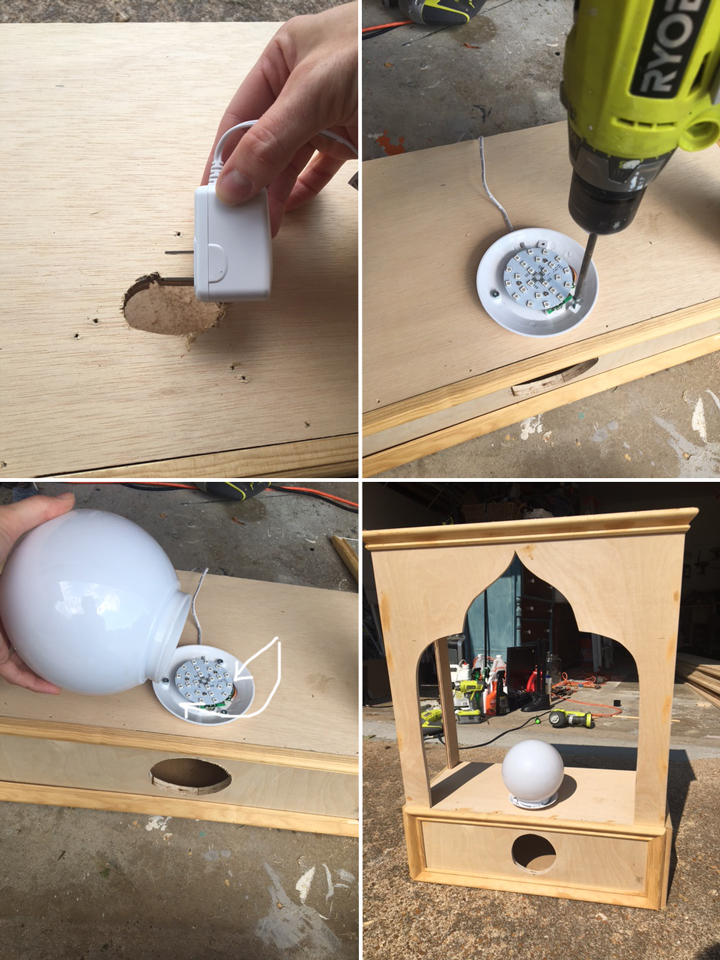
Step 4: Attach Color Changing Ball Lamp
Measure center placement of ball lamp and drill a large hole. Then use the jigsaw to cut out a larger hole, big enough to fit the lamp plug through it. Rug the plug through the hole and drill the base of the ball lamp to the plywood base using 3- 1″ screws. Attach the new, smaller, plastic globe light cover by hot-glueing or super gluing in place.
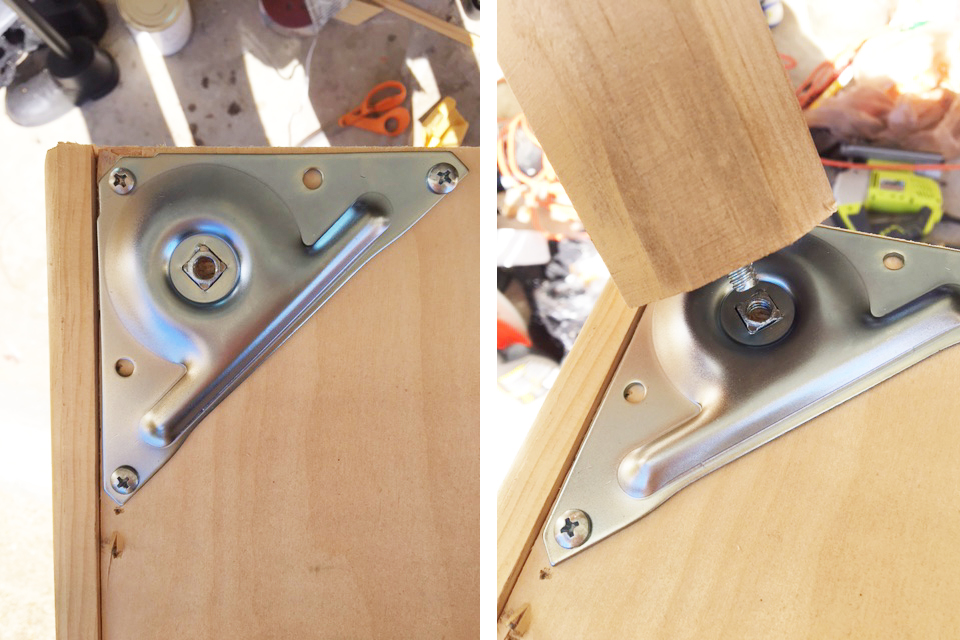
Step 5: Attach Legs
Turn entire unit upside down so the bottom of the base unit is facing up. Attach the 4 top plates for table legs on each corner using the provided screws and the screwdriver. Screw the 4 legs into the top plates.
Step 6: Sand, Fill Holes & Paint
Fill nail holes with wood filler, let dry. Sand entire thing smooth with 220 grit sandpaper and spray paint the trim pieces using gold spray paint. Once two coats are applied, use a paintbrush to paint the inside of the top part black. Paint the exterior of the top and base unit using a mustard, golden yellow, leaving all the trim pieces gold. Apply two coats of both black and the yellow.
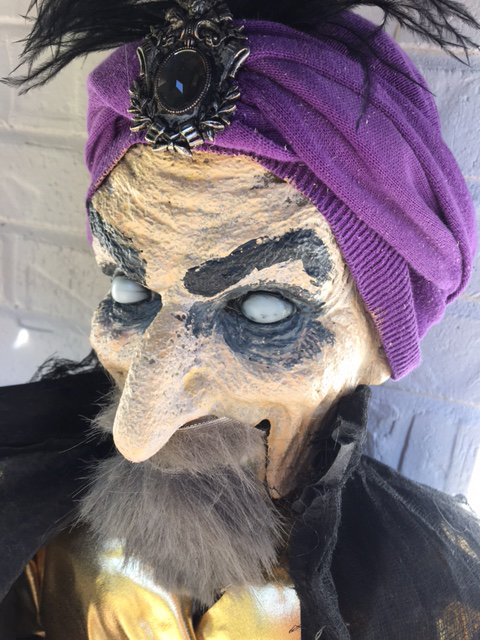
Step 7: Transform the Witch into Zoltar Fortune Teller
Cut off the hat, hair, and dress of the witch, being sure to leave in-tact the main bodice of the dress. Cut off sleeves from bodice of dress and the skirt. This will be used at the vest for the fortune teller. Remove the back battery pack and cut the electrical wires leading to the voice box. Reattach the battery pack.
![]()
Use an old sweater or some purple fabric to make a turban on the witch’s head and hot glue in place. Attach a black feather and jewel pendant on the center of the turban. Paint the face with flesh-colored paint, and paint on new black eyebrows. Glue faux fur on the chin and upper lip for the beard. Use gold fabric to wrap around the arms and body of the witch (gluing in place) and place the bodice over the gold fabric to be a vest. Glue the gold fabric around the wrists so the fabric stays put.
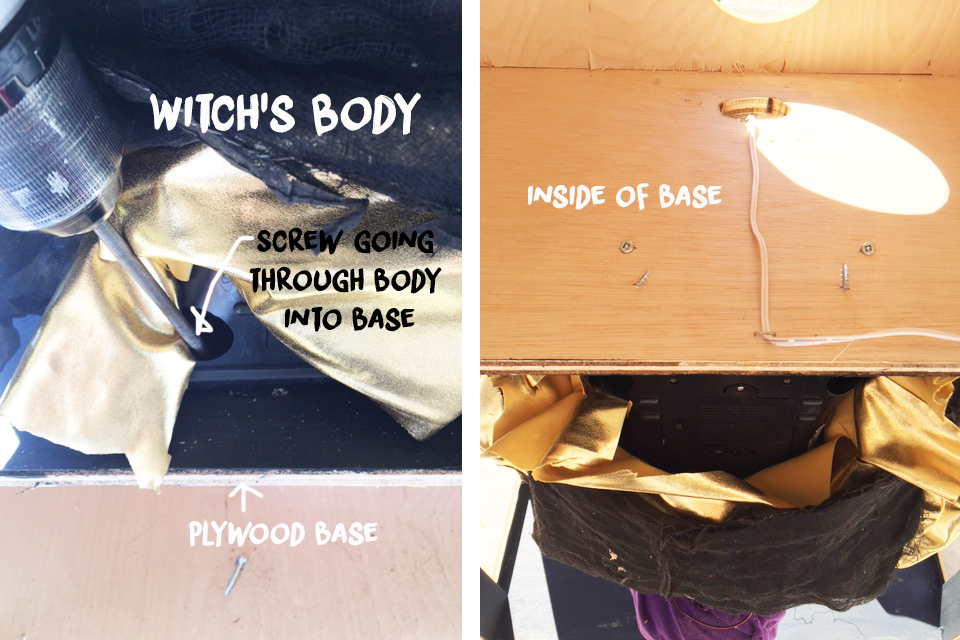
Step 8: Attach Witch/Fortune Teller to Plywood Base
Position witch/fortune teller in front of globe. Hold in place while screwing the body into the plywood base using 2 screws from the top, down. Then from the inside of the base, screw 2 screws going up into the body.
Step 9: Paint Words
Using a small paintbrush, paint the words, “Zoltar Speaks” or “Fortune Teller” along the top. Add additional words along the bottom so kids will know where the candy is! 🙂
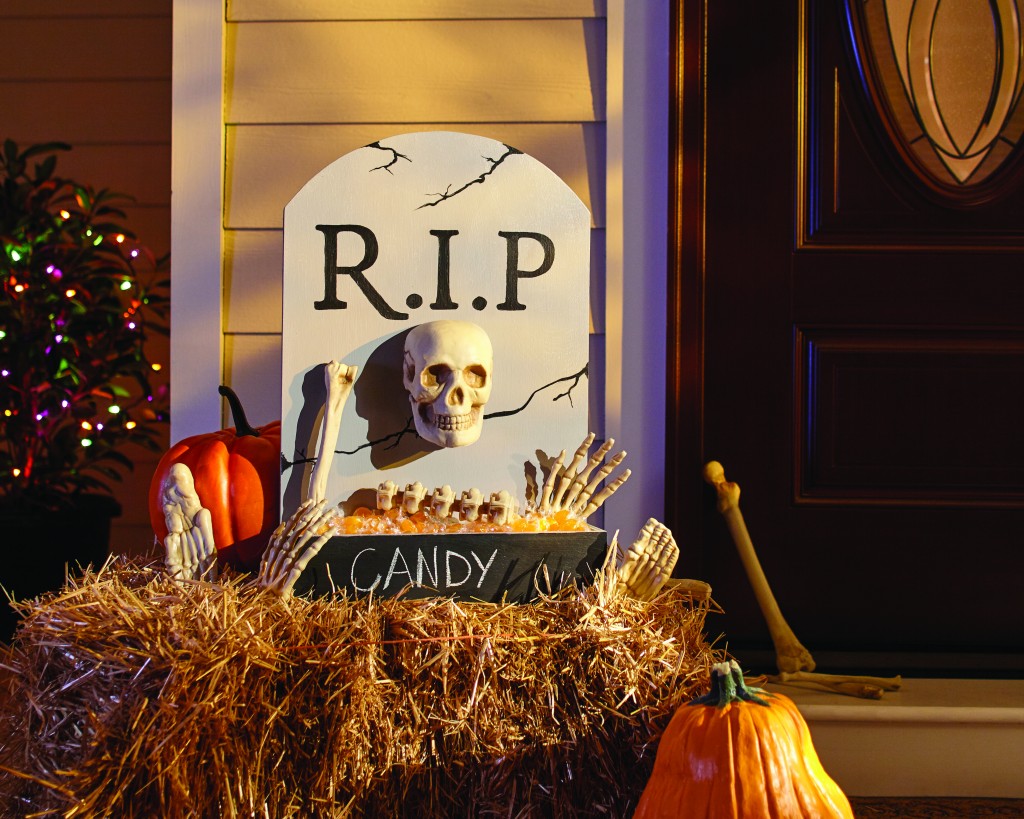
The Home Depot offers Workshops at all of their locations for do-it-yourselfers of all ages and experience levels. There are three types of Workshops offered: Do-It-Yourself (DIY), Do-It-Herself (DIH) and Kids. The workshop to build this tombstone candy holder is the DIH workshop.
Customers can learn how to build décor projects, how to make easy home repairs and how to operate tools through demonstrations and step-by-step instructions. Visit http://workshops.homedepot.com to learn more.
Ready to build your own? This Thursday, October 19th, 6:30pm – 8pm!!

Have you recently attended an in-store Workshop at The Home Depot? If so, The Home Depot would love to hear your thoughts! Feel free to complete the survey here to share your experience.
Make sure to check out all the creative versions of this Tombstone Candy Holder from these other awesome bloggers:
A Pumpkin and A Princess
*I acknowledge that The Home Depot is partnering with me to participate in this Workshops Program. As a part of the Program, I am receiving compensation in the form of products and services, for the purpose of promoting The Home Depot. All expressed opinions and experiences are my own words. This post complies with the Word Of Mouth Marketing Association (WOMMA) Ethics Code and applicable Federal Trade Commission guidelines.
How fun! I just love teller candy holder and all of the treats and costumes. Could make a great Halloween party candy holder as well. This would be so cute in our home!
OMG I love it! You did a great job.