A friend of mine contacted me a couple weeks ago about redoing her hutch. I went over to look at it and we agreed, it needed an update. She had mostly black and espresso colored wood in her dining room/living room area and this hutch was a shabbified white and light greenish/gray (I know you love that i just made up the word shabbified… feel free to help that one catch on!). It had hinges she hated and was just a little more country than she liked. She showed me a couple of beautiful pots she had hold plants that were teal and blue-green, and thought the hutch would look great with one of those colors. I knew that blue-green was a dead-ringer for Duck Egg, and it is SUCH a great color for someone wanting a pop of color, but something that isn’t too bright. We also agreed that it needed something to tie it in with the rest of the dark furniture, so dark staining was in order.
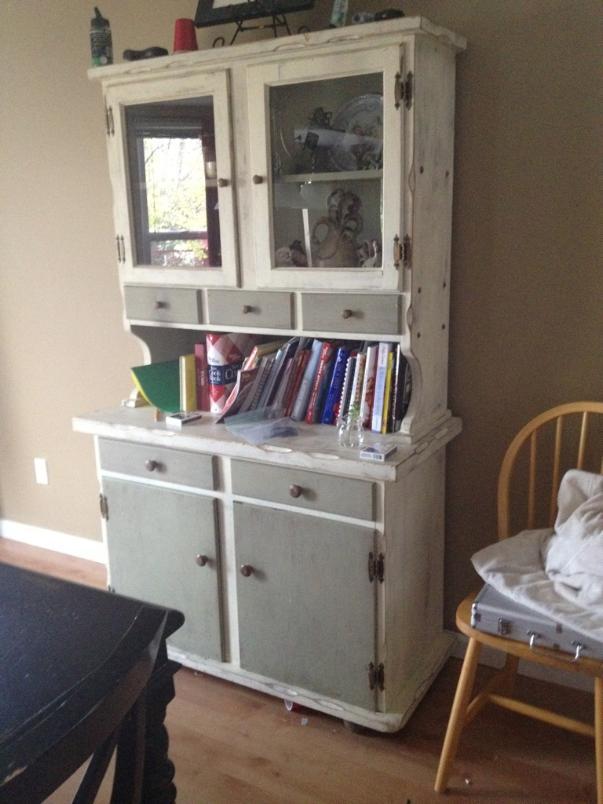
The next week, she delivered the hutch and I got to work.
First I took out everything she didn’t like: hinges, & these little round wooden circle things that cover holes where the screws went into the side. Then I filled them all with wood filler, and sanded until smooth.
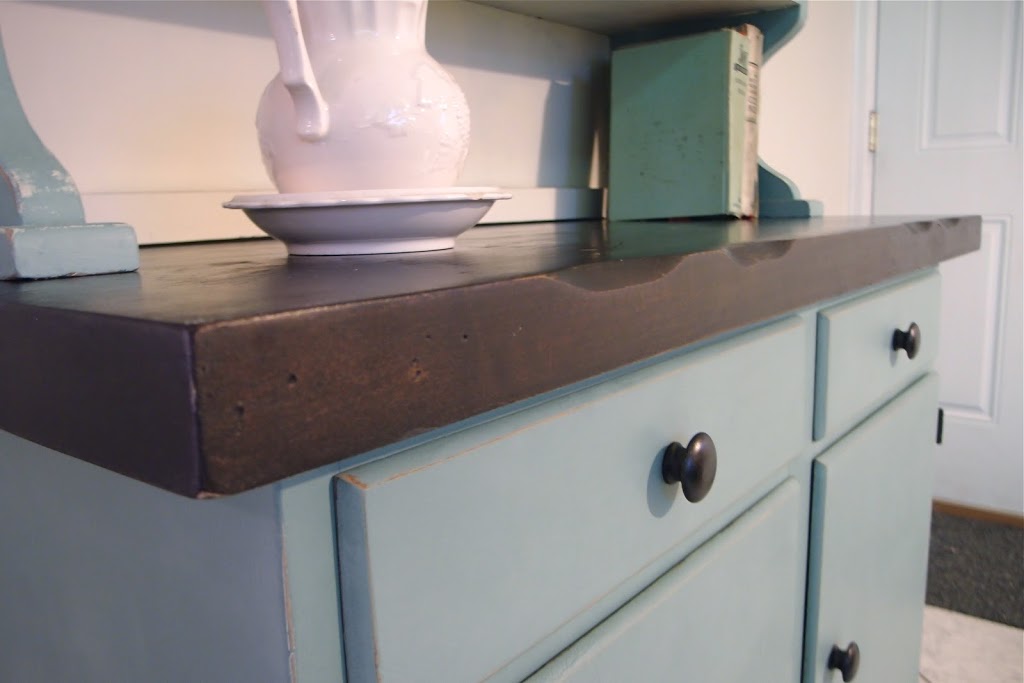
After that I stripped and sanded the top of the table portion of the hutch. OH and real fast, can I tell you how important it is to get quality sander and sandpaper? REALLY IMPORTANT, especially if you want the job to go faster and drive you less nuts.
The wood grain was much lighter (light oak) than I thought it would be, so I conditioned it then wiped on a Kona stain. Gorgeous dark stain and the wood soaked it right up. I did 2 coats of the stain. Then I did 2 layers of wipe-on poly, but it still seemed a little more rough than I wanted. So I sanded it a little with a 220 grit sandpaper and put dark wax on it. Seriously, smooth as butter. I love it.
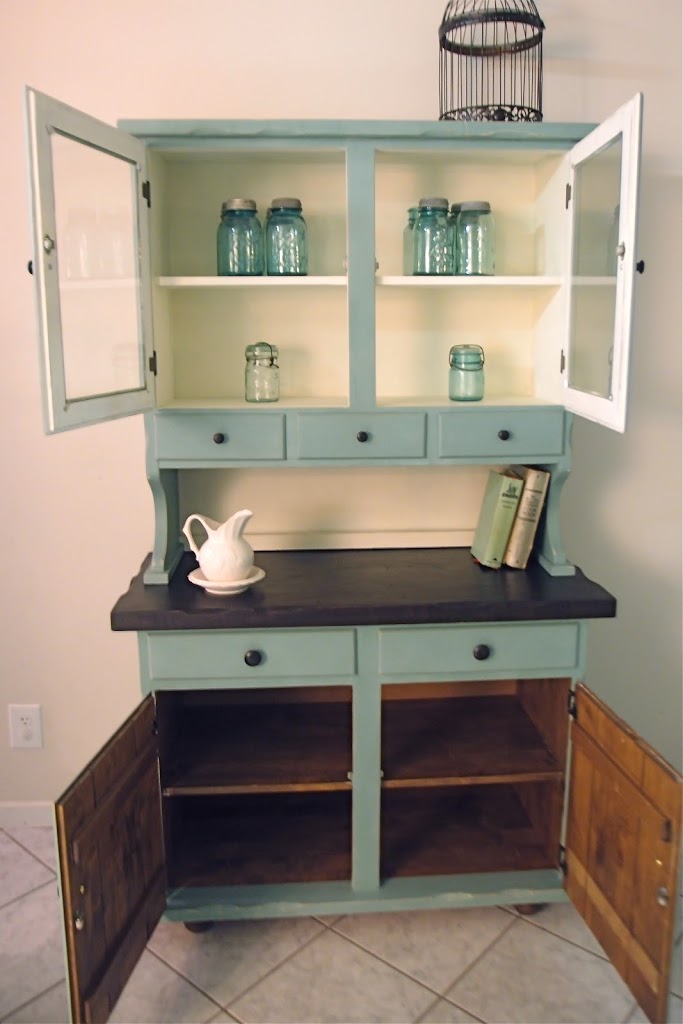
After all the sanding and crap was done (I hate that part), and got to the fun part: painting. I painted the body all Duck Egg and the interior of the top part, Old White. Two coats for the Old White and surprisingly one coat did the job for most of the hutch!

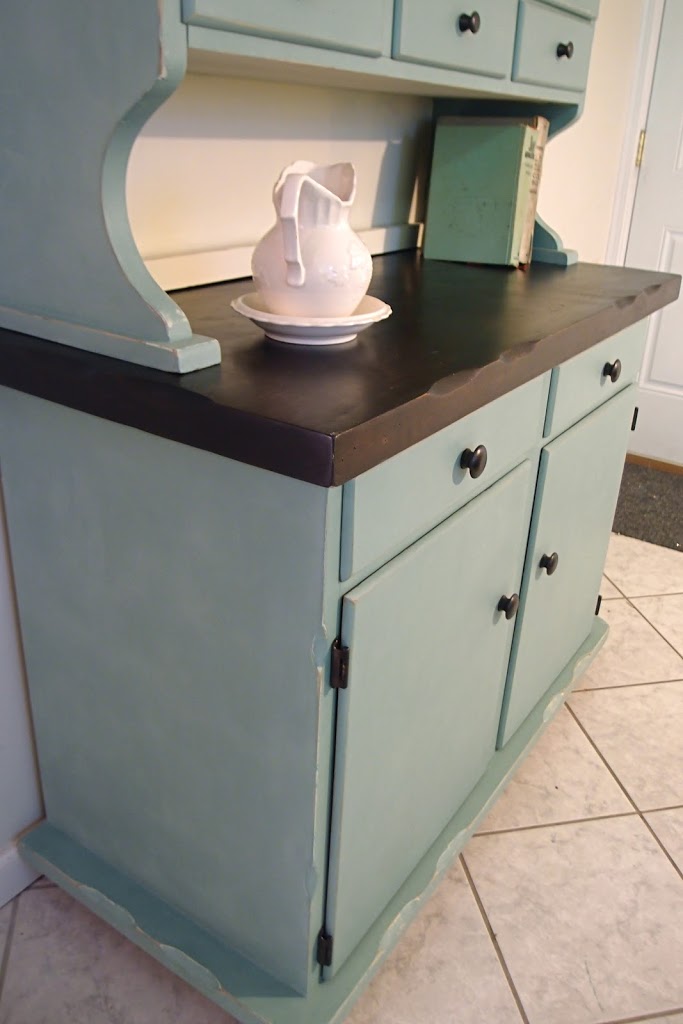
Once it was all painted and waxed (p.s. I love the rich color Duck Egg has once it’s been waxed… looks so authentically French to me!), I tackled the hinges.

By the way, if you have visible hinges (like with the screws and everything showing) and you don’t want it that way… you CANNOT just buy another type of hinge and think it will work. It will not. I bought some that were sooo wrong and I seriously looked at the hinge, looked at the hutch door, scratched my head and couldn’t figure out what I needed, although I knew what I had was wrong. Then the internets saved me.
I found out about Rockler and this guide to hinges! I love them now! They make every type of hinge imaginable and plus tons of other woodworking stuff that us furniture-fixer-uppers love. And their prices were very comparable to HD or Lowes. I found out that I need a 3/8″ inset hinge that was a low profile one. HD and Lowes only had ones that had visible screws. Nope. Rockler had what I needed for $2.99 a pair! Yesssss!
Anyhow, sprayed the original wood knobs with oil-rubbed bronze so they look pretty legit metallic if you ask me, and here she is!


Love the furniture and LOVE the Duck Egg color! Nice work!
Thank you Shelley!
Beautiful update! I’d never even thought about the hinges dilemma! Good to know.
Thanks Jaime!
What type of stain did you use?
I used Rustoleum’s Kona stain and did 2 coats of it.
This comment has been removed by a blog administrator.
This comment has been removed by a blog administrator.
This comment has been removed by a blog administrator.
BEAUTIFUL! and again…wonderful tips! I LOVE YOUR BLOG!
Where do you find the Duck Egg colour of Rustoleum chalk paint to purchase? I can’t find that colour.
It’s Annie Sloan Chalk Paint.