Last week I asked a question to my facebook fans, is there anything YOU want to know? Any questions you’d like me to answer? I got a number of responses, which I will answer today! Hopefully this information will be helpful to some of you!
1. What are your top 5 tips for someone who is about to do
their first piece of furniture?
So, I’m going to answer this question, assuming you have already chosen the piece of furniture to refinish/paint.
1. Get some inspiration! Many of you already peruse Pinterest and have lots of ideas. Start with something simple, like just 1 color. If you start with an elaborate stencil or design or layers or texture, you will likely get frustrated if it doesn’t end up like you had pictured. It is OKAY copy other’s work when you are first learning (but make sure to give the artist you copied some credit!). That is how artists learn after all! You learn to copy different styles and techniques, and then when you get more confident, you start making your own variation of what you have learned or perhaps your own style all-together!

2. Just DO it! Don’t be afraid! It is JUST paint. Paint that can be removed or painted over if you hate it. If it is something that you have been wanting to do for awhile, just take out a little time (even if it is just an hour) and get started! It is best if you start on something you own because there is less pressure to make it sell-able perfect. Most of what I’ve learned has been from just starting on a project (sometimes not knowing exactly how it would end up) and learning as I go. There is only so much reading and watching tutorials you can do. Once you begin, it is gratifying and you want to keep going back to it. It will be less intimidating if you just start!
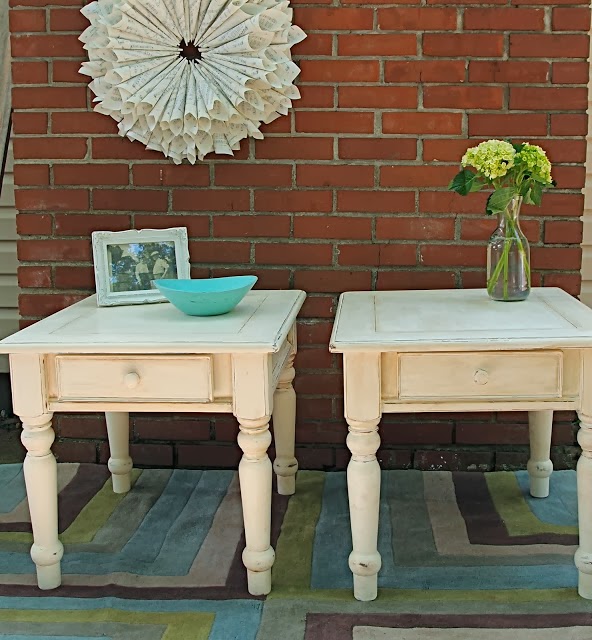
3. Choose quality materials. This goes for the furniture piece that you are working on as well. Plastic-y laminate surfaces will not look the same as something that is solid wood. And often, they don’t look that much better with paint. There are lots of sources for solid wood furniture, so don’t feel like you have to start with an inherited antique you have in your home, or some expensive brand-new piece. I started on end tables I found at a garage sale for $10.
Thrift stores often have great deals as well, if you are willing to glue some joints or clean something out. For paint, go with the highest quality you can afford. There are several brands out there that don’t require much prep work. They also tend to cost slightly more than paint brands you see at HD or Lowes. Quality paint, in general, has higher pigment ratios, so it requires less coats and a longer lasting finish. Colors fade faster in cheap paints. For brushes, get a Purdy brush. Thank me later! It is worth it! The bristles are high quality and durable. All the pro painters use Purdy brushes and it is for good reason!
4. Prep your piece. Even on the paints that say no prep work required, you really should prep a little. For example, remove all hardware (this seems like a no-brainer, but I’ve had people question that), fill knicks, cracks, chips in wood with wood filler (my favorite is Famowood Wood Filler from Woodcraft), glue any loose or wiggly joints with wood glue (my favorite is the Tightbond brand), and sand lightly all over. Now the sanding one is optional for some pieces. If I’m using wood filler for anything, I usually give the whole piece a light sanding regardless, just because you have to sand over the wood filler once it is dry, to get a smooth surface. If it is a piece in good condition or the knicks or chips don’t bother me (sometimes it adds good character to an antique), I usually only lightly sand if it is super shiny. Even though ASCP says it can adhere to any surface, even very shiny ones (and it does without chipping or flaking), for DURABILITY’S sake, I will lightly sand it, just to give it a bit of ‘tooth’… gives the paint something more to adhere to. If you don’t use a paint like Annie Sloan Chalk Paint or MMS Milk Paint with the bonding agent, then you absolutely should sand lightly all over. It doesn’t take long at all with an orbital palm sander. I usually use a 120 or 150 grit sandpaper.


Another prep tip is to clean the piece. This doesn’t have to be super involved or intense. Wipe off dust and dirt with a warm washcloth. Usually this is sufficient. If there is a smell (in a dresser for example), you might have to use a stronger cleaner, odorless mineral spirits, and seal with shellac.
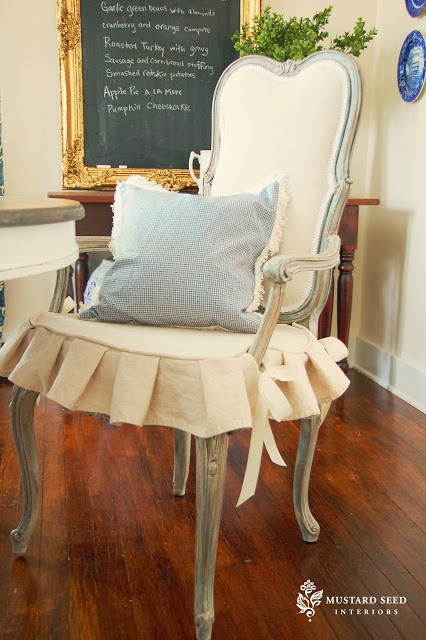
5. Use a good top-coat. Consider how this piece will be used and also the look you want. If you want a clean modern (non-distressed) look, make sure to use a top coat that is very durable and hard. Like clear Verathane for floors, or Polyacrylic (I really like the General Finishes brand with 2-3 thin coats).
Lightly distressing, even for something who doesn’t really like for something to look “old” is great because it removes the paint on the edges in a controlled manner, giving your overall look more “durability” because it is less likely to be marred in a noticeable way. My favorite topcoat, if I distress a piece of furniture is Annie Sloan Clear Wax. It goes a long with with a brush, but can be applied with a soft cloth. It is quite durable, can easily be reapplied, and touch-ups are a breeze, since they blend in. You don’t have to strip or sand or recoat anything.
2. How long does the paint or wax really need to dry–per
different types of surfaces?
Different paints have different drying times. Latex usually takes 30 minutes to an hour, depending on humidity, temperature and how thick of a coat is on. ASCP usually dries in about 20-30 minutes for the first coat and about 30 minutes for the second coat (if you don’t water it down at all). Milk paint usually dries in about 20 or so minutes, but it is a very thin so even if it feels dry to the touch, it really isn’t truly DRY until it no longer feels cool to the touch. I always like to give milk paint an extra hour to dry after the 2nd or 3rd coat because once the moisture is completely evaporated, the chipping and crackling begins to happen (if you don’t use the bonding agent), which is a trait about milk paint that is generally desirable. Furniture wax, like Annie Sloan brand, MMS brand, or Minwax Paste Wax, dries very quickly. You must remove excess with a cloth and I have found within 5-15 minutes it has dried hard. It takes about 24 hours for there to not be anymore fingerprints when you touch it. Now for the wax to cure to it’s hardest state, I would give it more time. Some people say 24 hours, some people say a week, I usually say be gentle with it for 21 days. That is how long paint takes to cure as well. Painted furniture is not indestructible, but it can be quite durable if you are careful with it in the first few weeks.
Not all waxes are created equal. Some aren’t meant to be used on top of painted surfaces and will remove the paint when you wipe it on. Yikes! I’ve learned the hard way! If your wax is tacky after 24 hours, you have likely applied too much. You can use odorless mineral spirits to remove furniture wax, or you can just paint over it and try again.
3. Is it more difficult to strip a piece that was painted with
chalk paint as opposed to latex paint? Is the process the
same?
No. It strips the same, from my experience. I’ve only had to strip a Chalk Painted piece once and had no problems. I used Citri-Strip and it all bubbled up nicely!
4. Have you ever painted kitchen or bathroom cabinets with
ASCP?

Not yet! However, we are in the process of looking for a new home, and almost all the kitchen cabinets I’ve seen are not the finish I like, so hopefully early next year I will be able to answer that question a little better! There is, however, a great review of that process HERE.
5. How do you know when it is necessary to sand before
painting?
In the first question I answered a little more in-depth as to when I sand a piece prior to painting it… BUT, if you are not using a special paint that is known for adhering to any surface (like Annie Sloan Chalk Paint), then you will always need to sand the piece prior to painting (for durability’s sake, so it doesn’t unexpectedly chip or flake on you). You don’t have to remove every bit of lacquer or shiny topcoat, but you will need to rough it up a little to give the piece some “tooth”. There are recipes out there to make your own type of chalk paint using latex paint and plaster of paris or baking soda. I’ve tried it before and was not a fan of the extra time and effort needed, as well as lack of finish options in comparison to ASCP. But it does adhere to most surfaces, just like ASCP would.
That’s all for now! Let me know if you have any other questions and I’ll do my best to answer them!
P.S. TWO winners were chosen for the Inspiring Blogger Book Giveaway! Congrats to:
Thanks Rachel
I am going to paint my first piece with chalk paint. This was very helpful!!
I love your site!!!!!
Great tips, Rachel! x
Thanks for the tips. We are in renovation currently and have been wanting to tackle something. I have a small chair I picked from the street I’ll start with to test the water!
Awesome ! So useful and important information about furniture painting you have shared with us. Thank you so much and please keep sharing this type of blog.