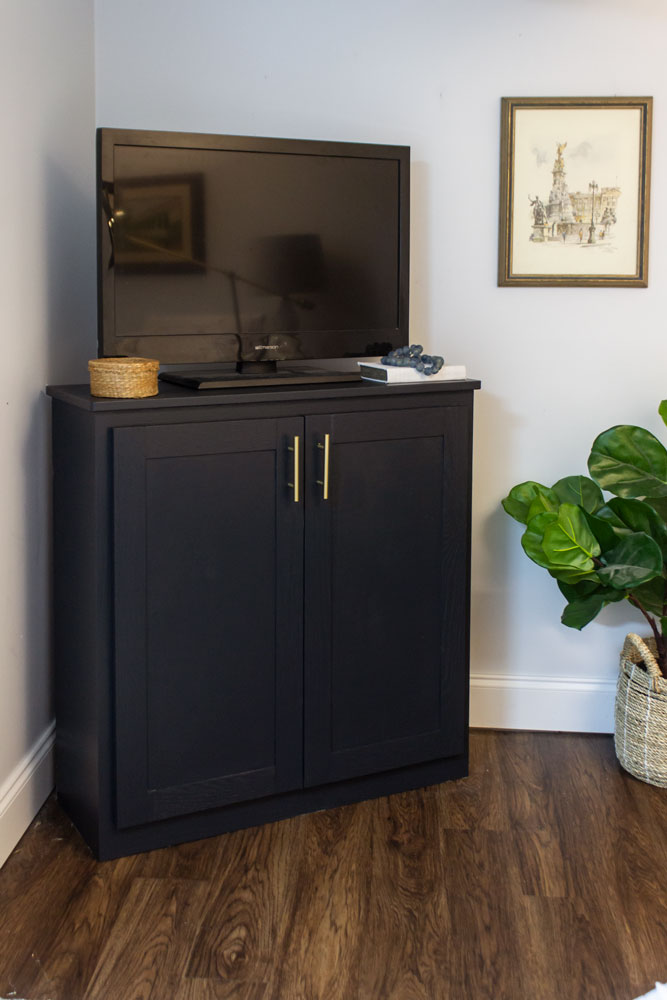
Today I’m showing how to build a cabinet door for pretty much any bookcase, using only a few tools! This is a low-cost update that will give a bookcase a more custom look and hide items such as electronics.
This post is sponsored by Kreg Tools. They sent me their new Kreg Pocket-Hole Jig 320 and asked me to create a small project using it. I have been using a previous model of their pocket-hole jig for years, but this one has the incredible price point of less than $40! It also has a few, cool improvements that make this portable, customizable jig a must-have for every DIYer!
Affiliate links used in this post.
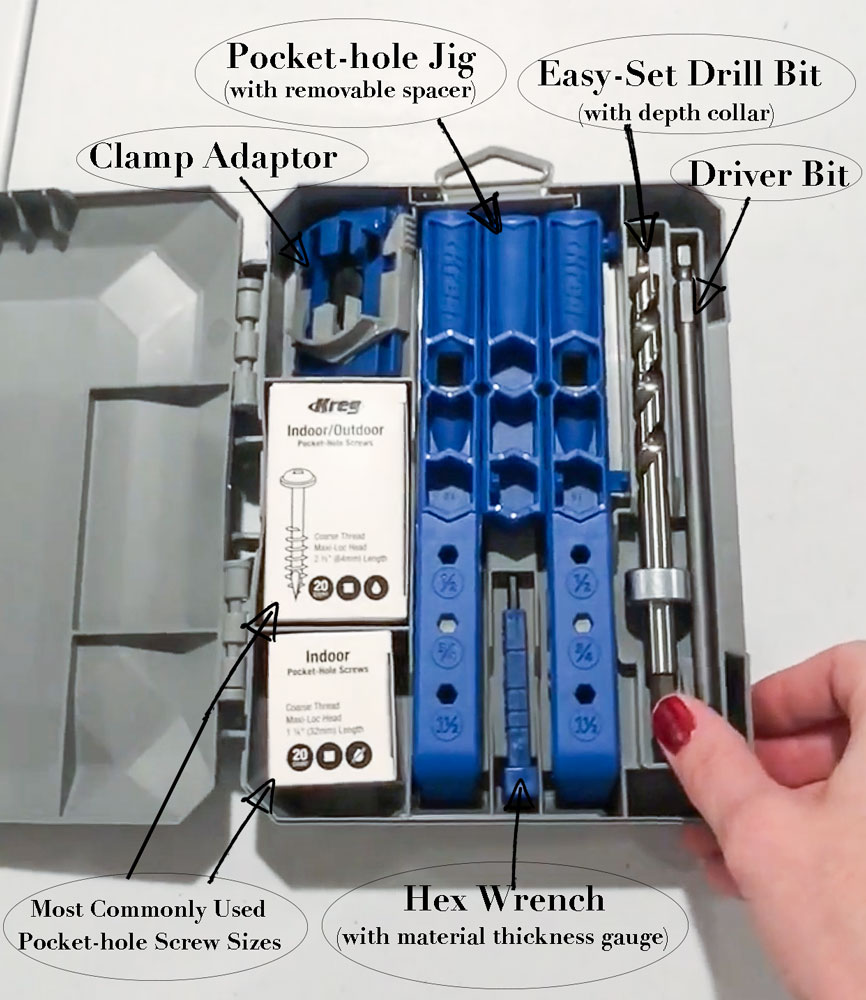
Here is an image of everything that Kreg Jig 320 comes with:
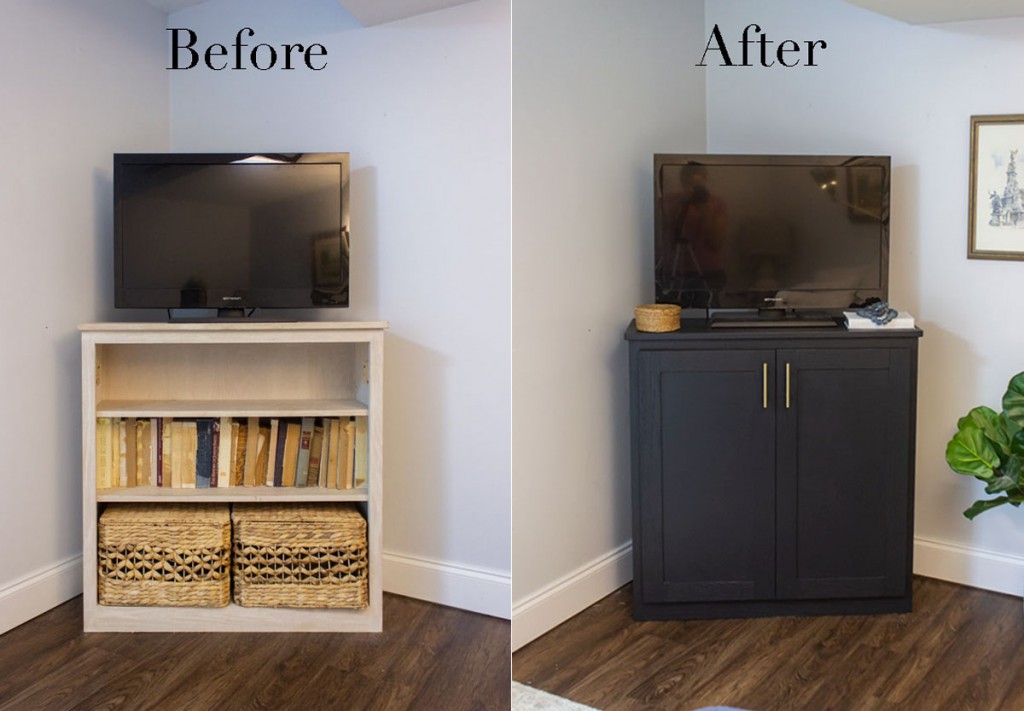
In our basement, we have a guest bedroom and guest bathroom. I’ve barely touched the guest bedroom in terms of improvements, but this bookcase that we’ve had for a few years was begging for an update! I knew a couple of doors would be a great addition.
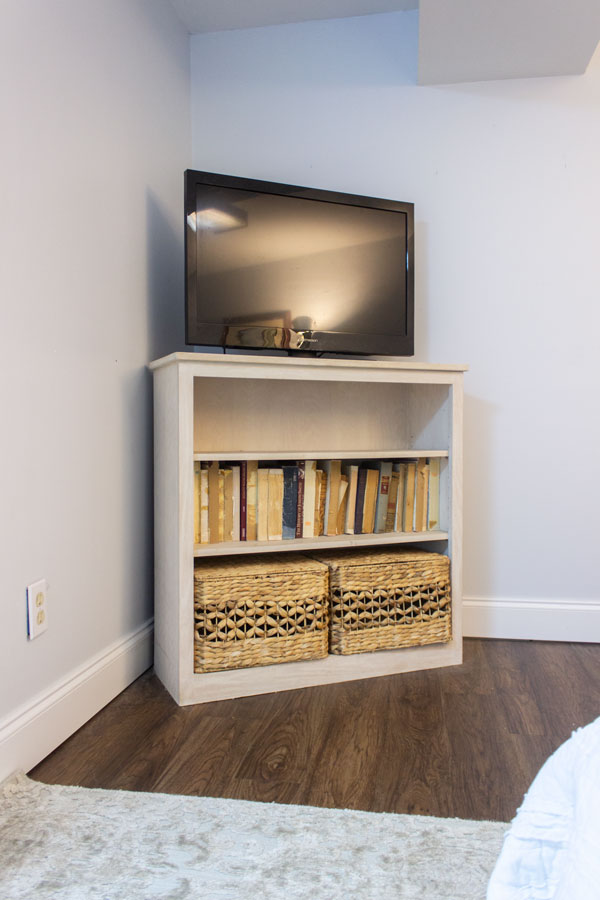
Maybe you too have a bookcase that you would love to add doors to cover the bottom couple shelves?
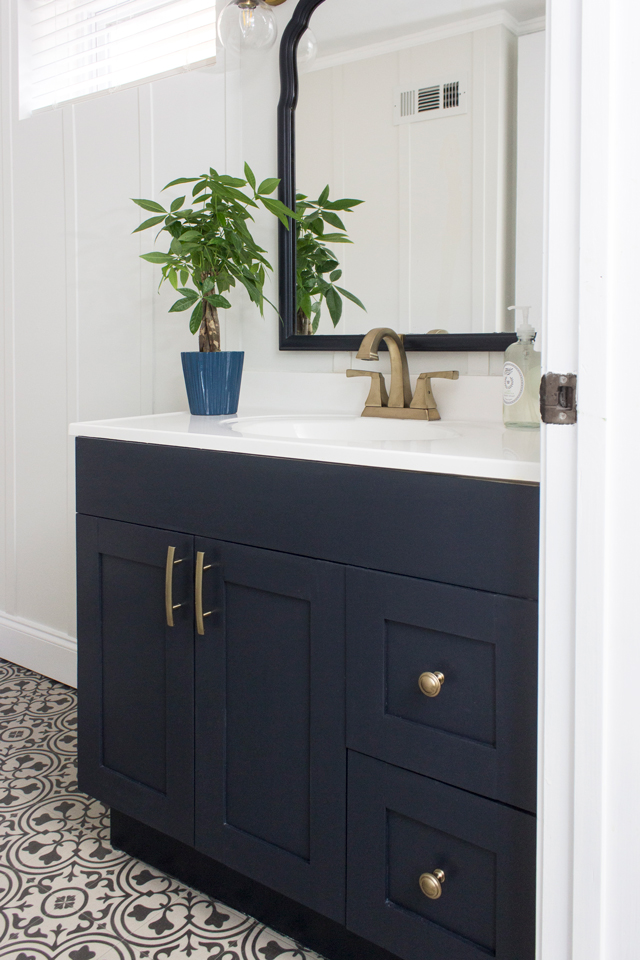
Or maybe you have a bathroom vanity that you would like to update with some modern-style doors?
This tutorial will show you everything you need to make new doors using the Kreg Pocket-hole Jig 320 and attach them with a frameless hinge!
Below is a video tutorial, but just in case you want a still image tutorial, I have that too!
Tools & Supplies Needed:
Chop Saw (optional or if you want, have the home improvement store make cuts)
1 1/4″ pocket-hole screws (comes with Kreg Pocket-Hole Jig 320 kit)
2- Full Overlay Frameless Hinge Sets
4- 4″ long pieces of scrap pine and 8- 1″ screws (optional if there is a overhang from bookcase frame)
Step 1: Measure the Opening
Using a measuring tape, measure and write down the opening for the space you want the doors to cover.
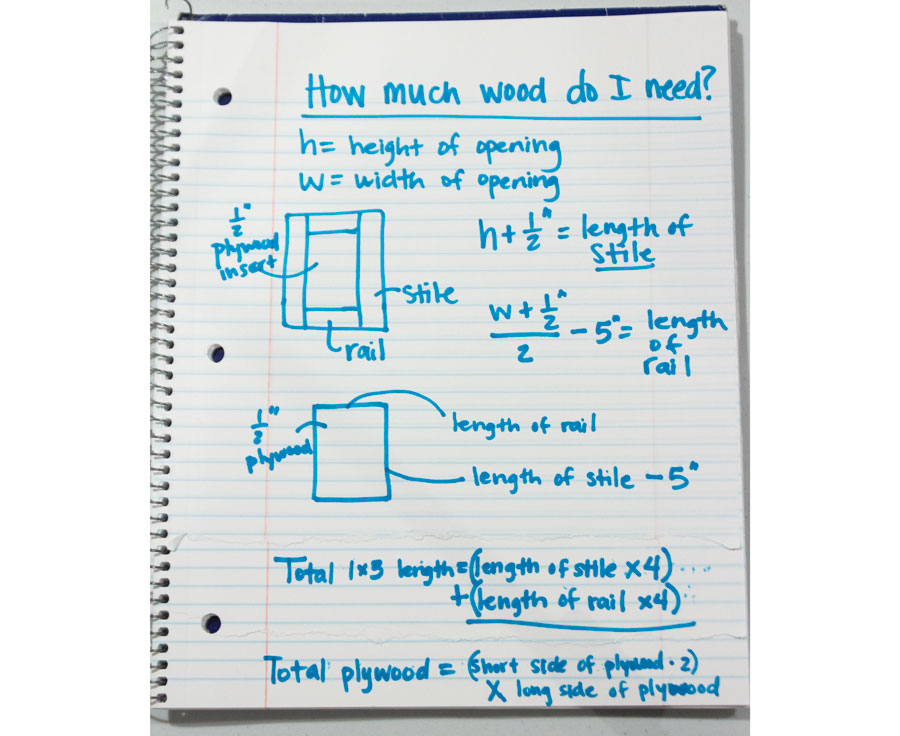
Step 2: Determine How Much Wood is Needed
I wrote down the formula and some basic sketches to figure out how much wood you will need to buy. This will also give you specific cut measurements, so if you don’t have a saw, you can bring your measurements to the home improvement store and have them make the cuts of 1×3 boards and 1/2″ plywood for you:
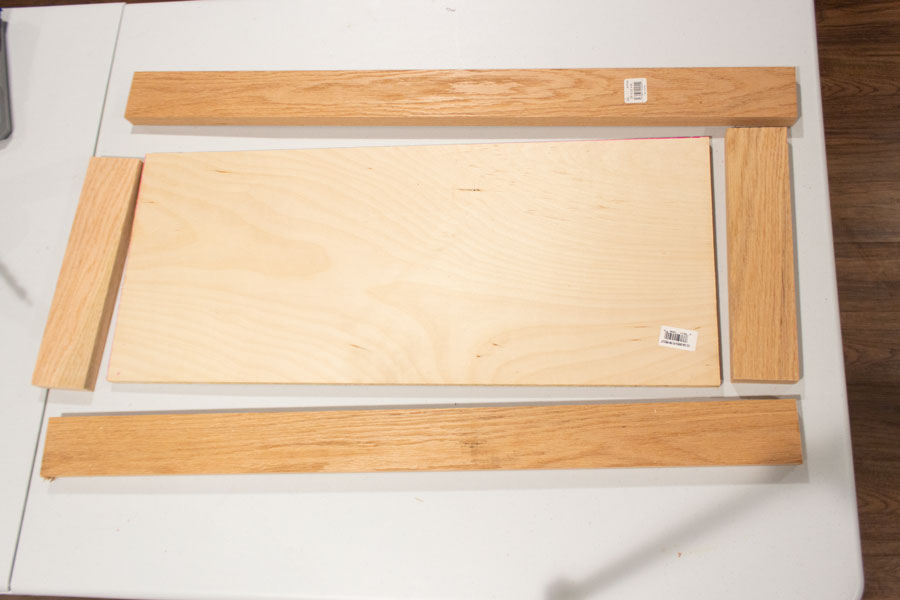
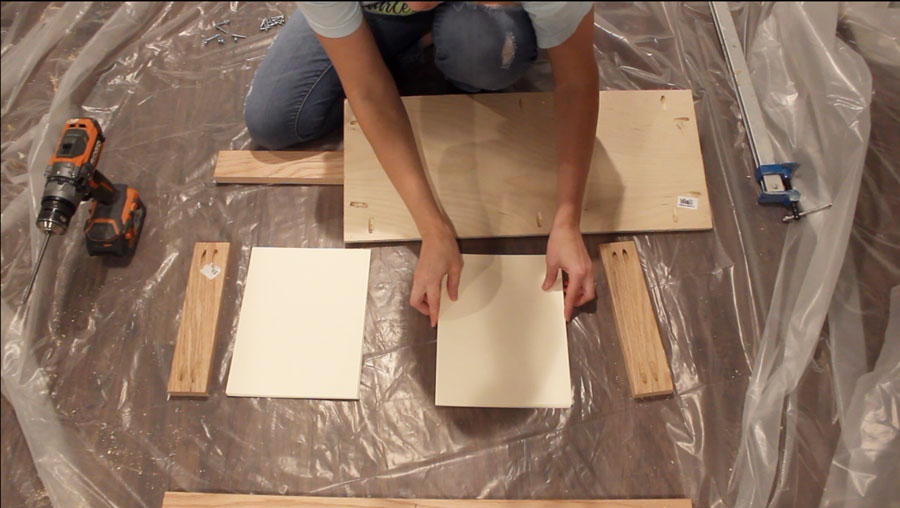
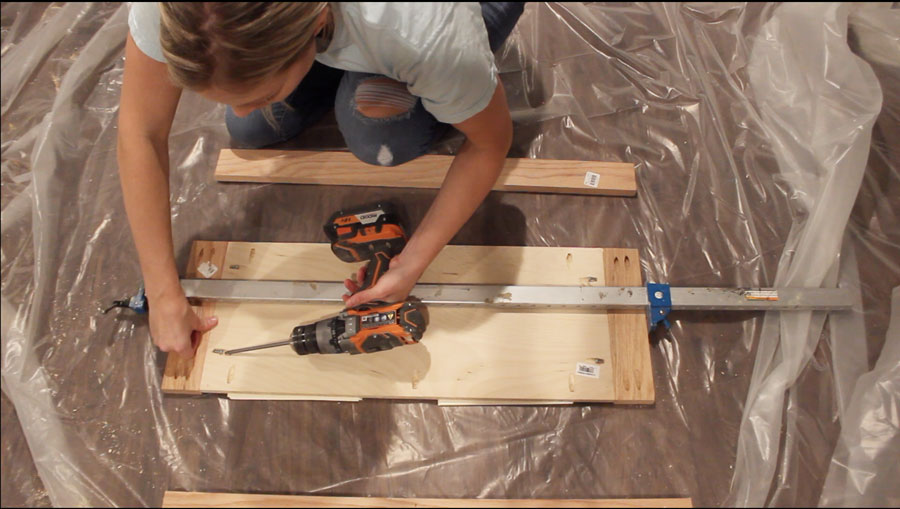
Step 3: Cut Wood and Lay it Out
Cut the 1x3s and the 1/2″ plywood to the measurements that you figured out in step 2. Lay out the pieces in the format you will construct the door and ensure the rails are perfectly flush with the short side of the plywood. If they are shorter or longer, even by 1/16″, it will cause gaps when you attach everything together. Likely, trim stiles if needed, so they are exactly the right length without any slight overhang.
Step 4: Drill Pocket-holes
You will be drilling 2 pocket-holes on either end of the rails, and on all sides of the plywood. Remove the middle spacer from the Kreg Pocket-hole Jig 320.
Adjust your Kreg Pocket-hole Jig to the right thickness (3/4″) of the 1×3 boards.
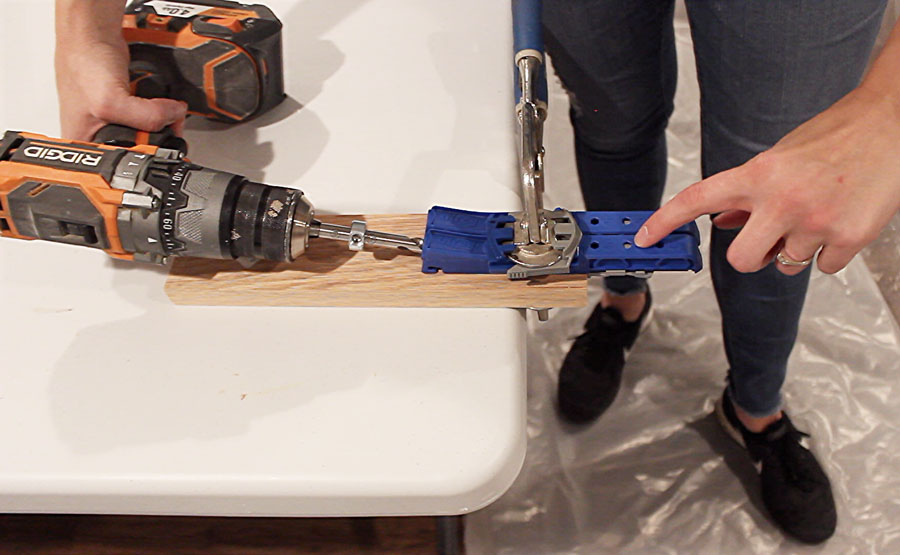
Adjust the depth collar on the drill bit to the 3/4″ mark as well using the hex wrench.
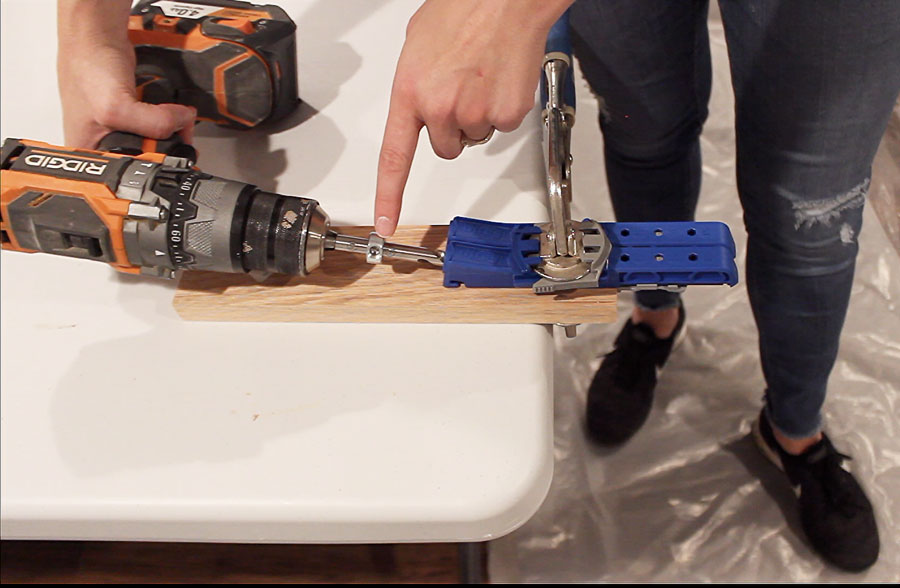
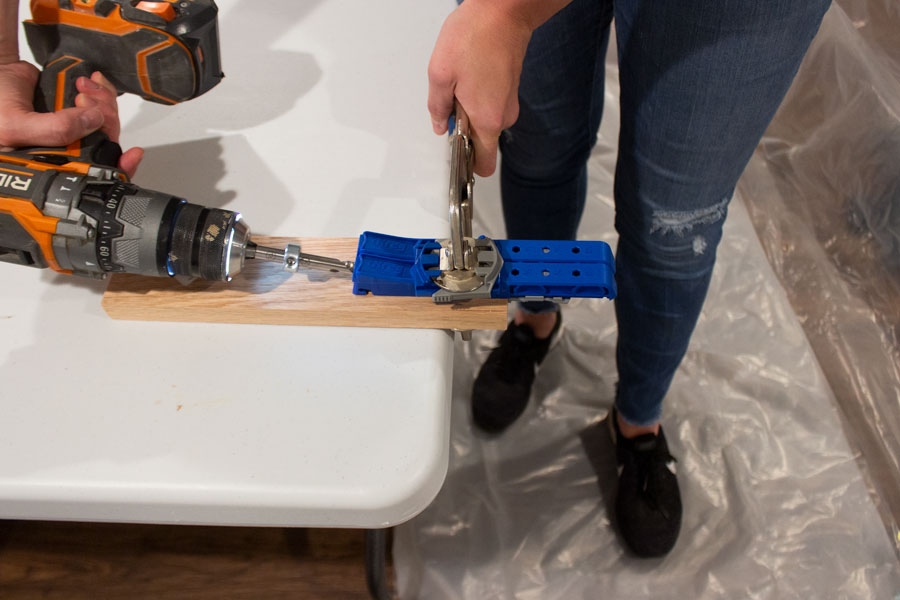
With the clamp adjuster and clamp in place on the Jig, securely hold the clamp with one hand and drill the pocket-holes with the other hand.
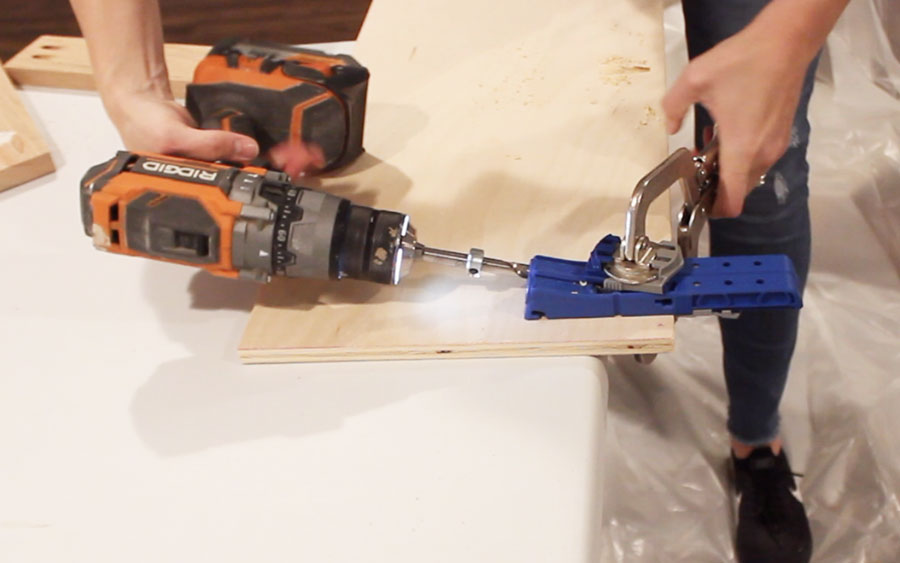
Drill the pocket-holes on both rails, then make the same adjustments on the jig and depth collar to 1/2″ thickness for the 1/2″ plywood. Drill 3 pocket-holes on the long sides of the plywood and 2 on the short side.
Step 5: Attach Inset to Sides
Using stacks of cardstock (I used 2 stacks of 20 sheets) or a magazine that is about 1/4″ thick, place the plywood inset on top. Then put wood glue on the short edges and line up the rails.
Gently clamp the rails to the plywood inset to hold them in place (but not too tight, otherwise the boards will buckle). Attach the plywood to the sides with 1″ pocket-hole screws using the driver bit that comes in the jig kit.
Glue and gently clamp stiles to the plywood. Attach the rails into the stiles with 1 1/4″ pocket-hole screws. If using hardwood (oak or poplar) 1x3s, make sure to buy 1 1/4″ pocket-hole screws that are specific for hardwood (they are labeled). If using softwood, then you can use the 1 1/4″ pocket-hole screws that are included in the jig kit.
Drive 1″ pocket-hole screws from plywood insert into 1×3 stiles.

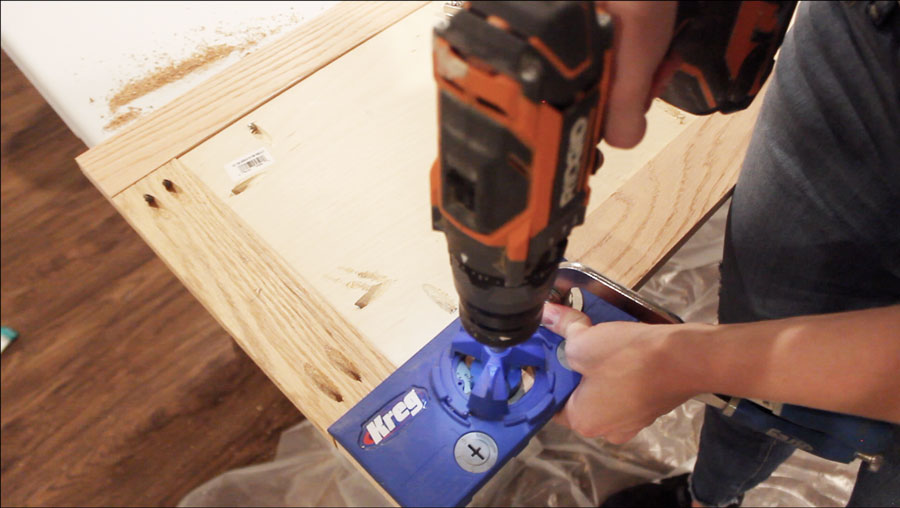
Step 6: Attach Hinges
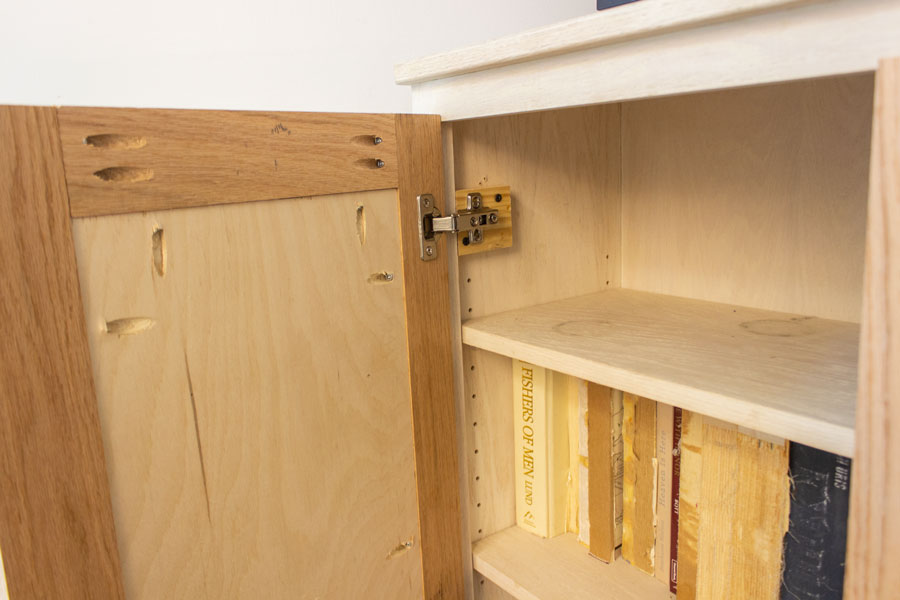
To attach the Full Overlay Frameless Hinges to the door, you will need to drill a hole to fit the hinge on the door. The easiest way to do this is to use the Kreg Concealed Hinge Jig. Set the depth you want your hinge to sit (I used the 3 setting) and clamp it to the edge of your door. Attach the cordless drill to the the hole-boring bit and drill the hole.
Using a very small drill bit (1/16th), pre-drill pilot holes for the screws of the hinge. There are perfectly placed holes in the Hinge Jig for this, so make sure to not remove the clamp before pre-drilling these holes.
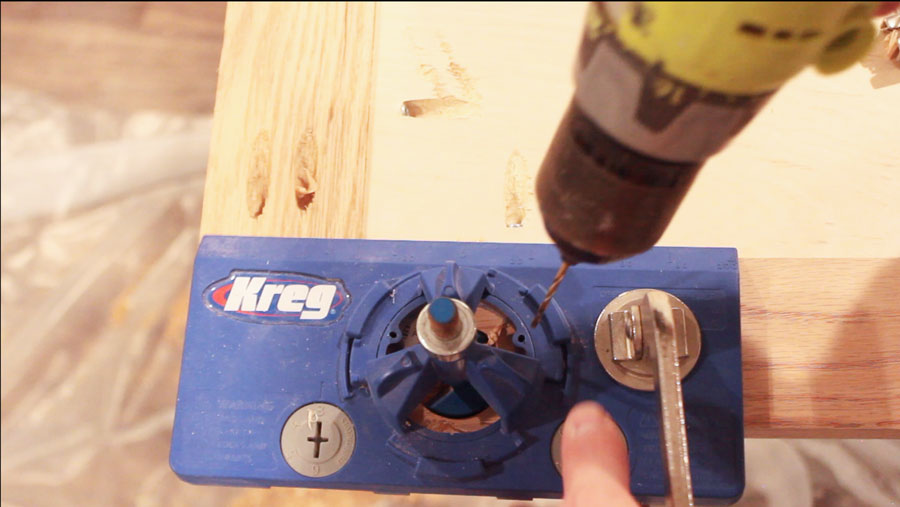
Below you can see the hole placement for the hinge and the pilot holes for the screws. Repeat this process on both ends of each door.

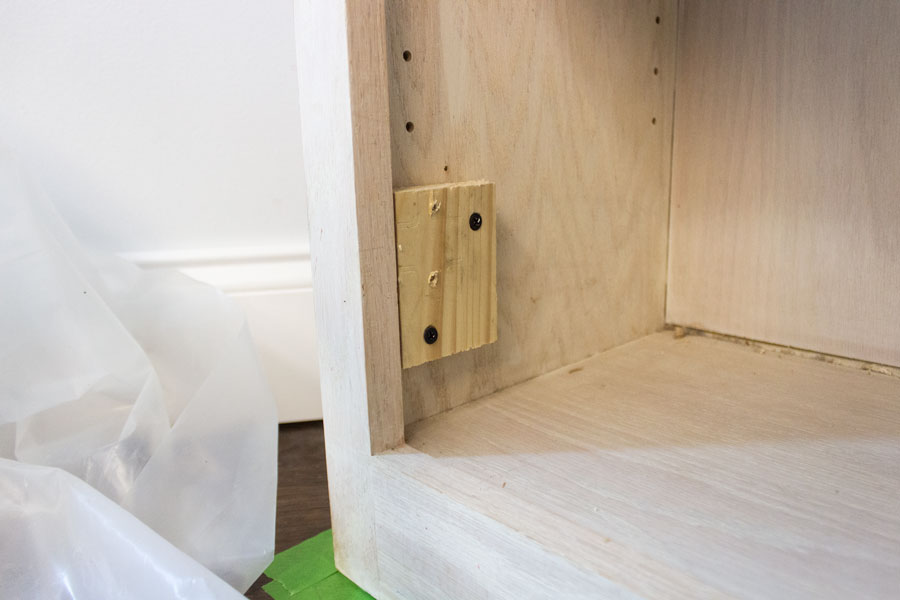
Step 7: Attach Spacers to Inside of Bookcase
If your bookcase has a lip from the face of the bookcase to inside wall of the bookcase, you will need to attach a spacer so the hinge can be installed properly. Use a scrap piece of pine (about 4″ long) and screw them to the inside wall, at the locations where the hinges will need to be installed.
Step 8: Attach Doors to Bookcase
Line up the bookcase so there is a 1/4″ overhang on the top and attach the top screw of the top hinge into your spacer, then the top screw of the bottom hinge. Shut the door and check to make sure the door isn’t too close to the bookcase frame. If that is the case, tighten the adjustment screw that is closest to the frame, to move the door away from the bookcase frame a little. Once placement is correct, attach the remaining screws into the hinge.
Repeat this process for the other door, then use the other adjustment screws on the hinge to get proper and even alignment of the doors.
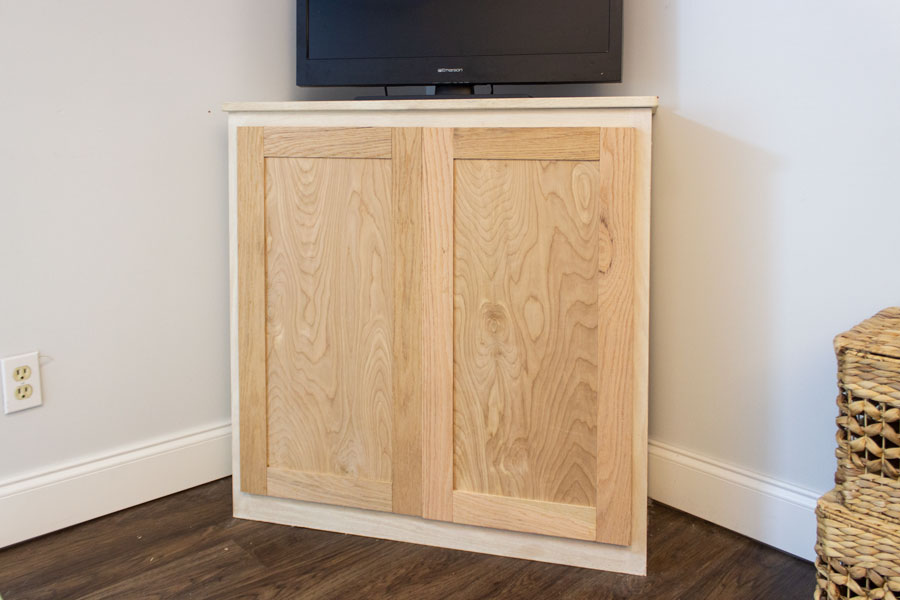
Step 9: Paint or Stain and Attach Hardware
Lightly sand the doors and pre-drill holes for desired hardware. Paint or stain the doors to match the bookcase, then attach hardware.

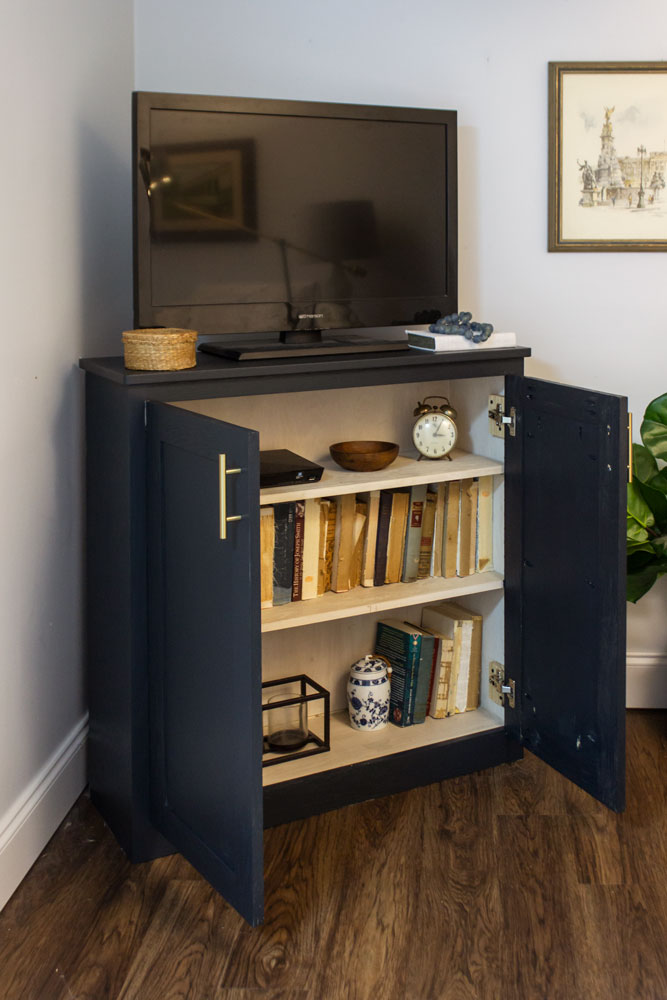
I absolutely LOVE how this project turned out and I hope it inspired you to build your own doors so you can update your furniture!
To buy the Kreg Pocket-Hole Jig 320 click HERE.
To buy the Kreg Concealed Hinge Jig click HERE.

Hello, great video! Could I do this with an ikea bookcase?
Yes you can!
Hello!
Can we drill the pocket hole with the Kreg jig k4?
Thanks!
Yup! I have that one and use it often! It gives you the exact same pocket holes. It’s definitely more expensive though so I wanted to show how you can accomplish this project using inexpensive tools.
Hi Rachel, I’m trying to follow your Tutorial. the formula you posted for the rails leaves a 1/4” overlay. Will a full overlay hinge work for this or Am I not doing the math right?
1/4″ overlay is correct– and the hinge I specified is what you’d need. As I explained in the video, you’ll need to install a spacer piece of wood on the inside where the hinge is mounted.
Hi. What kind of wood did you use?
Select pine and maple plywood.
Hi, Rachel loved the tutorial! I am having a bit of trouble with the math. These are the values I’ve obtained so far, but I’m unsure of where to go from here, and worried my calculations may be off. The measured values W = 52.5″ and H = 15.75″ is correct. This is what I’ve gotten so far:
length of stile = 16.25″
Length of rail = 21.5″
stile length x 4 = 65″
rail length x 4 = 86
(stile length x 4) + (rail length x 4) = 151″
Please, let me know what to do next and if I have miscalculated anything. Thank you for your informative video!
Hi! I am a school teacher and need to cheaply add doors to my shelves. Can I skip the framing step and just attach a plywood door to the inside of the bookshelf with the hinge?
The edge of plywood will splinter, so I wouldn’t recommend attaching anything without a finished edge.
how do i do this if i want glass in it
Hi! Love this idea. Definitely will be using it.
Can you explain the rational behind the length of rail and stile formulas? I’m assuming the 1/2″ is for waste? But why (-5) when you’re using 1x3s?
Thanks!