As a contributor for eHow, I was contacted a few weeks ago to participate in a #ProjectThrowdown Challenge against 5 other bloggers and eHow contributors. I was so excited to be included! It was our challenge to create a home decor project using our imagination and ALL of these specific materials:
1. Ikea Lack Table
2. One sonotube
3. Paint, stain or decoupage
4. Chain(s)
The winner is determined by whoever has the most pins and shares, so if you love this, will you pretty please vote by pinning/sharing? Whoever has the most pins/shares will be featured in eHow’s homepage and will be in their newsletter!
So, back to those materials…
I was seriously scratching my head for awhile with that list. I mean… chains and sonotubes? I had to google sonotube, since I had never even heard of it before haha!
But, inspiration finally hit and being a furniture gal, this is what I created:

And here is the tutorial!
Supplies you will need:
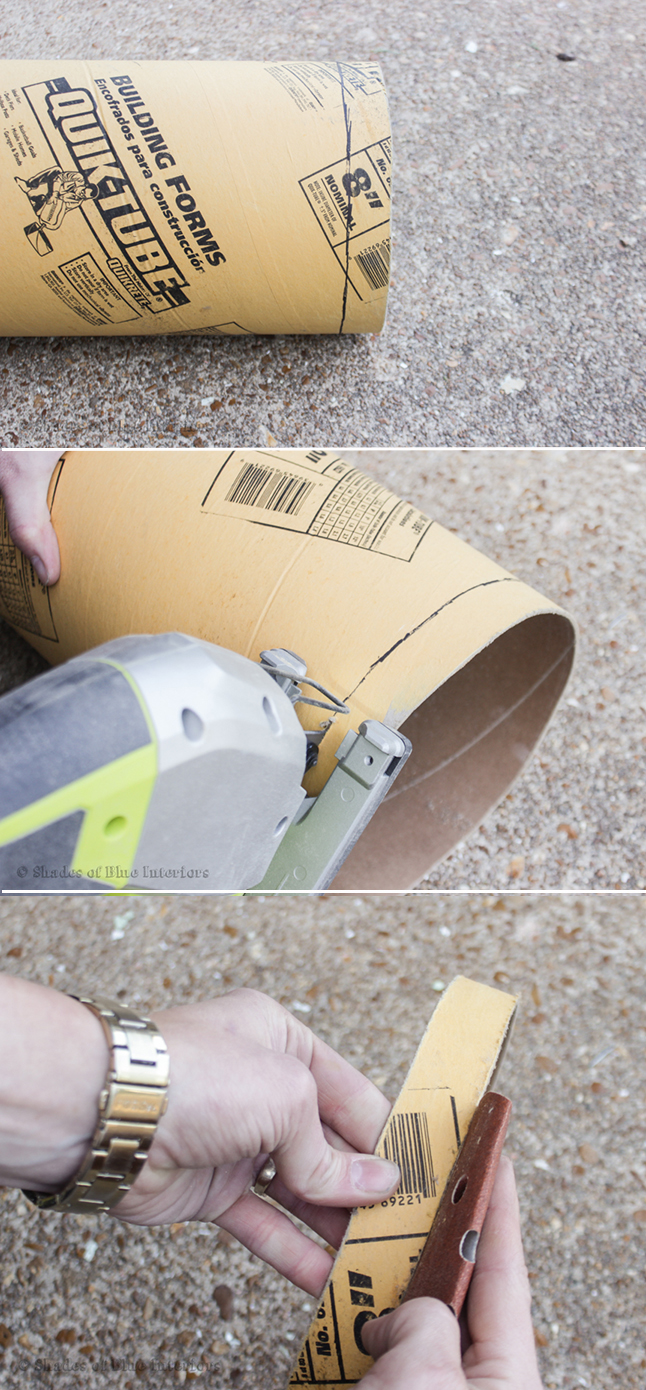
8″ Sonotube
Ikea Lack end table
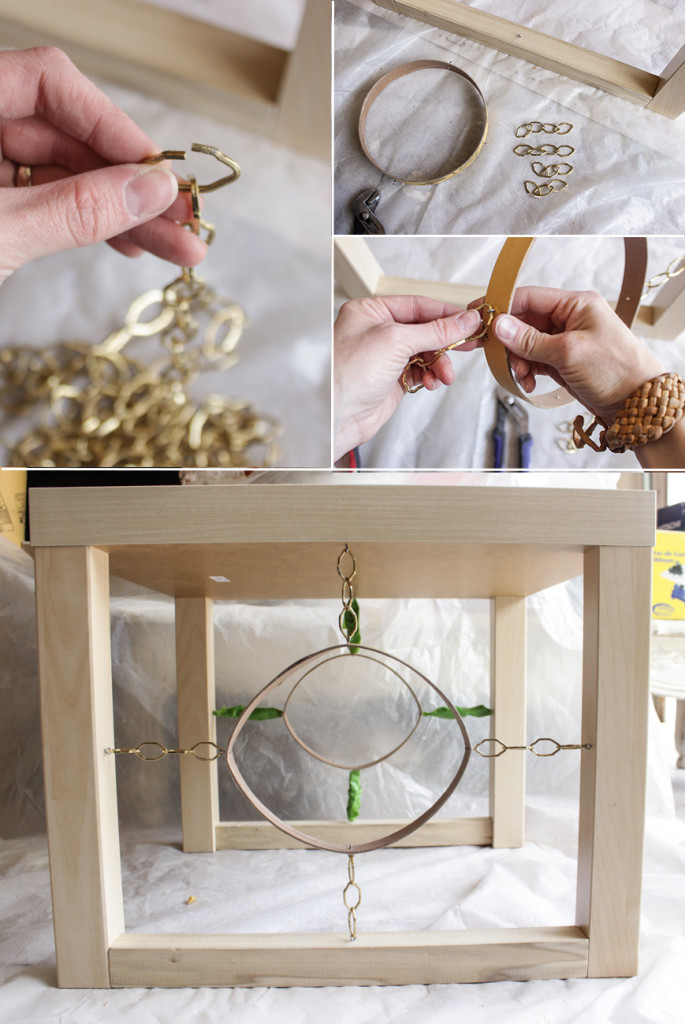
#31 Cathedral Chain, brass finish, 28 links
16 Metal Screw Eye Hooks, #216 – 1/2″ x 1/2″
2×2 poplar piece of wood, 3 feet
4- 2 1/2″ pocket hole screws
Painter’s tape
White spray paint
Glossy clear coat spray
Tools you will need:
Measuring tape
Protective Eyewear
Jigsaw
Sandpaper, 220 grit
Circular saw
Kreg Jig pockethole system
Electric screwdriver/drill
Metal clamps
1/16″ drill bit
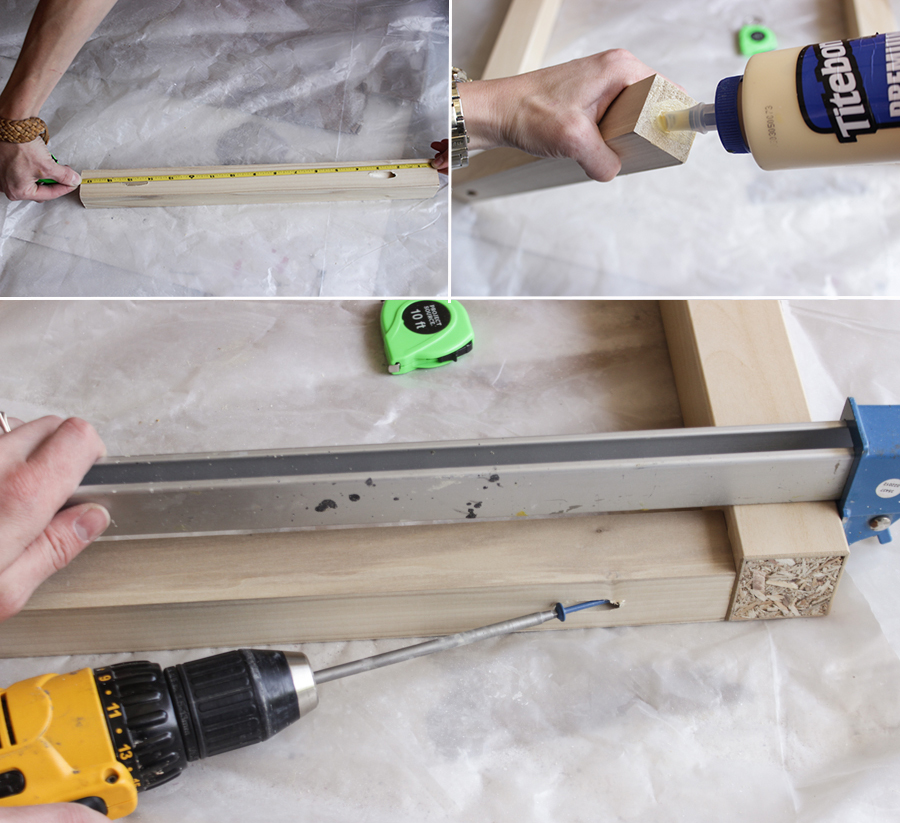
Step 1-
Mark 1″ wide on the sonotube and cut out with a jigsaw. You will need to start it out with a hack-saw, then once a hole is made, insert saw blade of jigsaw. Make two of these, and sand down the fuzzy edges with 220 grit sandpaper.
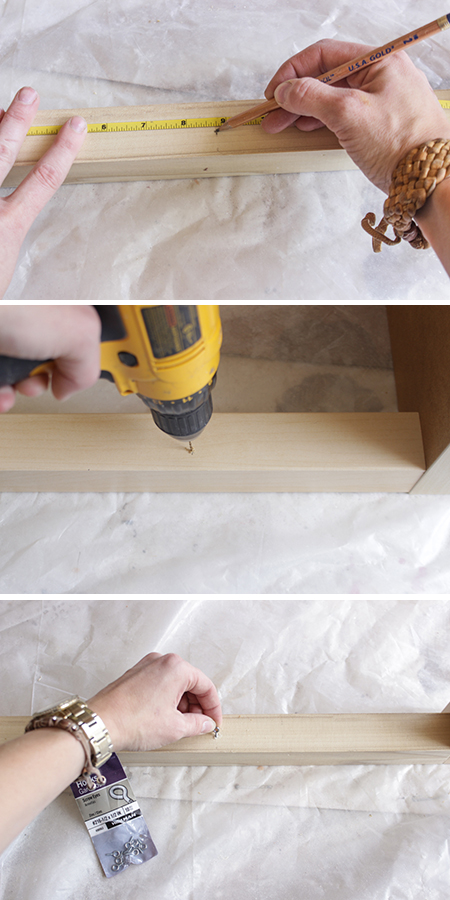
Step 2-
Measure the distance between the legs of the assembled Ikea Lack Table (about 17.5″) and cut out 2 from the the poplar 2×2 to that length.
Step 3-
Using a Kreg Jig Pockethole System, drill 1 1/2″ pocketholes on either end of the poplar 2x2s that were cut out in Step 2.
Step 4-
Lay the table on it’s side. Take one of the 2×2 poplar pieces and put a bit of glue on either end where it will attach to the legs. Lay the board with the pocketholes facing toward you, in between two of the legs, flush with the bottom, and clamp. Attach 2×2 to legs with 2 1/2″ pockethole screw on either end. Repeat for opposite side of table.
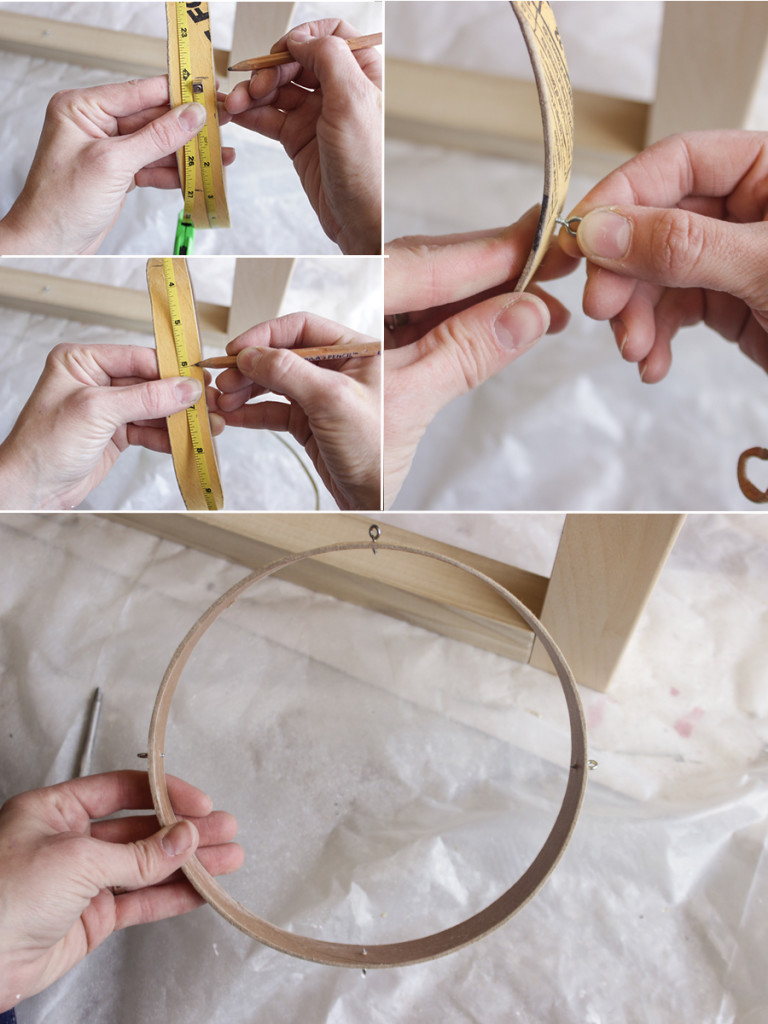
Step 5-
Mark the center of the poplar 2×2 that you just attached, and the center of both legs and the underside of the table, directly parallel to the base 2×2 that was attached, on both sides. Pre-drill holes for the screw eye hooks using the 1/16 drill bit in the center marks you just made.
Step 6-
Screw the eye hooks in with you fingers, into the pre-drilled holes.
Step 7-
Measure the diameter of the cut sonotube. It should be about 2 feet. Mark your starting point, and mark every 6 inches around. Screw in the eye hooks at these marks.
Step 8-
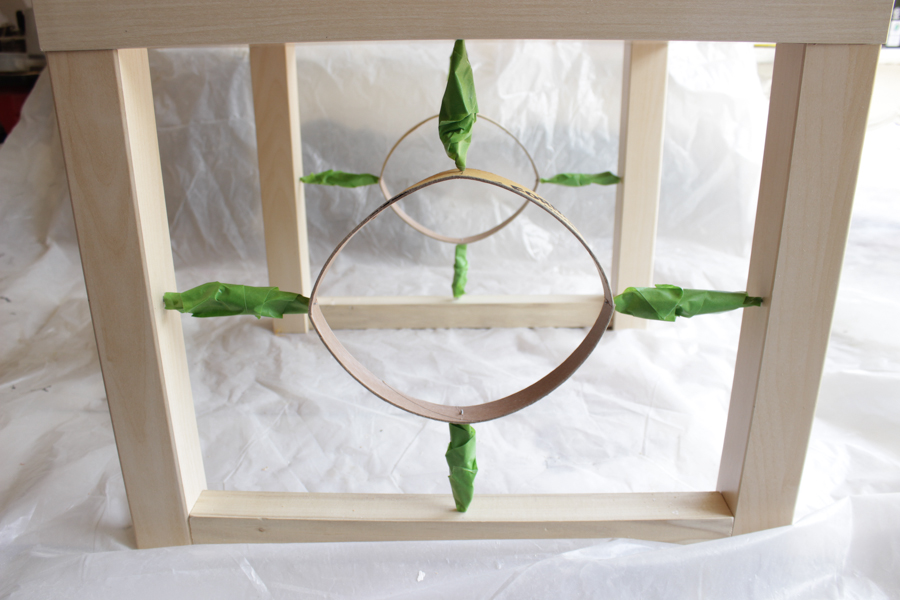
Using pliers, bend open the chain link, so that you can remove 2, 4 link lengths, and 2 3 link lengths. Leave the link on either end of each length open. Say that 10 times fast haha! Then attach each end to the screw eye hooks on the sonotube and the table. As you pull the links to attach them to the eye hooks, you will notice the sonotube changing shape a bit from a circle to an oblong shape. This is the beauty of using a sonotube! Use pliers to close links once attached.
Step 9-
Wrap chains in painter’s tape and paint with white spray paint. Give the entire table and sonotubes at least 2 coats, allowing them to dry at least 2 hours between coats. Sand the sonotube lightly on the edges to remove any fuzziness.
Step 10-
Finish with 2 coats of glossy clear coat spray in a can (allowing 1 hour dry time between coats). Allow to dry and cure 24-48 hours before bringing into your home and placing items on top.

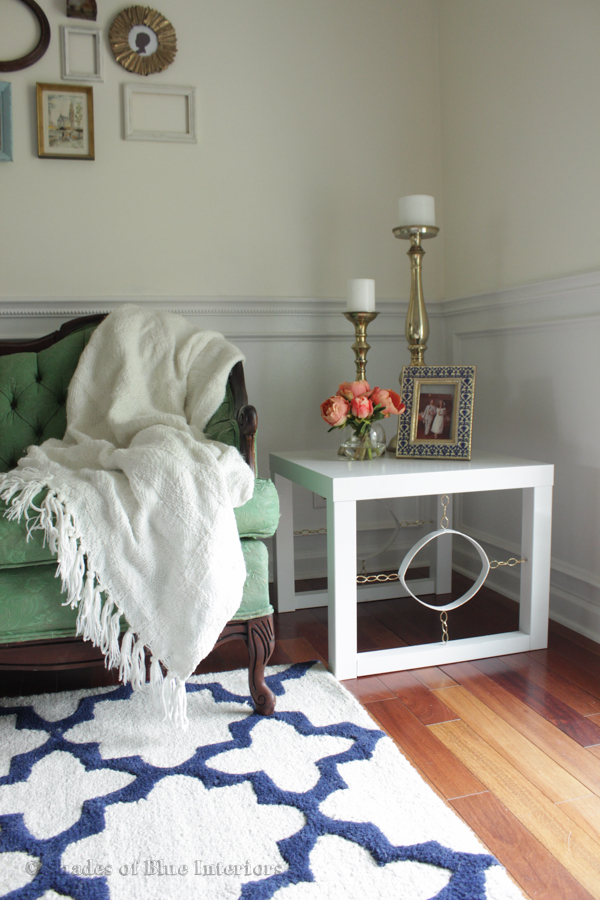
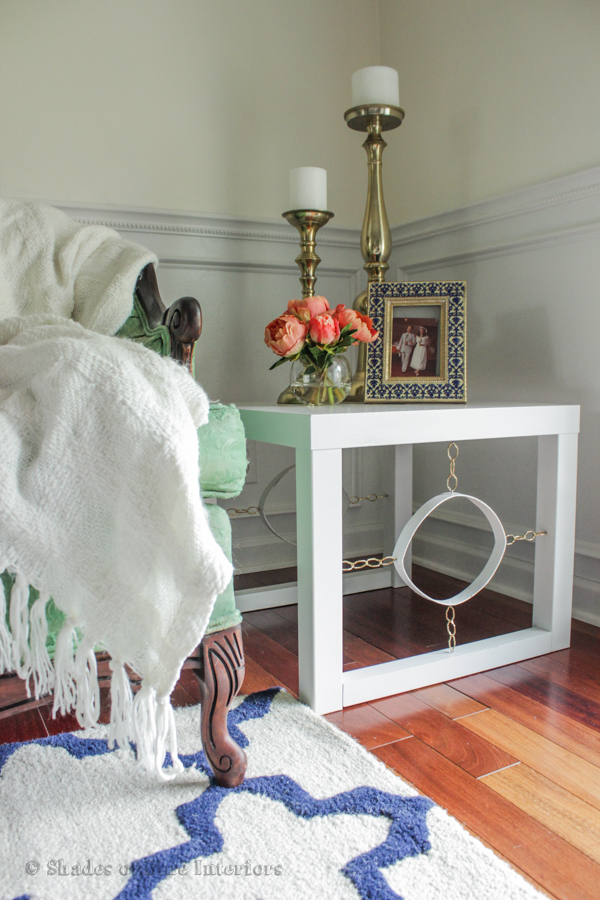
I like how inexpensive the materials used were, but how classy and expensive the final result is!
You could use different chain than I did, but I prefer this shape of this Cathedral chain, and I especially love the brass finish.. it is what makes it have a bit of a vintage mod feel.

If you look really closely, you can see the slight crease on some parts of the sonotube, but most people wouldn’t notice that, especially if they don’t get down on hands and knees inspecting your table! 😉
So, what do you think?
Like I mentioned above, the designer with the most pins/regrams/shares will be the winner of this #ProjectThrowdown. So don’t forget to utilize the sharing buttons below to help me out!
Check out eHow’s curated article on the #ProjectThrowdown HERE!
xo, Rachel
P.S. Here are the other designers that participated in the challenge if you want to check them out (but come back and vote for me ;)):
Rachel Pereira, Shades of Blue Interiors
Rachel I LOVE your table! This is clever and doesn’t look like a DIY at all! Isn’t that chain great? I bought the last three boxes at Lowe’s and it looks like it’s discontinued in our area 🙁 Awesome job!
Rachel, your table is so gorgeous. Probably the most elegant IKEA hack I’ve ever seen. Love how clear your instructions were too! Love it.