A couple weeks ago, in preparation for Vintage Market Days, Bruno and I set to work building some furniture we wanted to bring and sell. In the past we have always done painted and refinished furniture, but since we have had fun building furniture lately, we decided to make a couple show-stoppers, including a printer’s console. This was built 100% from THESE plans on Ana White’s blog. I will say that I noticed a couple of errors, which I will share at the end. We got to this point within a day:
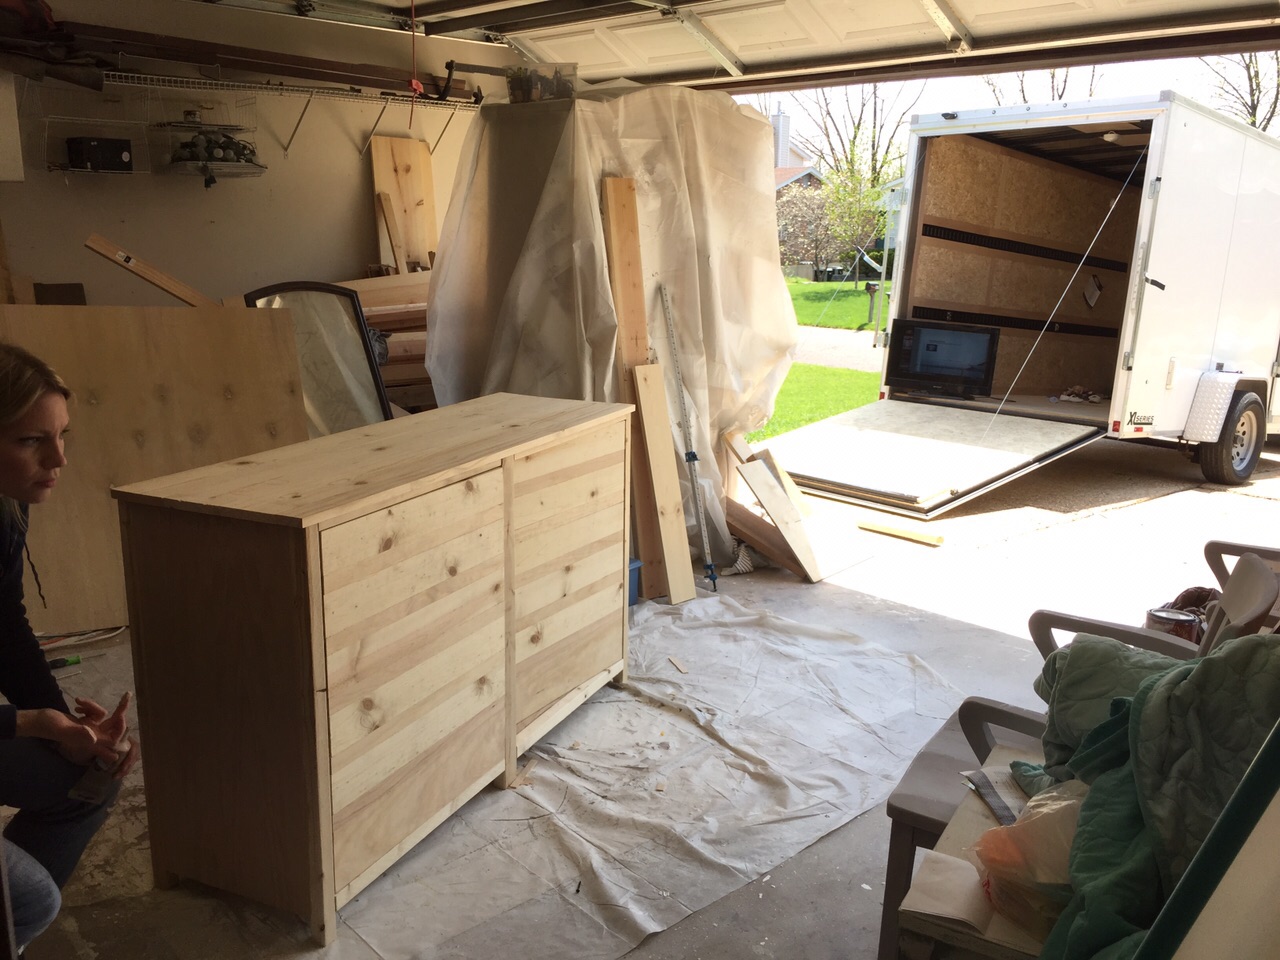
You can see I wasn’t aware the picture was taken, and our garage/workshop is pretty messy with all the market prep and building. But Bruno had his TV set up so he could stream some European league soccer! haha #priorities
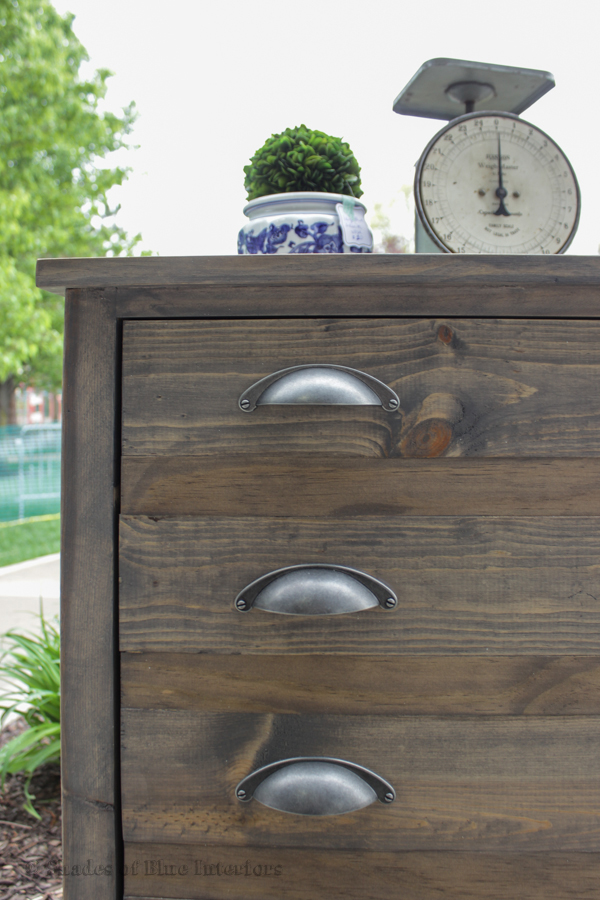
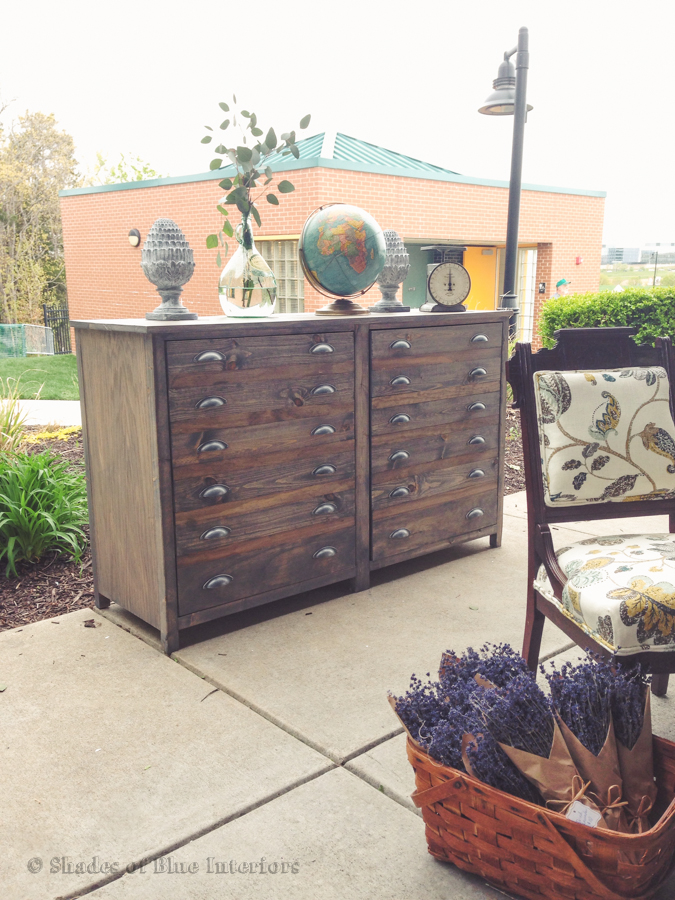
One thing that I’m not sure is obvious here, but to keep wood costs down, we used common board pine for the 1x4s and select pin for the 1x2s. This meant there was more knots (which I think add to character), but I also feel that because it absorbed the stain a little differently, it made the grain stand out more and added a nice contrast with the smooth, perfect 1x2s. The wood filler took some time to dry, then we sanded everything smooth. With this piece, I really want the wood to have a visible grain texture, which pretty much disappears when you sand pine smooth. So, I used a method that I saw on Pneumatic Addict, where she uses a wire brush to scrape the wood, going in the direction of the wood. It is GENIUS! It totally adds that natural texture that harder woods often have. Pulls arrived the next day and after conditioning the wood and staining the outside and inside with Minwax Classic Gray stain, we attached these pulls:

They are from D. Lawless Hardware and are the Antique Pewter Pulls. Their price is much better than anything I could have found locally, and they arrived within 2 days of me ordering. Instead of going with one pull per “drawer” I chose to do 2, which made it look much more like Restoration Hardware, in my opinion. Totally worth the extra expense.
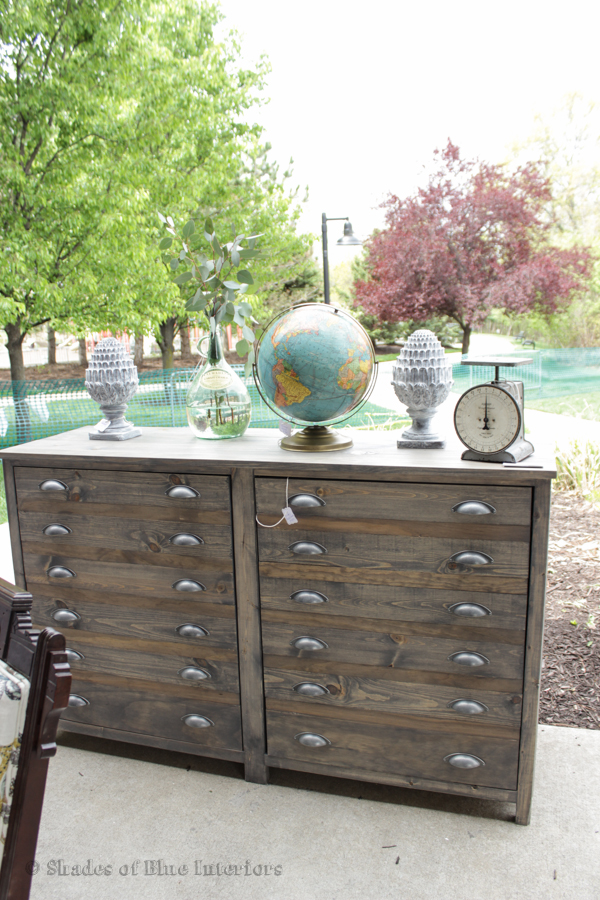
To make the “drawers” stand out more, I used Minwax Special Walnut layered on top of the Classic Gray for the pieces of wood in between the “drawers” and then I sealed the entire thing with Minwax Wipe-On Poly.
Because I was using PureBond plywood for the interior and the sides, and Purebond is pretty much the only brand of plywood that actually cares about the ply having a pretty grain, I chose to stain the inside also. It didn’t necessarily need it, but it was a nice extra touch. I chose to install shelf pins for the shelves inside. It made things a little easier to customize for the buyer.

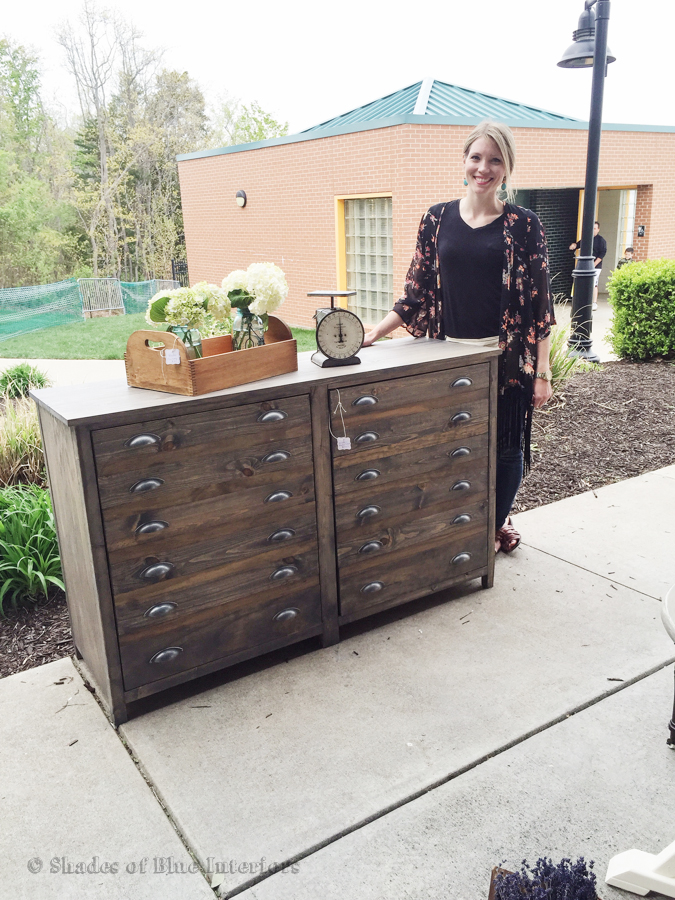
Bruno took this with his phone, but we were so proud of this piece and this is the only picture of my with any of the furniture for VMD!
Here are the errors or minor changes we made when building:
For the Cut List,
Listed under “Drawer Faces”:
we cut our drawer faces more like 25 7/8″ because 26 ended up being too tight of a fit. And we really did have exact cuts, but it was just a little too tight for some reason.
Listed under “Box”:
instead of 1- 1×6 @ 30 3/4″ and 1- 1×6@27 7/8″, the 1×6 for both is supposed to be 1×16 (same width as other plywood pieces)
instead of 2- 1×16 @ 56 1/2″ we would cut it to 56 1/4″. The plywood box was a little too long from the face frame. Part of this I think is because the face frame is built with 2x2s which, even though I selected pieces that were very straight, still bench and warp a little, whereas the plywood is stronger and keeps its shape better. At least that is my best guess for why we had a bit of an issue with it.
In the instruction, I didn’t feel it was clear, but make sure when you attach the bottom piece on the box, there is a 3/4″ gap from where the bottom piece attaches to the middle piece and the sides, to the ground.
**Tip when attaching hardware**
Drill counter-sink holes for the hardware on the inside of the door where the 2×3 braces sit. Measure carefully and mark, then pre-drill all your holes, so attaching the hardware with the screws will go smoothly. It will still be a bit of a pain, but decent-size counter-sink holes will make things go a little smoother if you do it ahead of time.
Total wood cost was about $100 and the hardware was an additional $50 including shipping. I’d say $150 for a console as pretty as this isn’t bad, right?
this piece is stunning and so are you!