This post is sponsored by Kreg Tools.
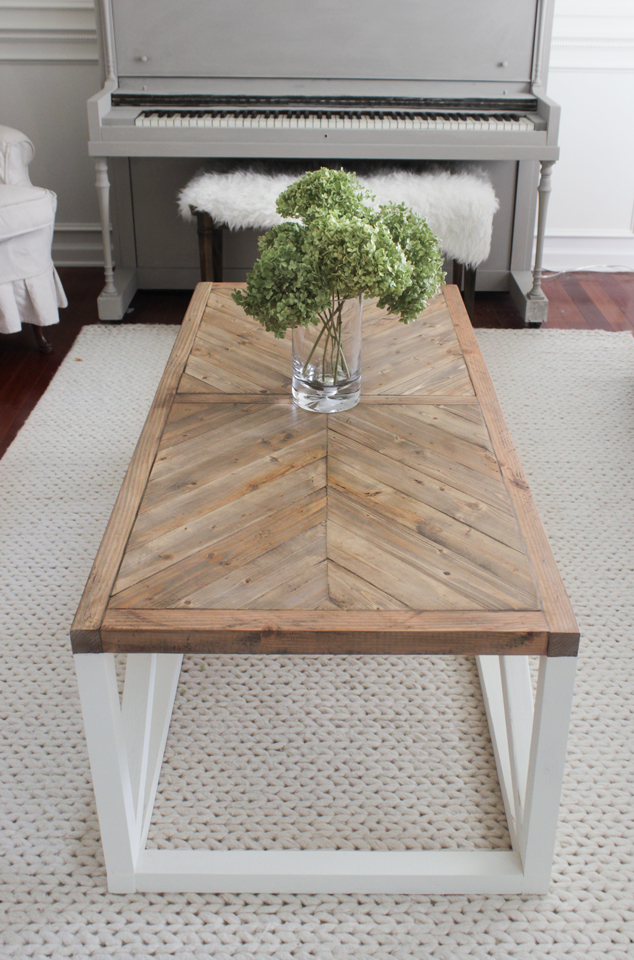
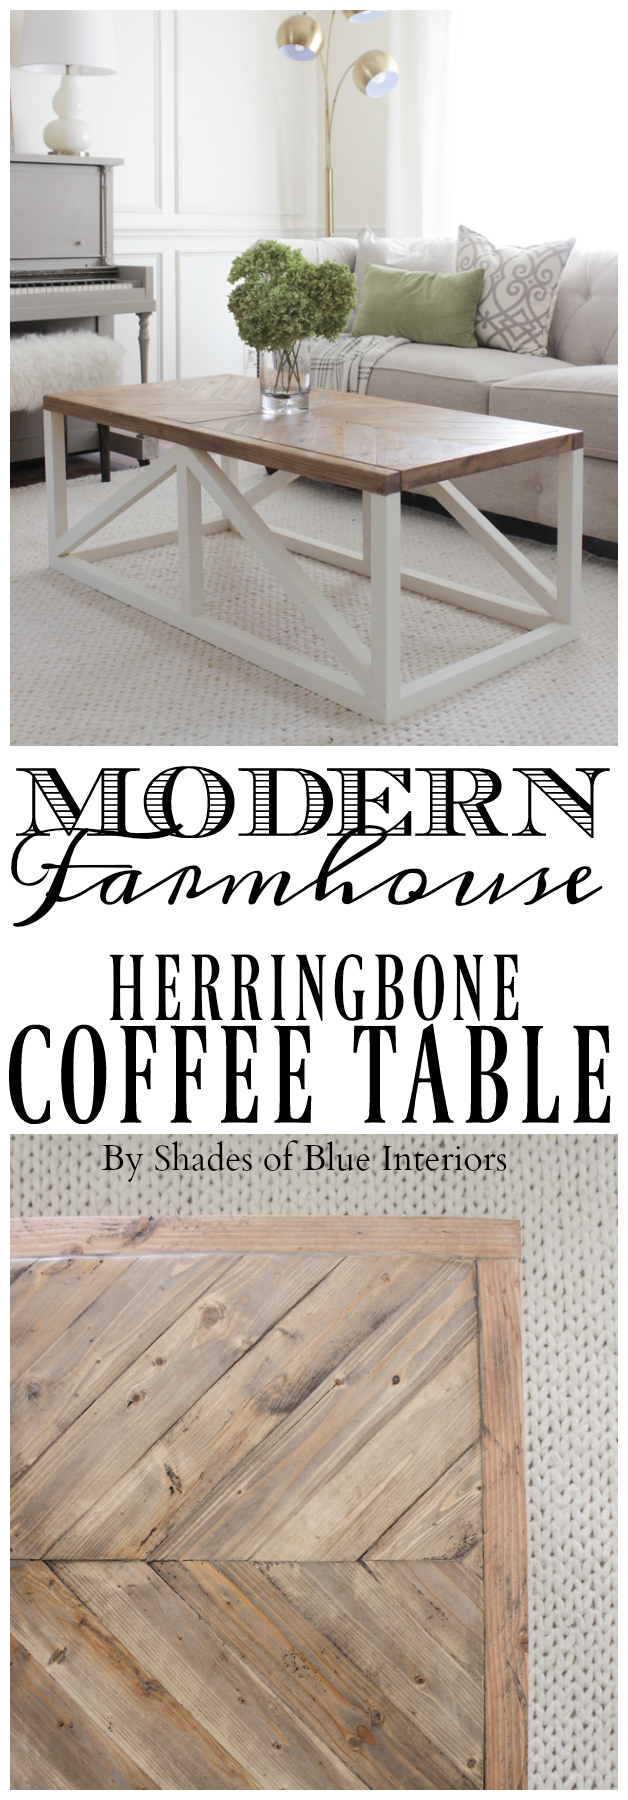
Yesterday I gave a sneak peek of this table on Instagram and shared how I achieved the perfect finish on the top in IG Stories. Today I’m sharing more pictures and free build plans for you! Say hello to this Modern Farmhouse Herringbone Coffee Table! This table ONLY COST $40 to build! Isn’t that unreal? I found it cheaper (and easier to get straight pieces) by buying 3- 2x6s and ripping them down to 2x2s. Then I got bought 6- 1x3s and used a couple of smaller scraps of 3/4″ plywood that I already had. That is it. That is all you need!
Now before we go any further, I know this design isn’t *technically* true herringbone. But it IS reminiscent and I couldn’t think of a better descriptive word, so herringbone it is! 😉
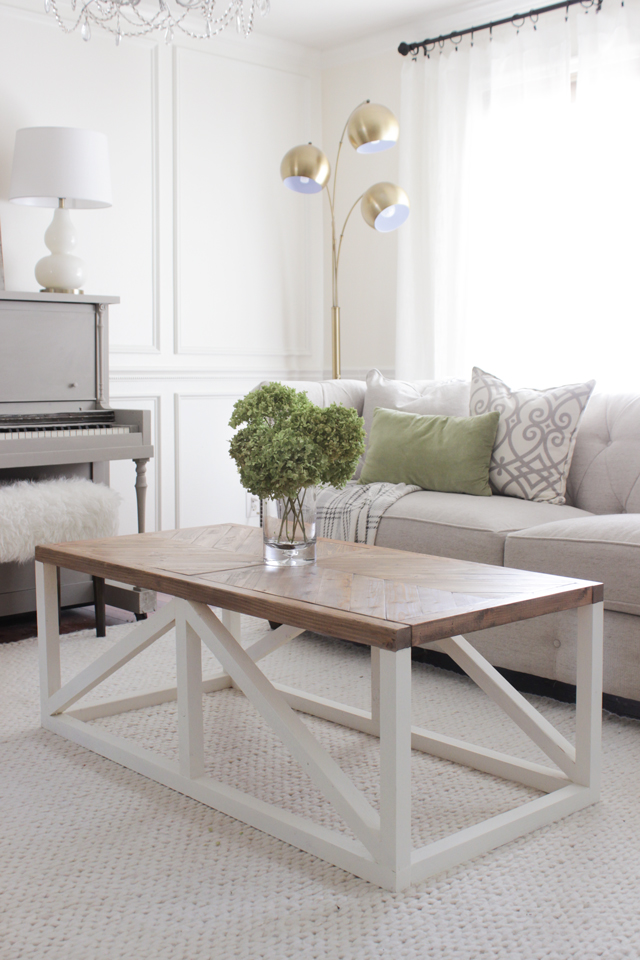
This table design was one I woke up on Saturday morning having dreamt about, but it looks very familiar to me– so I’m sure there is a similar one out there, but likely not identical. 🙂 I love the simple angled sides and the more detailed top.

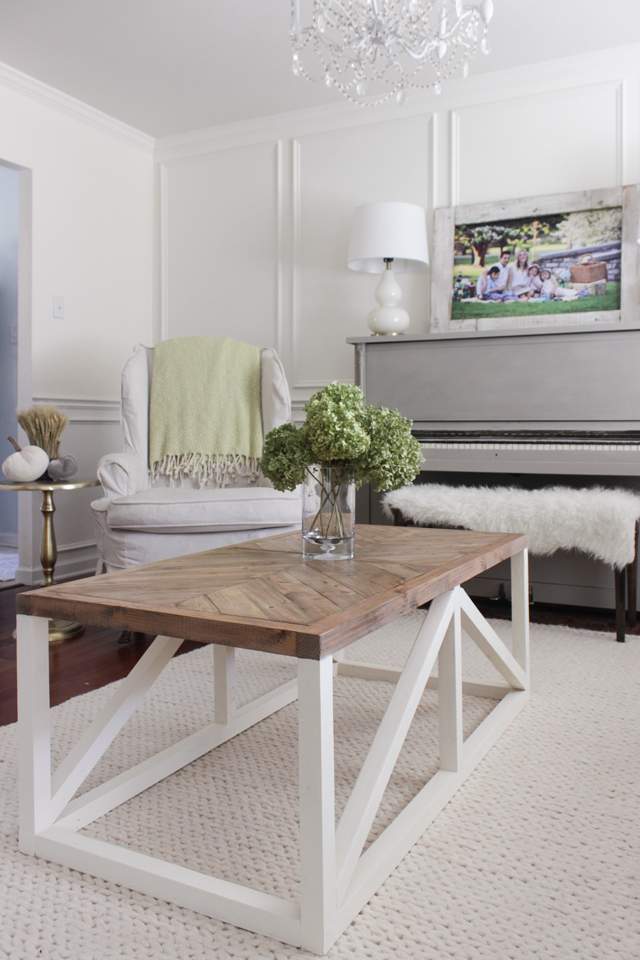
I was originally planning on putting a brass leg table in here with a marble white top or glass top. However, when the opportunity was presented for me to design and build a new coffee table, it only made sense to make one for my front room, since I wasn’t happy with what was there. You can see my recent front room changes and plans here.
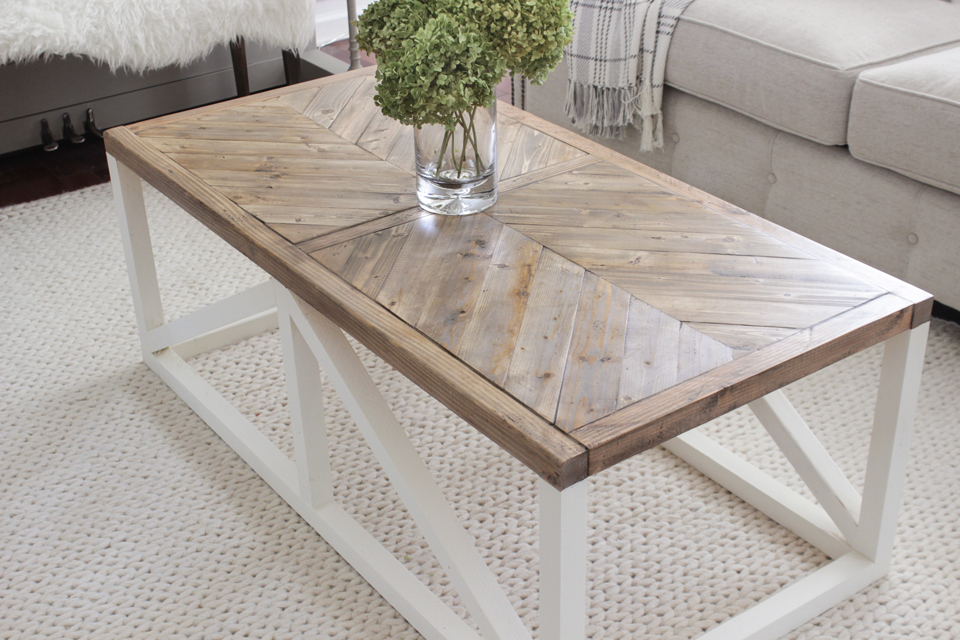
I’m quite obsessed with this new table and don’t even want to put much on top because I don’t want to cover that wood inlay.
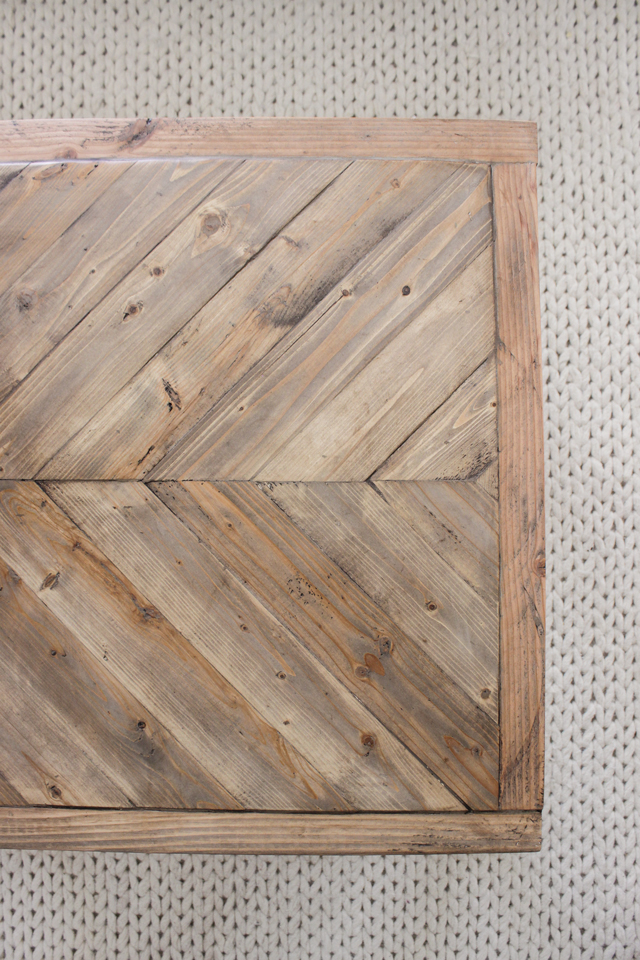
I shared how I achieved this finish in my IG Stories, but I’ll fill you in on the combo here:
Wood conditioner first,
THEN Verathane’s Sun Bleached oil based wood stain
THEN Annie Sloan Dark Wax applied generously (to fill in all the marks and cracks), and wiped off excess.
THEN buff to a sheen. The result is a buttery smooth top that is full of character and the perfect shade of aged warm wood.
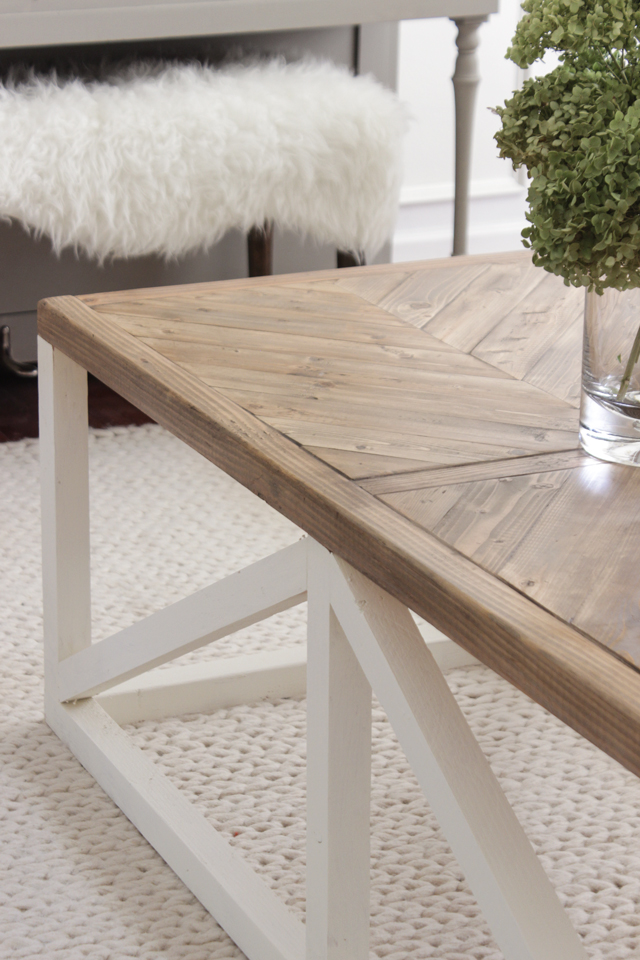
That Sun Bleached stain gave the wood a pretty gray base and the dark wax brought back all the natural warmth of the wood. It is too perfect. I WILL say that making all those angled cuts was a lot of work. It took me a couple hours JUST to do the top, then another little while to fill in all the edges and seams with wood filler, sand down, etc. But man was it ever worth it.
Here’s a little hint at some rearranging I’m doing– this wing chair has found a new home in this corner, but I plan on switching it out for something new (but still a wing chair). I’m really digging this new arrangement, and taking out those small floral chairs made this room suddenly feel more welcoming and comfortable.
Wanna build it?
READ FREE PLANS ON BUILDSOMETHING.COM HERE
This is so genius! The texture is so compelling, that it looks like the star of the room. Did you construct the border for the top first, or add it last?
Rachel, I’m IN LOVE with this table. Wow! So beautiful! I love herringbone and that stain is one of my favorites!!!! I think we might this for our house. Gorgeous!
Love herringbone pattern and that wood color is perfect! Rustic perfection!
How can I purchase this coffee table?
It’s not for purchase. But you can build one!
I’m refinishing a dresser and want it to have that weathered look. I was originally going to do the liming finish (similar to your weathered oak tutorial) but I see that you finished this coffee table differently. What method do you prefer? How do they compare? I have recently found your blog and am enjoying all the great tutorials. Thanks.
If you or someone else decides to build this and sell it, please contact me at jack.p.oconnell.2@gmail.com or 914.760.0951 as we would be interested in purchasing one if the price was reasonable. Thanks!
I have been obsessing over this table ever since I first saw it a week ago on Pinterest. I was looking to build a coffee table for my livingroom (and my blog) and would love to make this one, and link to your blog with your permission. I was just wondering how much you would say it cost to make it? Thanks Rachael 🙂
I was wondering if you have the plans to build this, I want to make one but can’t seem to figure out the size? You can email me thank you in advance.
If I tinted my Annie Sloan clear wax with black paint do you think it would have the same effect as the dark wax?
No, because dark was is dark brown not black.
If I tinted it with brown? I am super excited and don’t know if I can wait for the dark wax to ship!
What about using brown paint? I am super excited and don’t know if I can wait for the dark wax to ship!
Sorry didn’t mean to say the same thing twice.
I am looking into refinishing my kitchen table and came across this post. I love the way you stained the top of your coffee table, I am trying to replicate this look. I have a question, the wood conditioner did you use oil based or water based? Thank you!
Always oil based everything when it comes to conditioners, stains, etc. and working with bare wood.
Can you put a coat of polyurethane over the final coat of wax? I wanted to use this technique for our kitchen table that gets daily abuse.
I don’t think the poly would stick— the wax would repel it and would never dry. I know plenty of people that have waxed stained dining tables tho!
When you used the dark wax, did you follow all the Annie Sloan ways (using clear wax first) or did you just use the dark wax directly on the stained wood. I’m hoping for the same effect as yours! Thanks!
Just dark wax onto the stained wood!
Love this table and bummed to see that it’s something you made vs. something I can buy somewhere. 🙂 But I also love your couch and rug! Would you happen to know (and be able to share) where you got both?? Thanks!
Can you tell me the dimensions of the table…..height, width and length please?!
Good looking table! Although this is technically a chevron pattern (you don’t cut the wood with a true herringbone pattern), it still looks great!
Hi! This table is so beautiful, and I’m working on gathering materials now! Do you mind my asking what kind of wood you chose for the table? I know some woods are softer than others, but I’d love to duplicate what you did!
Pine!
I know this post is old but just seeing it. I’m trying to get your color on a pine top but it’s just not coming out right. I used the conditioner, then stain then wax. Stain dried overnight before wax. Do you have any tips? Stain on how quickly after conditioner? Wax on how quickly after stain? I’m just getting a gray stain that just looks dirty after wax. TIA!!
An you please tell
Me the tools or saws, that would be needed to construct this beautiful piece.
Thank you, Jenny
I am wanting to restain my farm table and I love this color. I have used the dark wax before and not sure it would hold up well on a dining table. Any suggestions of things that could go over the wax or maybe have the same effect as the wax that a poly could go over?
Wax does pretty well on dining tables from what I’ve heard! Miss Mustard Seed has been using furniture wax on her dining tables for years! I don’t know of a poly that can’t go on top of wax tho…
Are there some stain colors that may give the same effect? Maybe a special walnut? I may have to play around with it
Where on the inlay boards did you put the nails to attach to the plywood? Did you nail them in at an angle on the sides so the nail spots don’t show from the top?
The nails spots do show, I just filled them in with wood filler so they aren’t noticeable.
Hi…where. An I find the plans for this gorgeous coffee table?
It’s linked in the post.
This is beautiful! I realize it is a few years old now but wondering if you have any tips on how to get the color. I bought the wood conditioner, stain and wax you mentioned. When doing a test it appears less rich in color. Did you leave the stain and wax on for some tile before wiping off? I assume you let the stain dry at least over night before waxing. If you have any tips- would love to hear them. Thanks so much!
Make sure to sand the wood before staining, as there is a slight film on boards that resists a deeper stain absorption.
The style of your table top is called Chevron.
I’m having a difficult time with this build. The top ends up being shorter than the sides. The sides are cut to 48 inches but the top, (2 panels at 21 inches and 3 2×2=46.5) considering the 2×2’s are actually 1.5×1.5. Am I missing something?
Do you have any plans for a matching side table?
I don’t, I’m sorry. I have plans for other side tables, however.