


1- Fold the paper in half, long-ways.
2. Fold the bottom right corner to the center crease.
3. Fold the left side of the paper over so it lines up with the crease you just made on the right side.

4. Repeat steps 2 and 3 for the opposite side. So, fold the left corner to the center crease, then fold the right side over on top, lining up with the left sided fold.
5. Notice where creases are, the center triangle is what you want!
6. Fold in half, and cut along crease.
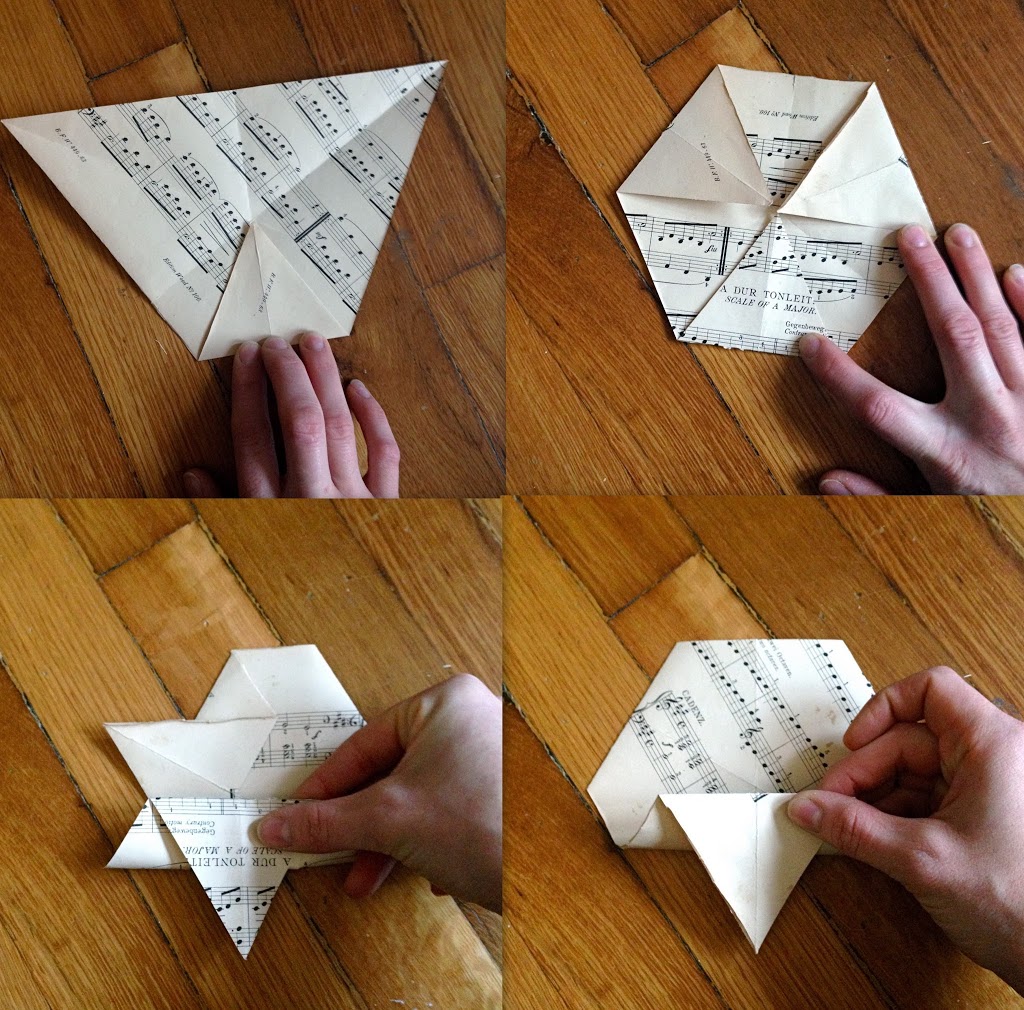
7. Fold a corner to the top meets the center (where all the creases converge).
8. Repeat on all 3 corners.
9. FLIP OVER and back fold each side to the center. (Pictured above, the 3rd and 4th pic should be reversed, but you get the idea)
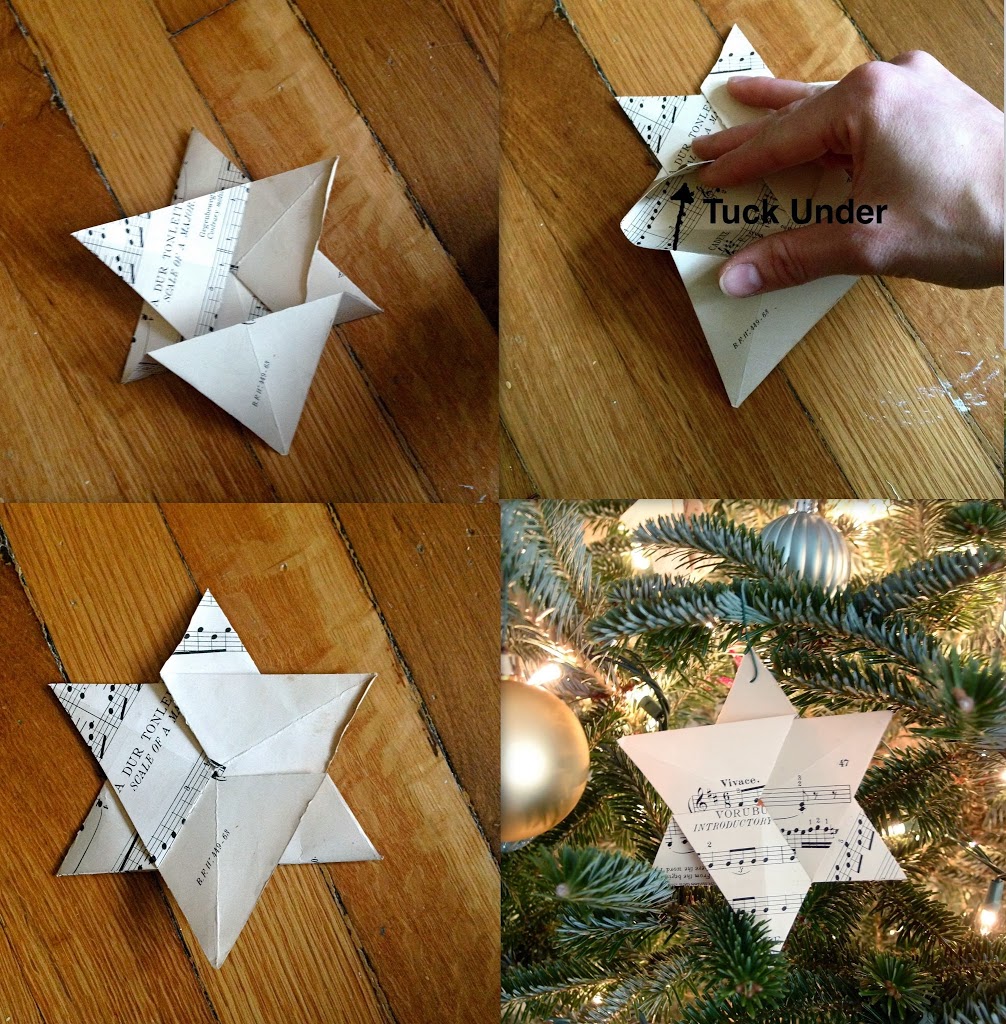
10. Once all side are back folded, it will look like this.
11. Tuck the left side of the one you last folded, under the left adjacent fold. That sounds super confusing, but I think the pictures make it pretty clear.
12. Voila! All sides are tucked under their adjacent sides, keeping it from coming un-done! Now all you do is poke that wire ornament hanger in one of the star-points (choose one that has a double paper thickness so it won’t tear as easily) and hang on the tree!
So pretty! x
I found this right before my annual Christmas ornament exchange party (the Sat. after Thanksgiving) for the girls in our family which total close to 40 now.
I decided to print off “O Come, O Come, Emmanuel” and let everyone make their own star.
It was a big hit and then we sang the song. So, so beautiful. ♥️
Every home in our huge family will now have a Jewish Star hanging on it thanks to your post. Thank you!
May God bless and keep you and yours,
Debbie
Beautiful, thank you for sharing!