One of my best friend’s husband contacted me about 6 months ago and told me, the next time his wife was out of town, he wanted me to refinish a couple pieces of bedroom furniture as a surprise to her. Isn’t that the greatest idea? All husbands! Take note! 😉
So a little over a month ago he reminded me that she was going out of town for the month of May, and the opportunity was approaching. She left town, we came and picked up a dresser and nightstand. I asked him how he wanted them painted and he said, “Whatever you think will look best. She loves everything you do.”
TALK ABOUT PRESSURE!
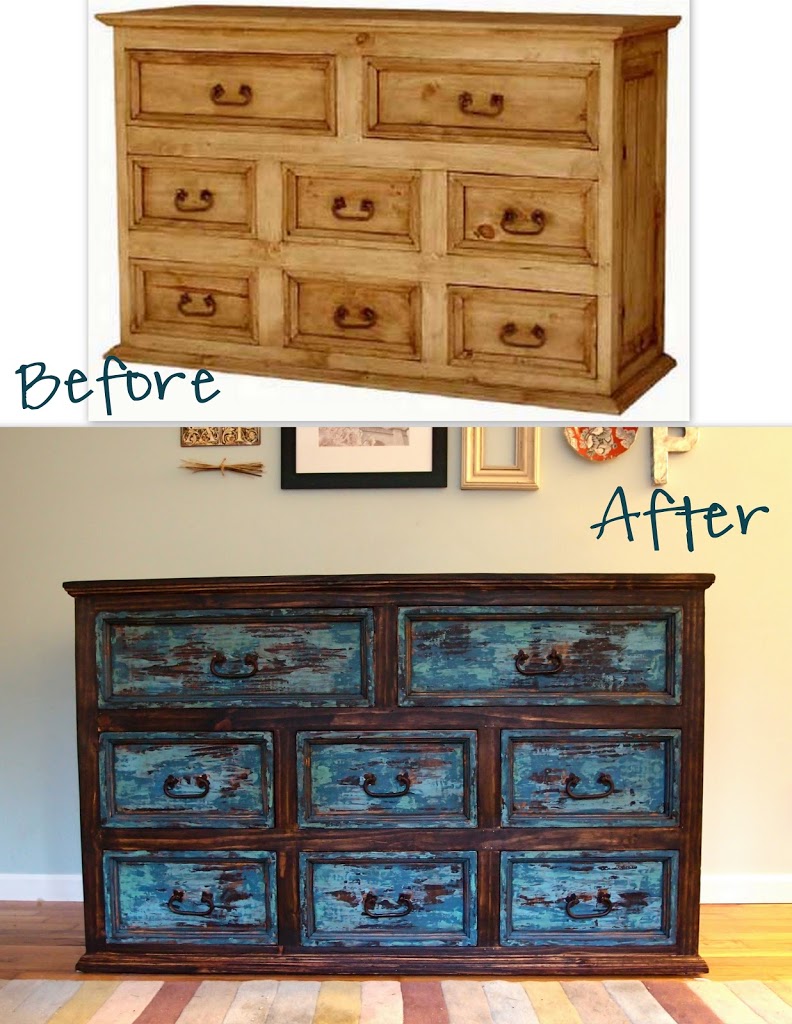
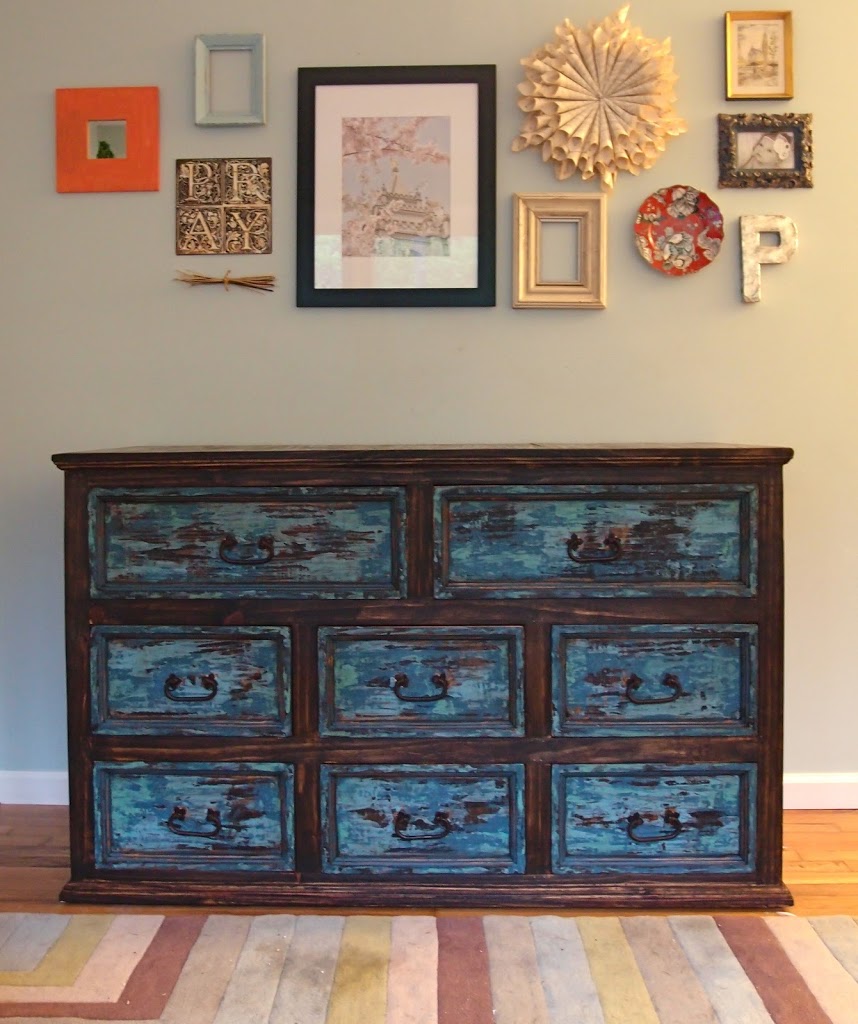
I couldn’t handle it all and my husband was no help (love ya hon! :)), so after finding some inspiration online, I called up a couple mutual friends of ours and told them a couple ideas, but we all agreed on this sideboard she had pinned on Pinterest with the title “Dresser redo?”

Cute, right? Rustic and chippy looking in all the right places.
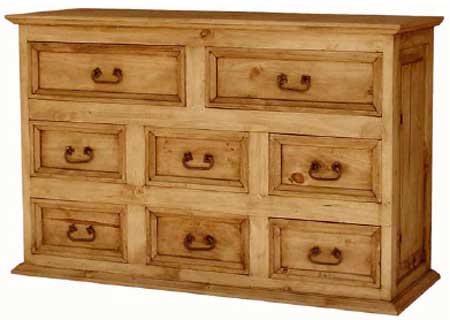
Just so you have an idea, this is exactly what the before looked like.
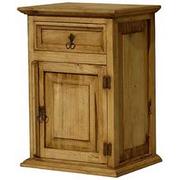
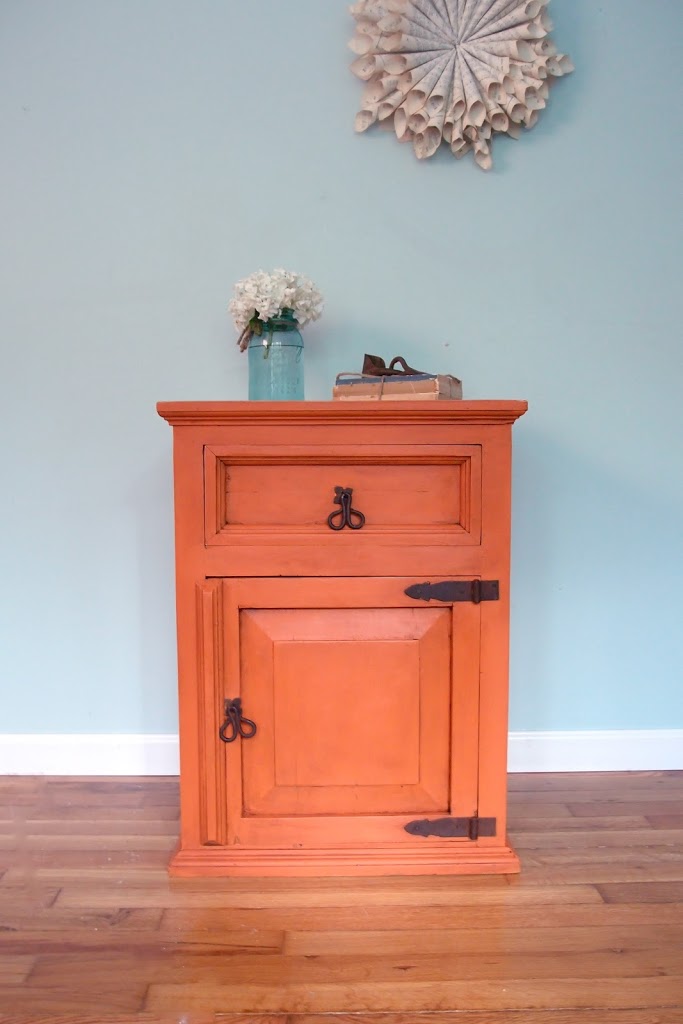
And this is the matching night stand (which we decided a pop of orange is what this needed). I loved them how they were, but apparently she had been talking about redoing them for years. So it was time for an update!
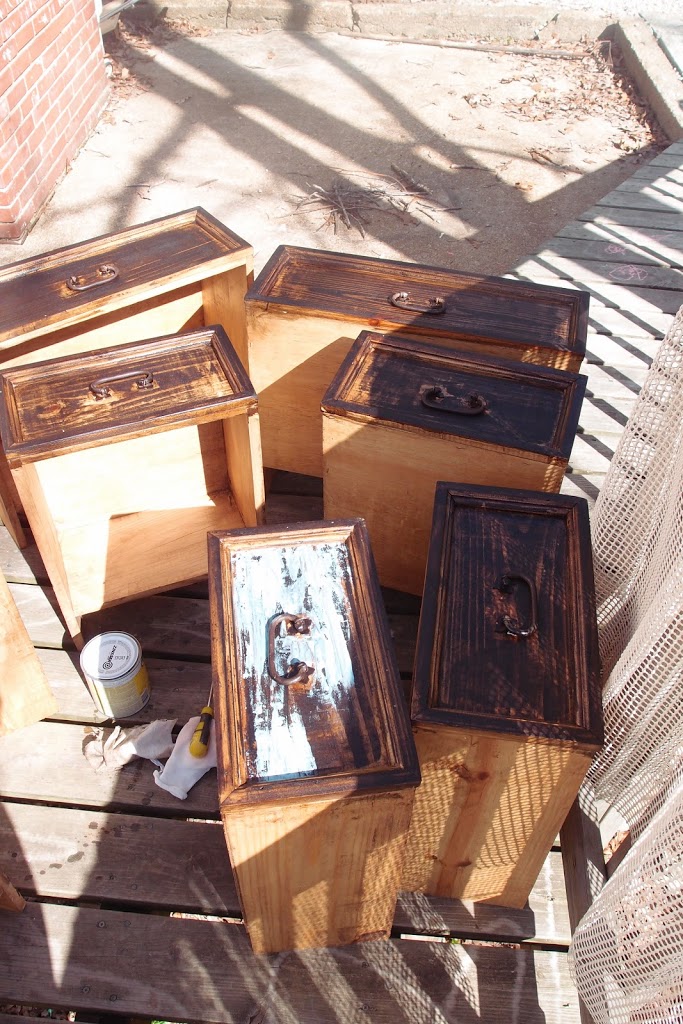
So I started out by sanding the entire thing down and staining it all with dark walnut. Once I had done that, I realized I couldn’t just paint layers on and sand or scratch/chip them away. That distressing process would also remove the layer of stain I did! So I slept on it. And I woke up with a brilliant idea of not using a paintbrush at all! I would paint with a metal spatula!
Finally all those hours as a kid watching Bob Ross paint with a metal spatula paid off! 🙂
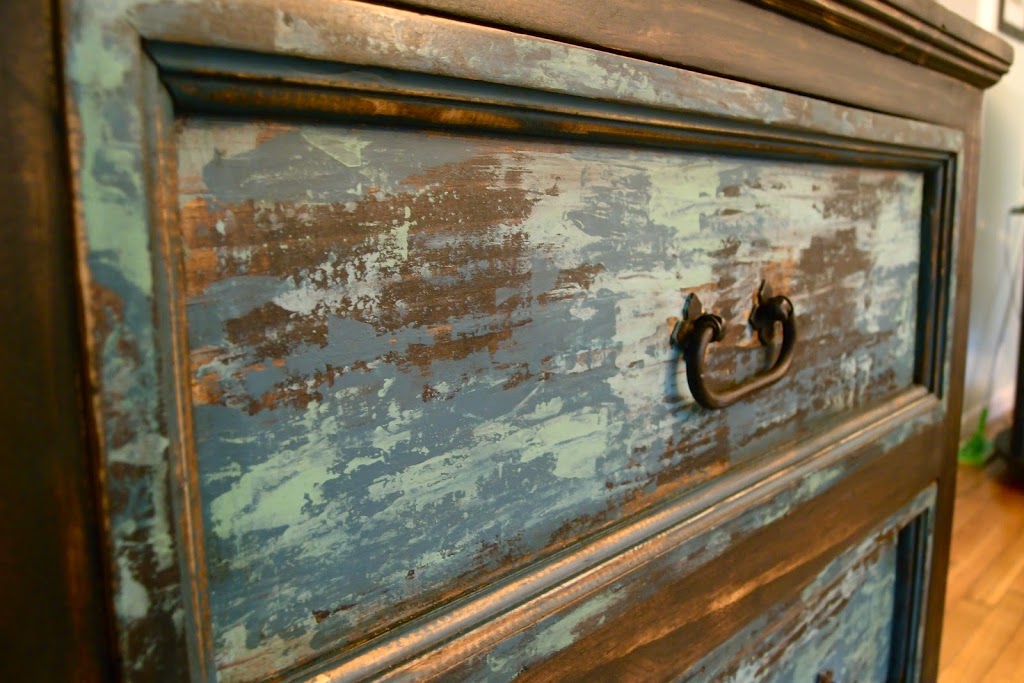
So, I started with Provence, got a little bead on the spatula, and started “painting”.
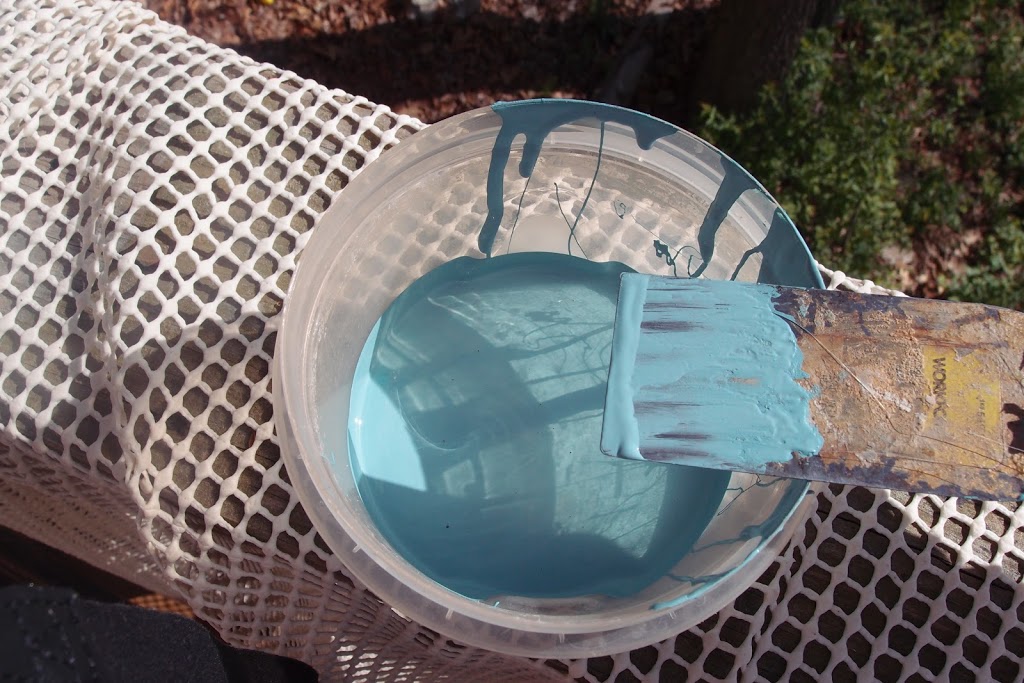
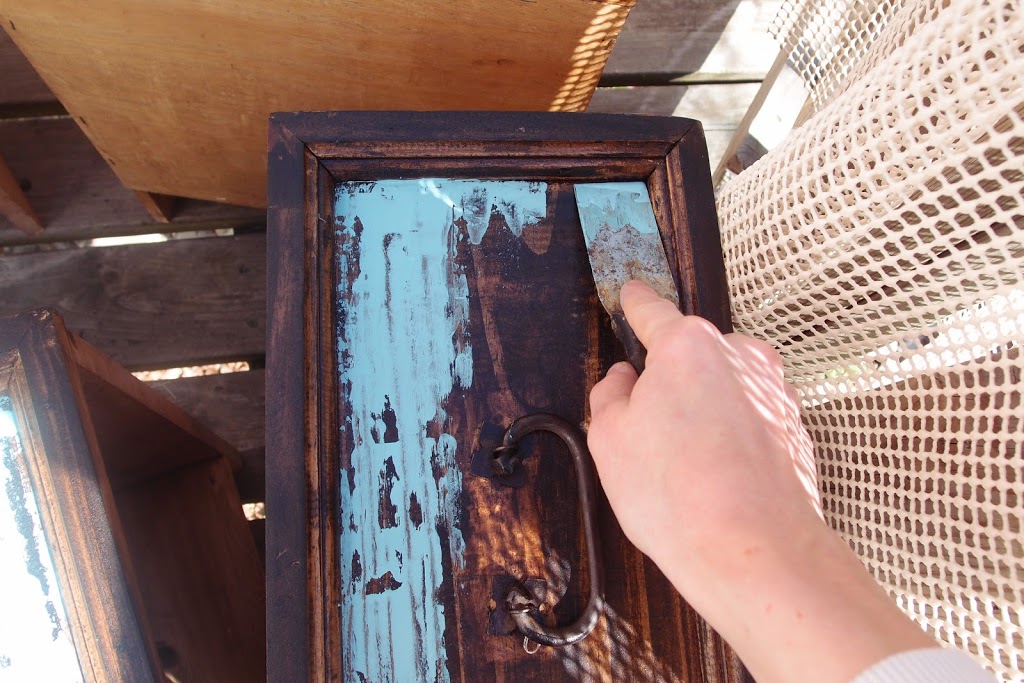
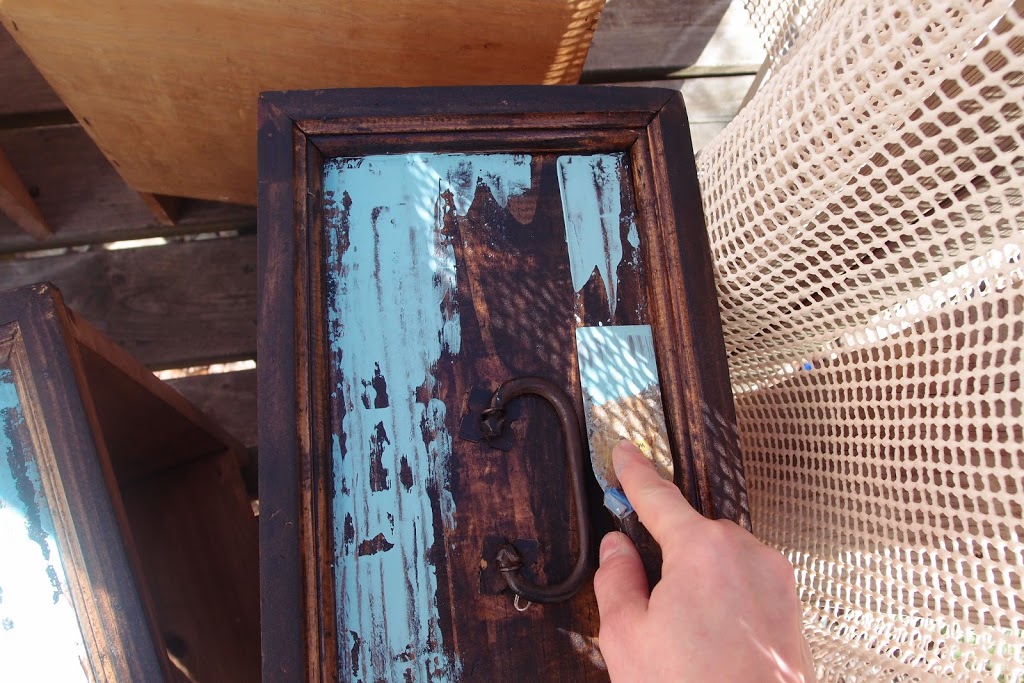
Can you see how the paint comes off slightly uneven and with an almost chippy, distressed appearance?
One down…
…7 more to go!
I tried to make each one a little different. Some with more paint, some with less.
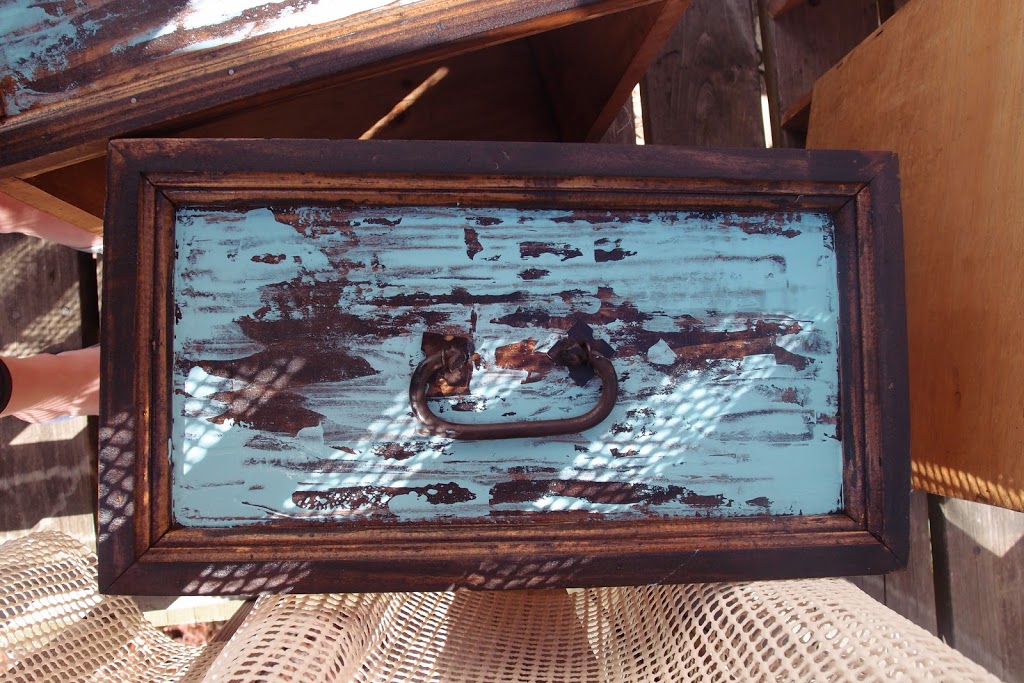
Then I took some Aubusson Blue and did a layer on top of that. Now it was really starting to look cool.
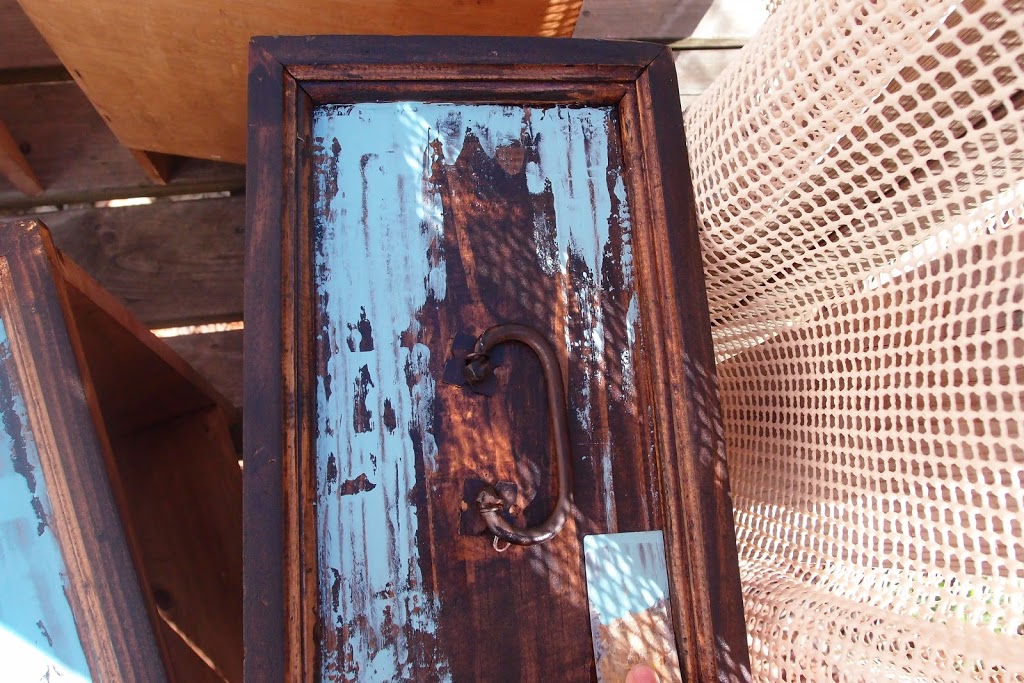
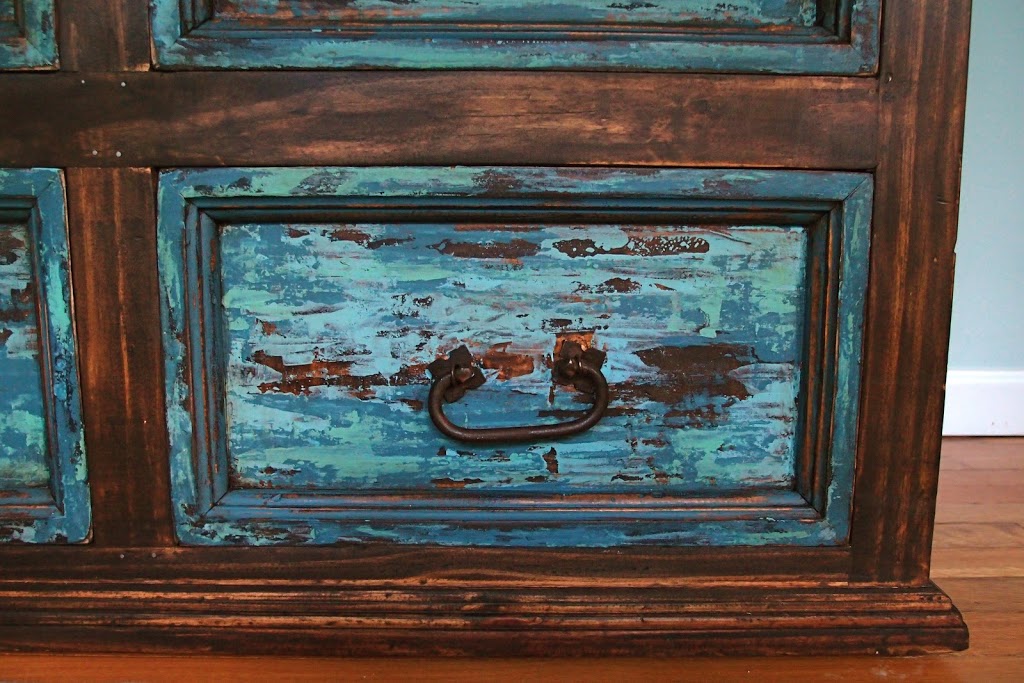
Lastly I took a tad of Antibes Green mixed with Provence and applying a very small amount on some areas. Just to add a little more variation and to further the goal of making the drawer fronts look like they had on layers of chipping paint that someone tried to scape off at one point, but didn’t finish. I finished it off by applying dark wax over the entire thing. , but especially in the corners and crevices.
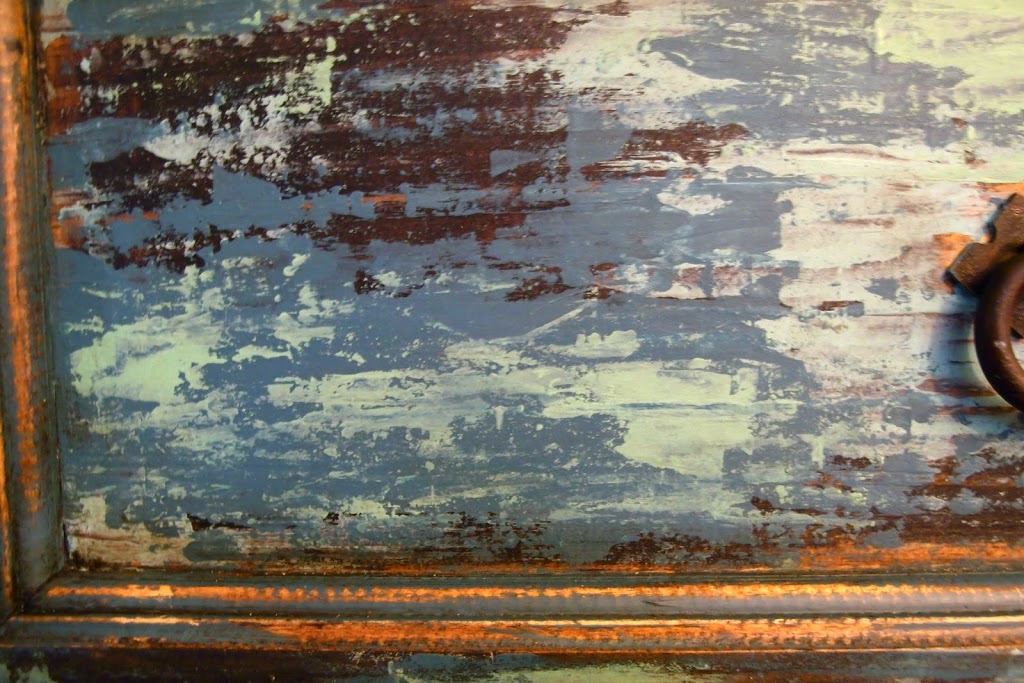
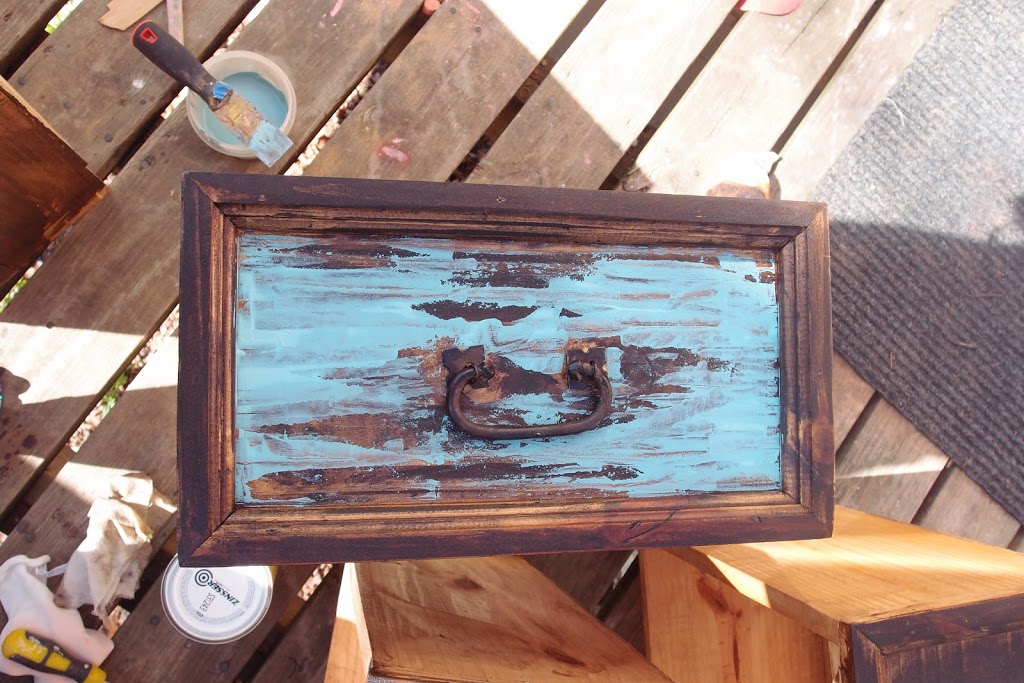
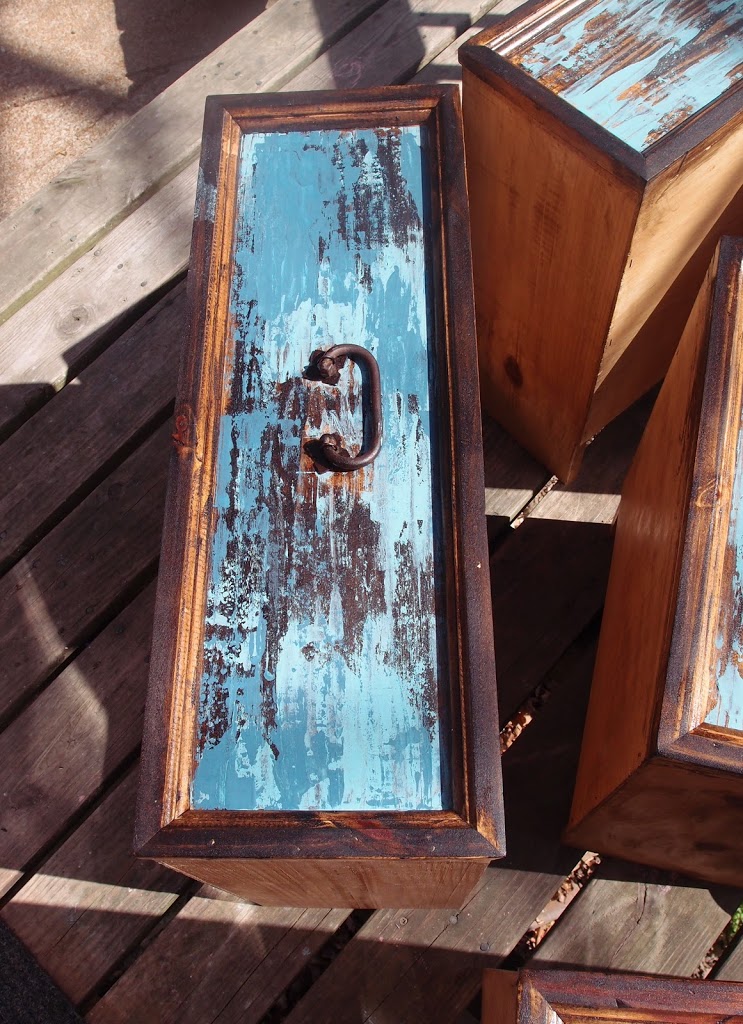
Forgive the lighting in these two pictures, the sun was setting and I was doing my best to get some natural light but some of the close ups, I had to turn on our torch lamp.
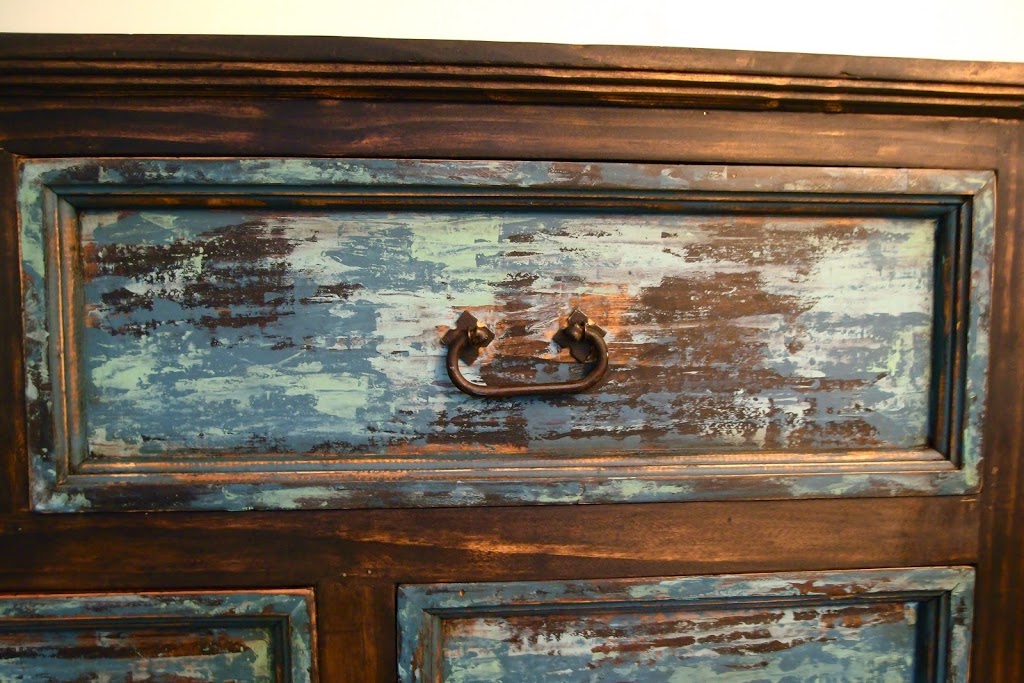
This one is a little better at capturing the truer colors.
The pine stained dark walnut turned out totally rustic and spot-on for what I wanted!


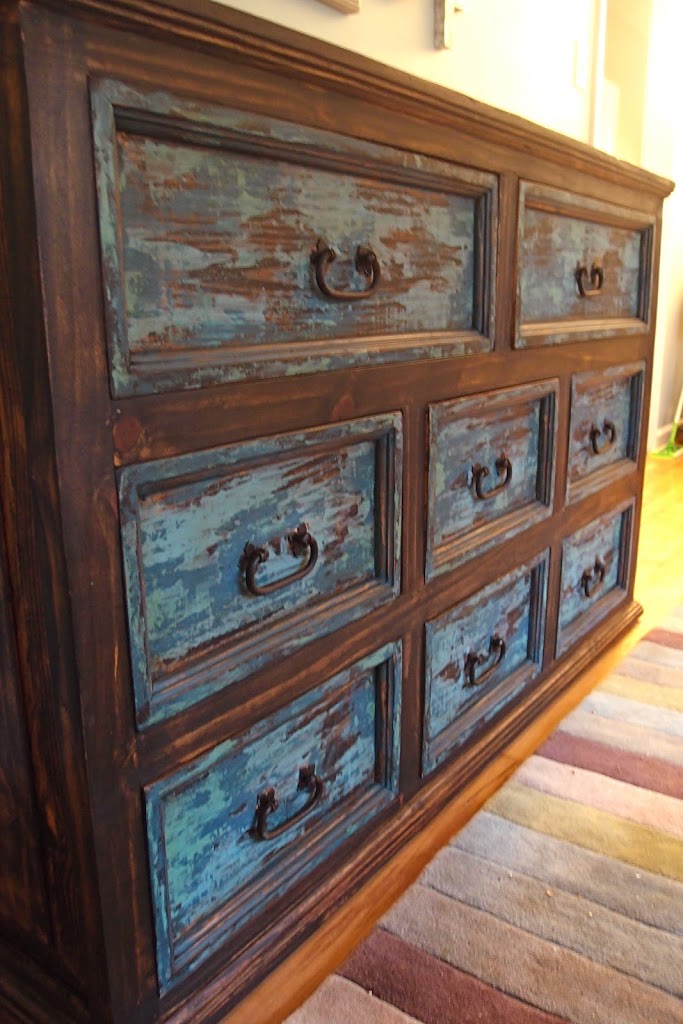
I was SO excited how it turned out! Completely different method than anything I had seen, and it was KILLING me to not be able to share it on any of my social media platforms. haha! I never realized how much I second guess myself and really need that positive reinforcement!
It was decided that the night stand should be orange. Barcelona Orange to be exact. My friend has orange in her bedspread and she has a thing for pops of orange in home decor anyways, so even though it doesn’t match, it still works with her style. (p.s. I DID use a brush with this one!)

She’s back in town now and LOVED the results! We have since talked about how cute it would be to decoupage some maps (with the same colors as the drawer fronts on the dresser) on the top of the night stand. So you will just have to imagine that and in a few weeks, if we can find some maps, I will go over and take some pictures and share with you all!
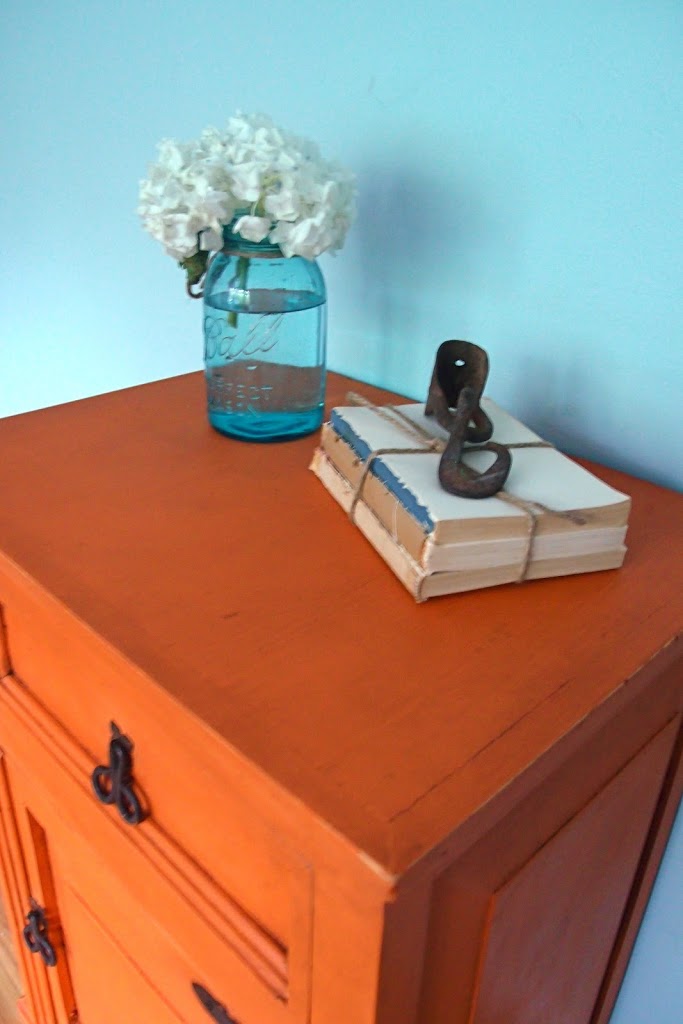

I did NOT distress this one. I just used dark wax all over and especially in the corners and crevices. Barcelona Orange, much like Antibes Green, BEGS to be used with a dark wax. It is simply too bright without it. The dark wax adds depth and showcases texture in a way nothing else can do.
Hope you enjoyed this new “painting” technique and let me know if you give it a try!
Linking up to:
OMG – you knocked that first one right out of the park – it’s absolutely stunning – and what a great idea and tip – can’t thank you enough for sharing that!!!
Beautiful job – your friend is going to be overwhelmed – most definitely!
Hugs,
Suzan
Experts say mass effect ship and drugs affect the same pleasure centers in
the brain. Then, on Wednesday mornings, she can be called to arrange a rematch.
Feel free to visit my site mass effect lithograph
What a great technique! Loving it! x
So smart!!!! I never would have thought to use a putty knife to get that look. I love it.
Love it !!! I used this method years ago to do a display case in an antique mall..had completely forgotten about it …yours did turn out better than mine.. I hurried too much 🙁
Not saying I tried it because I thought it would be cool…it was the middle of the night I had forgotten my paint brush and it had to be painted to look old before opening the next day 🙁 You do what ya gotta do and hope for the best .
What an interesting method to paint and the result is gorgeous!!
Thank you for sharing 🙂
I love it! Thanks for the inspiration! I’m your newest follower.
What a fun surprise! Both pieces turned out great!
I love it! Great idea, colors and thanks for sharing it!! It looks like the ‘elements’ line from Living Spaces….or is it Ashley Furniture??
IDK, one of those!!! I like yours better tho!
Those look great! I liked the one you did better than the one she pinned. 🙂
If you want to meditate with your Black – Berry using the
resources already installed on the phone, there are a variety of ways you can do this:.
If you little bit understand technologies, you can easily root
your Black – Berry. You can output the display to a bigger monitor
with the help of a mini- HDMI slot.
Also visit my web page – blackberry playbook
Great goods from you, man. I have bear in mind your stuff previous to and you’re just too wonderful. I actually like what you have received here, certainly like what you are saying and the best way by which you say it. You are making it entertaining and you still take care of to keep it sensible. I cant wait to learn far more from you. This is really a great site.
My blog post … Amazing Male Butt