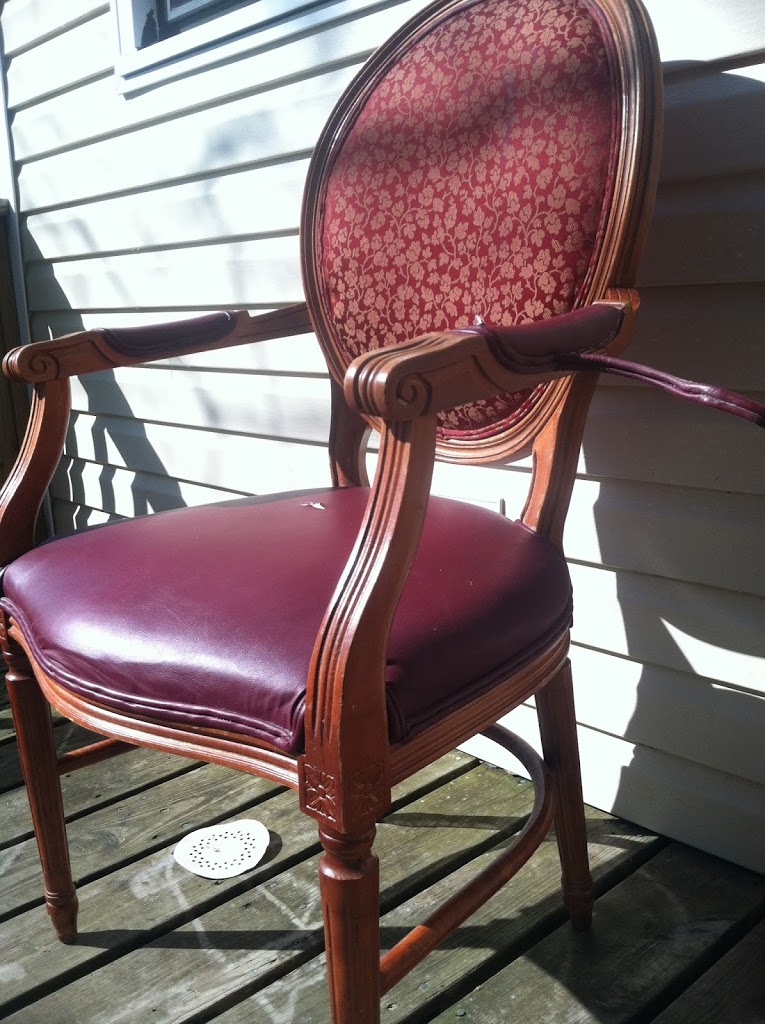
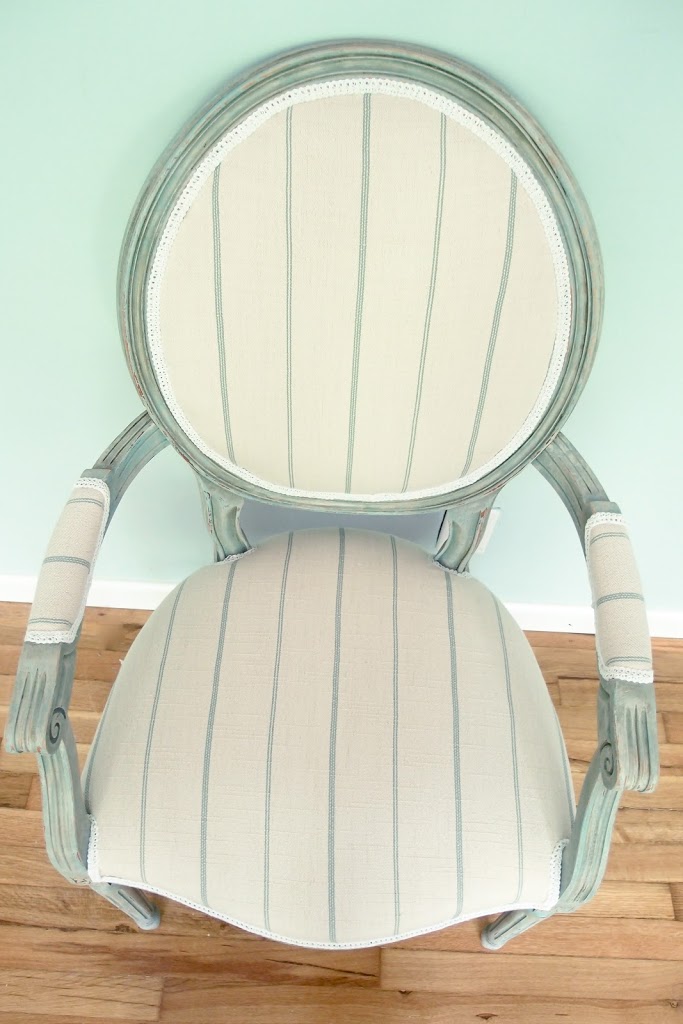
Last week I finished a french arm chair that I painted blue and dry brushed with gray, then covered the upholstery with new fabric. Since I’m fairly new on the re-upholstering front, I do not yet dare remove all ugly existing fabric. There were about 10 of these chairs at the thrift store, but I chose this one because the fabric was the least damaged:
I knew I could do, like I did with the Gold Gilded French Chairs and remove the trim and staple new fabric on top. It makes this kind of project doable in a day. I don’t have to worry about cramming the stuffing back in, or stretching webbing across a frame… none of that.
It all looked pretty doable, except the back of the chair. 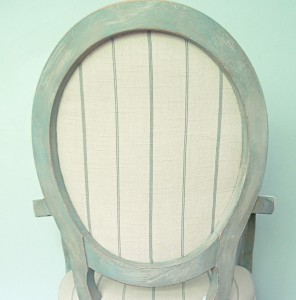
Notice, there aren’t any staple marks on the edge, and if I had chosen to staple new fabric on it, and put trim over it, it would have looked…. well, silly! I pushed in with my finger, on the edge of that fabric along the wood frame, and found it was secured somehow and would only allow about 1/4″ of my finger to go past the wood frame. I was stumped on how I would attach the fabric, until I thought of something…
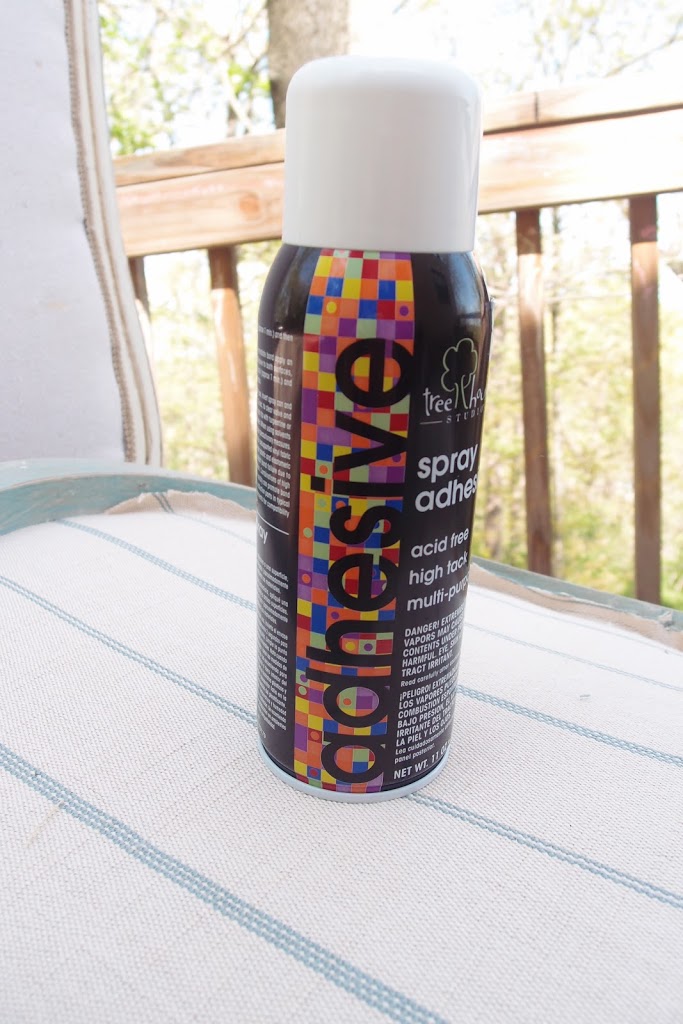
Spray adhesive! Forgive me for not having more pictures of the during of this process. I wasn’t sure it was going to work, so I didn’t bother to document it, until I saw that I WAS in fact working beautifully.
Here are the steps:
1. I took some Frog Tape and some long scraps of fabric (but plastic would have worked fine) and covered all along the wood frame on the back, so the wood would be covered and wouldn’t get the sticky overspray.
2. Then, I carefully laid the fabric down, make sure my stripes were going in the right way and everything looked as straight as possible. It takes about a minute for the glue to get really tacky, which is the perfect about of time to lay the fabric down and reposition if needed.
3. I then trimmed the edge so that there was only 1/4″ of excess fabric all along the back of the circular frame.
4. Knowing that something metal or pokey would have caused a hole, I used a wooden spoon and started tucking:
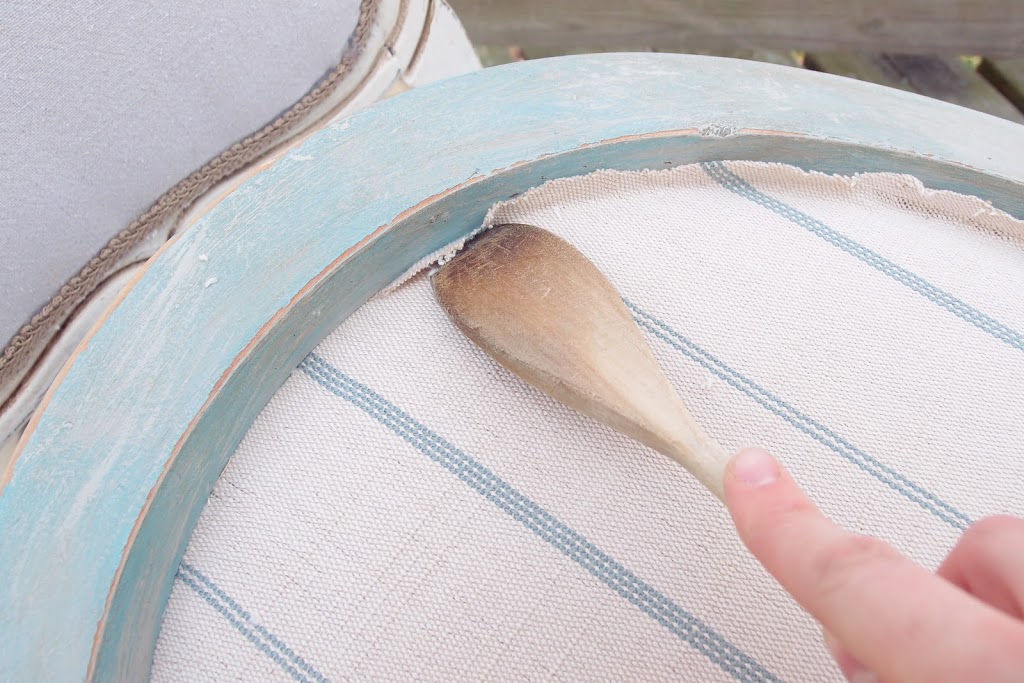

I did that all the way around and… VOILA! It was finished, was very secure, and looked great!
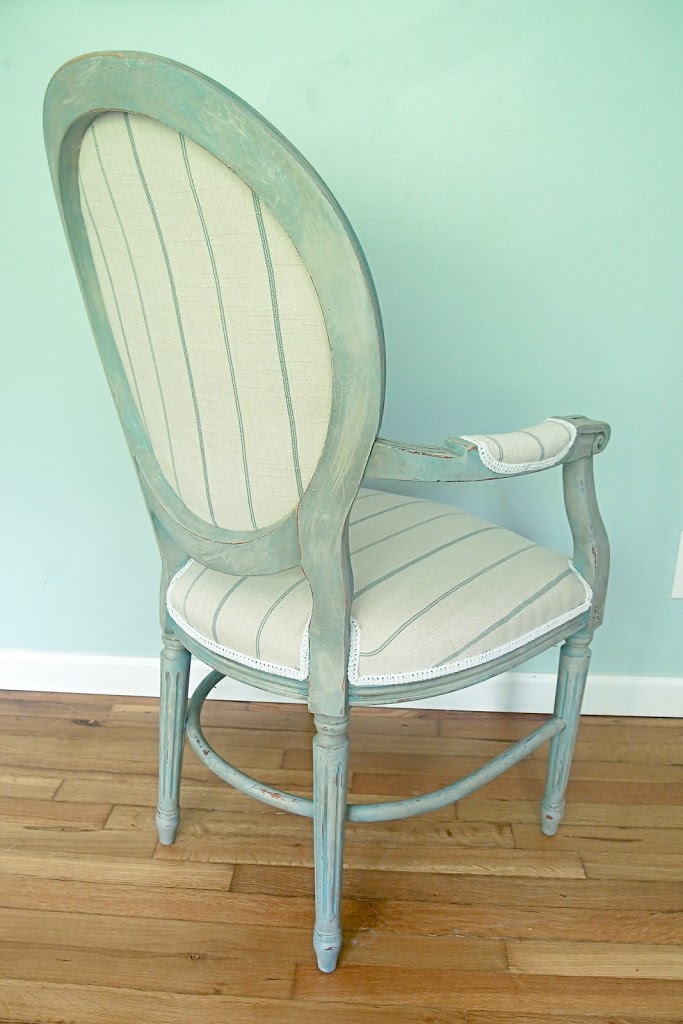
I also used the spray adhesive on the front of the seat back of the chair before I stapled. That chair back is slightly curved inward and I didn’t want the fabric to be loose, so I sprayed my new fabric first, lay it over the front of the seat back, smoothed out any wrinkles, then stapled it in place.
Hope this information helps at least one of you tackle your next ugly chair! 🙂
This is a great tip! Thanks for sharing!
First of all, what a beautiful transformation – and secondly thanks SO much for that great tip!
Hugs,
Suzan