Whenever I tackle a furniture redo, I always try to determine if I can reuse the original hardware that came with it. Not only does it save money, but it often adds to the unique-ness and character of a piece.
Even if I feel the original hardware or the hardware that came with it, doesn’t match the aesthetic/design I am creating, I always ALWAYS keep the old stuff. I OFTEN am able to find uses for it eventually. Just last week, I built a couple of cupboard doors and was able to reuse some older hardware, making it look more modern, by spraying it with oil-rubbed bronze spray paint.
There are a few styles of hardware that I am simply not a fan of. Not saying they are ‘bad’ per se, but I just don’t ever think they look good with pieces I finish. One of those styles is Chippendale hardware. This is found on lots of mid-century pieces, specially Ethan Allen furniture from that time period. Just a couple weeks ago, I revealed a little hand-painted chest that originally had Chippendale style hardware on it originally.
It looked identical to this before:
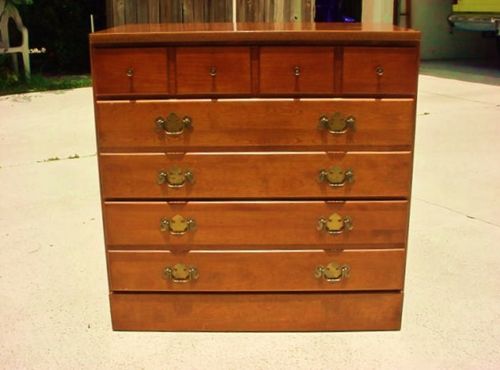
So, obviously it has the hardware that will not work with what I have in mind. They are too big and detract from what I want to be the star of the show: the hand-painted details. However, sometimes I’m lazy and I don’t want to fill all the holes with layers of wood putty, sand them down once dry, then measure and drill new holes for the new hardware I would have to buy. I figured out a solution to this problem earlier this year, when I was in a similar predicament and wishing I had just a simple pull. The answer was simpler than I thought: Remove the welded backplate!
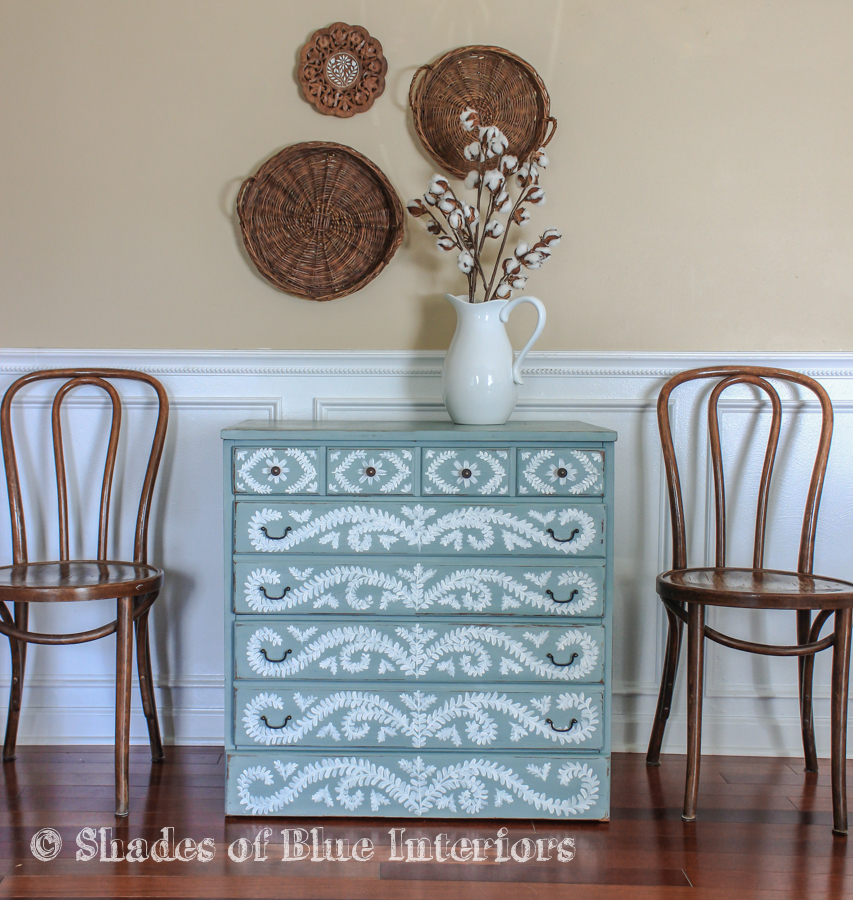
Here is another piece where I have used this solution:

So, have I convinced you yet, this is a good solution? 🙂
Good, let’s get started!
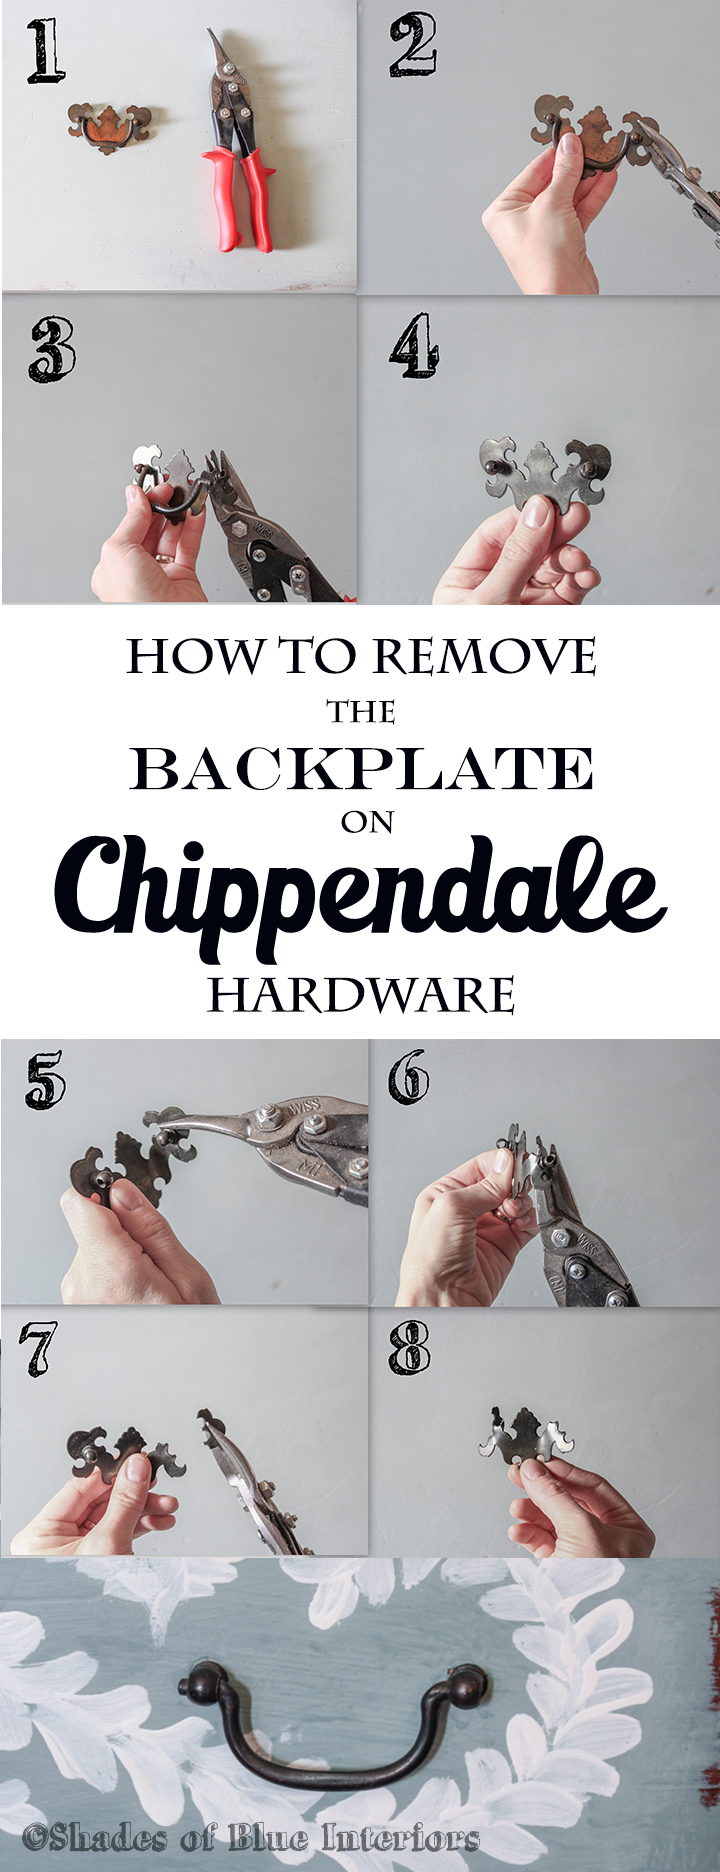
1- Grab some tin-snips or wire cutters and your hardware.
2- Firmly hold onto the backplate and pull with one hand, and pinch a corner, as close to one side of the pull as possible, with your tin-snips.

3- Bend that corner back firmly. This will release the actual ‘pull’ part.
4- After the pull is out, you will notice, you need those little round mounting stems. They hold the pull in place and also are where the screws are attached on the other side. They are lightly welded to the backplate, but trust, me, it is easier than it looks to break the weld.
5 & 6- Pinch the corner of the backplate again with the tin-snips and bend back and forth to break the flimsy weld. This may take a couple of back-and-forths (depending on the thickness and strength of the backplate).

7- The corner piece will weaken from all that back-and-forth action, and break off. Leaving your with a sweet little mounting stem.
8- Repeat steps 2-7 for the other side.
Now, all you have to do is place the mounting stems back into their original holes on the dresser, fit in the pull, tighten screws, and voila!

Here is a Pinnable image with all the steps!
I am ALL ABOUT saving money when it comes to redoing furniture, but it HAS to look good. And I LOVE the final look that these pulls gave to the dressers I’ve used them on.
So, what do you think? Do you always reuse old pulls, or do you always buy new? Are you ready to think outside the box to save money on pulls?
Let me know if you give this method a try!
Rachel you are a genius! What a clever idea. Thanks for sharing this. I believe I have a drawer full of this type of hardware.
P.S. Loved your painting and waxing tutorials.
Love this idea! Definitely going to try it. 🙂
Thank you! Thank you! I had this exact idea and have been searching everywhere on how to get the backplate off. Yay!
That’s a great tutorial, but I I have an additional problem. On the doors of my solid cherry vintage buffet, that has chippendale pulls on drawers, there are backplates that have TINY RIVETS that hold the backplates onto the doors. I dont know how to remove them without damaging the wood doors! And I mean Tiny! They are not exposed on inside either. Any ideas?
You will have to pry those little pin nails out in order to get the backplates off. I usually use a flat-blade screwdriver or a knife or a chisel or something to pry underneath them and then eventually pull them out with a hammer.
Help! I used this method to remove the backplate on 18 drawer pulls . On the LAST one, the piece on the pull that fits into the mounting stem broke off! Any suggestions on how to remedy that?
Pro tip: when doing this, go slow. My pull broke right at the part that goes into the round welded pieces. So unfortunately, trying save money on a new pull didn’t work this time 🙁