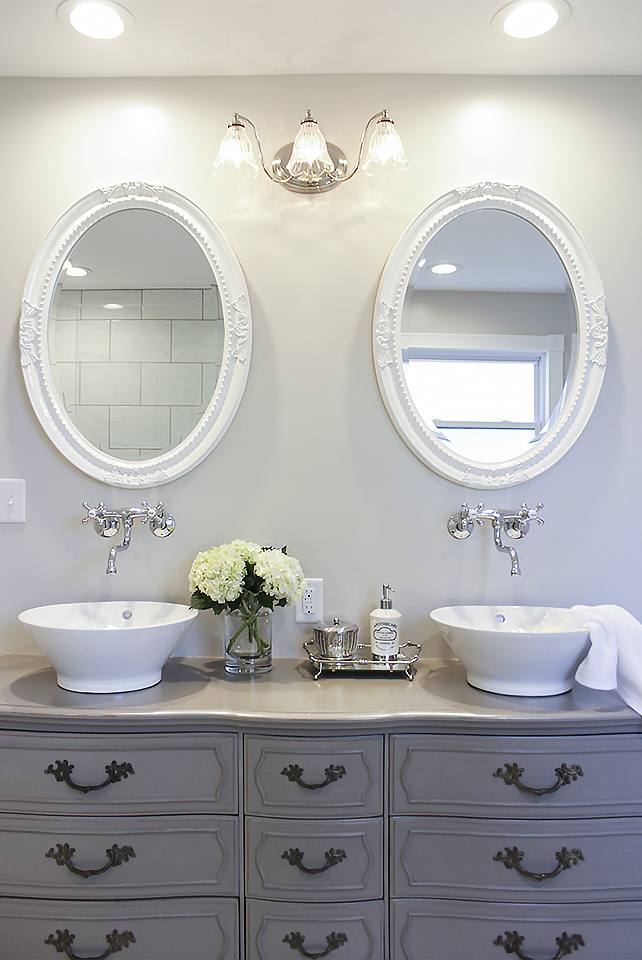
Several months ago a friend of mine reached out to me, requesting a dresser that she needed converted into a double sink vanity. She explained her master bathroom was getting a makeover while she was out of the country, and needed me to find, refinish, and convert a dresser to fit two vessel sinks, with cut-outs for plumbing. Fortunately she knew exactly what she wanted, communicated very well for being long-distance, and she also trusted me to make some decisions along the way. The end result? Exactly what she wanted.
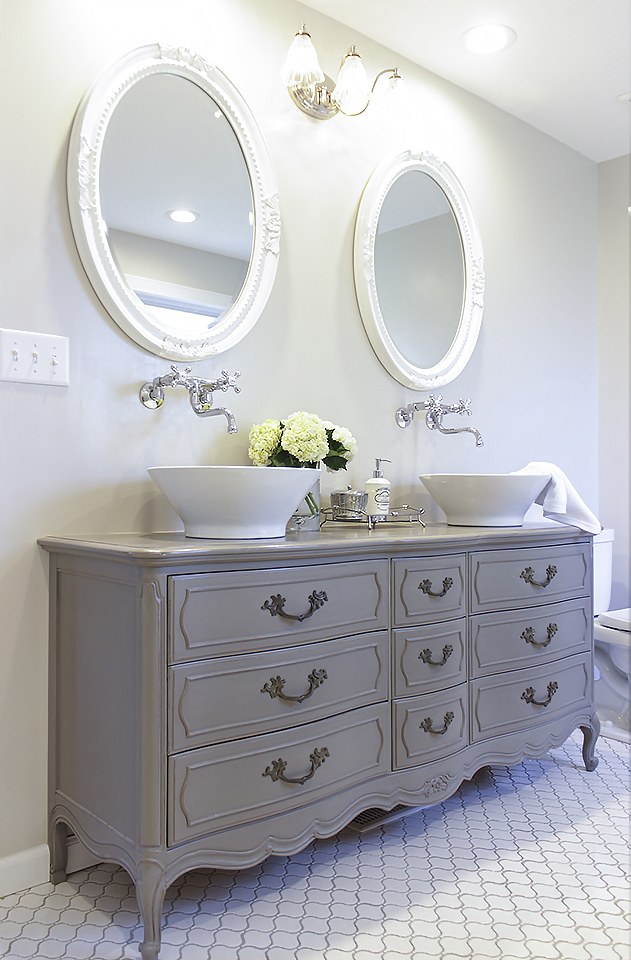
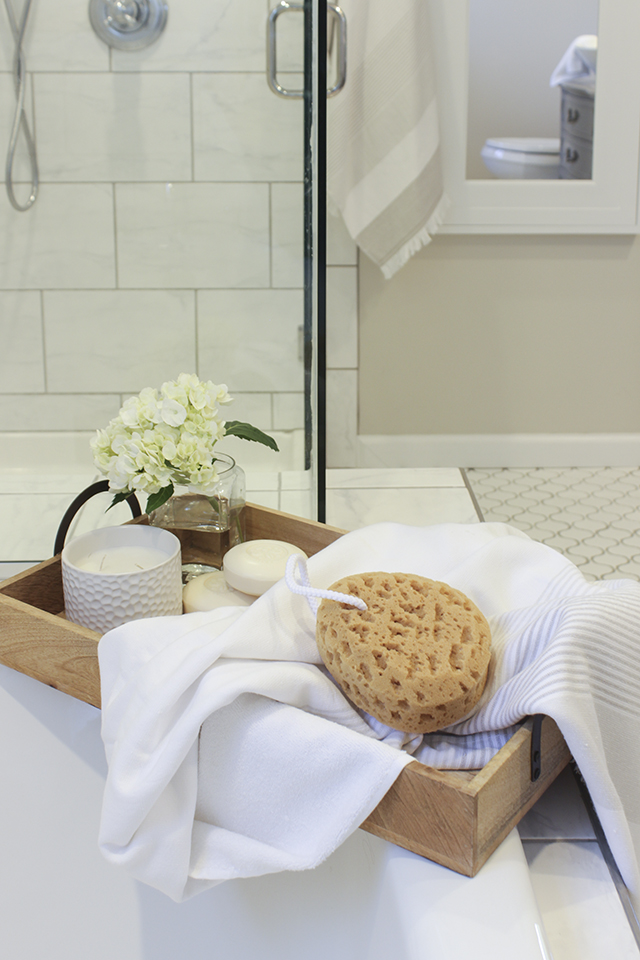
This vanity was the first thing finished for the bathroom, so I’ve waited awhile to get these shots of the whole bathroom makeover. She has really good taste in fixtures and finishes, so all credit goes to her for that. I simply brought in some pretty things to stage it, and captured all this loveliness.
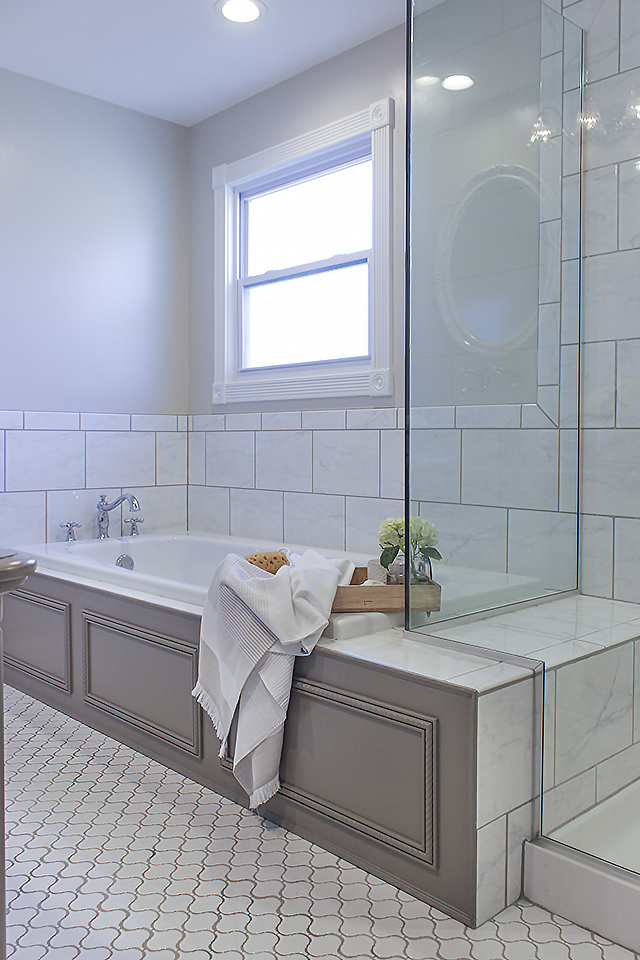
I think most people worry about a topcoat for a painted vanity, and I will explain that further down, but before I took all the pictures, I put the same top coat on this custom woodwork that was built around the tub and painted with the same color as the vanity. Each panel pops out from brackets so work on the plumbing can be done if needed.

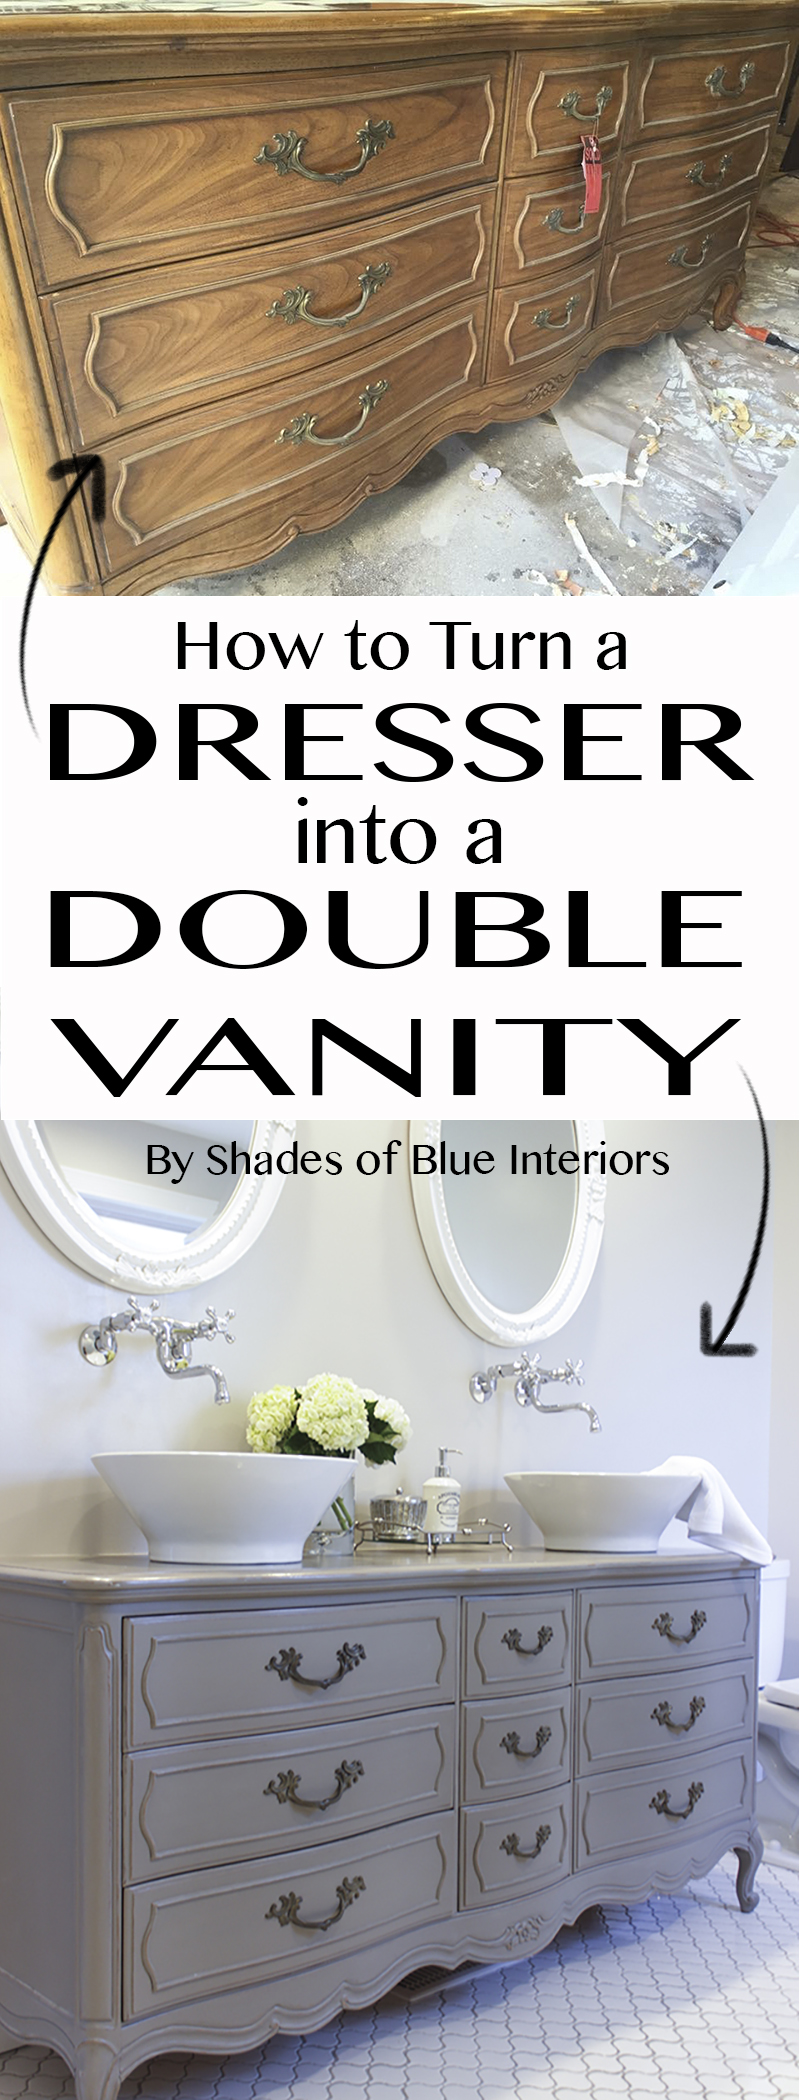
So here was the ‘before’ of the dresser-turned-vanity:
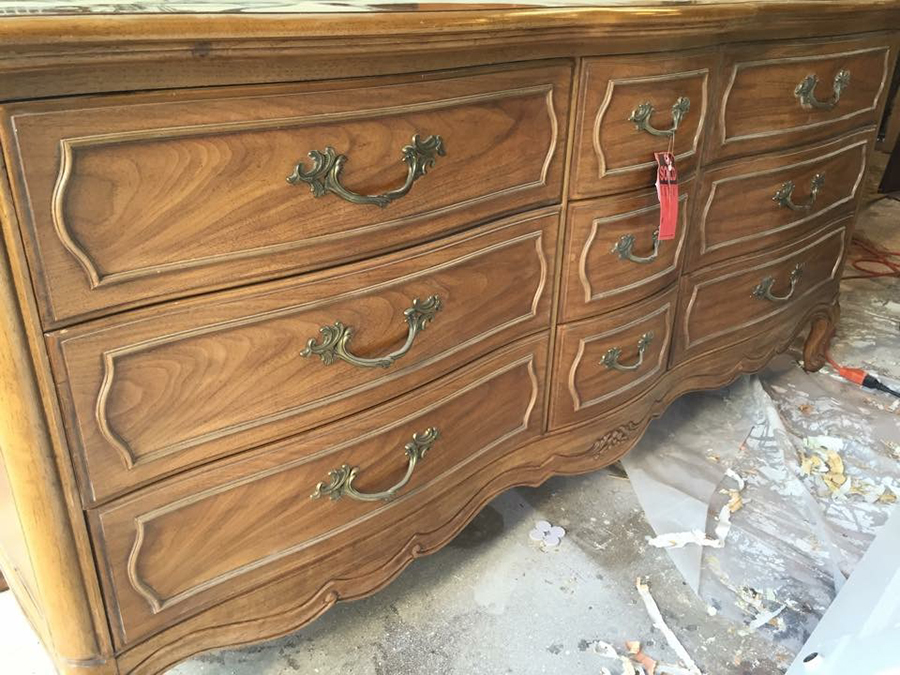
It was in beautiful shape and solid wood– a Thomasville. A perfect candidate!
So I’m going to explain the steps I took for this 9 drawer dresser (67″ long and 21″ deep), but the basic concept can be adapted to other size dressers.
How to Turn a Dresser into a Double Vanity
You will need:
Measuring tape
Jig saw
Square
1/2″ plywood– a 2′ x 4′ piece should be more than enough (exact amount varies based how many drawers you need to re-build)
Nail gun
1″ nails
1- 1×2 @ 8′ (if replacing center glide with side wood glide/supports) OR metal side glides for as many drawers as you need
1″ forstner bit
Step 1- Mark Plumbing Measurements on Drawers
Determine height that plumbing leaves the wall, width of plumbing, and distance it extends from the wall. If the vanity will butt up against a wall on either side, measure how far the plumbing is from that wall. Remove plywood back of dresser. Determine which drawers will need cut-outs and mark according to the measurements. For me, I needed to cut out the top 2 drawers on either side. The middle row I left untouched. The plumbing was done after I finished the vanity, so I used standard measurements. For the width of the pipes, standard is about 10 inches, so I allowed 10 1/2 inches (between hot and cold pipes), the height was 12 inches from the ground (the bottom of the U-trap) so I allowed 11 1/2 inches, and it extended out about 11 inches from the wall, so I allowed 11 1/2 inches. This extra 1/2″ for each measurement makes sure if something needs to be moved around or adjusted a bit, that you don’t have to worry about re-building again. If you have a baseboard that the dresser will go up against on the wall, then subtract the thickness of the baseboard (about 3/4″) from the measurement of how far the pipes extend from the wall. Make sure when you mark the cut-outs on the drawers, that they are completely centered, so when you mark the sink cut-out on top later, it lines up.
Step 2- Cut Out Drawers
Using a square, draw the exact lines where you will cut out on the bottom of each drawer that needs to be cut, and the back. Work slowly and cut along the lines with a jig saw. On my dresser was a piece of plywood seperating each level of drawers, that held a center glide that was supported by a wooden “frame” that went along the perimeter of each drawer shelf and attached to the frame of the dresser. I removed the center glide and converted the drawers to side glides, just gluing/nailing a piece of wood either side of the dresser frame (on each level or shelf), so that the drawer wouldn’t have any ‘play’ or move from side to side. It is the same method that is used on most antique dressers that I repair. You can also install metal side drawer glides if you prefer, that would pretty well and are simple to install.
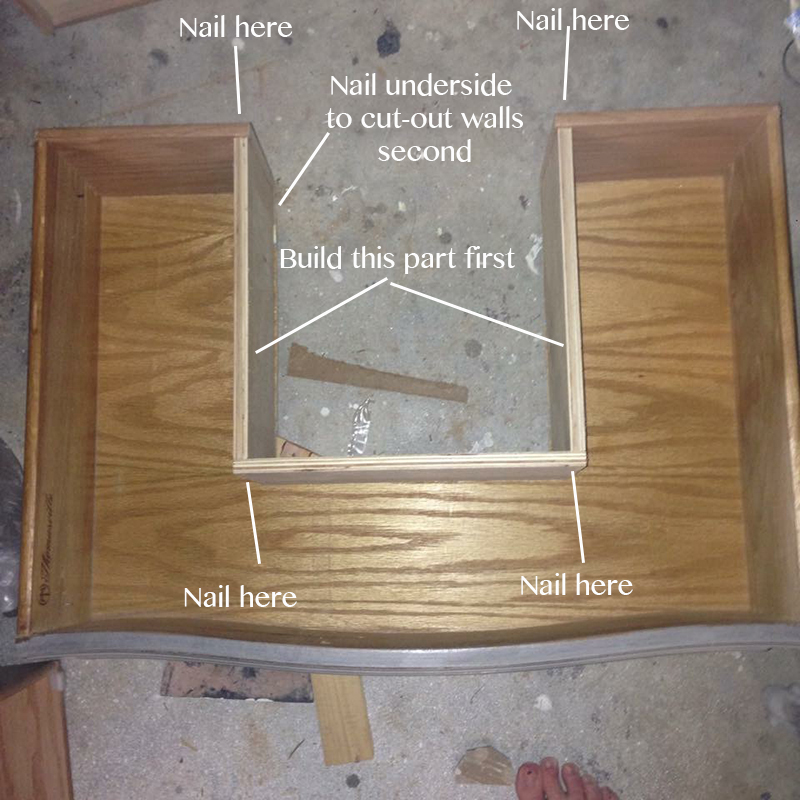
Step 3- Rebuild Drawers
Using 1/2″ plywood, cut out 3 pieces per drawer that are the same height as the walls of the drawer, and are the same length as what was cut out of each drawer bottom. Nail them together first, then place in the drawer and nail from the bottom, using 1″ nails. Also, nail from the back of the drawer to the cut-out walls.
Step 4- Mark Cut-Out For Sinks
Most new vessel sinks comes with a template which is super helpful, but THE MOST IMPORTANT PART is to mark the center of the where you will cut out the hole with the center of the face of the drawer. So, you want each sink centered over the drawer it will sit over, when you look at it from the front. You also want it far enough back from the front of the dresser, so that the faucet you choose will be centered over the drain. Then draw your circumference from that center mark. There should be at least 1″ lip from the outer edge of the base of the sink (if it is a vessel), to the circumference of the cut-out that was drawn.
Step 5- Cut Out Drain Holes for Sinks
Using a 1″ forstner bit, drill a center hole close to the edge of the circumference line. This will be where you can insert your jig saw blade. Use the jig saw to cut along the circumference line for each vessel sink cut-out. This wood is quite thick, so work slowly. Step 4 and 5 has to be done with the sink in-hand and faucet in-hand, so my friend ordered what she wanted online and had them shipped to my house, so I would make sure and get the measurements right.
Step 6- Paint or Finish
Before I painted, I sanded the entire dresser with 150 grit sandpaper, not to completely remove all the current finish, but to rough it up, so the paint would have some ‘tooth’ to adhere to. This is not necessary, but I feel adds extra durability. Then I painted using Annie Sloan Chalk Paint in French Linen. I did not use any wax. I lightly sanded the painted surface, once dry, with a 220 grit sanding sponge, just to make it super smooth and free from any texture.
If you aren’t going to paint, I suggest sealing the top with a high performance clear top coat, like Waterlox. If you ARE going to paint, the best clear top coat that will protect against pretty much anything is Modern Masters MasterClear Supreme. It is spendy, at about $45 a quart, but it is water-based, non-yellowing, and it is completely waterproof. According to their website it “protects Interior Surfaces against abrasion, scuffing, chipping, water, alcohol, household chemicals, plus it protects Exterior Surfaces from oxidation, salt air, chlorine, acid rain, bird droppings, mildew, etc”. I was told about this product from Nicole with Rescued Furnishings and have found it holds up amazing, just as she assured me it would. It works on both stained and painted surfaces, and is an acrylic/poly resin that dries very fast. I brushed it on, but Nicole swears by applying it on with a foam roller. I applied 3-4 coats to the top and two on the rest of the body.
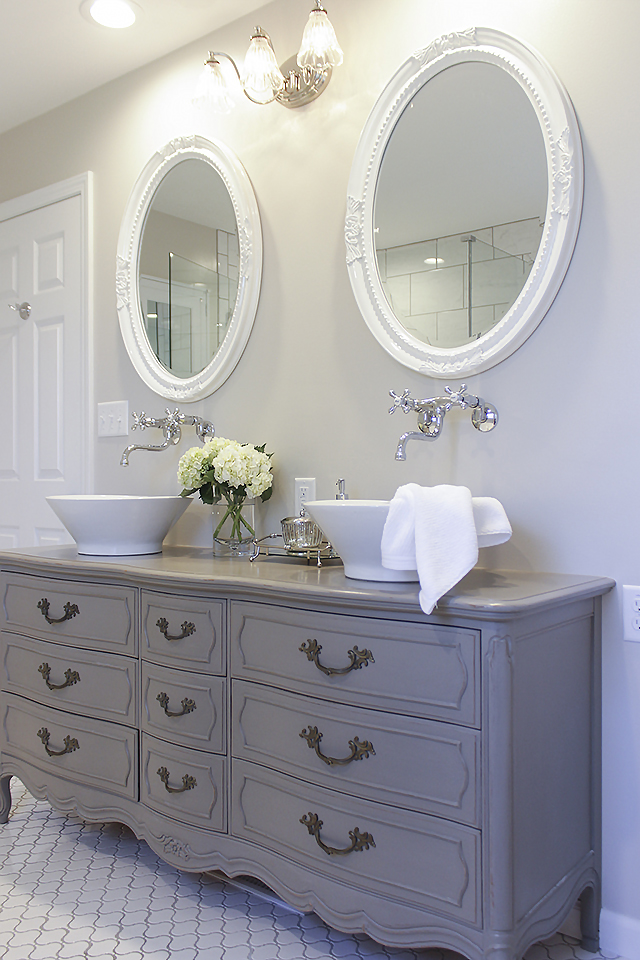
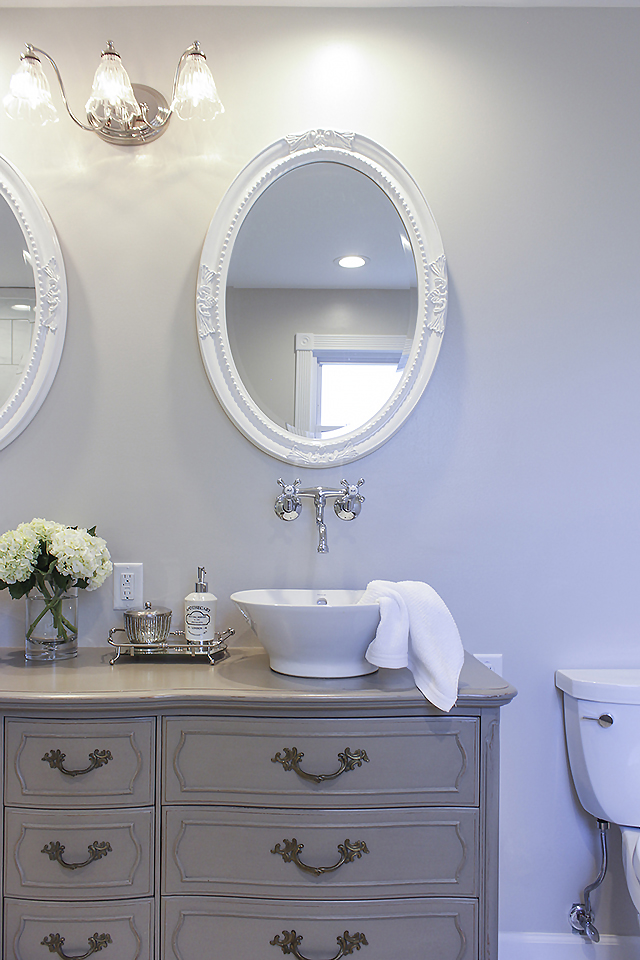
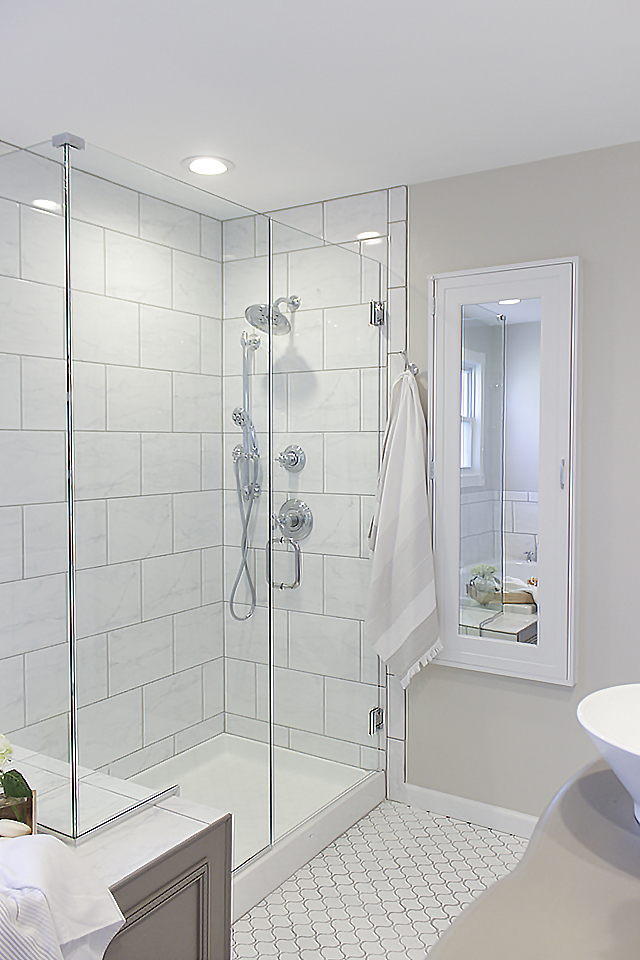
So here is more of the final result and a tour around the rest of the bathroom:

That built-in medicine cabinet on the wall next to the shower was custom-made by my husband’s uncle, Luciano, to mimic the Restoration Hardware ones that were all sold out, that my friend fell in love with.
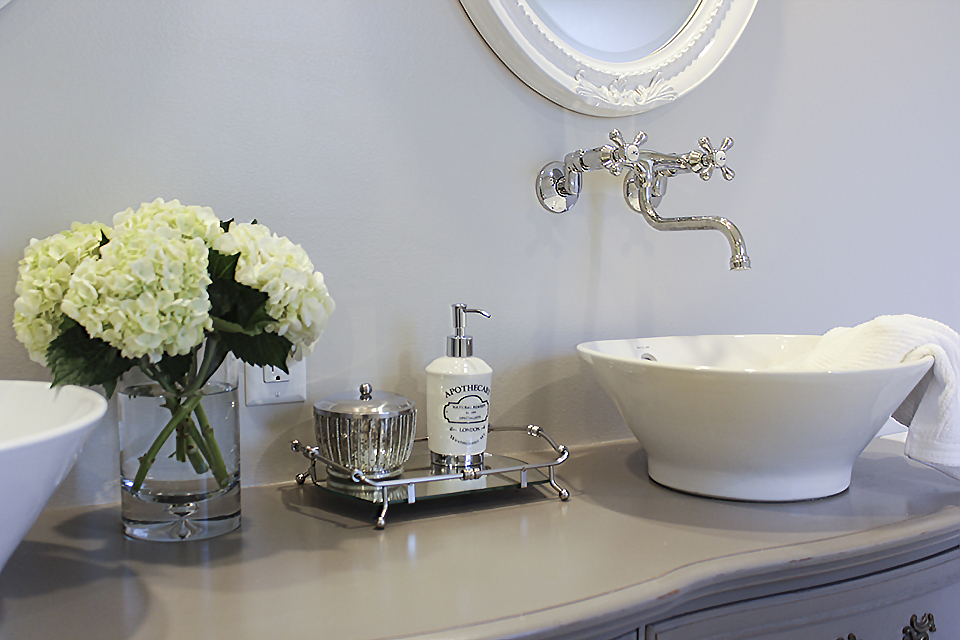
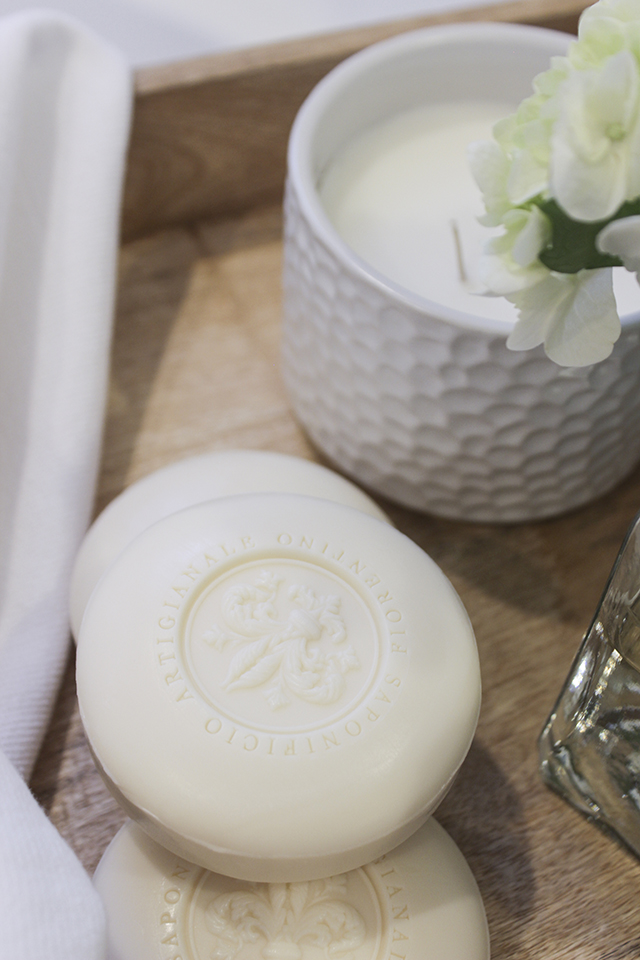
All items used to stage the bathroom were found at HomeGoods.
Except for the flowers! 😉
So what do you think? Beautiful bathroom, right?
Vessel sinks: Decolav Round Tapered Vessel found HERE
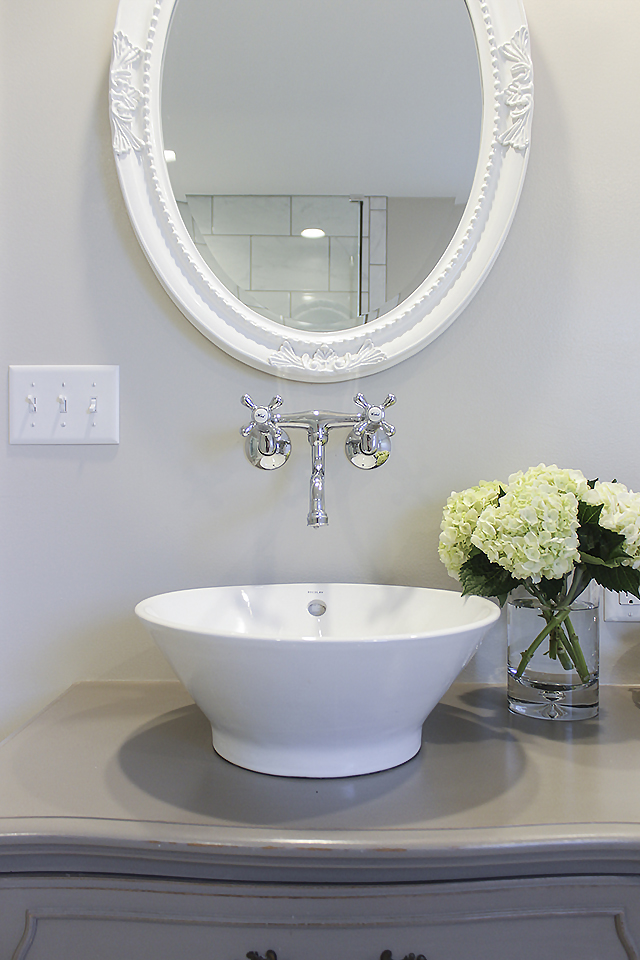
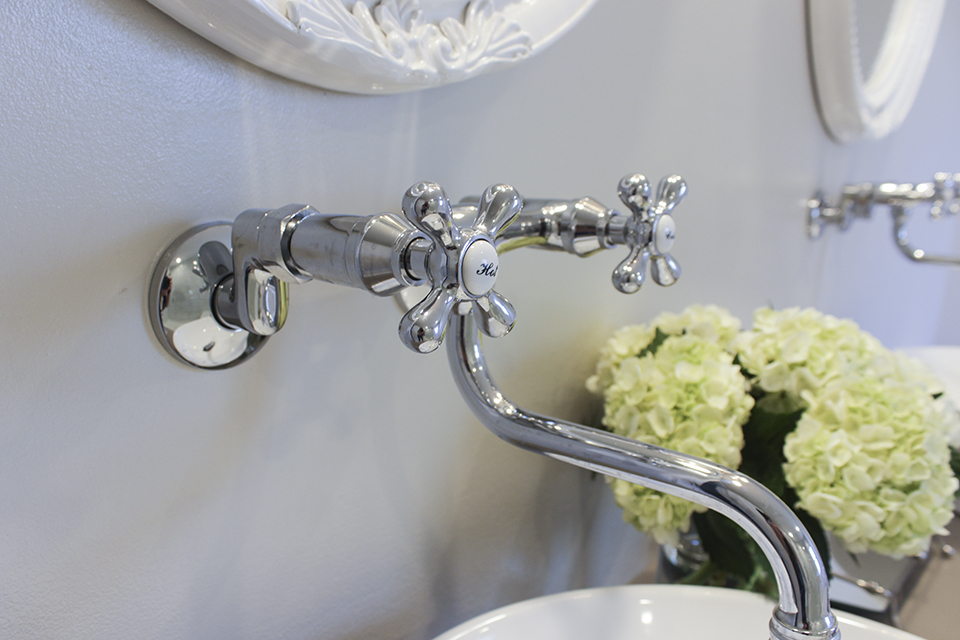
Sink faucets: Kingston Brass Victorian Wall-Mounted found HERE
Bath faucet: Delta Cassidy Roman Tub with Cross Handles found HERE
Tile: Metro Lantern Glossy White Porcelain found HERE
Shower Kit: Delta Cassidy MultiChoice 14 Series Shower Trim with Cross Handle Valve found HERE
It’s beautiful, Rachel! April has such a treat to come home to!
You are all kinds of amazing and this is fabulous Rachel! Great job, I’m inspired?
Alma
Hi Rachel, this is amazing! Your furniture transformations are so inspiring . Thanks for the great “how to”.
Gavin
This is so beautiful, Rachel x
Love it! the top clear coat that you used was it matte or satin?
It was satin! 🙂
You rocked this one, Rachel! The dresser reminds me of one HGTV used on Fixer Upper last season…although yours is much prettier! Your friend picked out lovely fixtures and designed a gorgeous bathroom! Hats off to both of you!
Stunning transformation! What paint color did you use?
Would love to know the paint color you used on the walls.
Hey, This is so beautiful! I have a dresser that I am going to convert to a vanity, but I worried it will be too high with the vessel sink on top. My dresser is 35 inches tall and the vessel sink is 6 inches tall, so the total would be 40 inches. Can you tell me how tall this dresser is?
Hi Rachel!
Where did you purchase the mirrors?
This is a keeper! Learned about this thru Prodigal Pieces. Just have to find the right dresser, cause I have stuff, and lots of it, I want to hide in the drawers. I want that type of faucet too but for the kitchen and later for the bathroom.
Rachel,
Thank you you for the tutorial, I have been wanting to do this for a few years. You make it sound so simple.
Thanks again
I am interested in the mirror.. Please let me know where to purchase the mirrors. Thanks
Thank you SO MUCH for listing your resources!!!!
Wondering what sheen of Modern Masters Clear Supreme you used? I’m assuming gloss? It comes in gloss, semi-gloss and satin.
I used Satin!
I have a dresser just almost exactly like this but it has a top on it that’s not wood. How would I finish that?
Hola, acabo de encontrar un mueble identico, lo compre y voy a hacer el mismo trabajo que usted hizo, es hermoso, simplemente encantador. Saludos desde Hermosillo, Sonora, Mexico
Could you tell me where you bought the mirrors and what the paint was called?
The mirrors I didn’t buy— if you read the post you will find this bathroom belongs to a client so she gave me the info as best she could remember but it’s now been a couple years. Also the paint info for the dresser is in the post but the wall color I don’t have that info, sorry.
Could you tell me where did you buy the mirrors?
I would like to panel the front of my tub the way you did just in a different color. Can you advise where I can purchase a panel like that?
It was custom made around the tub by a carpenter.
It’s so beautiful! What would you do if the night of the dresser was not enough? What is the height of this one you used?
what color grout was used for the tile on the floor?
I’m not sure… since I wasn’t doing the entire remodel, just the vanity, I don’t have all the details of everything, sorry!
What finish did you use on your clear top coat?
I said it in the post, but its Modern Masters MasterClear Supreme
Hello. I’m doing the same thing. Dresser is ready. Have my bowl vessel sink. I’m wondering if it’s going to be too high?! How high is this dresser and the sink used? Is it comfortable to use?
This was for a client, but the height was great, not uncomfortable at all. I don’t have the exact measurements tho.
Hello,
Outstanding! Curious was the vanity anchored to the wall? I want to do this with a sideboard but with an undermount sink, but I’m thinking the vanity should be anchored to the wall for stability. Any advice you can provide will be appreciated.
Again outstanding.
It is not anchored. It’s a very heavy vanity and we didn’t feel it was necessary. Haven’t had any issues of being unstable since it was originally installed!