Remember this dresser? It was my first Miss Mustard Seed Feature and it remains the one piece of 2012 that was my absolute favorite. A few weeks ago I bought a dresser off of Craigslist that had a similar shape but needed a little work. It was definitely an antique, but one of the sides had chipping veneer, there was a iron stain on the top, and lastly 3 out of the 4 drawer-bottoms needed to be replaced… they were warped beyond use. Oh I forgot! The beveled mirror was loose in the frame and was wobbly when attached!
I got it right before Christmas, so I took my time making the repairs and had every intention of re-doing my old fav. Then just a couple weeks ago I had someone request the very same dresser! It was meant to be!
The actual dresser repairs were easily done with a little grunt work. I stripped off the veneer off of one side that was chipping too badly and sanded it, then other areas I filled with wood filler. Then I bought some new oak plywood for the drawer bottoms and nailed them in place. Last came the mirror. It was tough! I had to ask my brother for advice and he told me what I didn’t want to hear. I needed to remove the plywood back of the mirror frame and reposition the mirror, then re-attach it. That was scary at first (I was afraid of breaking that wonderful antique, heavy beveled glass!), but once I got it apart, I saw it needed a few more wood chips nailed in place to keep it from moving around. I just got out a chisel and with some leftover oak scraps from a previous project, I fashioned some little chunks that fit snugly on the top and bottom. Then I nailed the back, back into place and voila! It wasn’t loose anymore! For the brace brackets (that held the mirror arms onto the back of the dresser) I just had to move it to the side a little and screw new holes, and after that it was no longer wobbly!
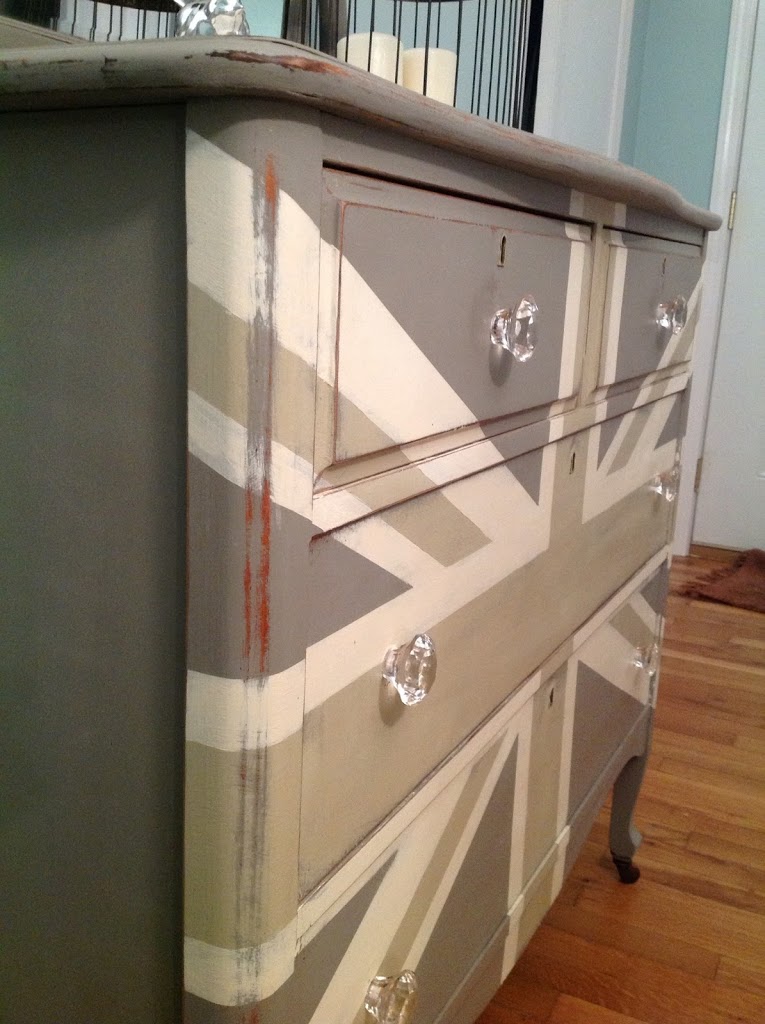
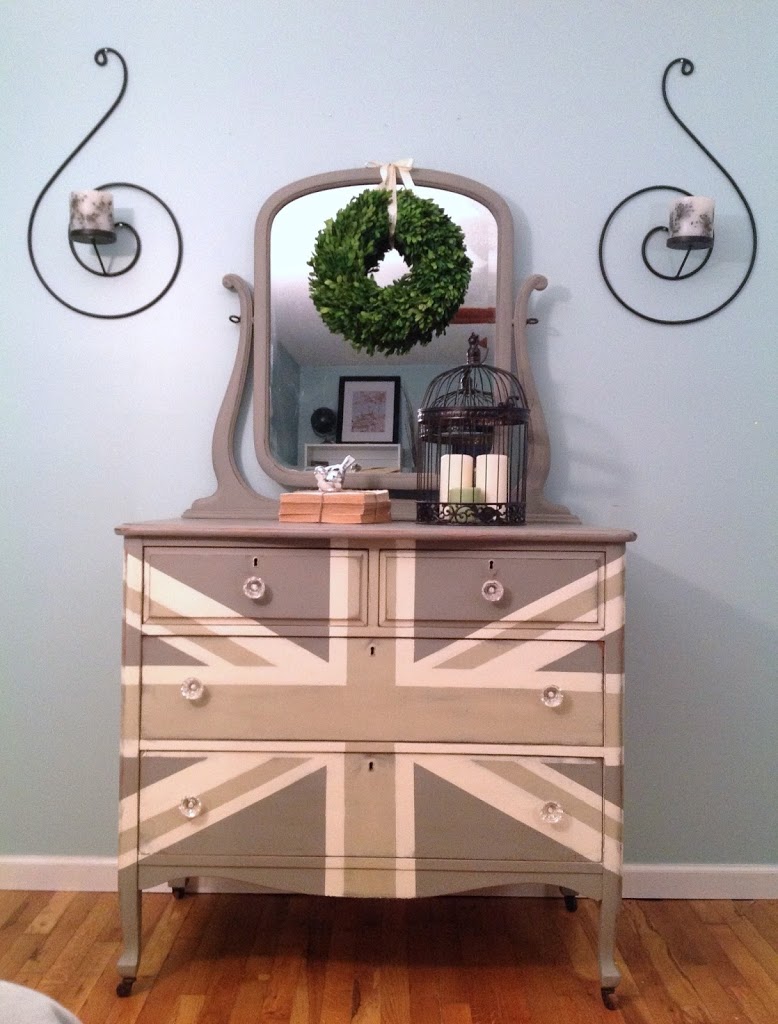
So on to the fun part… painting! I’ve done this Union Jack design a handful of times and I think I’m getting better at it. It takes me about 2 hours total. I’ve heard of some people taking a lot longer than that, so I’m thinking that is good! 🙂 Don’t bust my bubble if you can do it in a 1/2 hour! (That’s what she said.)
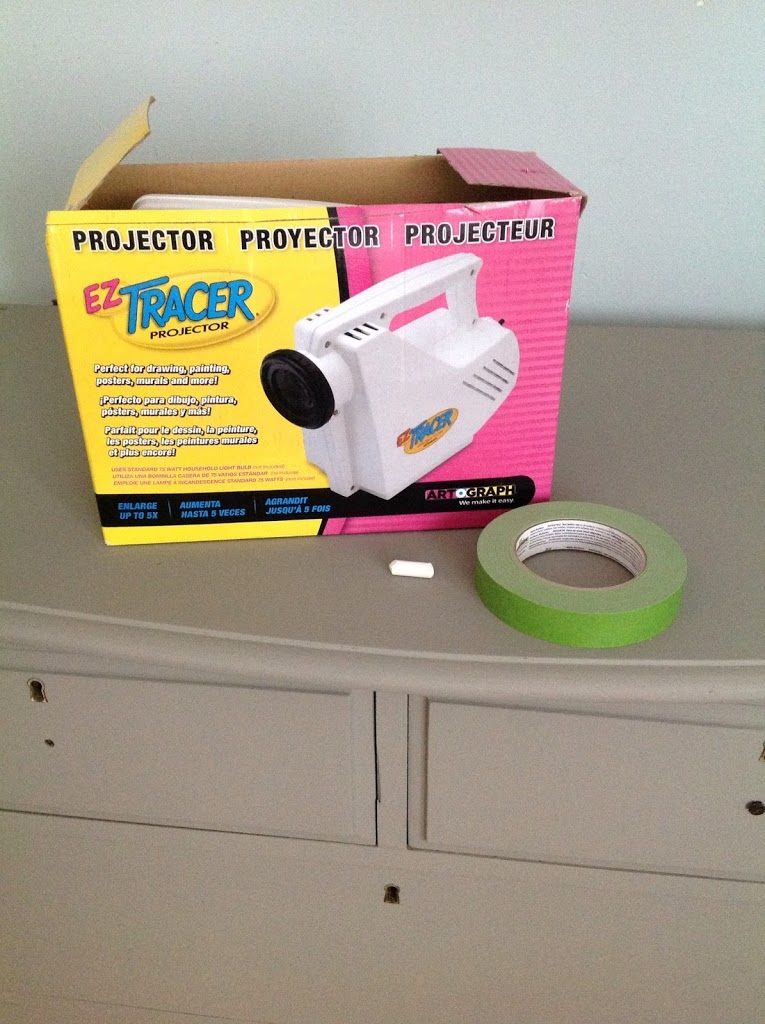
Here are the supplies you need:
1. Projector
2. Chalk
3. Frog Tape
4. Protractor (optional, not pictured because I thought of this afterward)
5. Small yet accurate British flag (I use this one)
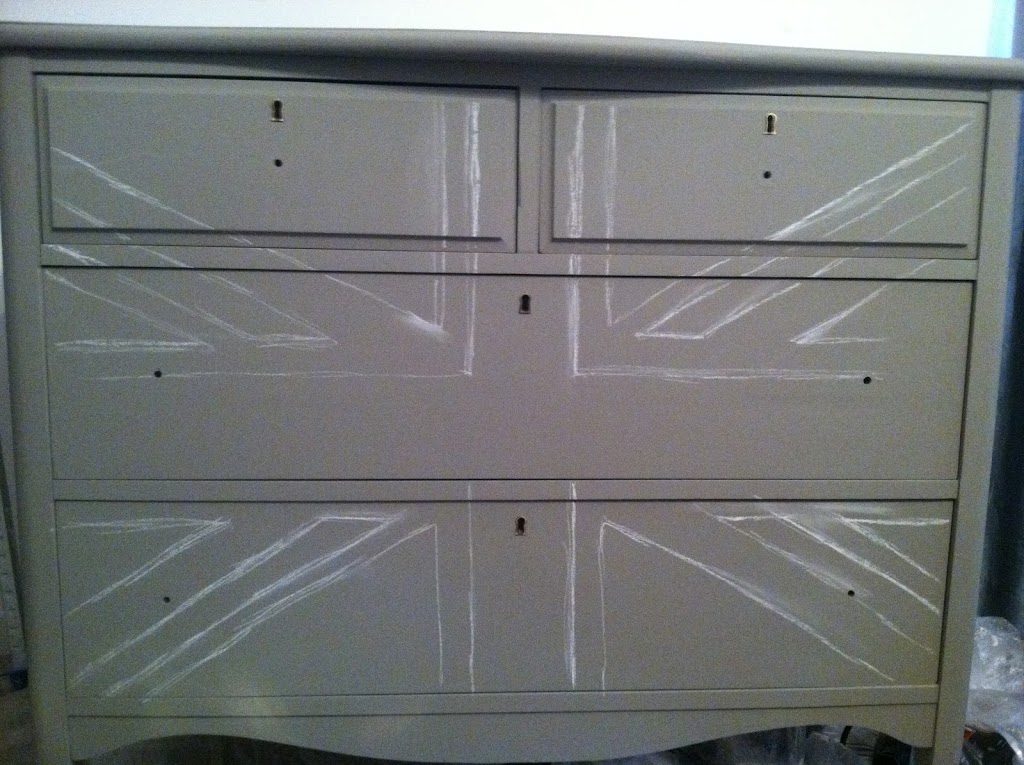
First of all, my projector is pretty crappy but it gets the job done. The lines are a little blurry and it doesn’t project a large area, so you kind have to move it around and spend time positioning it just right to get the whole design sketched out. I probably waste a good 20 minutes on sketching just because of that whole moving the projector around business. You could buy one like this (pretty cheap I’m sure) or you can get a nice one, but seriously a projector makes it so you don’t have to measure or do any math! I take that back, you might have a measure a little with the protractor.
So here is what it will look like after step 1, sketch out the design (it doesn’t have to be perfect).
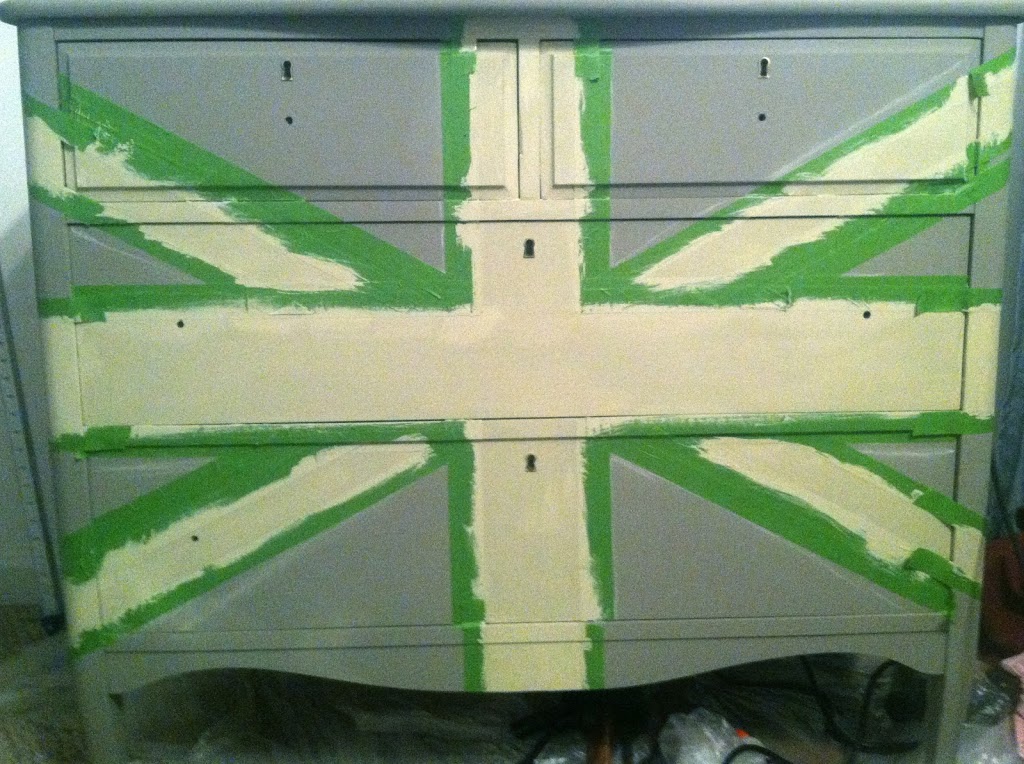
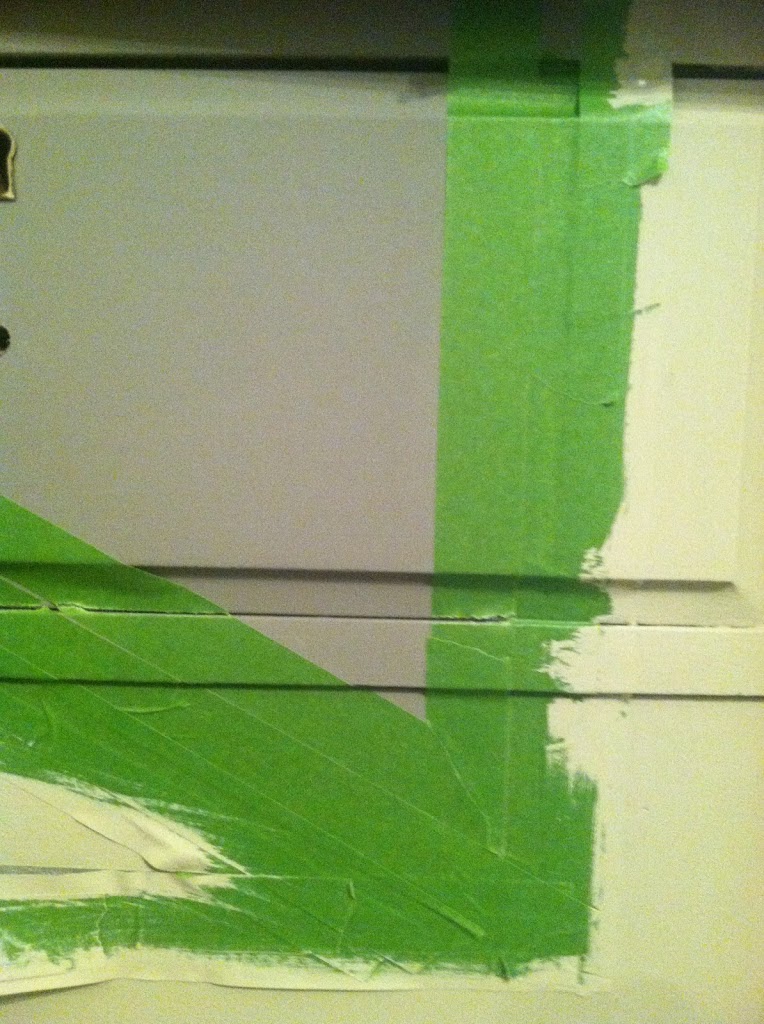
Next get to taping! I used to use blue Painter’s tape, but it bleeds too much. Frog Tape has these little moisture-absorbing spheres in the tape, so that once you really seal it down, it doesn’t let ANY paint through! I LOVE it! I learned about these moisture-absorbing spheres when I accidently got a drop of water on the side of the roll, and the gel stuff appeared after a minute of it sitting there. So I googled it and found out that is what makes it the best for preventing bleeding of paint lines! This initial step takes me about 20 minutes.
You can see I repositioned some of my lines because I got out my protractor and measured the angles of the accurate picture to match the angles of where the tape was originally placed. This part took another 10-15 minutes.

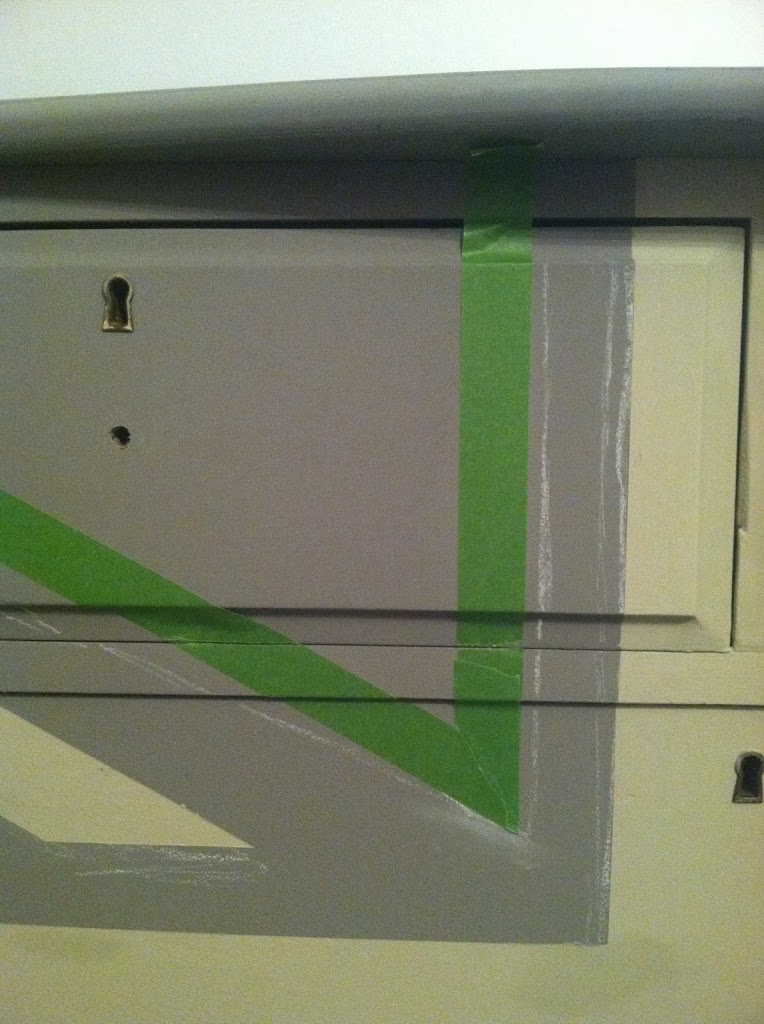
I paint the center cross color first. In this case I was using Country Gray by Annie Sloan. This part took about 10 minutes.
BEFORE I removed the tape where the white is going to go, I took more Frog Tape and carefully taped around the existing tape, so I would have an outline for the white tape. Confused? Example:
After I painted center cross:
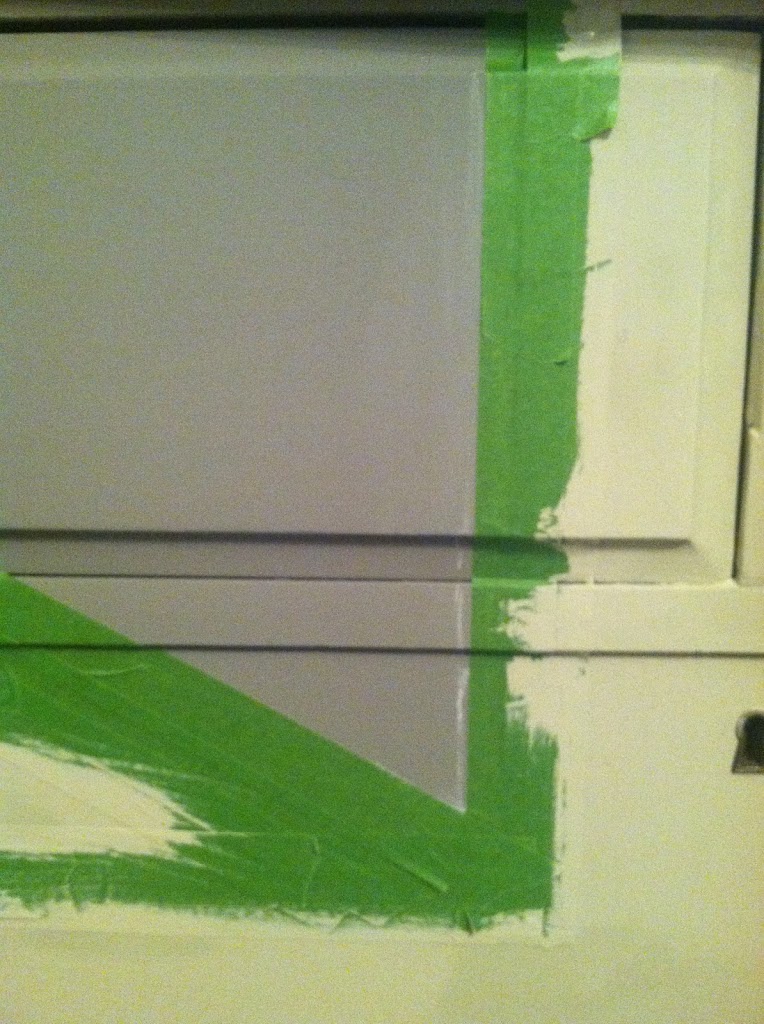
After I taped around the tape where the white goes:
After I removed the tape where the white will go:
After you have done that it will look like this (that part took me another 10-15 minutes):

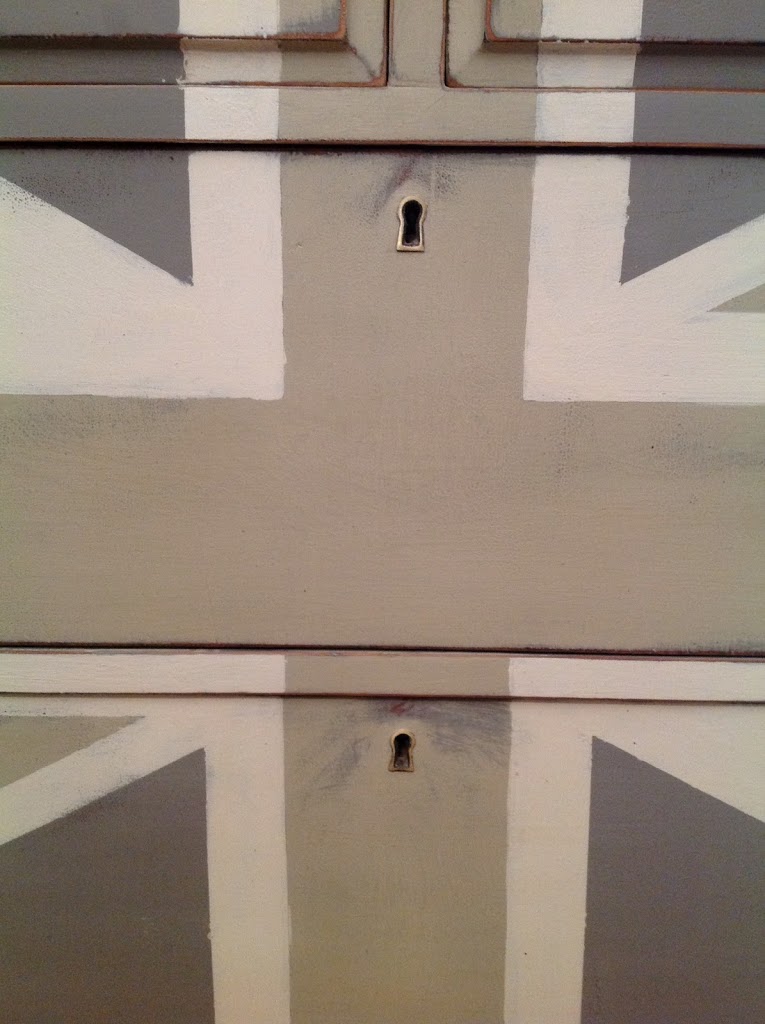
Now, here is where I chose to do a little more of an hand-painted look and carefully painted between the Frog Tape and the existing Country Gray (center cross color). It was the most time consuming because there wasn’t any tape preventing me from painting over the Country Gray. Maybe I could have put the Frog Tape over it, but it was freshly painted and even though it was dry already, I didn’t want to risk it. If you want EXACT lines and you don’t plan on distressing it when you are all done, then wait 24 hours and then put the Frog Tape on top of the center cross color. This part took me about an hour to paint 2 coats.
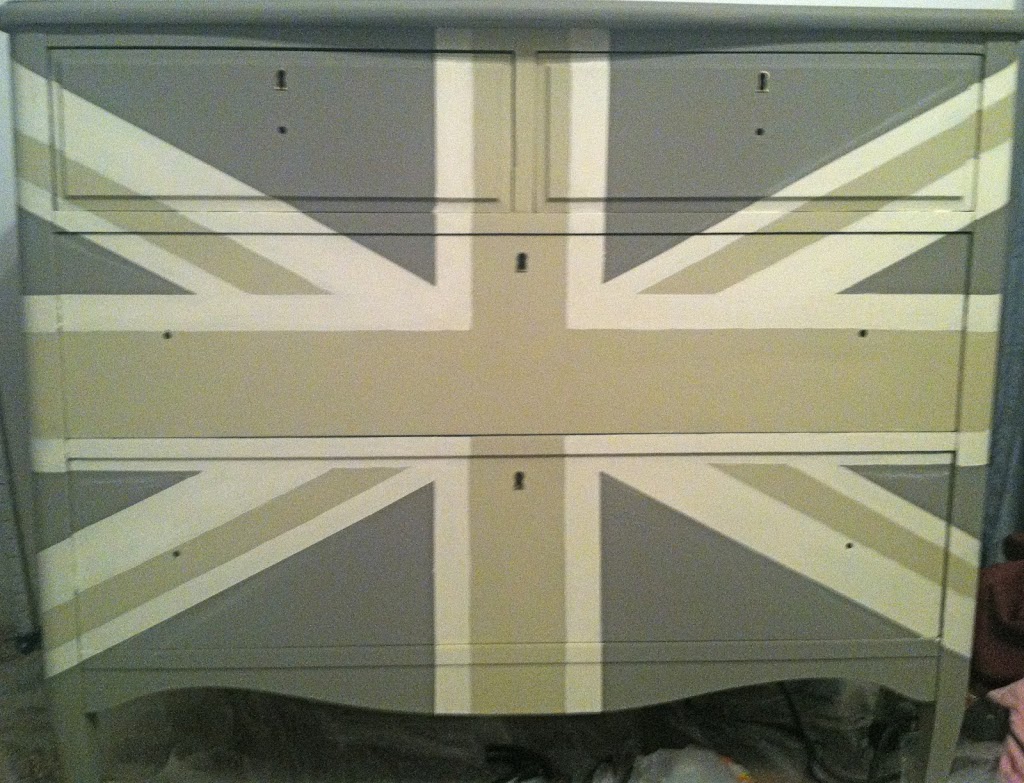
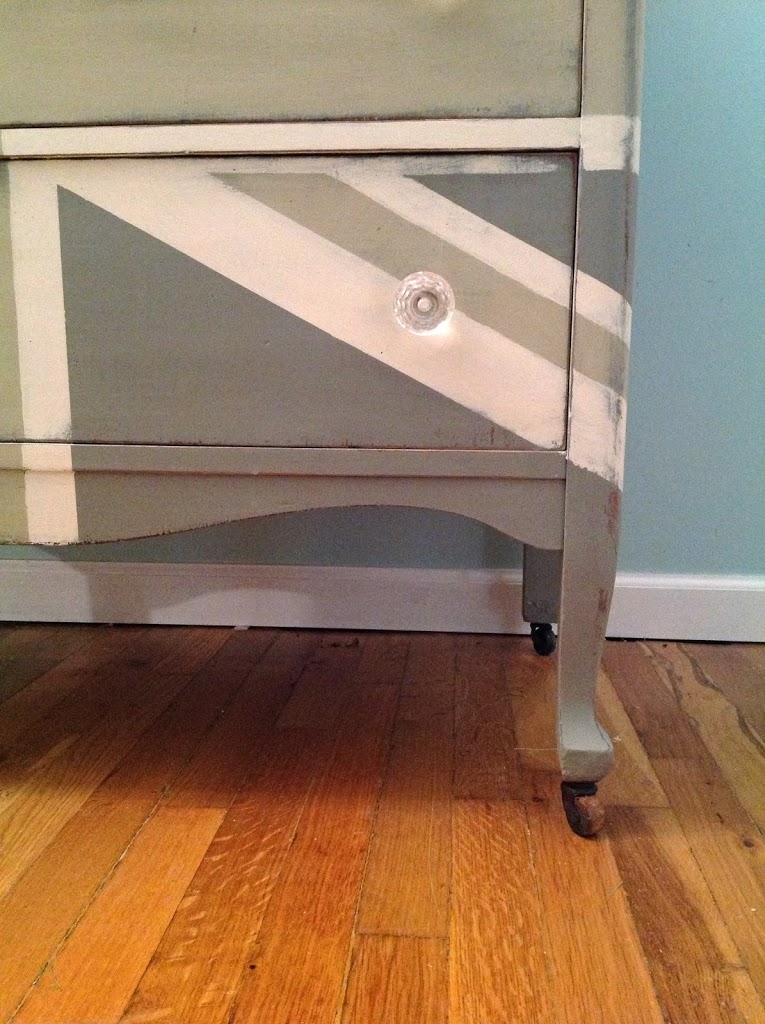
After the whole thing dried, I distressed all the edges (and places that seemed natural to wear), sanded smooth the entire thing and then clear waxed it.
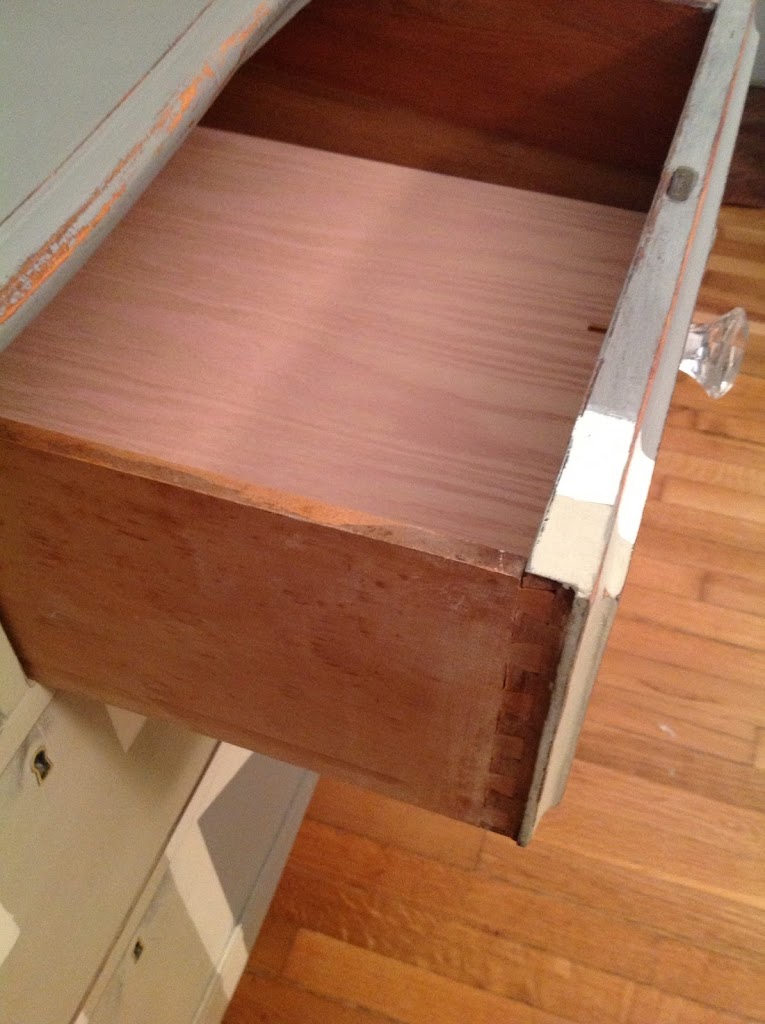
Here’s a peak at the new drawer-bottoms and the dovetail drawers!

I had fun picking out items for my vignette! It’s simple yet cheerful!
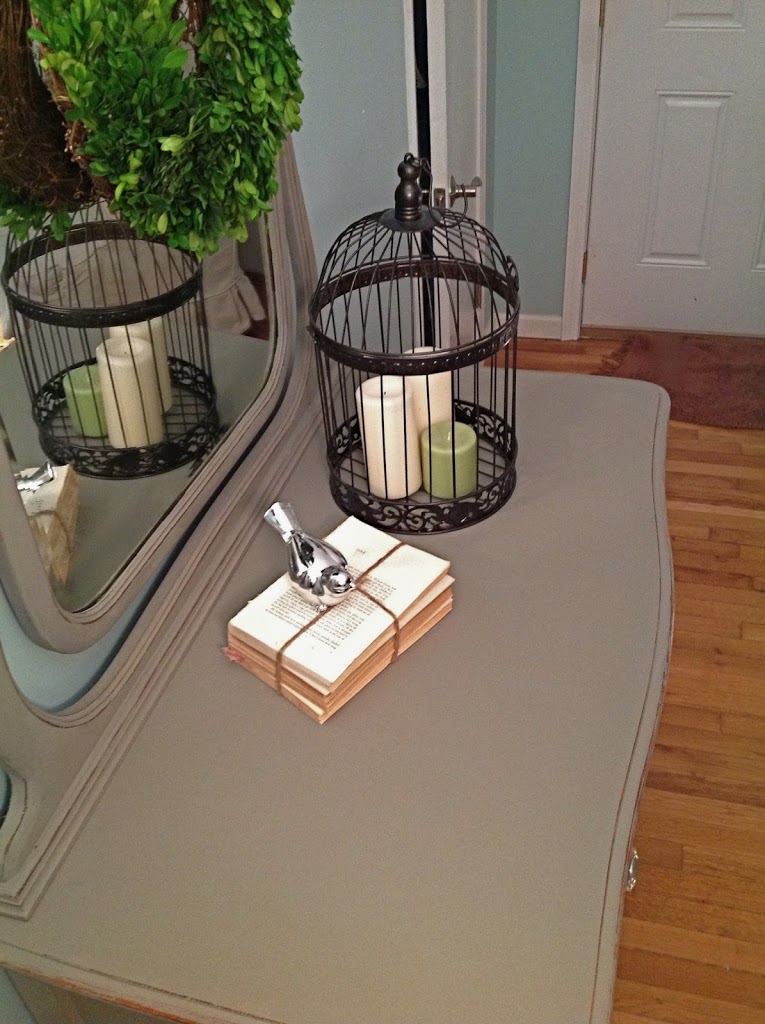
The silver bird and birdcage were from Ross (remember I made-over the birdcage?), the candles from Walmart, the books were a thrift store find that I tore the damaged covers off of and bound together, and the boxwood wreath was a Black Friday deal I got off of Decor Steals!
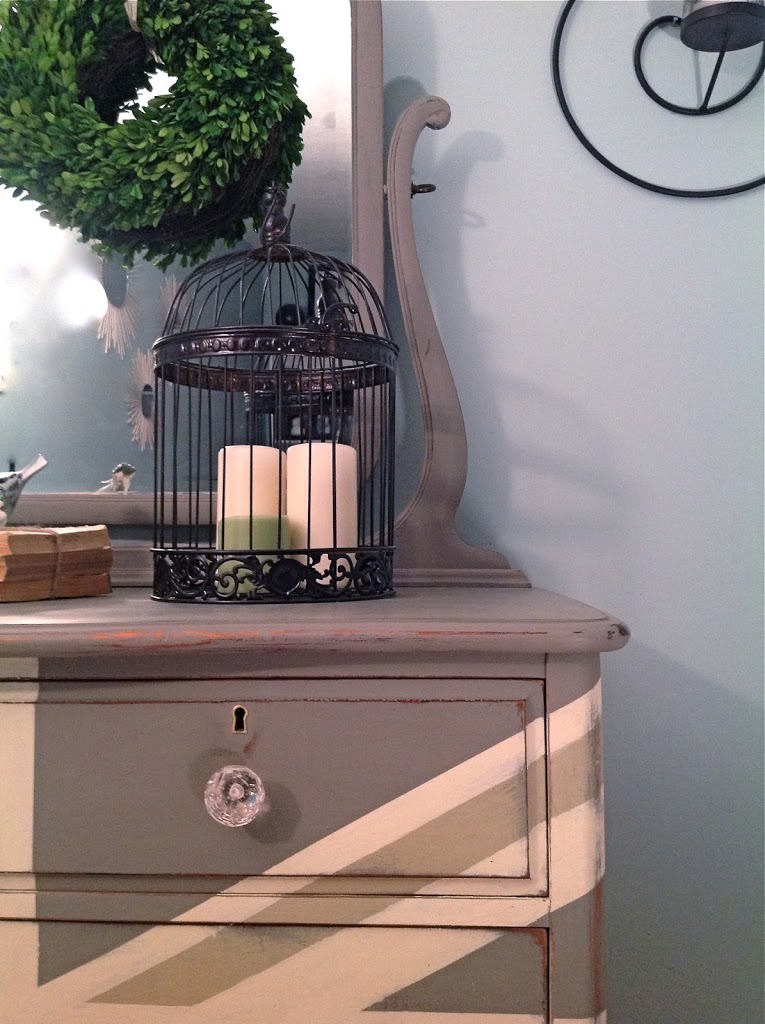
TA DA!
Sharing over at Coastal Charm’s Link Party!
Thanks for sharing this wonderful makeover at my party:)
Blessings,
Linda
Well done. I really like the colours you have used and it’s distressed just enough to be perfect.
So very impressive! I found you through Coastal Charm. Love this piece with personality! Melinda
I just found your blog through MMS and I love this Union Jack dresser! I did a trunk in the traditional colours (my husband is British and we met in England), but this looks a much easier way to do it. I am now following you so I don’t miss any other great ideas you come up with.