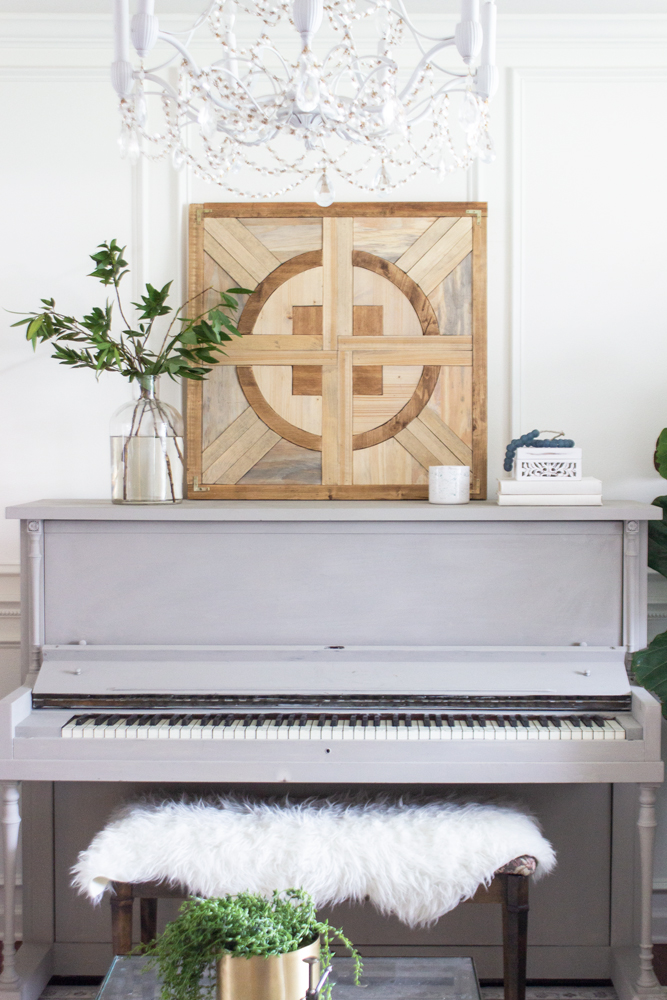
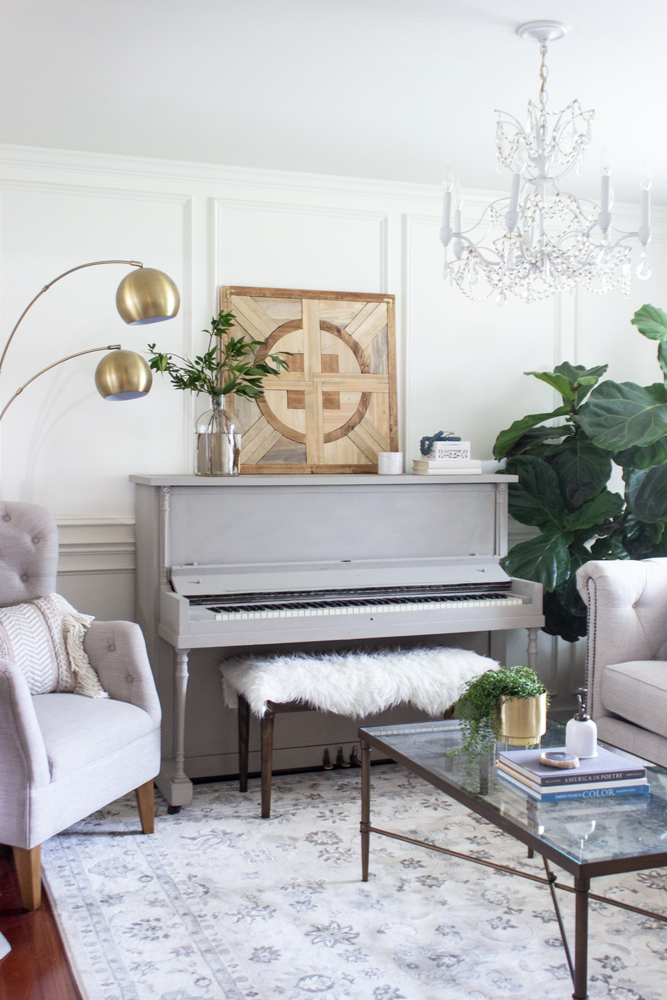
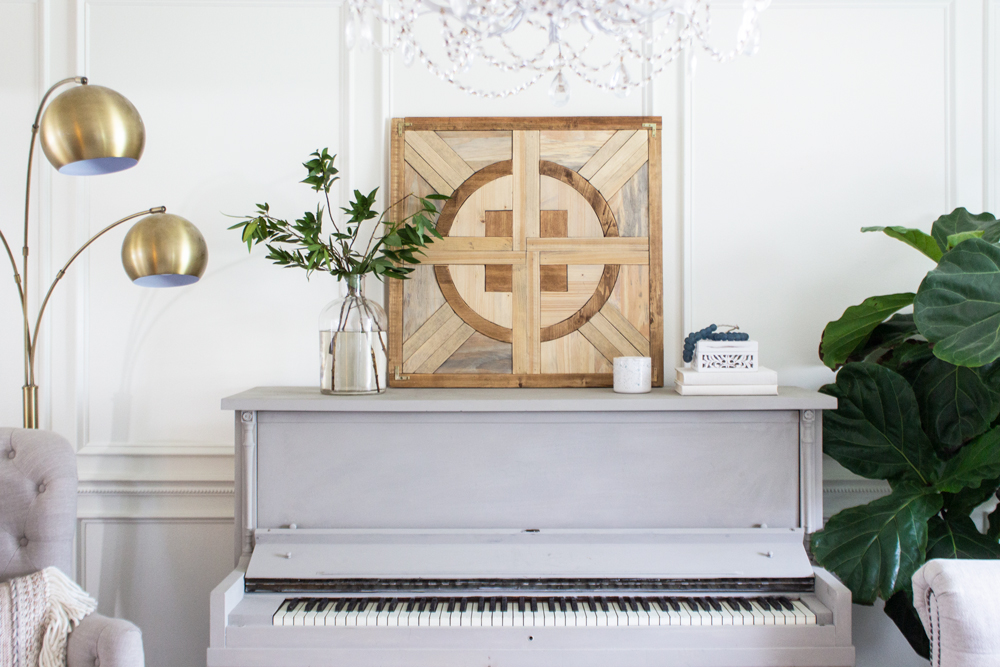
Today I’m sharing a beautiful, large piece of art made entirely of wood and you only need a couple basic tools to make it! Using only pine wood stained a variety of colors, this wood art is 30″ x 30″ and would make a great statement piece in any room.
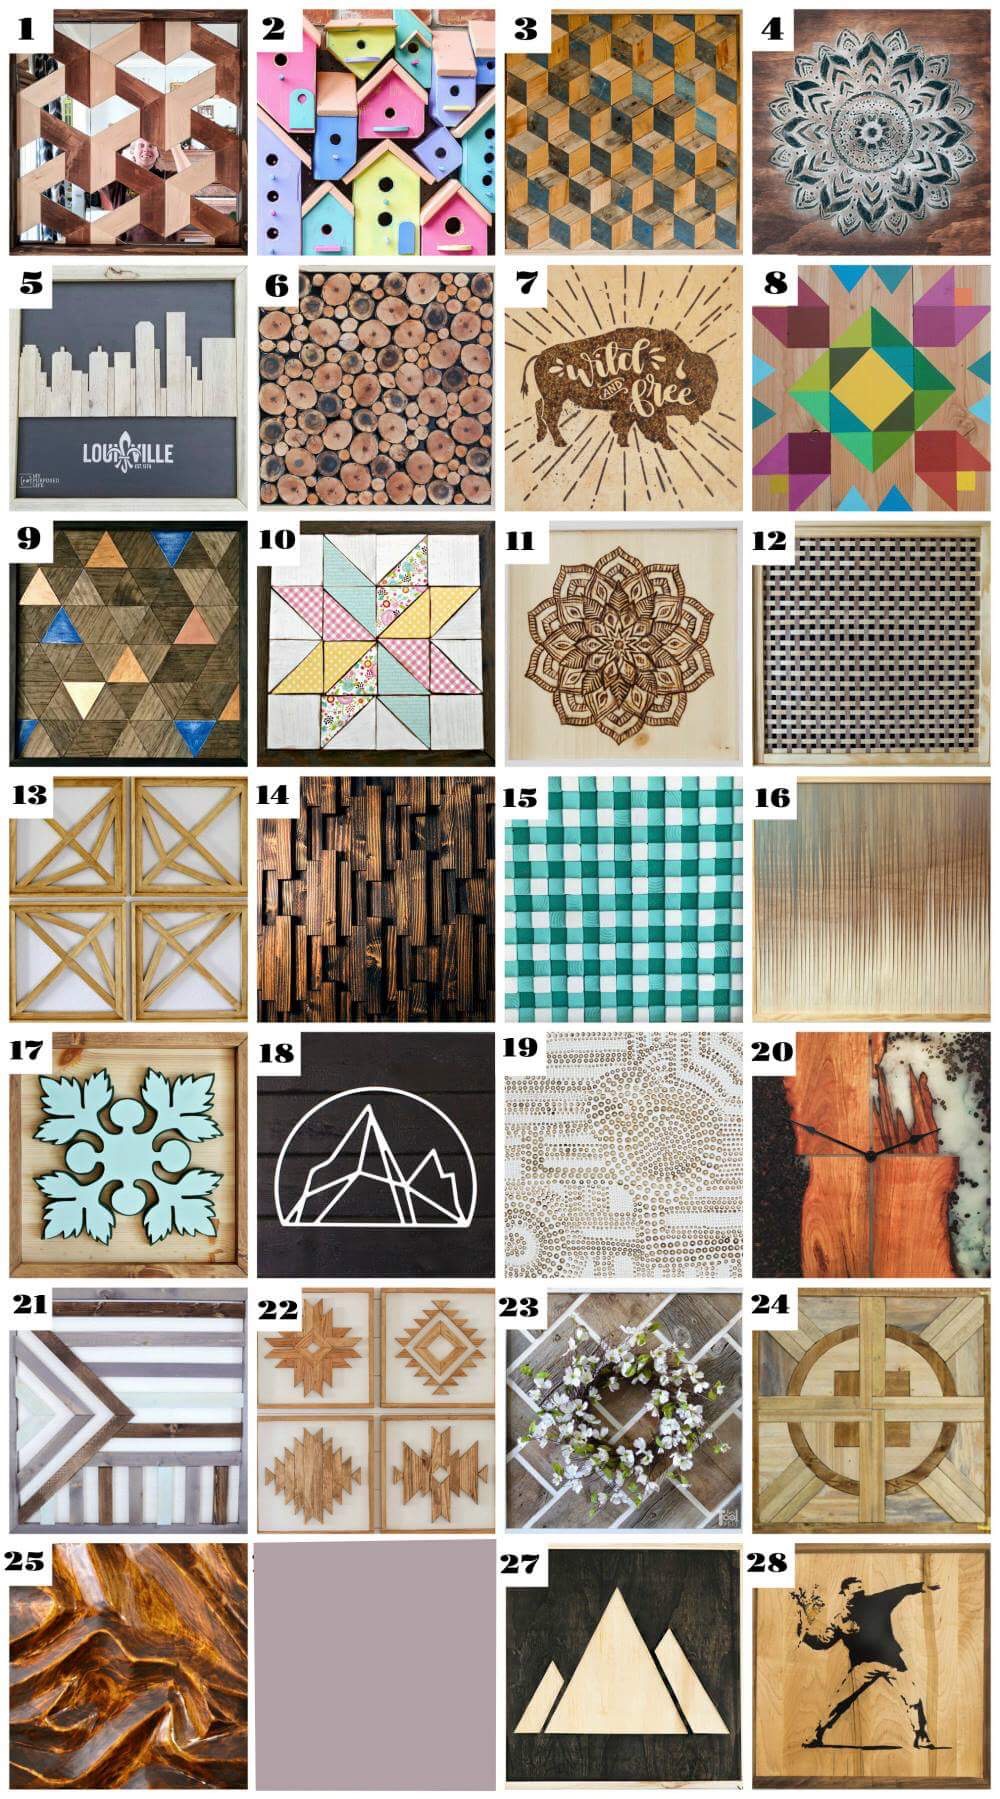
This wood art design is part of a Wood Art Challenge hosted by Bethany from Reality Daydream. She is a fellow woodworking blogger and invited several other bloggers to create a square piece of wood art, of any size. The results are absolutely killer and you don’t want to miss it!

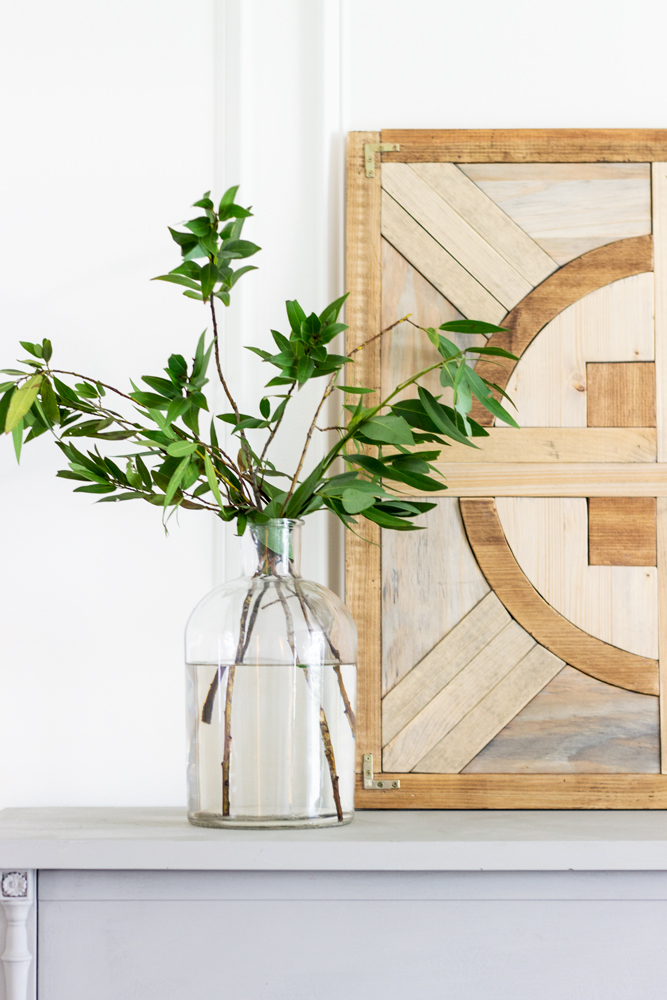
I was inspired by some wood flooring inlays I saw on someone’s instagram stories a couple months ago, and got out my pencil and starting drawing how I could make it work. It took me many hours to perfect it, but I am so happy with how it turned out. It was just what I had hoped for and I love how neutral it is!
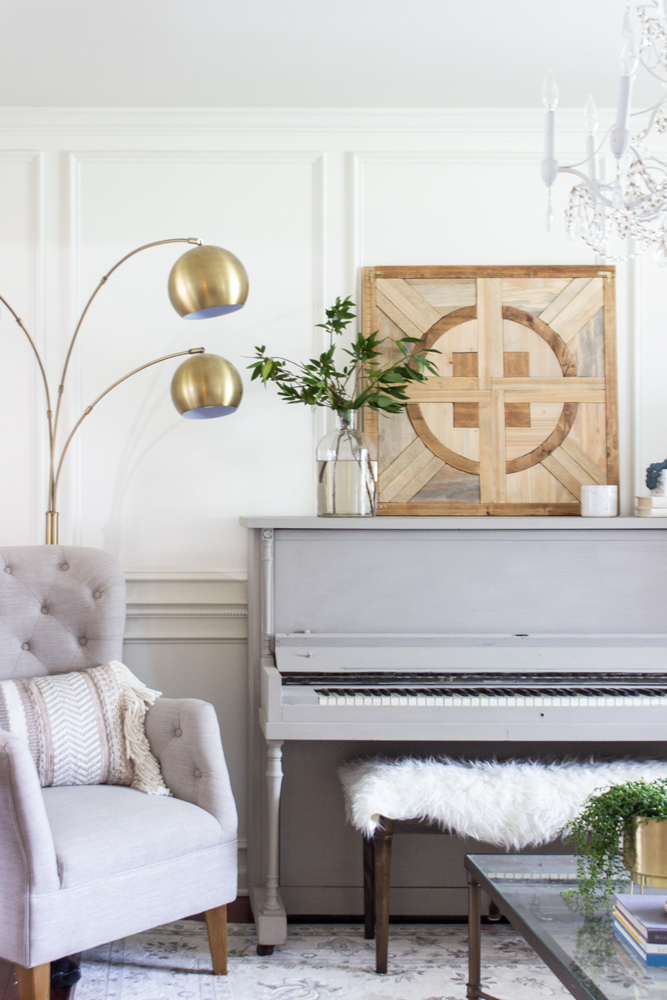
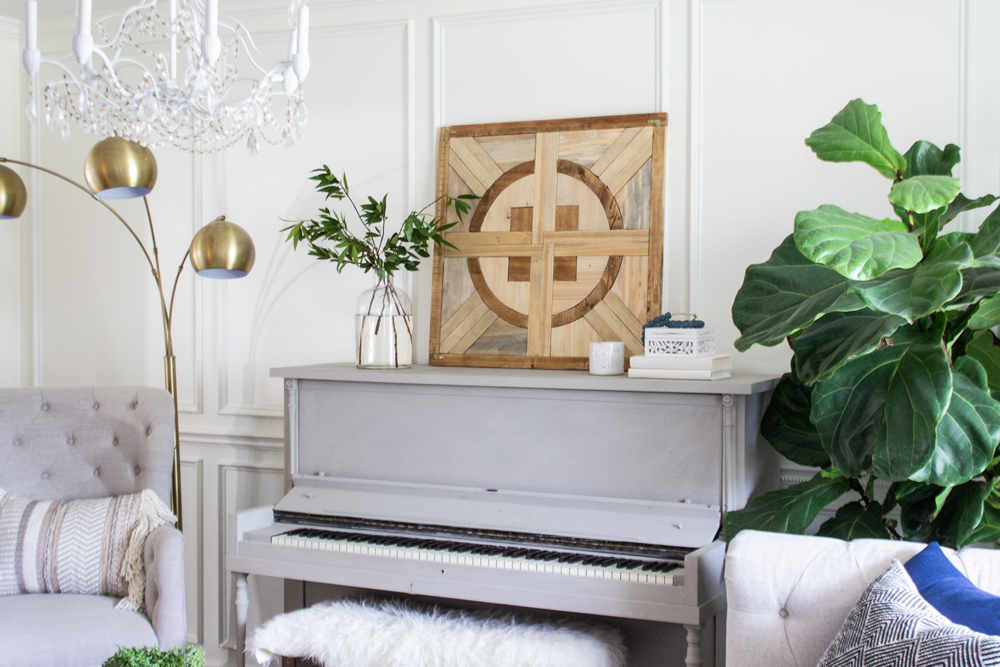
I haven’t had anything over my piano for awhile, so this was the perfect addition to my front room.
Sources (affiliate links included):
Clear vase on piano | White wood box | Blue glass beads
Brass floor lamp | Chair | Lumbar pillow in chair
Coffee table | Brass planter | Couch | Rug
Wanna learn how I made it? Tutorial is below!
Tools Needed:
Miter Saw
Jig Saw
Measuring tape
Brad Nailer (optional) or hammer
Wood Glue
Shopping List:
1/4 sheet 1/4″ plywood
4- 1×2 @ 8′
1- 1×10 @ 6′
1 package of 4 flat right angle braces
1″ nails
Stains of choice
Cut List:
1- 1/4″ plywood @ 30″ x 30″
4- 1×2 boards @ 28 1/2″
4- 1×2 boards @ 12″
4- 1×2 boards @ 13 1/2″
4- 1×10 board @ 10″ x 10″
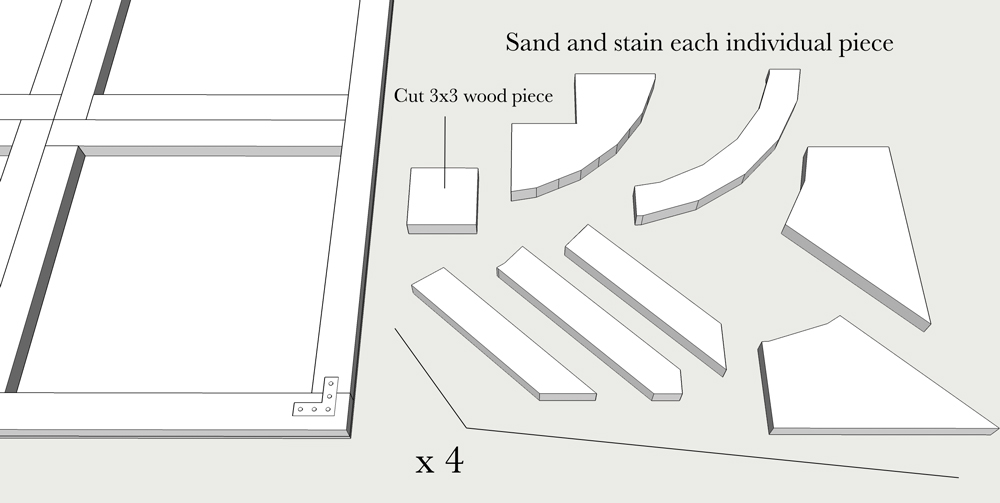
1- 1×4 or other scrap wood @ 3″x3″
4- 1×2 @ 10″ with one end being cut to a point with 2- 45 degree angles meeting at the center (making a sort of ‘arrow’
8- 1×2 @ 9″ with one end being cut at a 45 degree angle
Step 1: Build Base and Edges
Attach 28 1/2″ boards to edges of the 1/4″ plywood using 1″ nails and wood blue. Use flat right angle braces to add extra rigidity.

Step 2: Attach Center Dividers
Arrange the 12″ boards and the 13 1/2″ boards so they is one of each going out from the center along the middle line of each side. Attach with wood glue (and nails if desired).

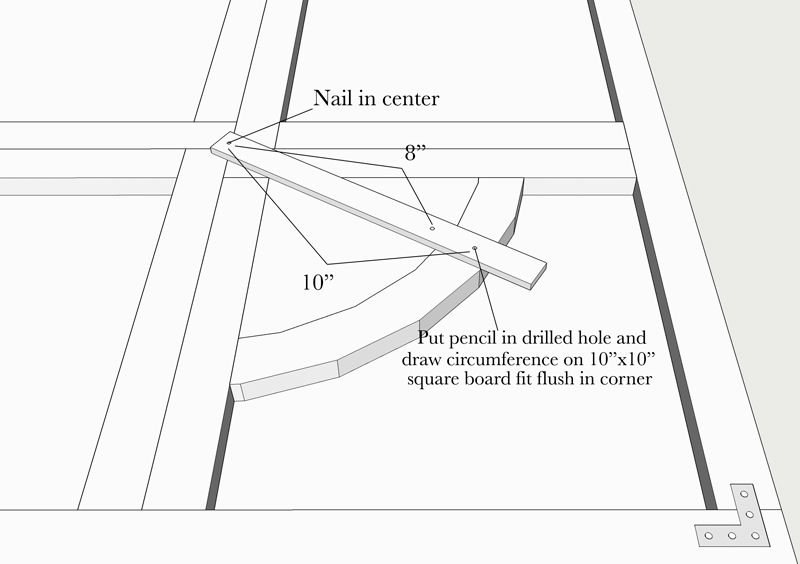
Step 3: Mark Circumferences from Center Point
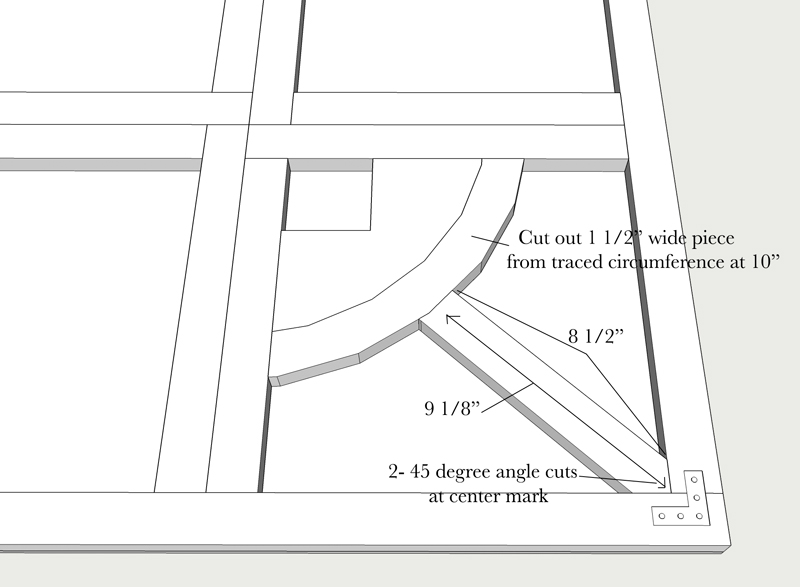
Place the 10″ x 10″ square board flush in the center corner of each quadrant. Using a 1″ wide lattice strip or other thin piece of wood about 12″ long, secure it to the center point using a nail. Drill small holes at the 8″ from center point, and 10″. Place a pencil tip in those drilled holes and draw the 8″ circumference and the 10″ circumference on each 10″x10″ square. Optional: Because I didn’t want the grain going the same direction on the two pieces, I made sure each 10″x10″ square had the grain facing a different direction and in a later step swapped the 1 1/2″ wide border piece (along 10″ circumference line) from each quadrant.
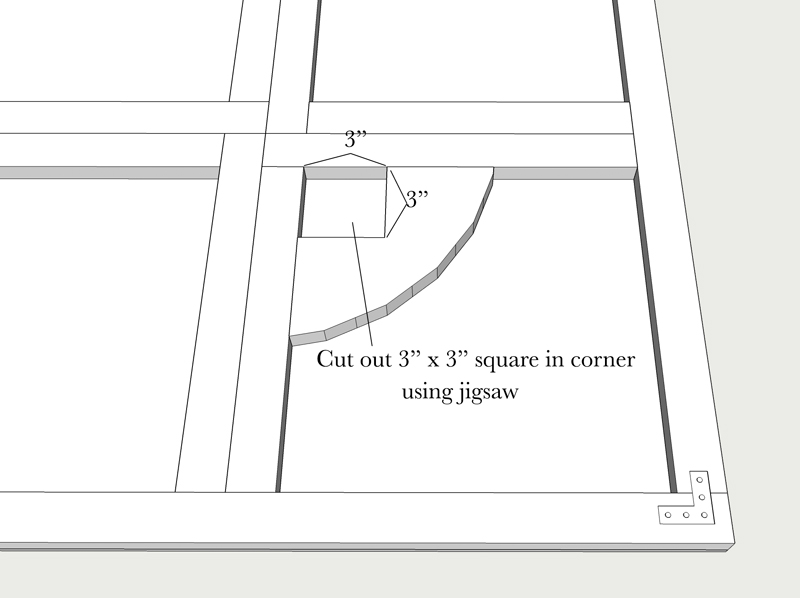
Step 4: Cut “Pie” Pieces
Cut the corner “pie” pieces along the 8″ circumference line using a jigsaw. Repeat for all quadrants.

Step 5: Cut Out Corner Square
Measure and mark a 3″ square in each pie piece and cut it out with a jigsaw. Discard that center cut out piece because with the space lost from the width of the jigsaw blade, you won’t have a flush fit. You will need to cut new 3″x3″ pieces to fit in this space.
Step 6: Fit Center “Ray”
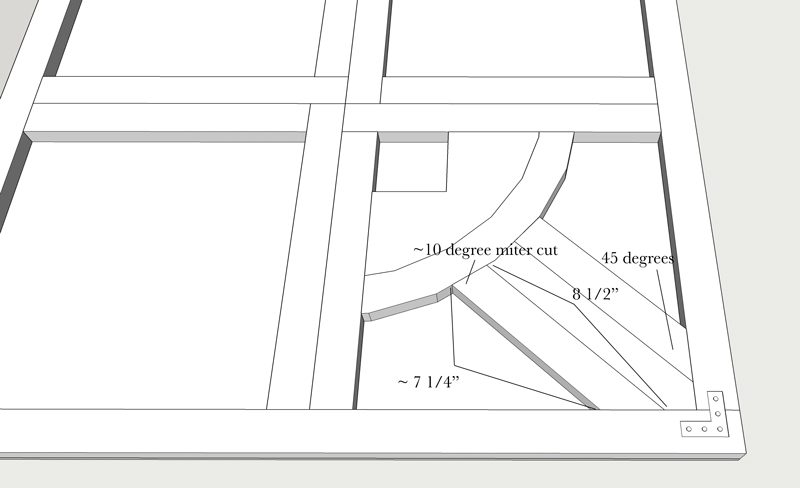
Place the ‘arrow’ end of the 1×2 just over the outside corner of each brace, and place it just over the edge of the semi-circular border piece and mark where it overlaps on both sides. Cut using a miter saw or jigsaw. I didn’t care about it being absolutely flush and perfect, so I used a miter saw and cut a straight line. It was about 9 1/8″ from center and 8 1/2″ on each side. Repeat for all quadrants.
Step 7: Fit Outer “Rays”
Repeat what was done in step 6 for the outer ‘rays’, placing the 45 degree angle next to the center ‘ray’ and marking where it overlaps. I used a miter saw to cut about a 10 degree angle on the other end of the 45 degree angle.
Step 8: Trace & Cut Out Remaining Corner Pieces
Using a piece of paper, trace the remaining corner pieces by placing the paper over the ‘hole’ and pressing along the wood edges. Cut along this impression for your pattern. Then take the pattern and trace onto a 9″x6″ board the shape. The corner angle side is 45 degrees so 3 sides can be cut with a miter saw and the curved edge side will need to be cut with a jigsaw.

Step 9: Remove all Pieces and Stain
Remove all cut pieces from each quadrant, and sand the edges and stain with your desired combination of stains. Re-place the pieces in each quadrant and glue them down. Let dry for 24 hours before hanging or displaying.
Step 10: Admire your handiwork!

This creativity and talent in this group is mind-blowing and you definitely want to see each of their tutorials!
Which one is your favorite? (or top three.. I know it’s hard!)
1) Reality Daydream
2) 100 Things 2 Do
3) House Becoming Home
4) Anika’s DIY Life
5) My Repurposed Life
6) 3×3 Custom
7) One Project Closer
8) Merrypad
9) Chatfield Court
10) Create & Babble
11) Hazel & Gold
12) Jen Woodhouse
13) Sawdust 2 Stitches
14) Wood Work Life
15) Remodelaholic
17) Jaime Costigio
18) Pneumatic Addict
19) Bower Power
21) My Love 2 Create
22) Addicted 2 DIY
23) Her ToolBelt
24) Shades of Blue
25) Ugly Duckling House
26) The DIY Village
27) DIY Huntress
28) Mr Fix It DIY
I love that the natural wood tons of your art really let the shapes and angles be the star! And it looks amazing above your piano. Your home is GORGEOUS. <3
So beautiful, Rachel. Love the design, the execution, the styling, everything. You are perfection, my friend. Thanks so much for joining in on the fun!
I absolutely love it! It looks so beautiful with the different subtle tones of the wood. Well done!
Rachel,
My head is spinning as I bow to your expertise! Your square art project is way out of my reach. I am so math challenged, it confuses me just reading your directions…. kudos to you for such a beautiful piece. It looks perfect hanging in your home above your piano.
pinned!!
gail
I love it! All those angles and different colors in the wood… they are just perfection!
A beautiful statement piece for sure! I love it!
Thanks for the post