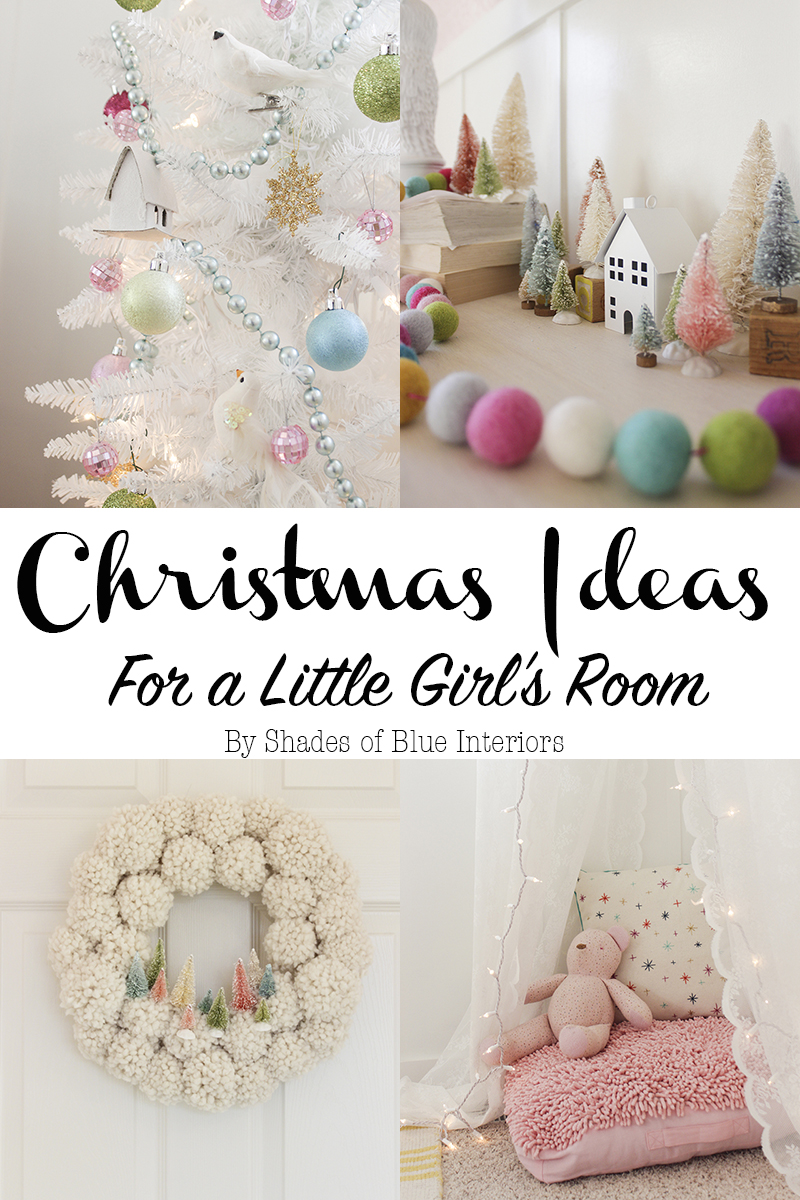
Last week my daughter’s room was getting out of control messy with a closet that hadn’t been organized since… well, ever! So we took a morning and purged, sorted, organized, and cleaned. Once that was done we really got in the mood to add some Christmas decor and I’m excited to share with you some Christmas ideas for a little girl’s room!
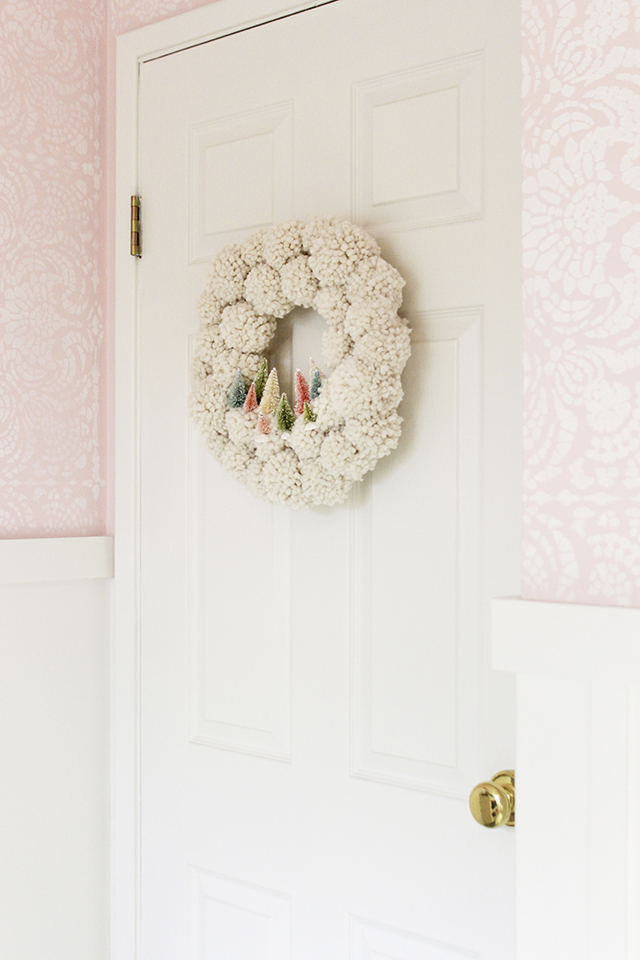
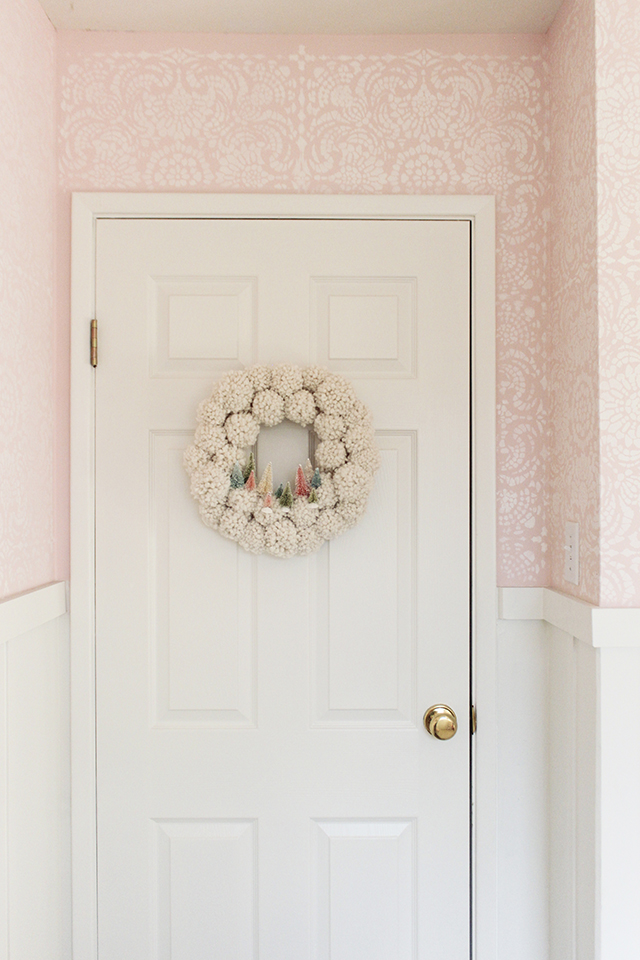
We started with things we already had, and since I had lots of yarn still from making pompom garlands in my master bedroom and entry shelf, we got to making a pompom wreath. I used a thick whiteish-cream yarn and added little colorful bottle brush trees for a…
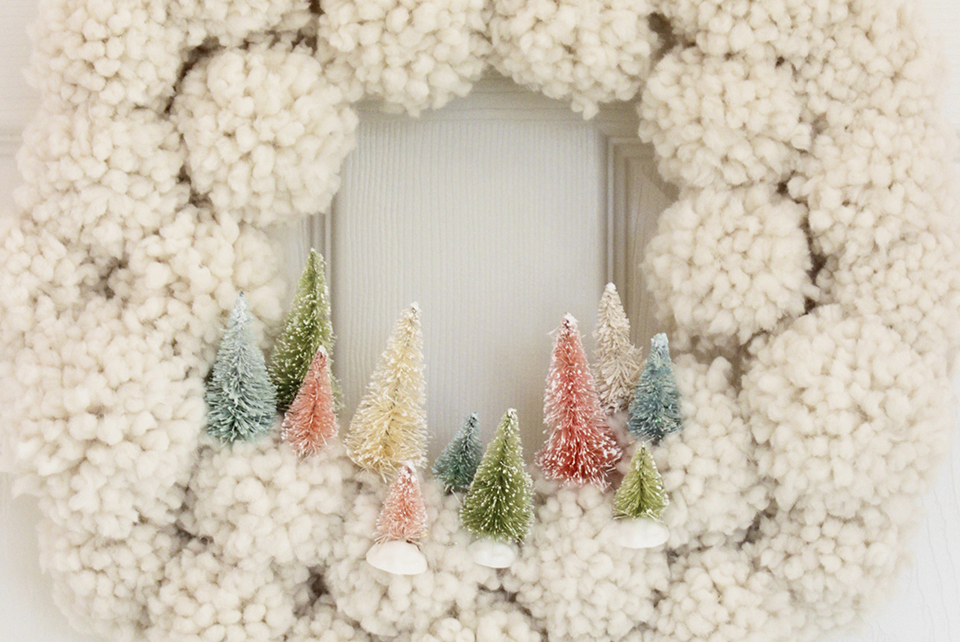
Bottle Brush Tree PomPom Wreath!

She was even able to help me with the paper donut method of making pompoms (she is 4). I wasn’t planning on doing a tutorial for this because it has been done a million times already, but several of you asked, and since I used specific sizes, placement, and a trick for making them a tad faster but that kids can still do, I relented and did a tutorial for this wreath, which is at the bottom of the post.
The bottle brush trees were found at Joann Fabrics (except for the blue ones, which I just dyed white ones with blue food coloring), and I got a little carried away with the quantity I bought, so I created a little village vignette on her bookcase.
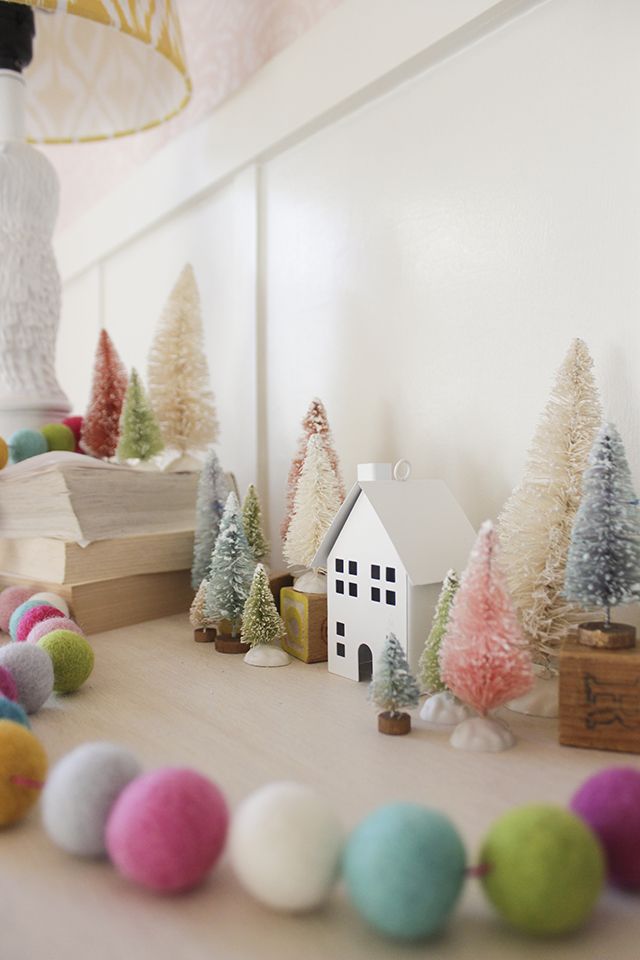
That metal little white house is from Michael’s.
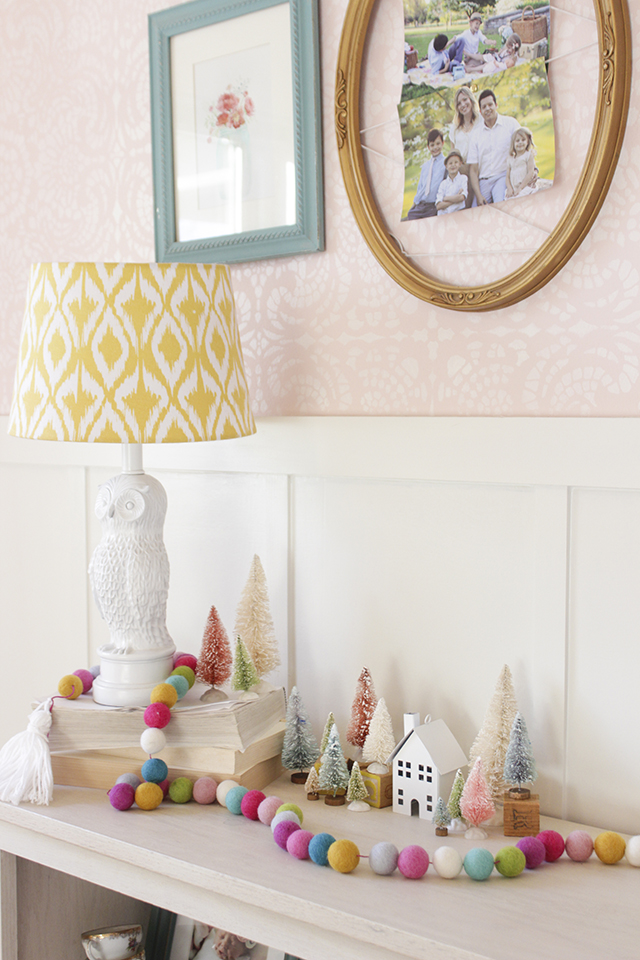
I kept my tree groupings in odd numbers and staggered heights using her blocks.
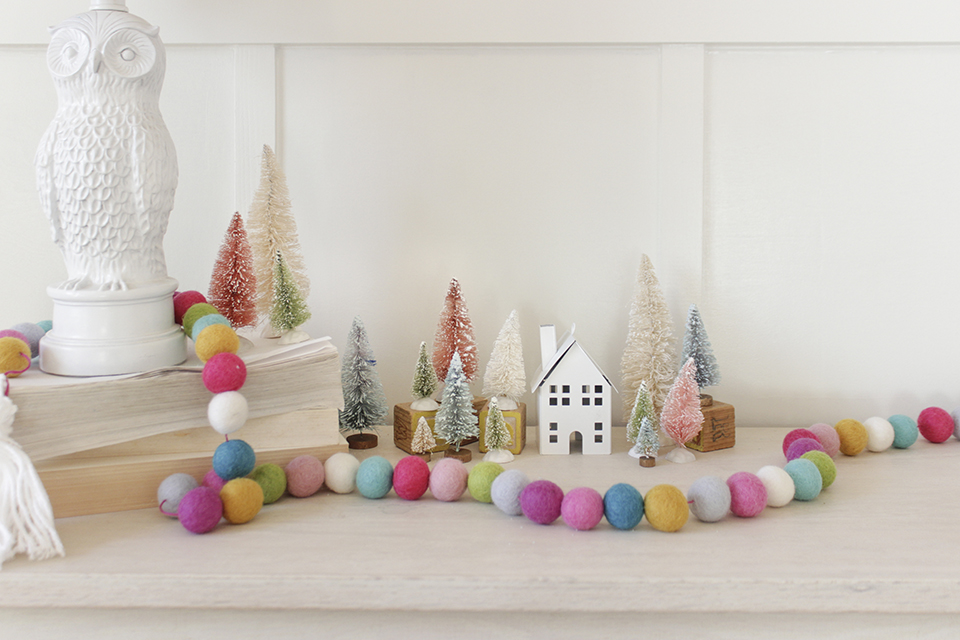
The felt pompom garland is from Hello Maypole and is the Seamstress colorway.
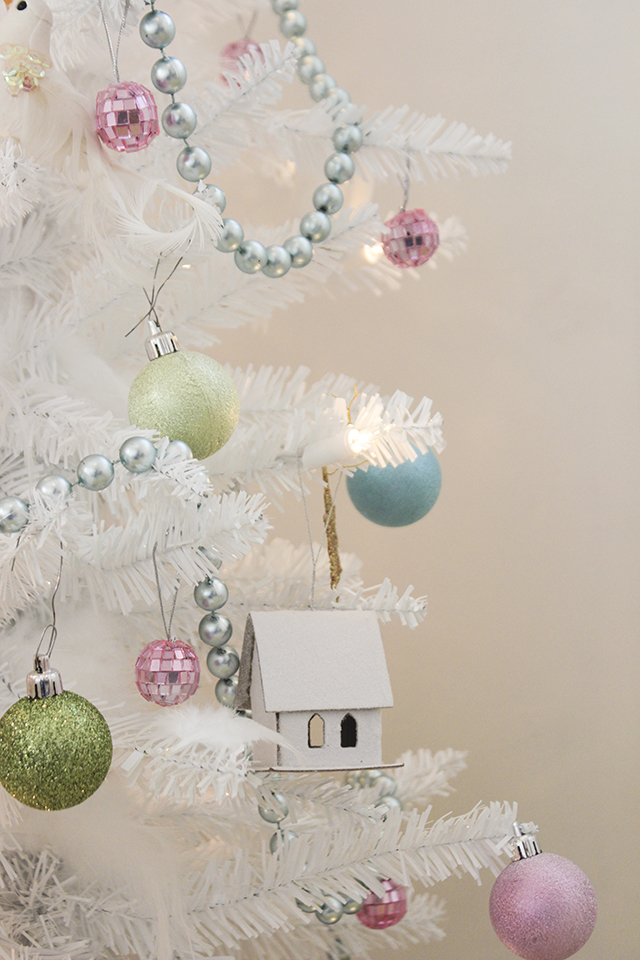
Once her bookcase was decorated, I couldn’t resist adding a little tree (found at Hobby Lobby on sale) by her bed.
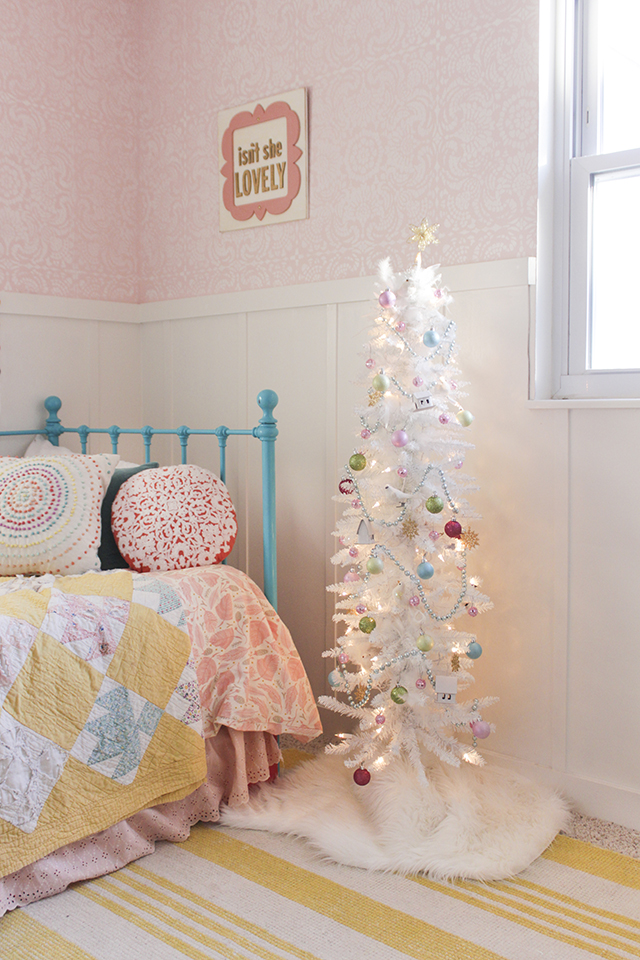
For the tree we used some colorful plastic ball ornaments and pink disco balls from Hobby Lobby, gold snowflakes from the dollar store, a blue beaded garland from Target, and some thrifted birds.
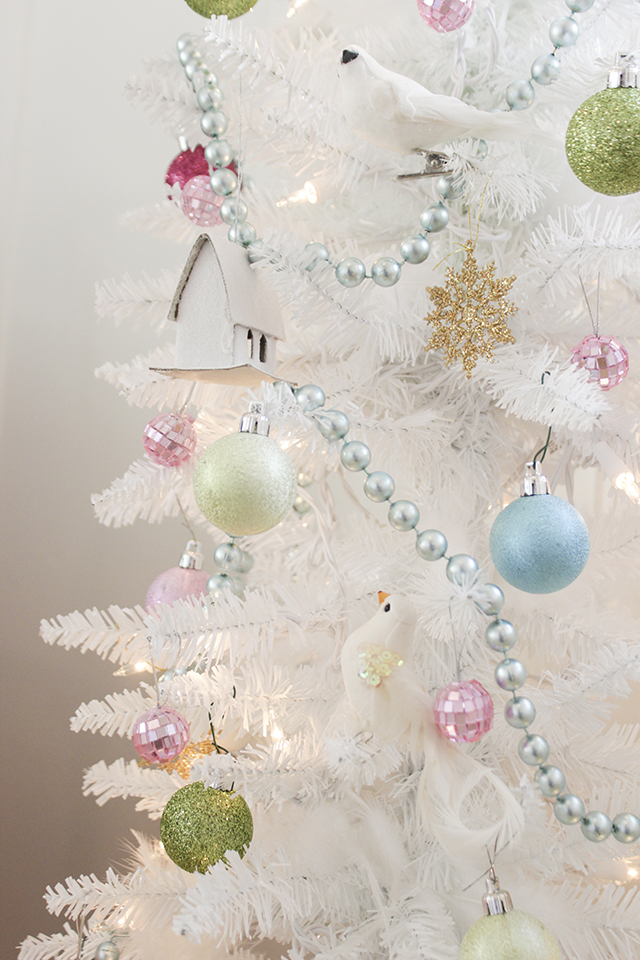
The little cardboard house ornaments are from Michael’s.
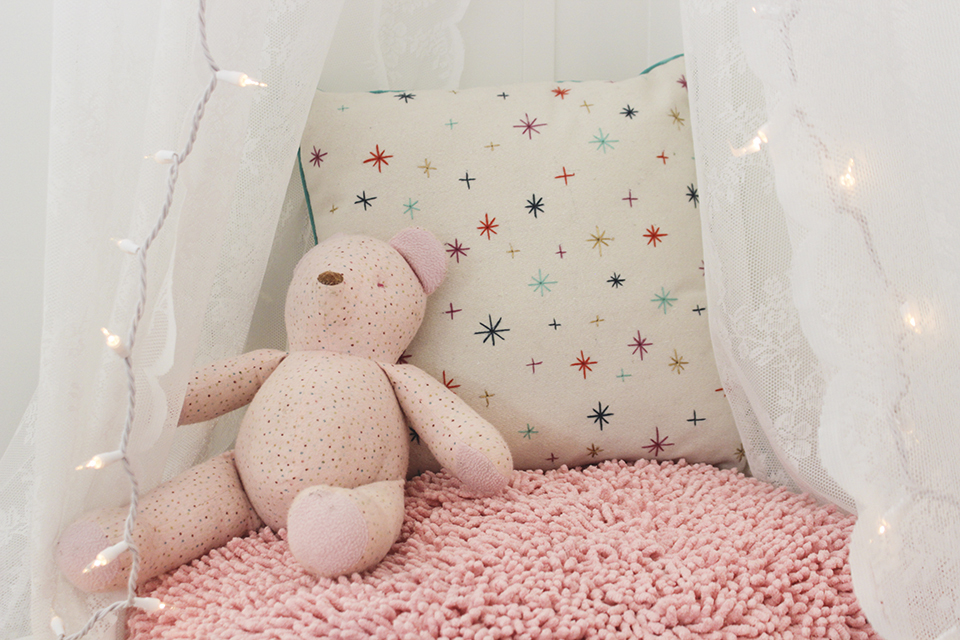
Lastly, we strung some lights on her canopy and added a little Christmas pillow from Target (which can easily work year-round).
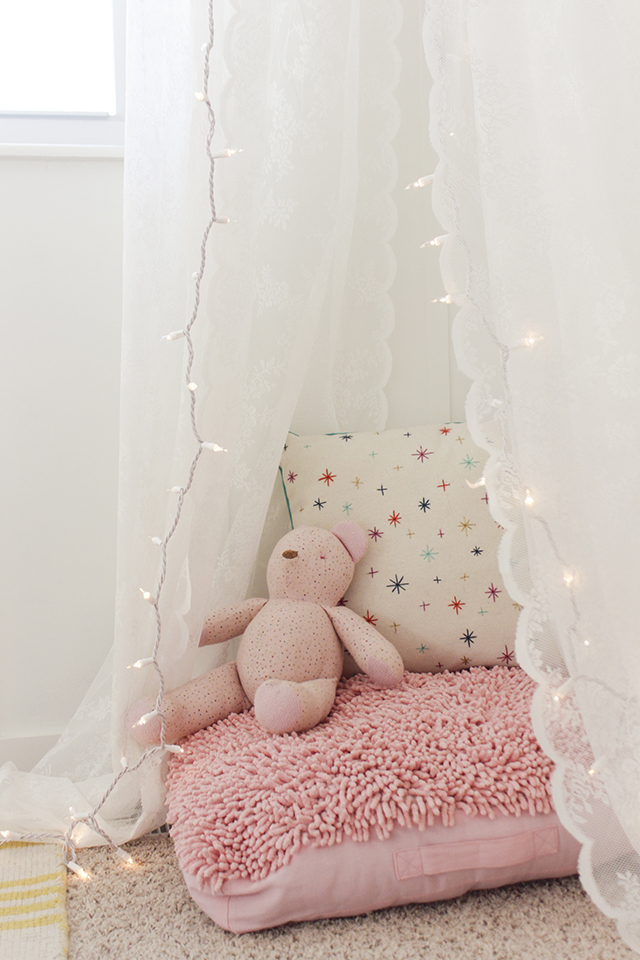
The pink bear was made by a dear friend, Paula, who hand-makes them and gave this to Kaila when she was born (hence it is loved). She specializes in making these keepsake or memory bears from flannel fabric, or a baby blanket that has sentimental value, or a garment from a loved one who has passed.
Back to the wreath…
To make the Bottle Brush Tree PomPom Wreath you will need:
10 pieces of cardstock
2-3 skiens of thick white yarn
Scissors
Foam wreath form
11 bottle brush trees of varied sizes and colors
Hot glue & hot glue gun
(I spent about $15 on the yarn and an additional $10 on bottle brush trees and the wreath form)
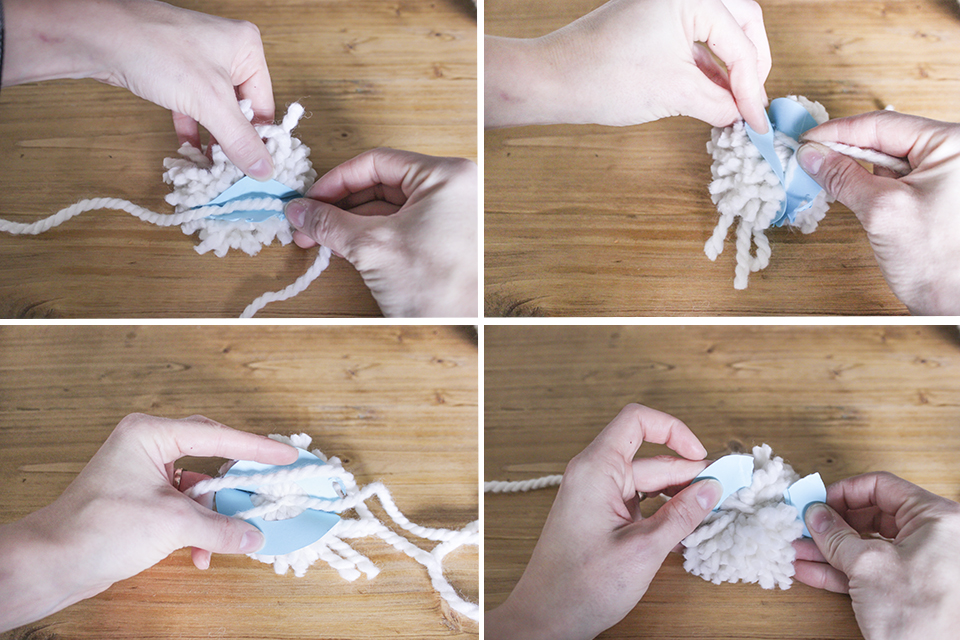
These pictures almost require no written instruction. In fact, I saw several similar tutorials online but I decided to vary mine by using quadruple yarn when wrapping my paper donut, which makes it go faster, but it still manageable for kids (which is why I chose the paper donut method at all).
1- Start out with 4 armspans of yarn, folded in half and half again. Cut a 3 inch diameter paper donut out of 2 sheets of cardstock. (Thin paper tears too easily during the process).
2. Hold the 4 end pieces with your thumb and with the other hand wrap the yarn around the doughnut.
3. Keep going around the donut until there is 1 even layer.
4. Repeat until there is 2 even layers.
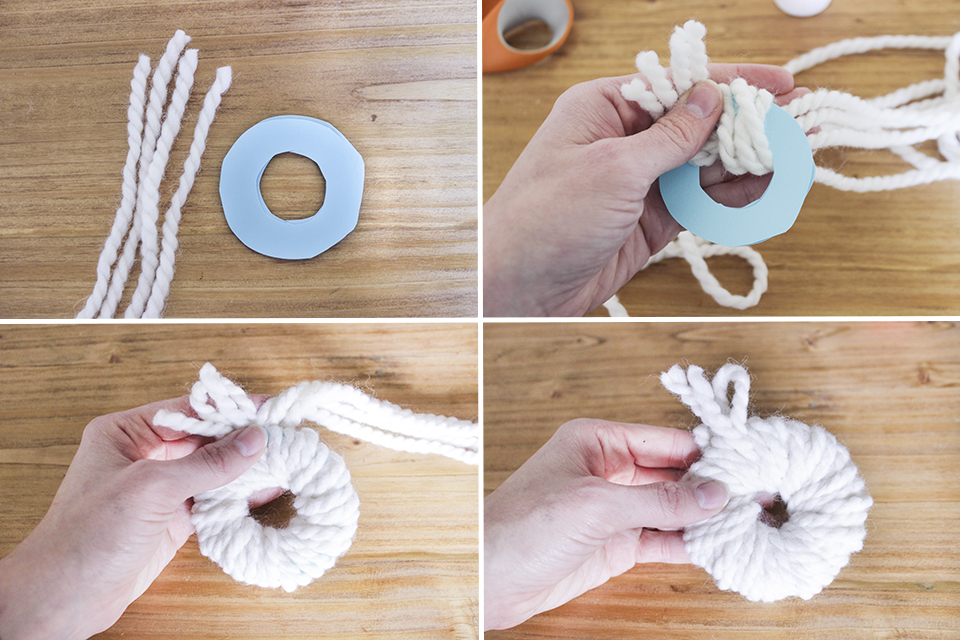
5. Peek through the yarn and find that cardstock.
6. Slide your scissors in between the two sheets of cardstock and start cutting the yarn.
7. Keep cutting around the donut.
8. Once yarn is cut all the way around, place carefully on a flat surface.
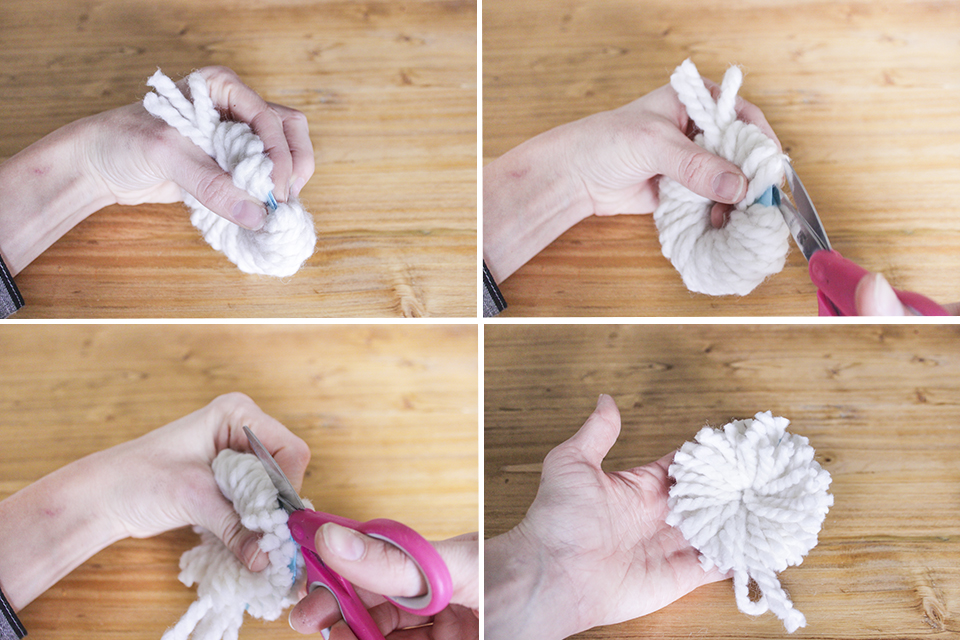
9. Open the two sheets of cardstock, and slide a 12″ piece of yarn in there.
10. Wrap the yarn all the way around between the two donut pieces of cardstock.
11. Tie a TIGHT double knot.
12. Tear (don’t pull) the two sheets of cardstock and remove.
13. Give your pompom a haircut. Trim extra long pieces until it is about the same size all the way around (but leave the end strings that tied the pompom together.
14. Take the pompom and start tying them on your foam wreath form.
15. Start with 5, evenly spaced, large pompoms (4-5 inch diameter cardstock donuts).
16. Place 2 small pompoms, between each large, closest to the center.
17. Place 3 small pompoms, between each large, along the outer edge.
Total you will make 30 pompoms. It takes awhile (I timed myself, and it took 5 minutes per pompom), so turn on Netflix, find Grand Hotel, and start watching it while you make them. You won’t regret it. Your welcome. 😉
**If you didn’t want to make the wreath, you could easily buy one (I saw several at HomeGoods and Joann Fabrics for around $40-50), and just glue the trees in place, to get the same look!
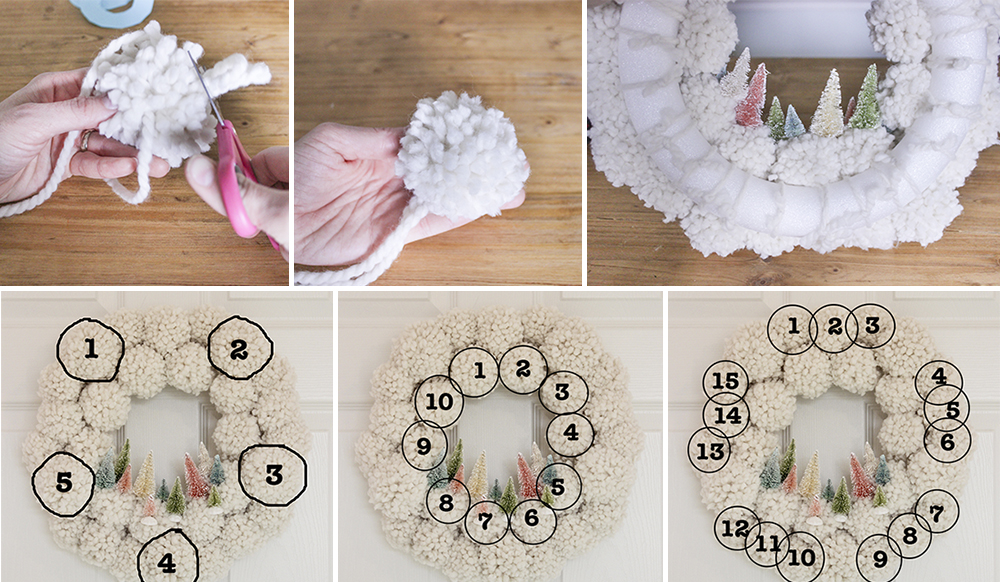
18. The final step is to remove the bases on the little bottle brush trees and hot glue them along the bottom of your wreath, so it looks like a little colorful forest. I left the bases on a few of them that were towards the front, when arranging them at staggered heights.
If you have questions about sources of art/paint/stencils/pillows/decor in this room, go to my daughter’s room makeover reveal HERE.
Did you like any of my Christmas ideas for a little girl’s room? Let me know what was your favorite and share with your friends!
This is the sweetest post ever!! What a darling mama, you are. Your daughter will always remember this.
Beautiful and cozy! love it all
Everything is so pretty. You did a wonderful job. What a lucky little girl to have a creative mom like you.