Last spring I finally got around to building my own DIY range hood to give an updated look to our kitchen, which has been a work-in-progress since we moved in 8 years ago. This post will walk you through the steps I did so you too can create your own custom DIY range hood for your kitchen!
If you are new here, we had a microwave over our oven range for many years. The microwave finally bit the dust last year and it seemed like the right opportunity to move the microwave to our pantry.
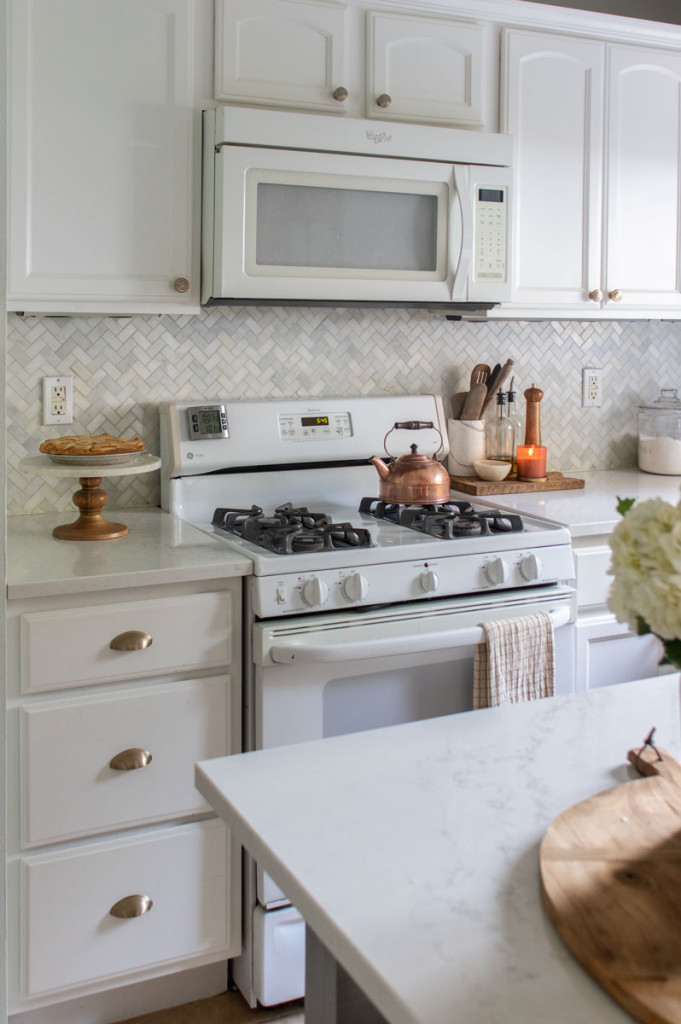
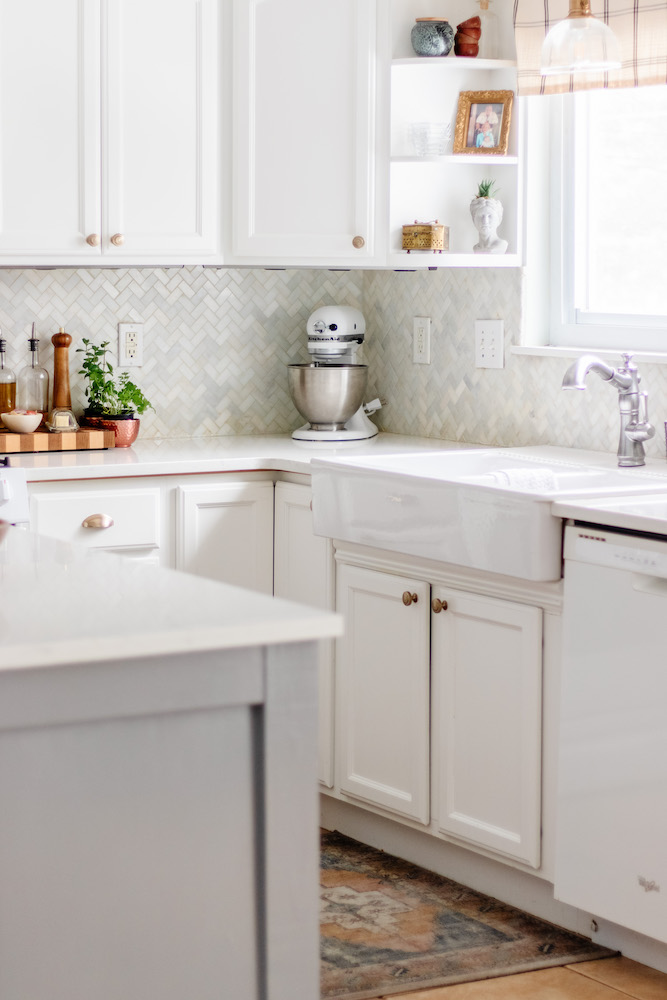
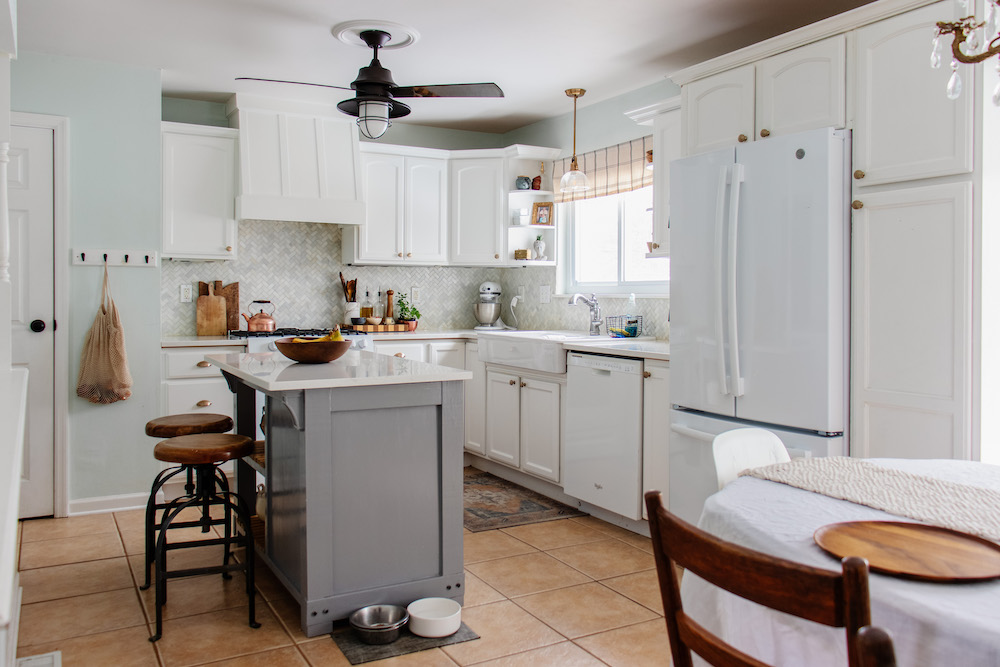
BEFORE:
So we got an electrician to run an outlet in the pantry, purchased a more space-conscious microwave, and I set out working on the range hood. It took me a few weeks to finish since I was also working on our bathroom makeover simultaneously. This is definitely NOT a difficult DIY project– I highly recommend it, especially since it could potentially save several hundred compared to hiring someone else to build a custom range hood out.
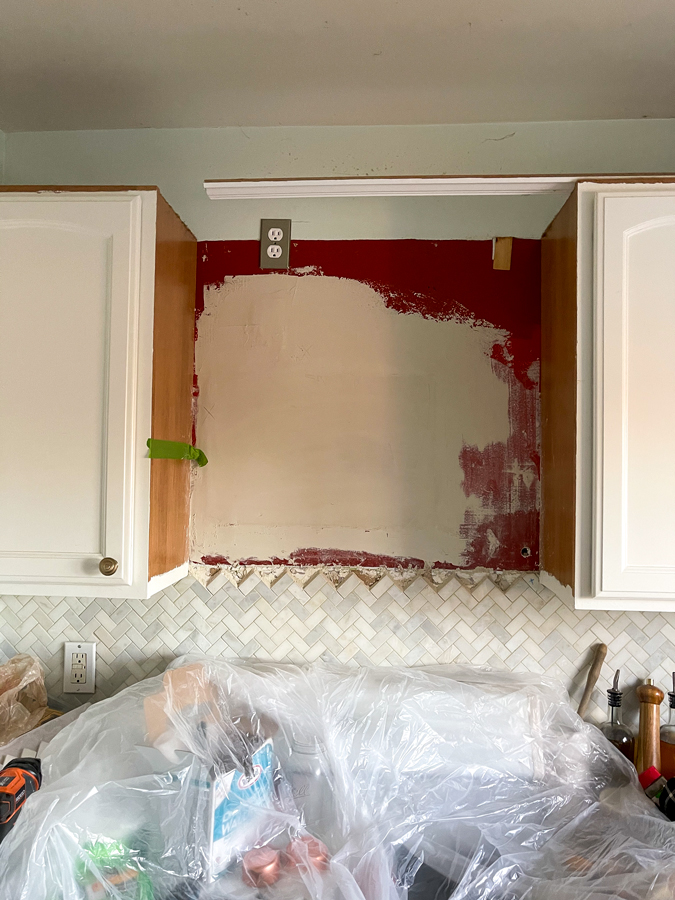
Step 1: Build & Install 2×4 Frame for the Top of the Range Hood
I first located the studs on the wall so I would know where to drive in the long screws. Then I built a rectangular frame out of 2x4s in the garage first that was 2- 26 1/2″ long 2x4s between 2- 12″ end pieces (I pre-drilled holes for the end pieces so I could use long screws and not worry about wood splitting).
After my frame for the top was assembled, I centered it between the space between the cabinets and drove 3 1/2″ long screws into the studs.
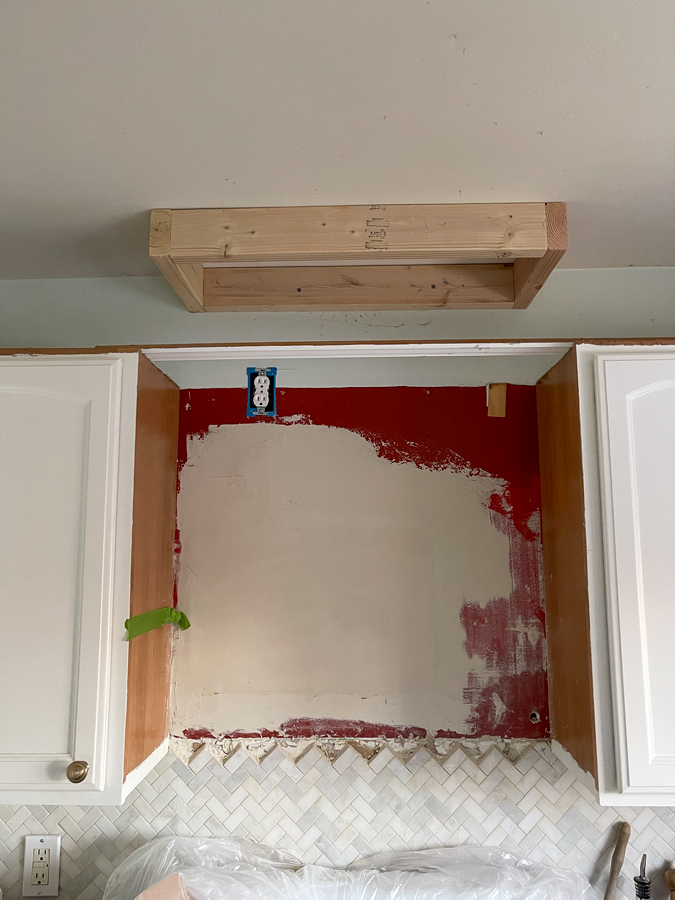
Step 2: Build Frame for the Base of the Range Hood
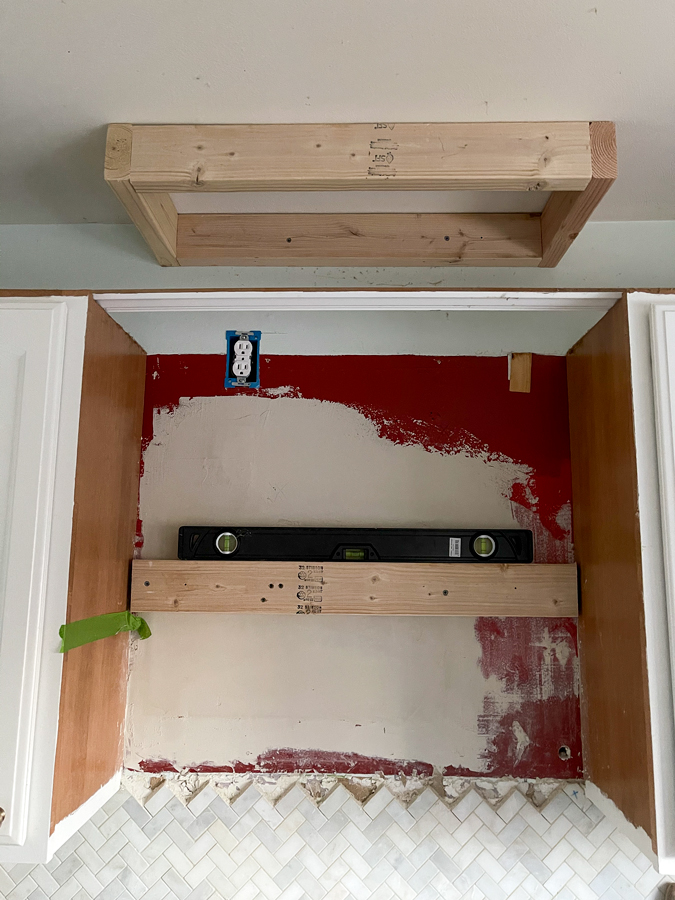
I chose to build the frame as I was installing each piece for the base of the range hood, because then I wouldn’t have to worry about using insanely long screws, and I could control positioning a little better. I used a 2×4 that was 29 1/2″ wide and attached it securely to the studs at the height I wanted my range hood to be, leaving ~1/4″ (slightly more) space on either side. This is going to hold the weight of the entire range hood so it’s important they are securely attached.
The height of your range hood is personal preference but I chose about 30″ up from the counter height.
I recommend not relying on measurements I’m providing, but instead measuring your width between the cabinets and subtracting about 3/4″ so you can slide in 1/4″ plywood on either side easily– that way you get a fit that is exactly custom to your space (even though the spacing is supposed to be pretty standard). I share measurements merely so you know about how much material you would need.
How far the range hood protrudes out is also personal preference but I wanted it to stick out about 19″ with all the finalized trim. So that meant my entire 2×4 frame needed to be 17 1/2″ in depth.
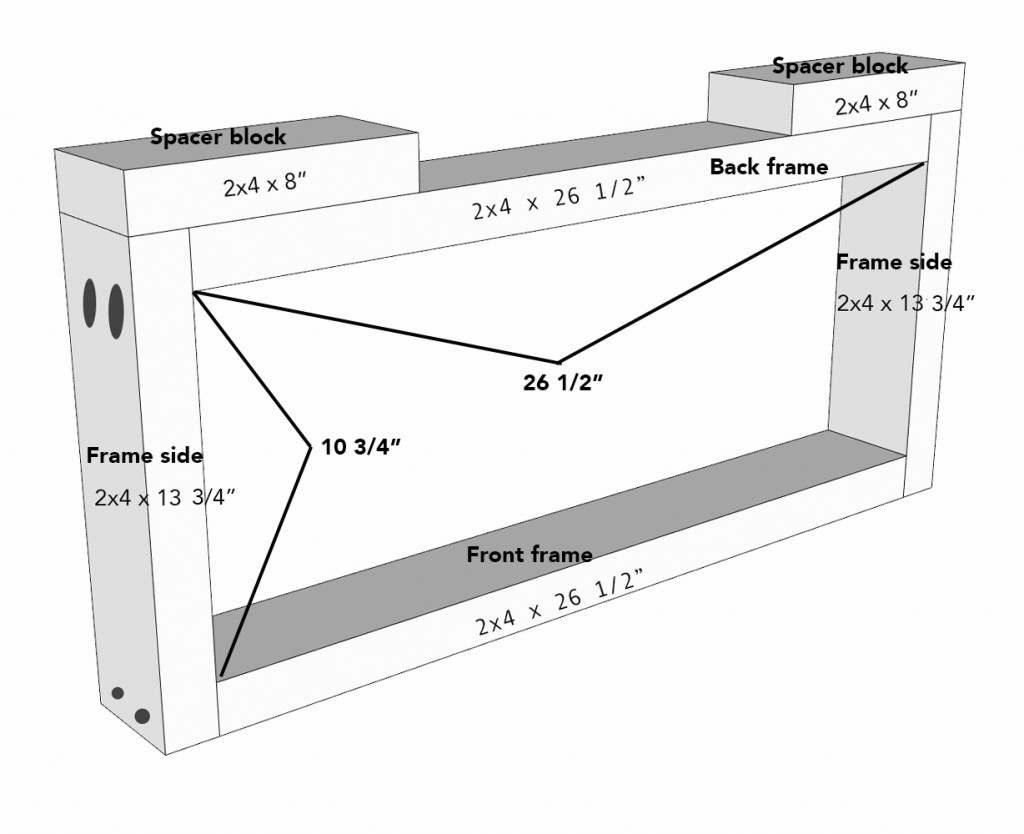
I also needed to make sure my measurements of the frame would fit the actual range hood– so it could be inserted and attached. The paperwork on our range hood called for an opening of 26 1/2″ x 10 3/4″.
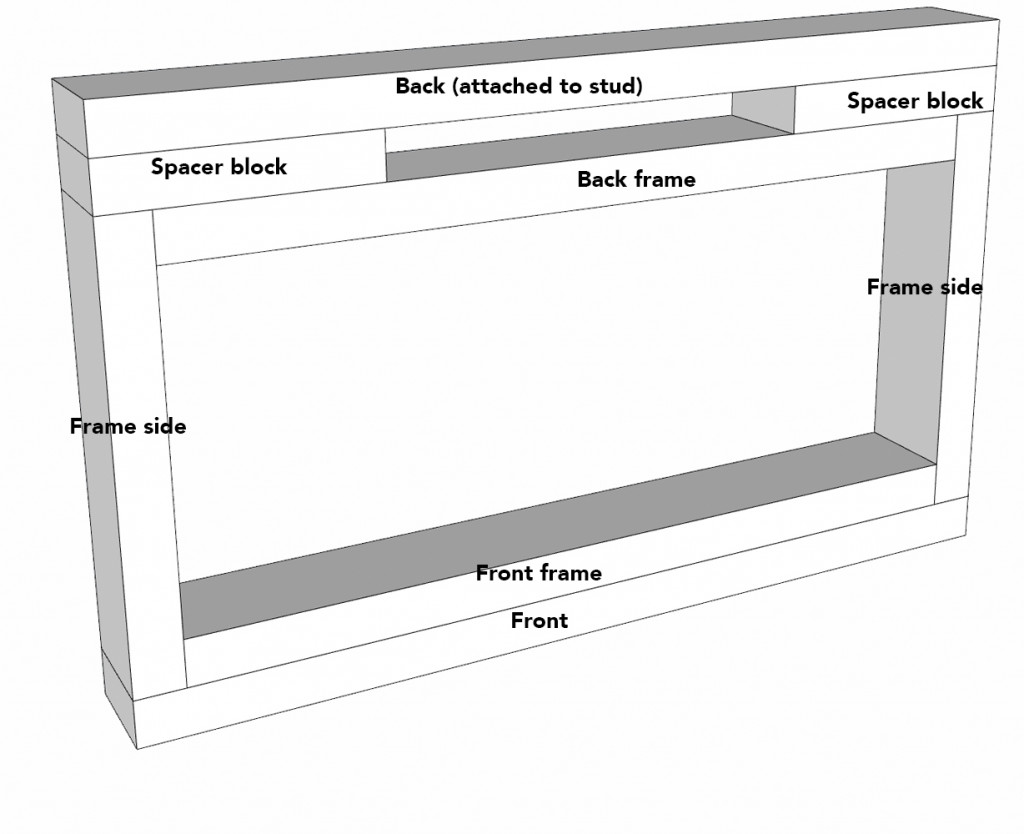
I first drilled 1 1/2″ pocket holes on one end of 2- 13 3/4″ long 2x4s (the frame side). Then I attached those two 2x4s to the ends of a 26 1/2″ long 2×4 (the front of the frame) using 2 1/2″ long screws. I attached the other ends of the side 2x4s (the ends with the pocket hole screws) into 2- 8″ long 2×4 spacer blocks. Another 26 1/2″ long 2×4 was attached to the block spacers (in between the sides) AFTER I attached the spacer blocks to the board that’s attached to the stud.
Then I attached a front 2×4 that was 29 1/2″ long to the front frame piece, so that my total depth equalled 17 1/2″. It also helped the placement of the range hood feel more balanced (not too close to the front vs the back).
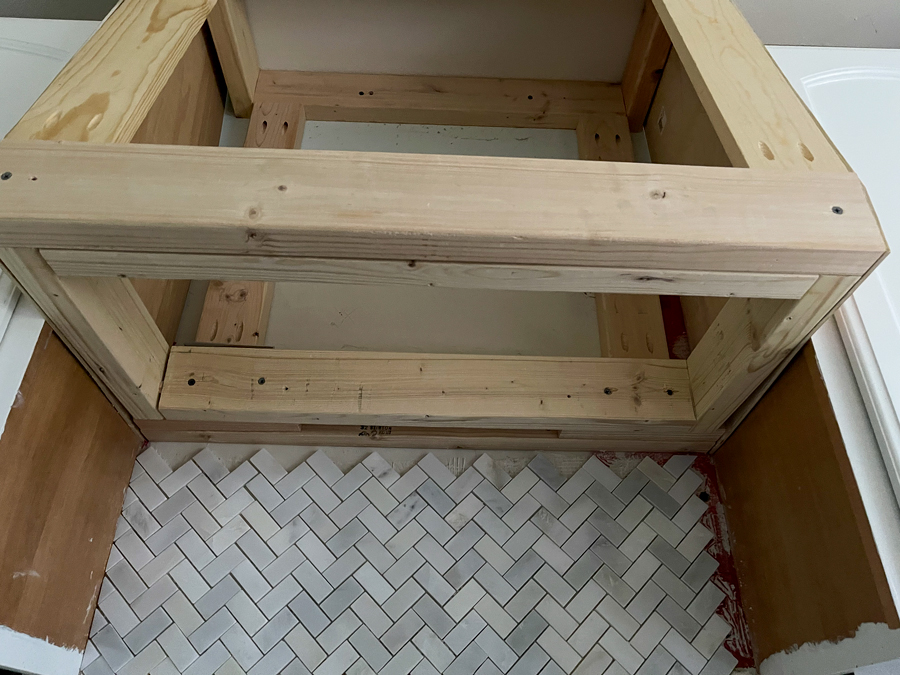
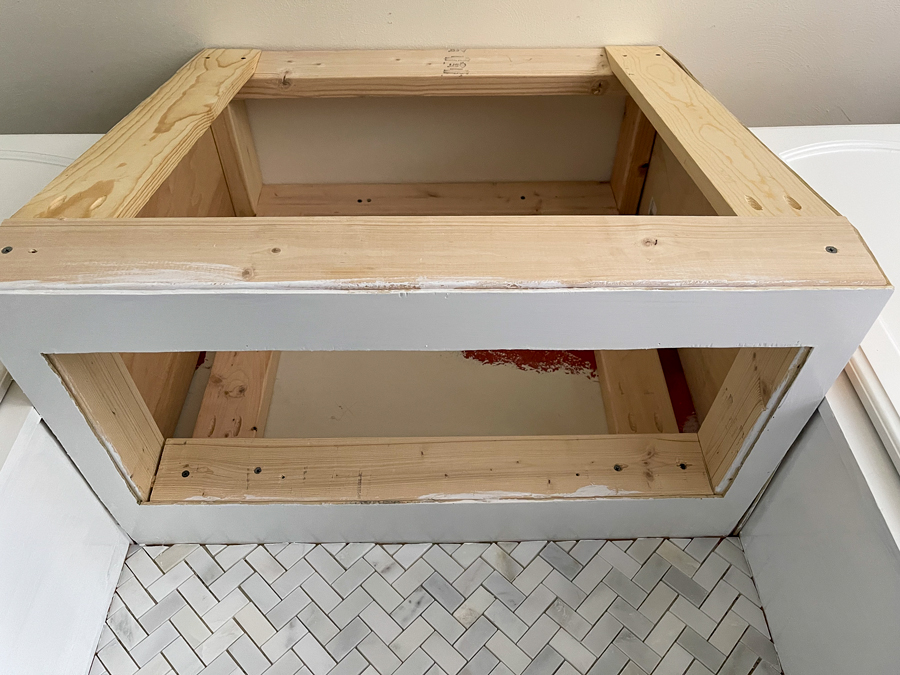
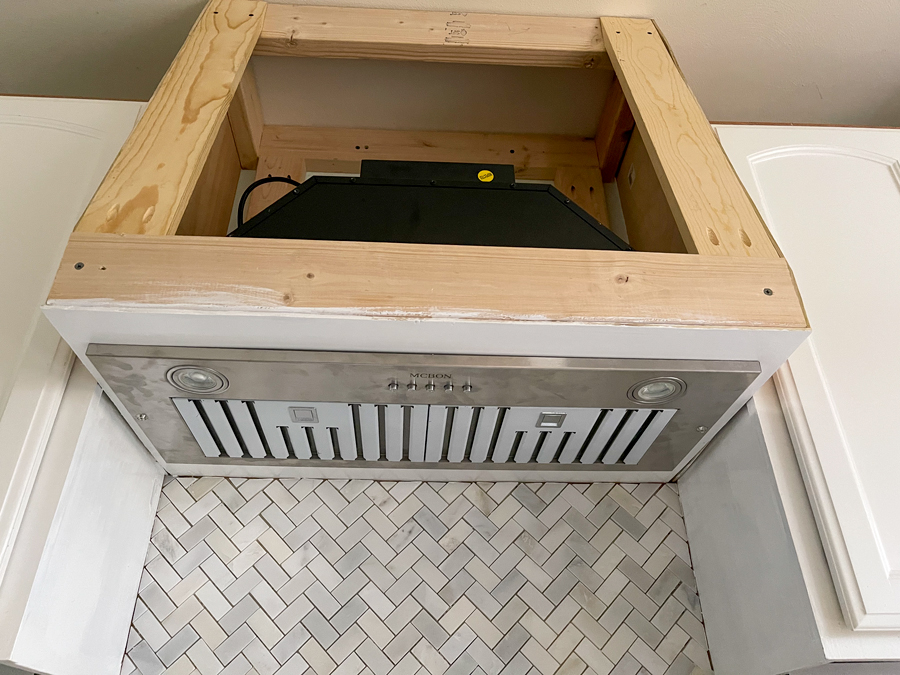
This is what it looked like from the underside:
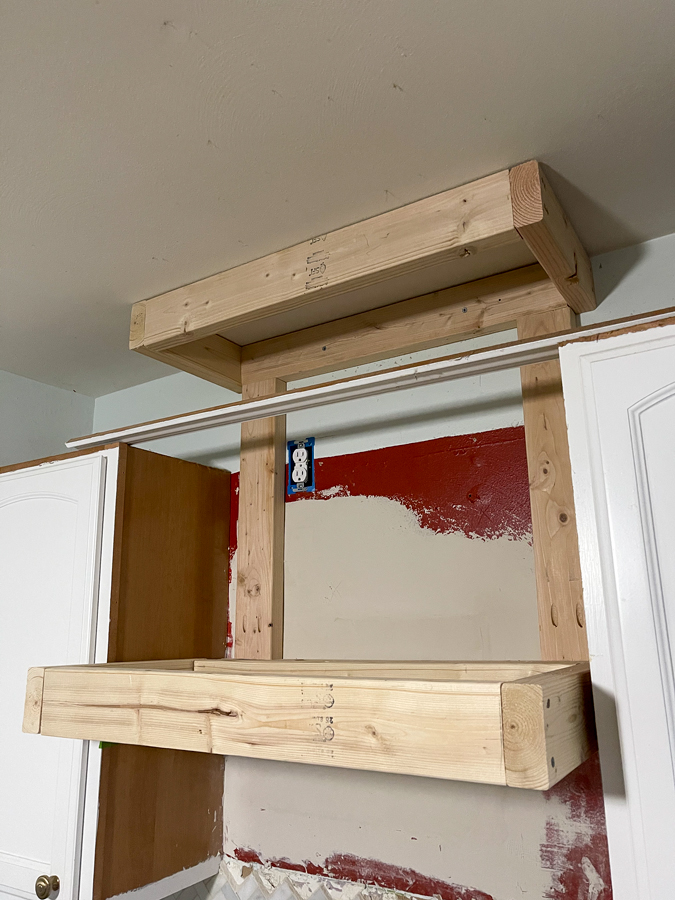
Step 3: Connect Top and Bottom Frames
To connect the top and bottom frames, I drilled pocket holes on either end of 2- 2x4s that were the exact distance between the back frame pieces drilled into the studs. This is a measurement that will vary depending on how high your ceilings are. Mine ended up being about 24″ long each, and I attached them with pocket hole screws.
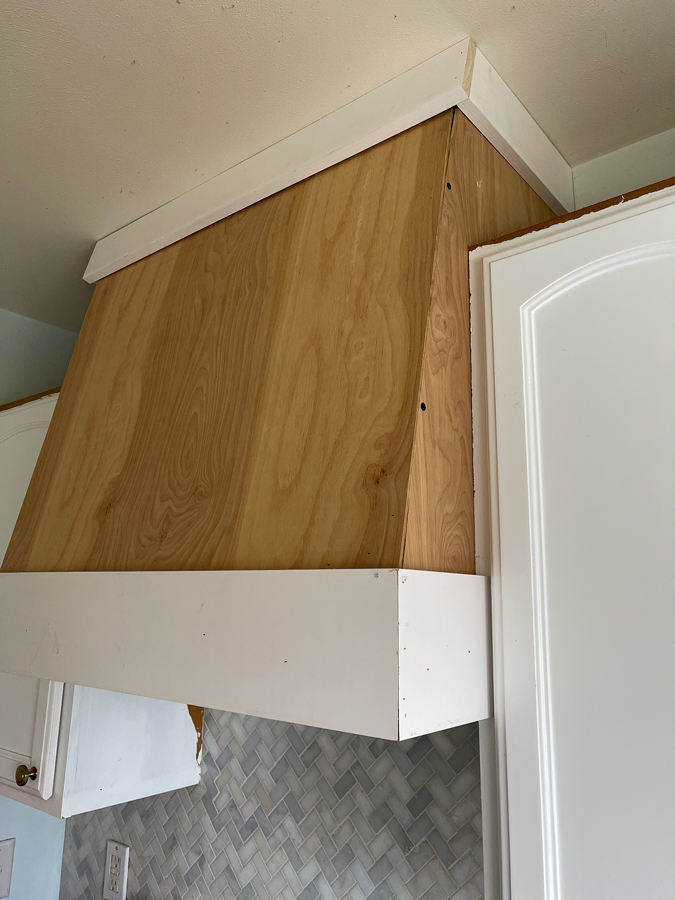
After the front 2×4 was attached, I cut my front connecting 1x4s (angle cut with my miter saw) on either end so they would fit flush, then I attached them with pocket hole screws on the bottom and regular 2″ screws on the top.
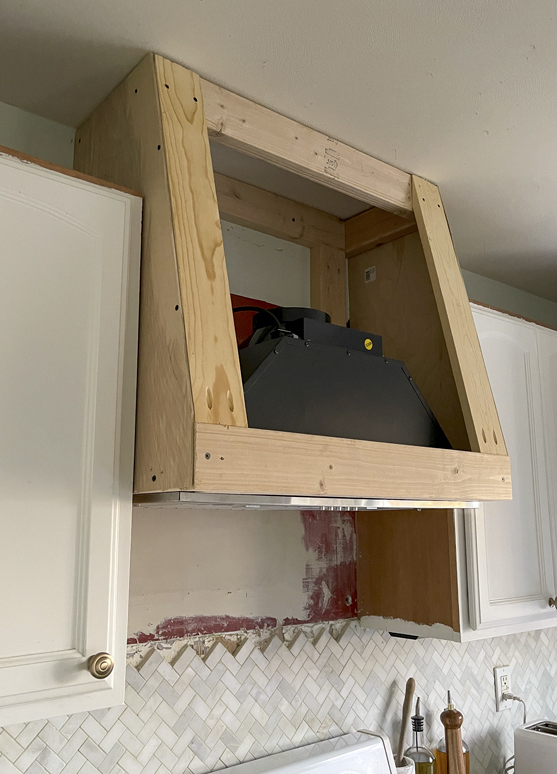
At this point, I was ready to attach the 1/4″ plywood pieces on each side. Getting the right shape wasn’t complicated, I just slid in a larger rectangular piece and traced with a pencil the outline of where I’d need to cut, then I cut it out with a jigsaw, and attached them with 1″ drywall screws.
I knew the screws would be covered with trim, and I wanted it to be more secure than just a brad nailer. Part of the reason was I have screws on the inside of my cabinets that drive into the range hood and screws would prevent the plywood from popping out of place when the interior cabinet screws were attached.
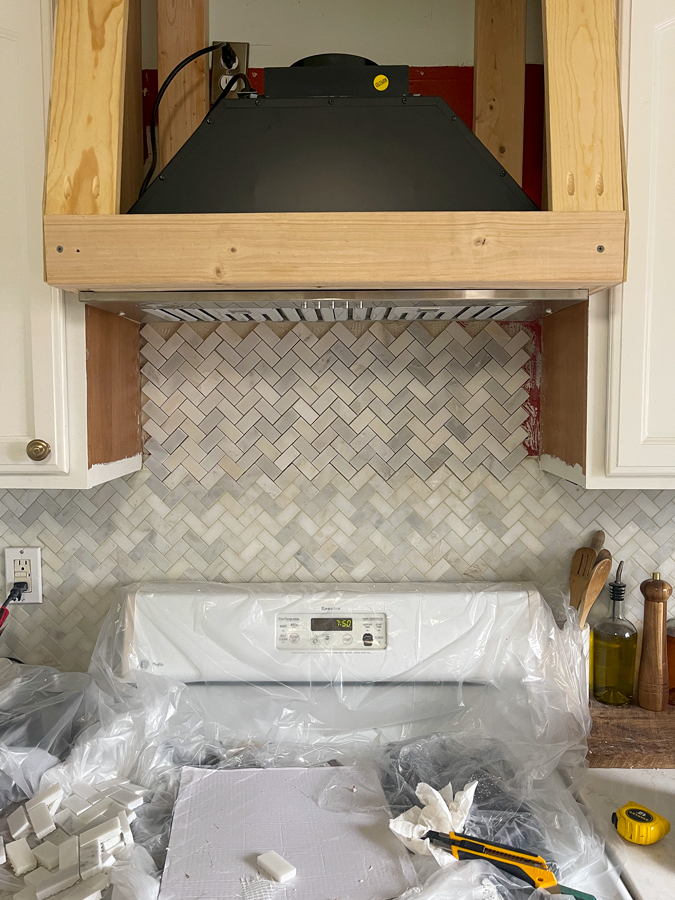
Step 4: Dry Fit Range Hood Vent
Dry fitting the range hood vent is important at this stage, because if some adjustments need to be made, you can do so without redoing the more tedious finish work.
This is also a great time to add additional tile to go up to the frame, and grout.
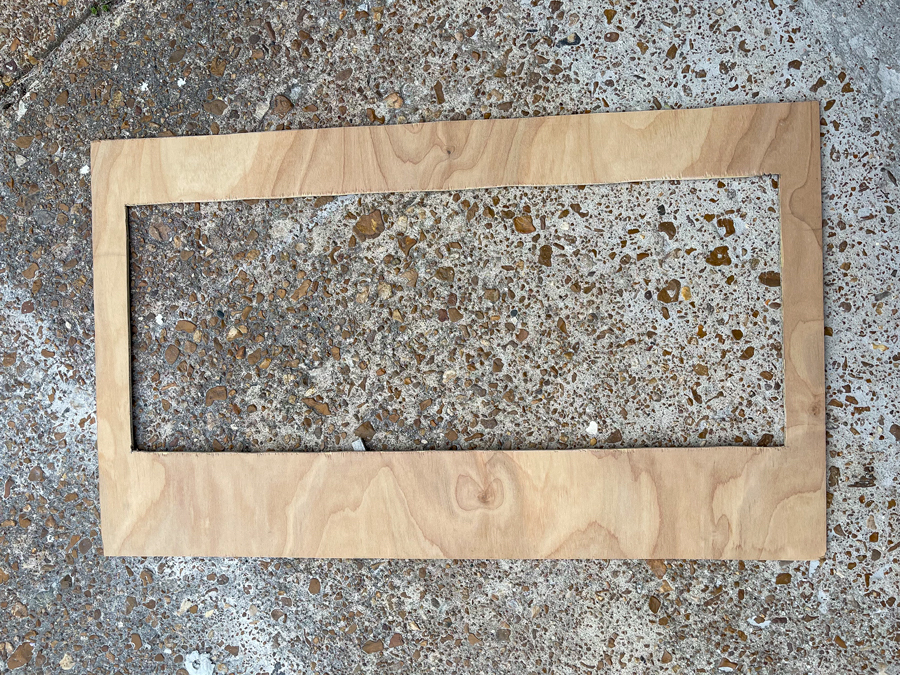
Step 5: Cover the Underside with Plywood
To cover the underside of the bottom frame (so there wouldn’t be any visible 2x4s) I carefully measured the exact rectangle I would need (30″ x 17 1/2″), and the insert space (10 3/4″ x 26 1/2″), and cut it out of a 1/4″ piece of plywood using a jigsaw. I attached it using glue and brad nails, then filled nail holes and applied 3 coats of white paint (1 primer coat, and 2 semi-gloss interior paint coats).

Once the finish was dry, I re-installed the range hood vent permanently.
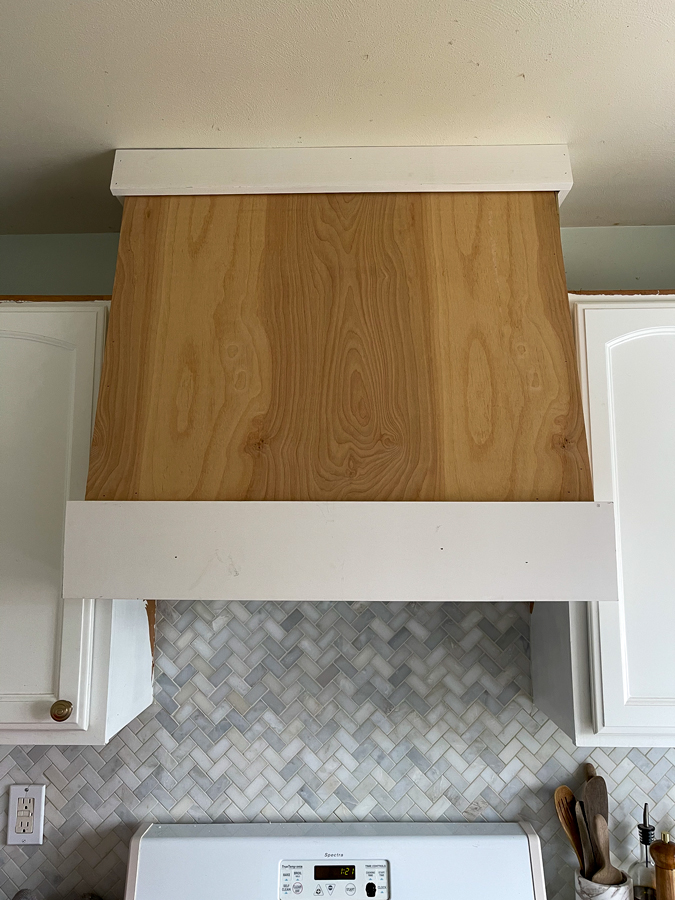
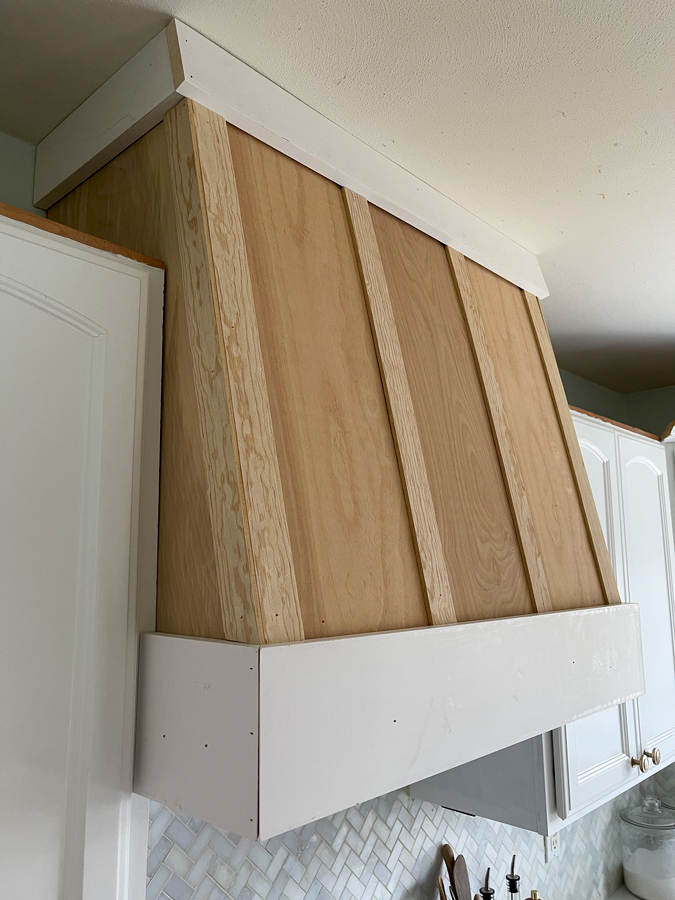
Step 6: Install Plywood Range Hood Face & Top, Bottom Trim
Using 1/4″ plywood, cut out the rectangle needed to cover the range hood face from the top edge of the front 2×4 to the ceiling (covering the top 2×4 frame piece). Attach it using a brad nailer into the side connecting pieces and the top 2×4.

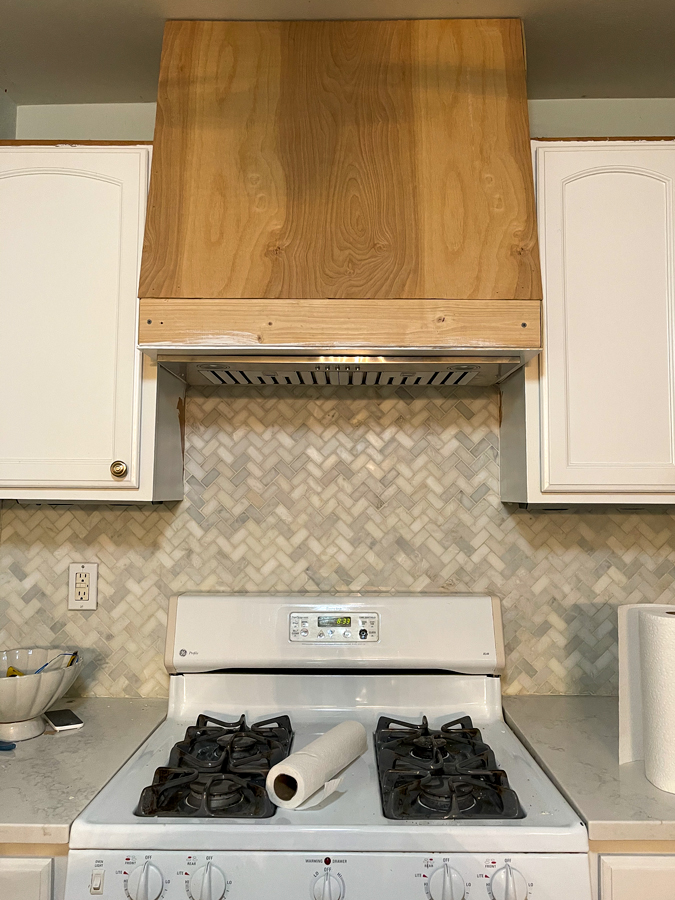
Then, using a primed 1×4, trim out the top against the ceiling, and use primed 1×6 for the bottom part of the range hood. I used a miter joint for the bottom (because it would be close to eye level and I wanted the joint to be as seamless as possible) and a butt joint at the top.

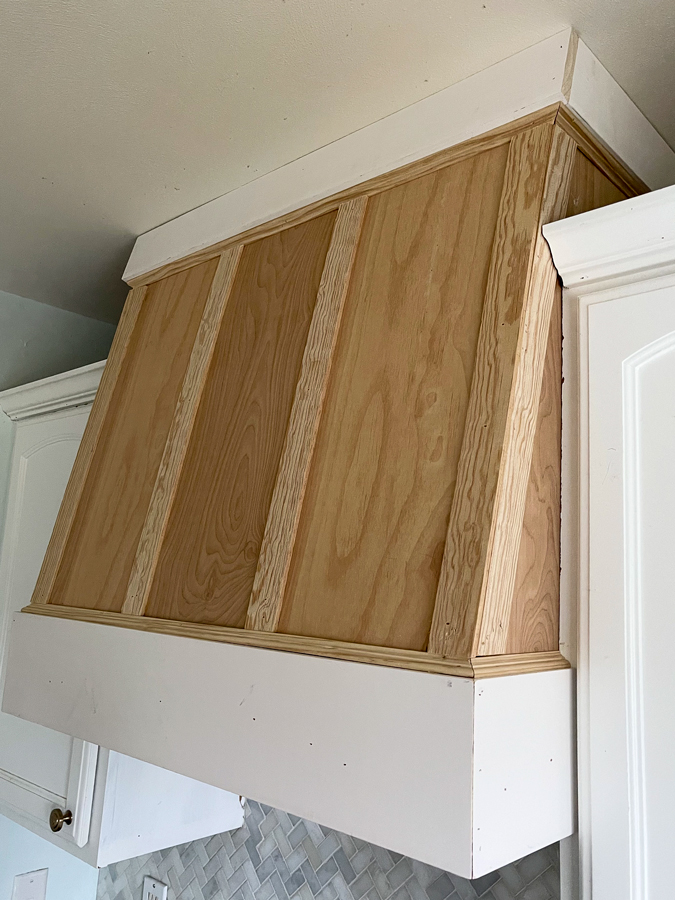
Step 7: Add Final Trim Pieces
Using primed 1×2, I added interior trim around the vent, then used wood filler and caulk to fill in seams.

Then I used wood lattice strips and added trim along each corner edge (covering the screws), and for the face of the range hood to give it a craftsman style. I also added wood moulding along the top edge of the 1×6, and the bottom edge of the 1×4. I ended up adding the lattice strips after the wood moulding.


This is what it looked like before wood filler, caulk, and paint:
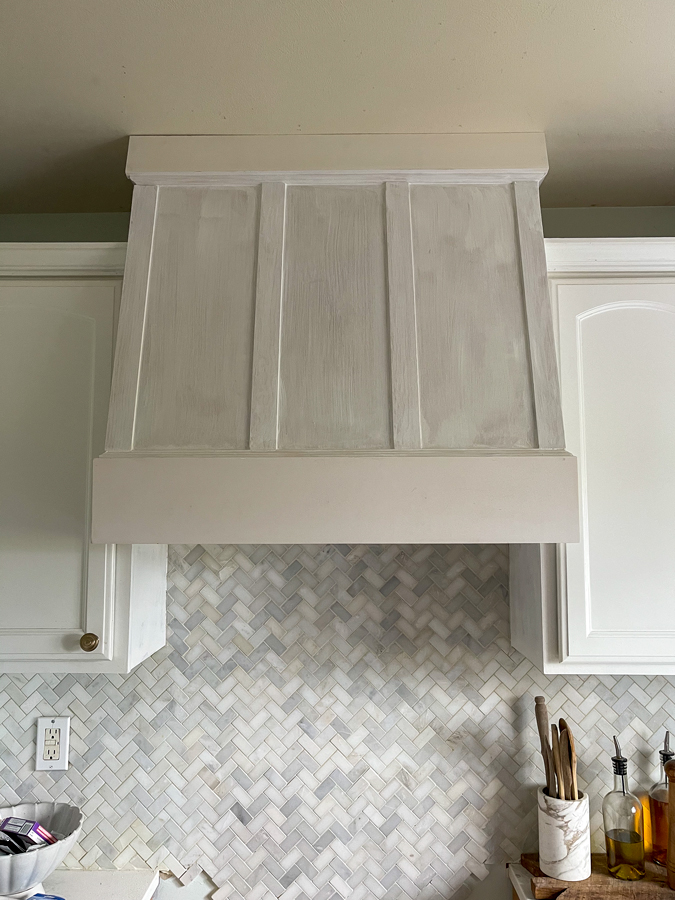
Step 8: Prime and Paint
Using a high quality primer (I use KILZ), prime all the natural wood. This is important because over time the natural wood will leach tannins through regular paint+primer paints and cause it to yellow. Once everything has been primed, paint with 2 coats of paint matching your cabinets (I used BM Advance in Satin- Bright White off the shelf).
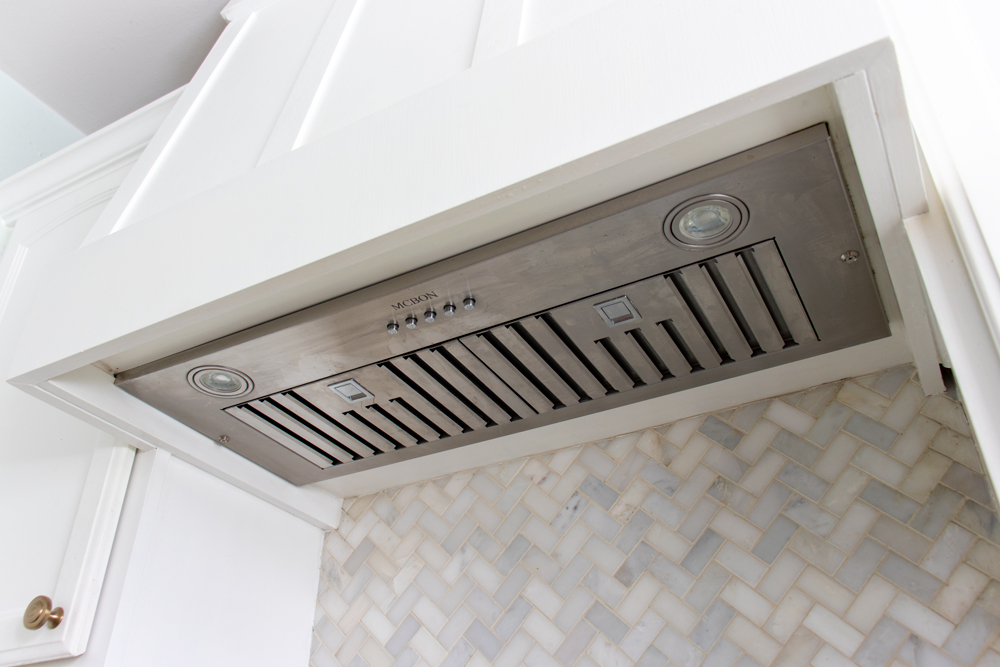
I taped off around the vent and painted the underside trim pieces as well. We love this vent hood– the LED lights are super bright, it has 3 different speeds for the vent and does a great job. The only tricky this is when you take out those panels to clean them (super easy to remove), the metal edges will cut your fingers if you aren’t super careful. This one we got from Amazon because it was a mid-price range for the air suction power, and it had great reviews. It is the MCBON 30″ Range Hood Insert with a Ducted/Ductless Convertible option with 600 CFM in Stainless Steel. (Affiliate link)
Step 9: Drill Vent Holes at the Top Against the Wall
THIS IS AN IMPORTANT STEP IF YOU ARE USING A DUCTLESS VERSION! The filtered air has to have somewhere to go, so it is important to use a hole saw and drill decent size holes (mine around 2″ diameter) at the top of the range hood close to the cabinets.

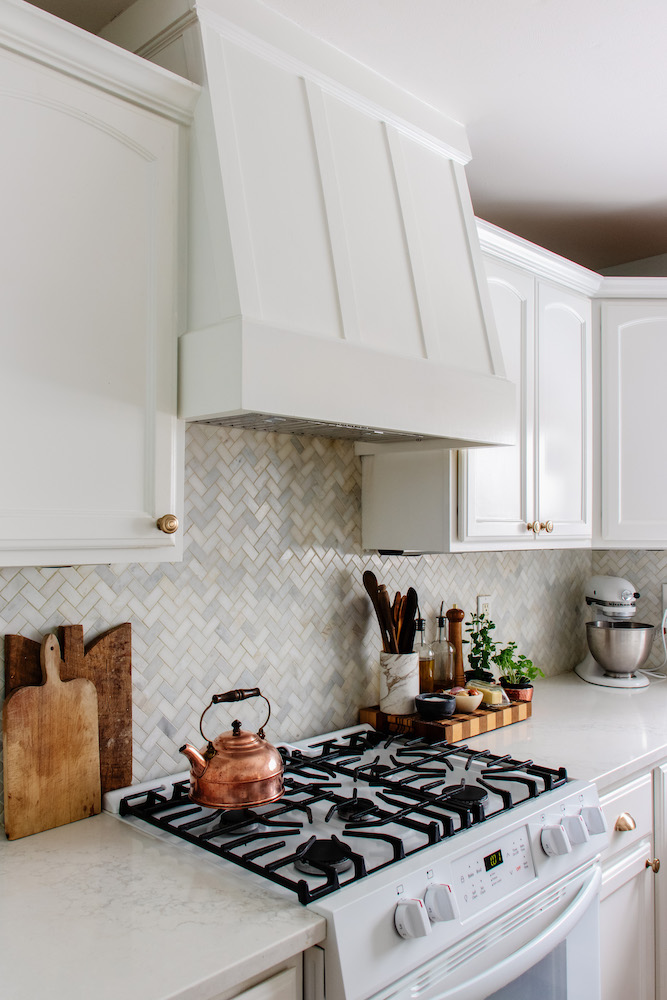
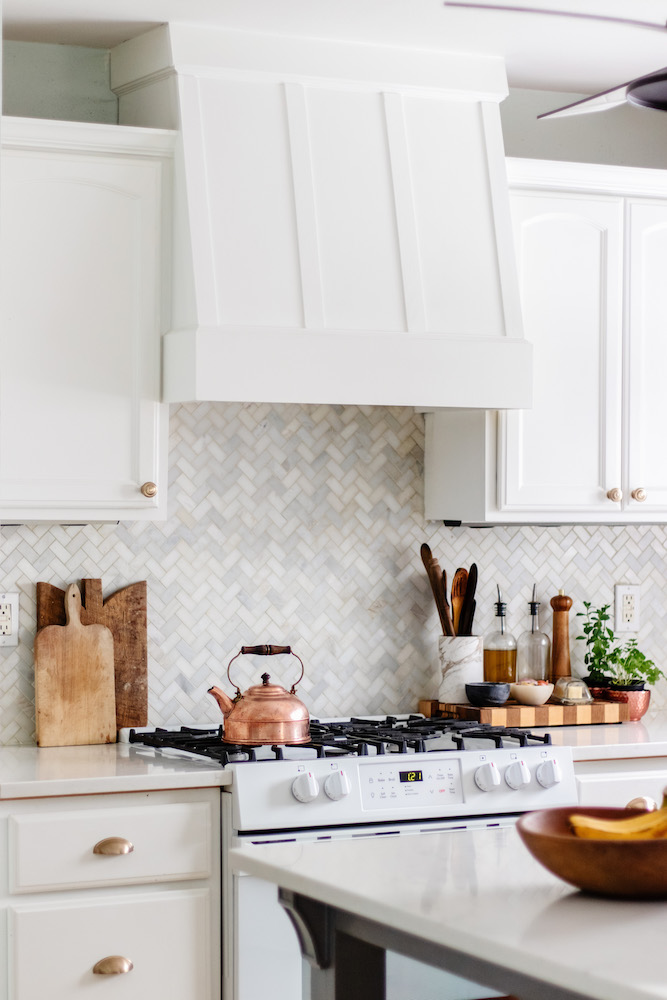
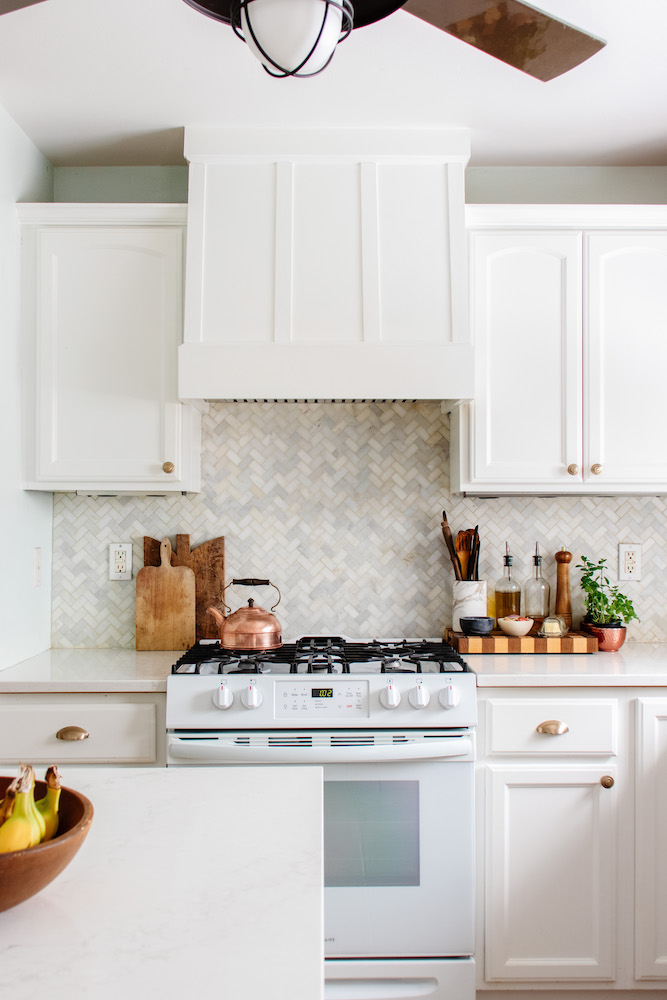
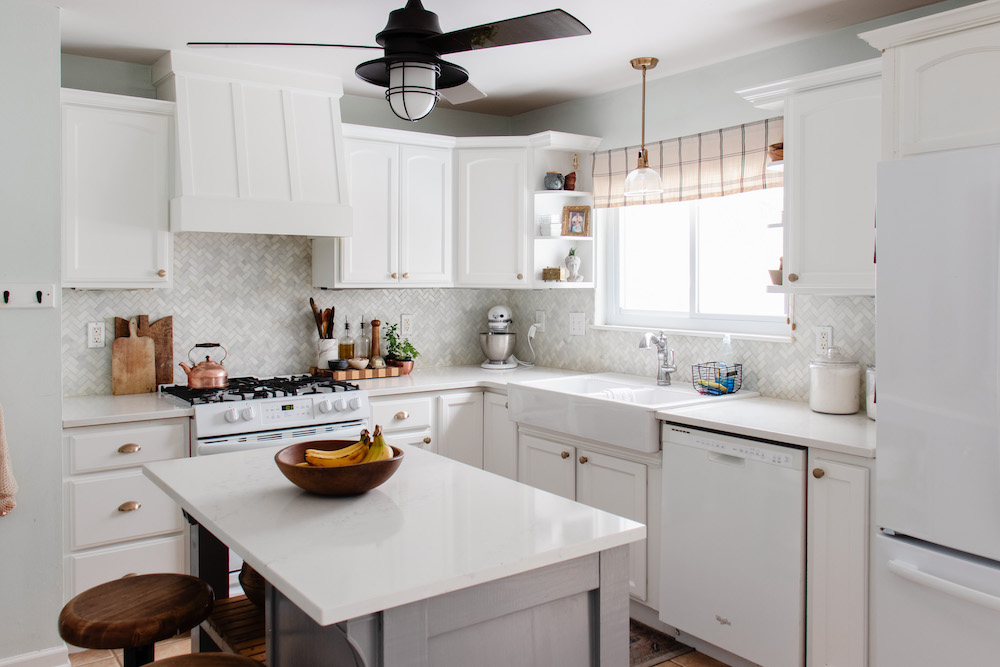
Step 10: Enjoy Your New Custom Range Hood
It was always part of the plan to get a new oven range that didn’t have a backboard. They tend to have a more built-in look without that back part. This is the Frigidaire 30 in. 5 cu. ft. Gas Range and Single Self-Cleaning Oven in White. (Affiliate link)


Looks really great! Did you end up putting the microwave in the pantry then? You mentioned a new outlet there and I don’t see a space-conscious microwave in your final photos.
Thanks for sharing the useful kitchen hood! It is looking amzing!
Did you share your actual amounts of wood you used? How many 2x4s, plywood, etc?
Did you do any fire resistance treatment to the wood?
Where did you buy the range hood vent? I don’t see motors, just whole units.
On Lowe’s online– I looked for range hood inserts. They also sell on Amazon.
Thanks for posting…although, a ductless range hood is not a good idea over a gas range. Definitely need to vent that carbon monoxide to the outside. Ducting could be run behind a valance over the cabinets.
Good thought! We have a carbon monoxide detector in the hallway just adjacent to the kitchen, and it was ductless before we created the range hood, so nothing has changed since we bought the home and it was approved by the home inspector.
Love your backsplash tile and cabinet color. Can you share what they are? Thanks!
The cabinets are bright white from BM Advance, and the backsplash is marble herringbone mosaic tile from Home Depot. They usually have some version of this available online.
This looks amazing. I am saving this post and showing it to my husband tonight.
Thank you for the nice video! I actually have something similar in the house we just bought. I would like to change the hood since it’s pretty old. My question is how to proceed with opening it?
when the air comes out from the hole, do you eventually see oil stains around the top cabinets?
They do have to be cleaned, but that is normal for all vent systems that recirculate and dont’ vent from the outside.
This looks great I’m a Carpenter and you did an amazing job on this! You should be proud of your accomplishment! O am wondering where did you get the actual range hood?
I got the insert off Amazon. Thanks!
I recently built a DIY custom range hood for my kitchen after our old microwave died. It was easier than expected and saved a lot of money. By building a frame from 2x4s and covering it with plywood, I created a stylish and functional hood. Adding trim gave it a polished look. Now, the kitchen looks great, and the hood works perfectly with bright LED lights and a powerful vent. Highly recommend trying this project!
This is beautiful! Do you have a printer friendly version? I want to print this out for my husband to follow the plans. Or just a copy of just the text somewhere? THANK YOU!
I had the same question as Johnny. Any fire resistant treatment? There’s a lot of plans for these wood range covers but no one seems concerned about a fire hazard. I’m just curious as I would like to do this but that’s my only concern.
How did you find the angles to cut for the 1×4? I’m stuck at that step
You can buy an angle finder tool at Home Depot, or you can get some scrap pieces and do some guessing/checking.