Today I’m sharing I project I finished this past weekend as part of the DIY Workshop Virtual Party sponsored by The Home Depot. As I announced last Monday, all local participating Home Depot stores will be hosting a #DIYWorkshop building this same project: A DIY Stocking Post (minus my customizations)! The basic design is the easiest build you can imagine and is perfect for those of us who don’t have a legit mantel, or whose Christmas tree isn’t close to a mantel.
Brad, from Fix This Build That, invited me to be a part of the virtual party and today we each share how we customized the same project– making it uniquely our own style.
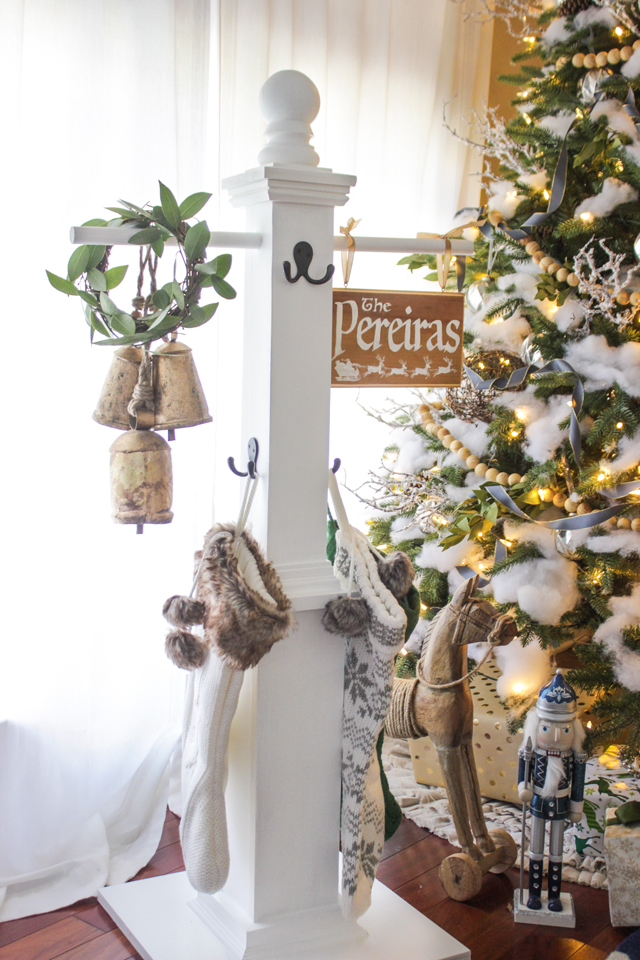
Here is my version:
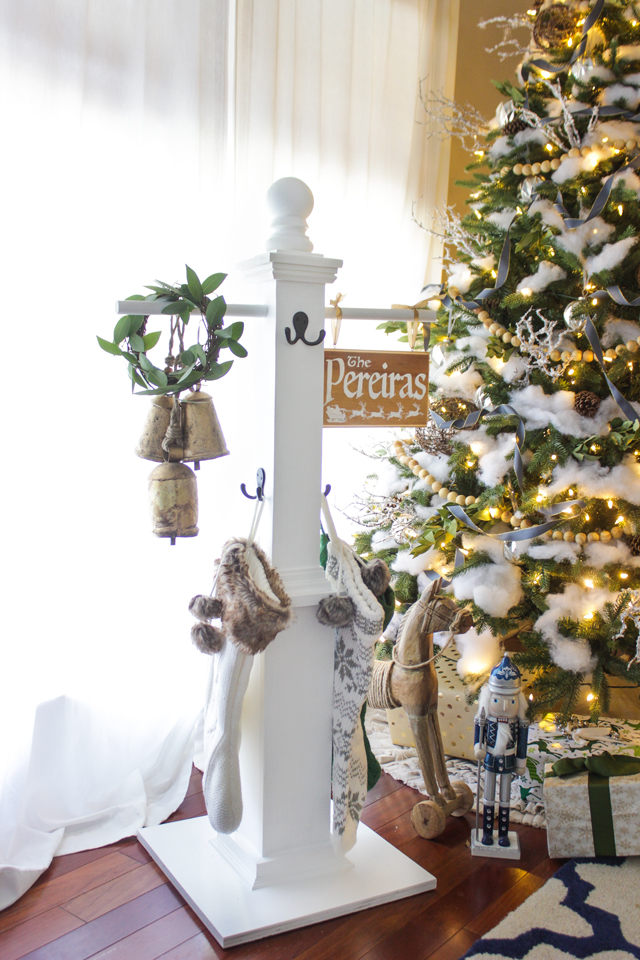
If you are new around here, then you might not know I have a bit of an obsession with craftsman style everything. I love it. So I took my fence post 4×4 and I trimmed it out to look like a craftsman style post or column.
When I posted about this on Instagram last week, I asked you all what things you would like to see to make it better. I listened to your responses and tried to incorporate most of them, including extra hooks– staggered, for people who have more than 3-4 children. I used these double hooks on three sides, which can hold 6 stockings, then I added this dowel, which, if needed, could hold at least 2 more stockings on each side– so all in all this design can hold 10 stockings if you decided to forego a sign or anything else hanging from the dowels! And it is super sturdy with the wide base, so it wouldn’t tip over either!
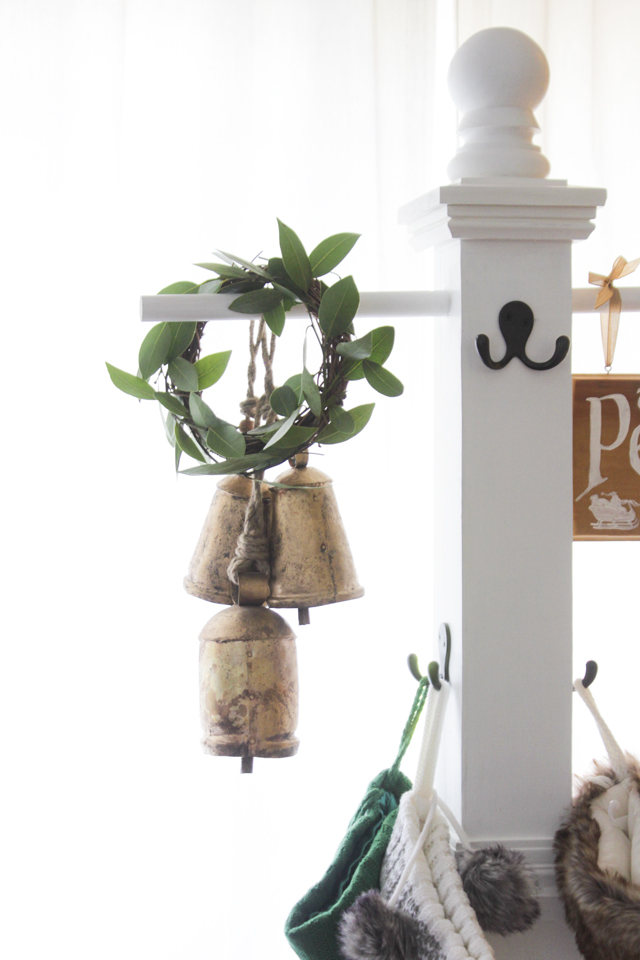
Someone else asked for a way to hang a family name sign on it. I had been thinking of that idea too, so the wooden dowel is versatile and can hold a hanging sign, bells, a wreath, a lantern… whatever you want! Not only that– this neutral design makes it so you could use it outdoors year-round on your porch or in your garden– hanging flower baskets on either side, a wreath or garden tools on the hooks, etc.
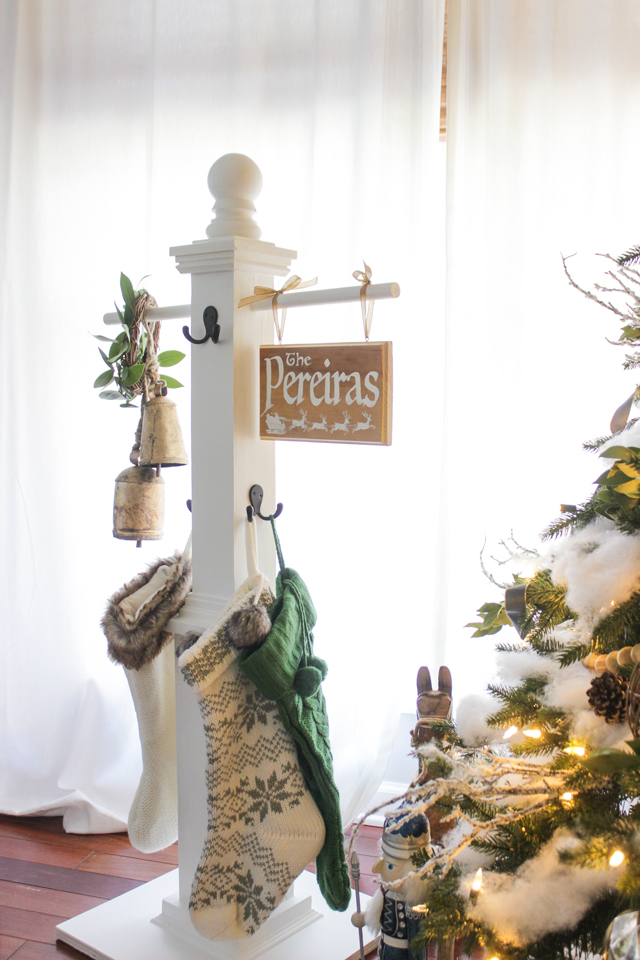
I made the sign using just some scrap wood that I routed and attached some eye-screws to. The design was something I just whipped up on Photoshop using holiday clip art online and a font that I thought looked pretty (Luminari, if you were curious on the name). I then printed it out and traced over it on top of the wood, pushing hard with a pen, then just painted over the design with white paint.

Here is a quick run-down tutorial of what I did and what you need to make one just like mine…
Supplies:
1- 4×4 pressure treated pine fence post @ 8′
1- 3/4″ plywood square (16″ x 16″)
1- 1×6 @ 6′
1- 1×4 @ 6′
1- 1×2 @ 6′
1- 3/4″ornamental trim moulding @ 4′
1- 7/8″ round wooden dowel @ 2′
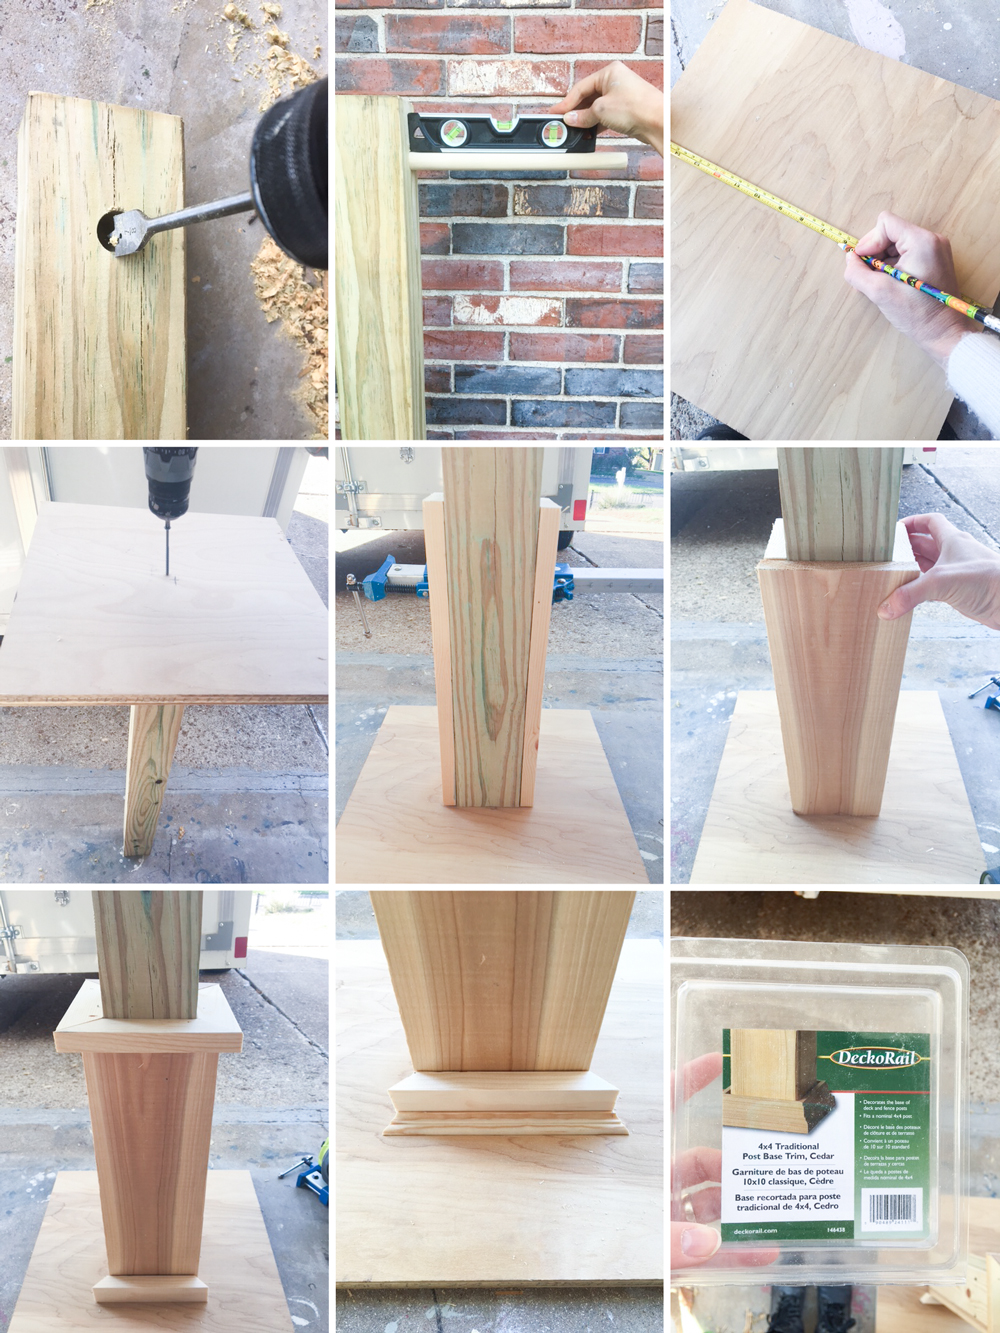
1- 4×4 Traditional Post Skirt Trim – Cedar
1- 4×4 Pressure-Treated Flat Top Post Cap – Cedar
1- 4×4 Pressure-Treated Finial Ball Post Cap- Cedar Tone
3- Flat black double prong robe hook (next to the hinges aisle, not the knob aisle)
3- 3″ exterior wood screws
2″ nails, 18 gauge
Wood Filler
220 grit sandpaper
White caulk
Exterior white paint
Tools:
Miter Saw
Table Saw
Cordless drill
Nail gun
Measuring Tape
7/8″ spade tip drill bit
Level
Optional: Drill press
Cut List:
1- 4×4 @ 41″
1- 7/8″ wooden dowel @ 23 1/2″ (10″ sticking out on either side)
1- 3/4″ plywood at 16″x16″
2- 1×4 @ 19″
2- 1×6 ripped to 5 1/8″ wide @ 19″
4- 1×2 @ 3 1/2″ shortest side with 45 degree angle cuts on both ends (fat side up)
4- 1×2 @ 5 1/8″ shortest side with 45 degree angle cuts on both ends (skinny side up)
4 – ornamental trim @ 6 7/8″ shortest side with 45 degree angle cuts on both ends
Step 1- Attach Post to Base
Measure 3 1/2″ from one end of the 4×4 post and drill a hole all the way through using the 7/8″ spade bit, staying as vertical as possible. If you have a drill press, use it to drill the hole instead. Slide wooden dowel in the hole and make sure it is level when the post is upright. Measure and mark the center point on the 16″x16″ plywood base on both sides. From the center point on one side, measure 1 3/4″ out in all 4 directions, so you know where to place the post. Attach the base to the post (opposite the end that has the hole drilled through), from the underside of the base using 3, 3″ exterior screws. Make sure you post is lined up with the marks you made.
Step 2- Add Pedestal and Trimwork to Post
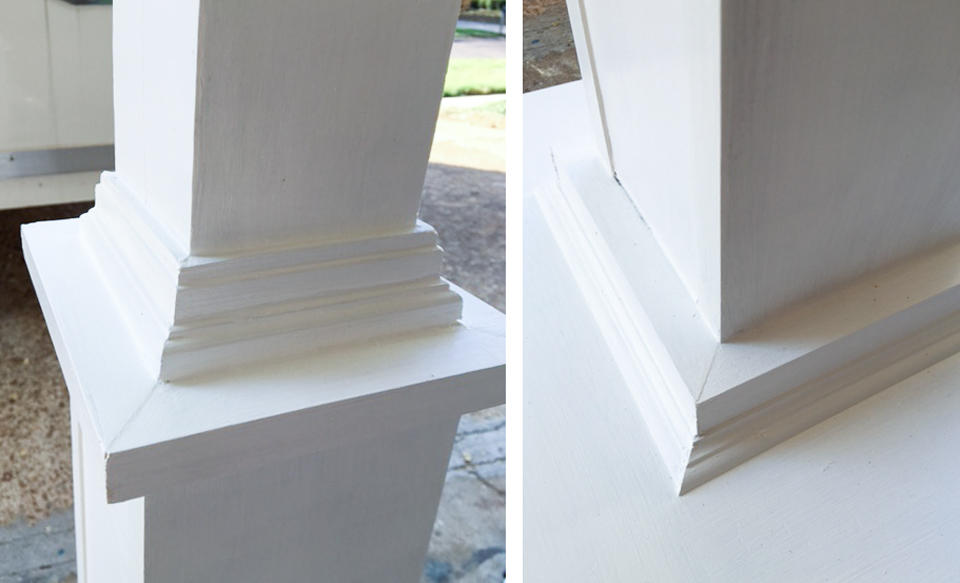
Glue and nail the 1x4s to opposite sides of the post (same sides as the dowels are sticking out), so they are flush. Glue and nail the 1x6s that are ripped down to 5 1/8″ wide to the front and back of the post. Glue and nail the 1x2s to the top of the pedestal created with the 1x4s and 1x 5 1/8″ boards. Glue and nail the 1x2s to the base of the pedestal with the skinny side facing up. Add the ornamental trim with glue (nails aren’t really necessary, but you can add one on each side if you want). Place the post skirt trim over the 1×2 ‘shelf’ on the top of the post pedestal and glue/nail it in place.
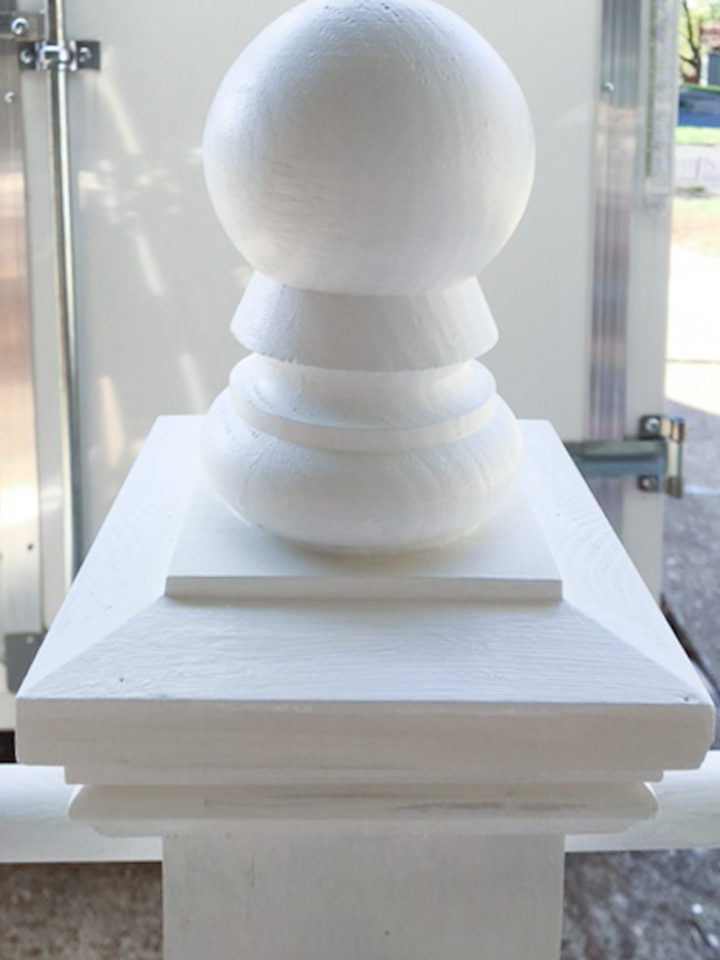
Step 3: Attach Ball Post Cap
Remove screw at the base of the ball finial post cap by unscrewing it with pliers. Place a generous amount of wood glue at the base and press firmly to the 4×4 flat top post cap. Let dry COMPLETELY before attaching the post cap to the top of the fence post using wood glue.
Step 4: Fill Holes/Cracks & Paint
Fill cracks, and nail holes with wood filler. Let dry and sand smooth with 220 grit sandpaper. Fill seams with white caulk and let dry. Paint with exterior paint.
Step 5: Attach Hooks
Measure and mark about 2 1/2″ down from the bottom of the post cap on the front and attach one double hook at that point using the provided screws with a cordless drill. Measure and mark the sides about 6″ up from the top of the pedestal trim.
Now I KNOW you want to build one too!
As you may or may not know, The Home Depot offers Workshops at all of their locations for do-it-yourselfers of all ages and experience levels. There are three types of Workshops offered – Do-It-
Yourself (DIY), Do-It-Herself (DIH) and Kids. Customers can learn how to build décor projects, how to make easy home repairs and how to operate tools through demonstrations and step-by-step instructions.
Visit http://workshops.homedepot.com to learn more.
This DIY Workshop will take place THIS SATURDAY November 19th, from 10:00-11:30am.
To Register to make a DIY Stocking Post CLICK HERE
Ready to see more awesome modifications the rest of the bloggers made to this project?
Fix This Build That — Her Toolbelt — Shades of Blue Interiors — Lazy Guy DIY — Uncookie Cutter
Love all the extra trim and molding! It’s beautiful!
So good, Rachel!! Love your version and thanks for joining!
Very nice , I may use a few of your ideas and keep this on my porch year around with may address on it. I work at Home Depot and help with the Do it Herself workshops. I will be showing this at the class.
Hi!
“The Pereiras”!? Are you from Portugal? 🙂
Love your stocking post.
My husband is Brazilian! 🙂
I am from Portugal!!
Merry christmas you all !!
Feliz Natal. 🙂
How much would you charge to make one for me?!
Sorry, I don’t make these to sell.
I absolutely love this idea! Pereira is my maiden name!!! My father was Portuguese and my mom born in Brazil!
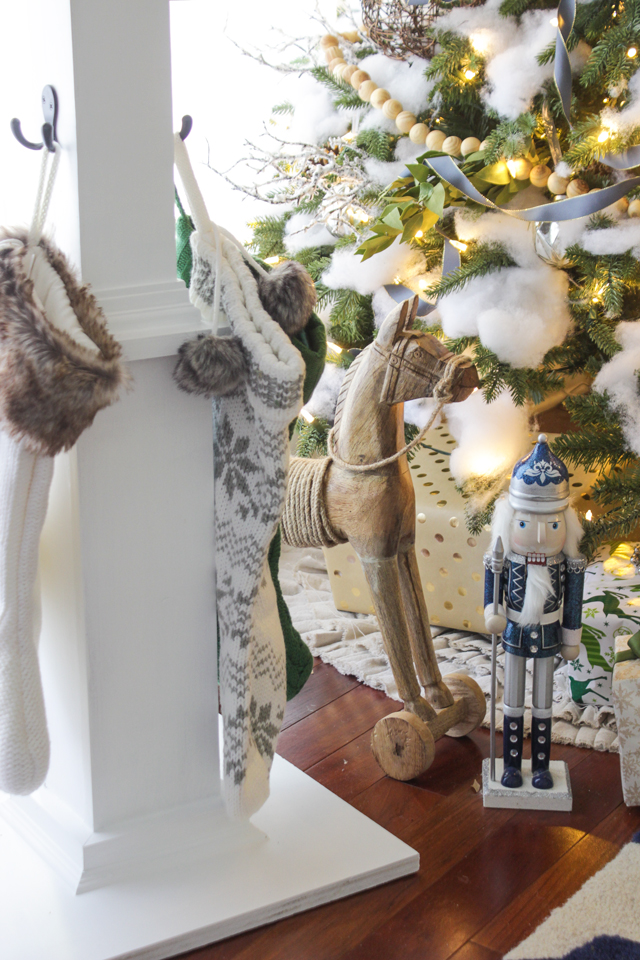
So beautiful! Where is your wooden rocking horse from?
I found it at HomeGoods last year!
So pretty! Where are those cowbells from?
I wish there were a VIDEO on making one.
beautiful… do you happen to remember how much it cost to make this?
Did you paint the dowel first? Or after it was inserted?
How much was this project to build?
About $50-60 I think?
You don’t by chance have a pattern for the stocking?
Sorry, I don’t. The stockings were purchased from Target.