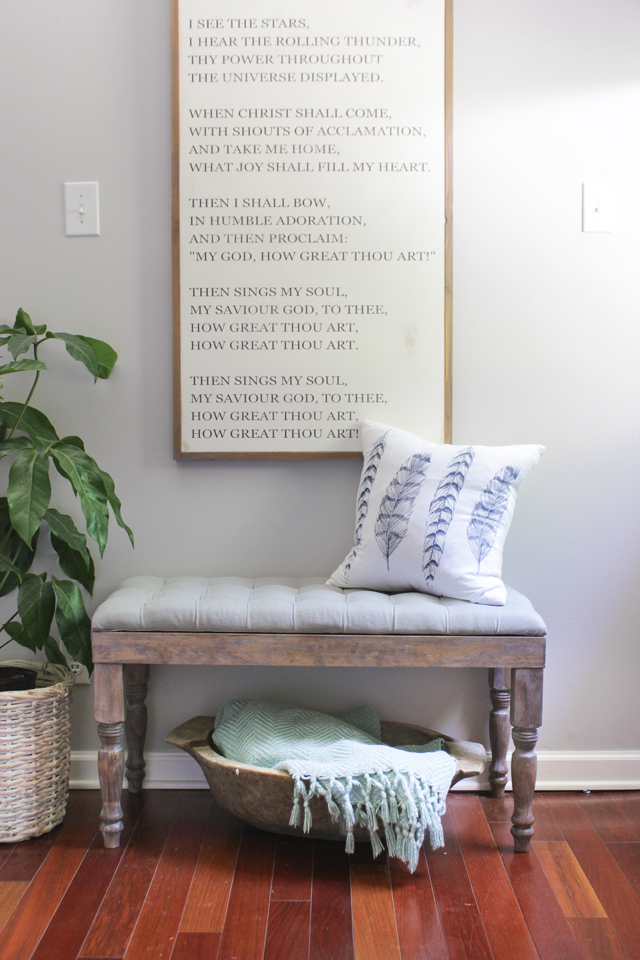
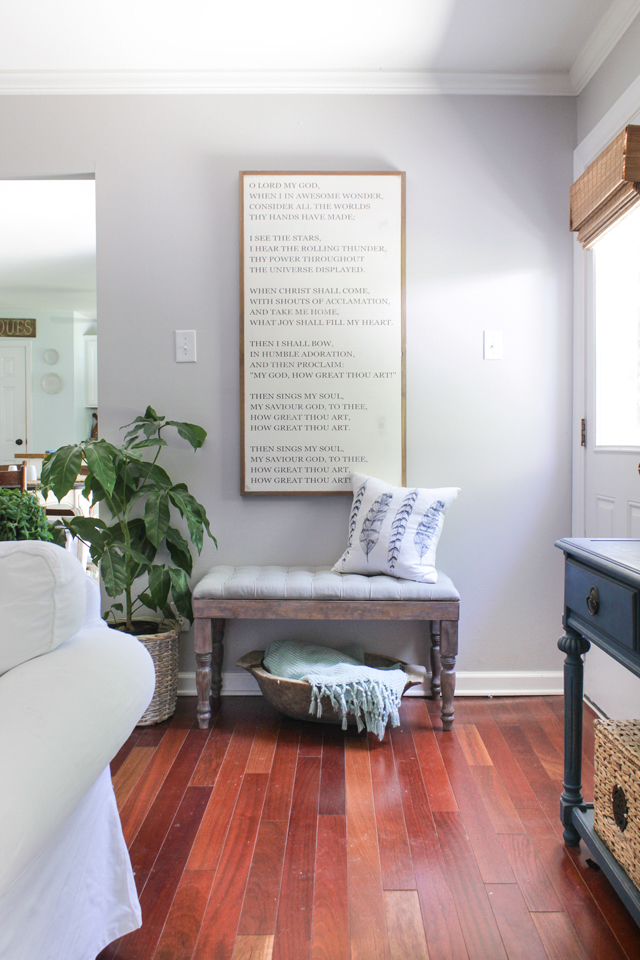
Today I’m sharing a project I finished months ago but never got around to taking final pictures of it until last week! This DIY Tufted Bench looks so perfect in our living room and the gray color of the fabric and gray wash of the wood make it super versatile to use in any room. I even tried it as a piano bench in our front room and it looks great! However, I think it will stay by this door for awhile since we already had a piano bench, and this short wall by the back door needed a little love.

I used the same method to stain and finish the wood as I did on my 3 compartment desk I finished a couple months ago.
I was looking everywhere for a bench like ones I have seen others purchase at HomeGoods and I just couldn’t find exactly what I was looking for. The ones I saw at HG were too short and not long enough. The ones I found online were either too long or too expensive.
I’ll be honest, this cost of fabric, foam and wood (turned legs are spendy) made this one of the more expensive DIY projects I have done, with materials costing around $120. However, I got exactly what I wanted, with the exact fabric and wood finish that I wanted. If you needed to make this a bit longer or a bit taller, it wouldn’t be a hard modification (use a 1×4 instead of a 1×3 if you want it taller, or lengthen the 1×3 long sides if you want it longer) and wouldn’t really change the price.
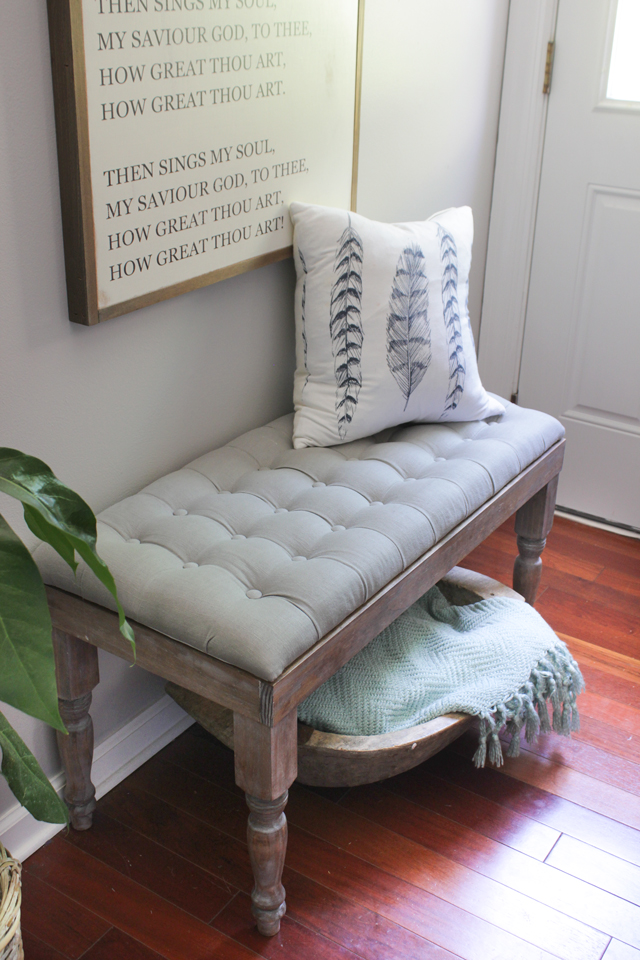

The “How Great Thou Art” sign was custom made by Between You and Me Signs.
DIY Tufted Bench Dimensions: 36″ wide, 16″ deep, 20″ tall
Tools List:
Circular saw (or miter saw)
Kreg pocket hole jig
Twist drill bits (sizes 3/8, 1/16)
Cordless drill
Pliers
Heavy duty stapler
Fabric scissors
3″ upholstery needle
Hot glue gun
Wood glue
Measuring tape
Shopping List:
1- 1×3 @ 12′
1- 1/2″ plywood @ 4′ x 8′
4- turned table legs @ 15 1/4″
8 – 1 1/4″ pocket hole screws
20- 1″ pocket hole screws
4- 1/4″ lag bolt screws @ 3″ long
4- 1/4″ washers
3″ thick upholstery foam @ 3′ x 18″
1/2″ thick batting
2 yards gray upholstery weight linen
2 yards white cotton fabric (I had some extra curtain liner fabric I used)
Upholstery thread
24 tufting buttons (pre-made– You can make your own but I went to an upholstery supply store and had it done professionally to ensure they were made securely… they cost 40 cents per tufted button)
24 medium size 4-hole buttons- clear or white
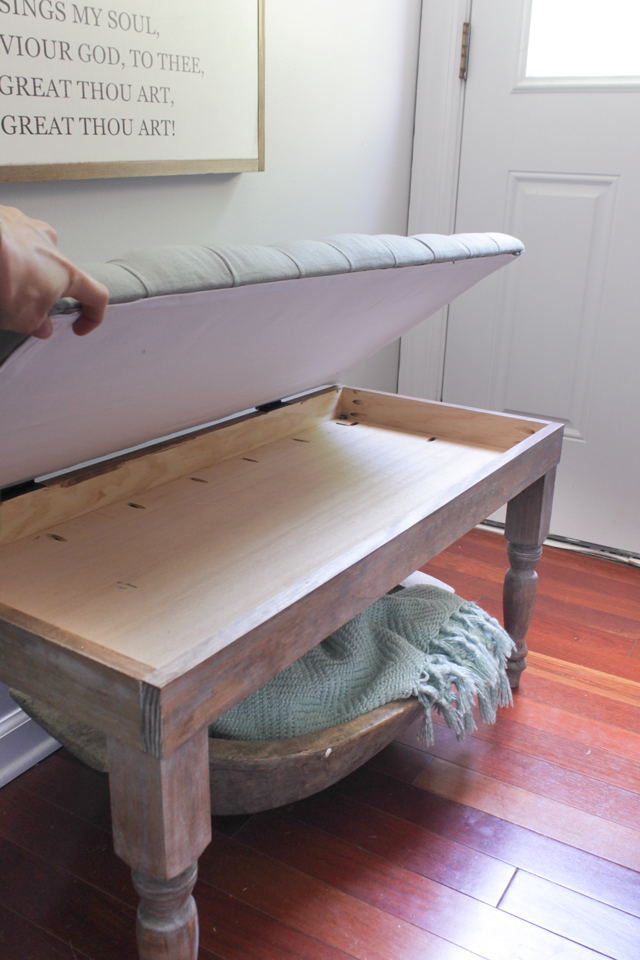
2- 2 1/2″ long flat hinges
Wood Cut List:
2- 1×3 @ 36″
2- 1×3 @ 14 1/2″
1- 1/2″ plywood @ 34 1/2″ x 14 1/2″
1- 1/2″ plywood @ 36″ x 16″
Step 1: Build Bench Base
Drill pocket 3/4″ pocket holes on either ends of the 14 1/2″ pieces of 1×3 and. Also drill 1/2″ pocket holes along all 4 sides of the smaller of the two 1/2″ plywood pieces. Attach the short 1x3s to the long 1x3s using wood glue and 1 1/4″ pocket hole screws. Attach the plywood bottom to the 1×3 box frame using 1″ pocket hole screws and wood glue.
About 1/2″ from each side in each corner, drill a hole using a 3/8″ or a 1/4″ twist drill bit. Place the lag bolt through a washer and into the holes in each corner of the base. Using a 3/8″ drill bit, drill holes in the centers of each turned table leg. If bolts are already in place, remove them and drill the hole about 2″ deeper.
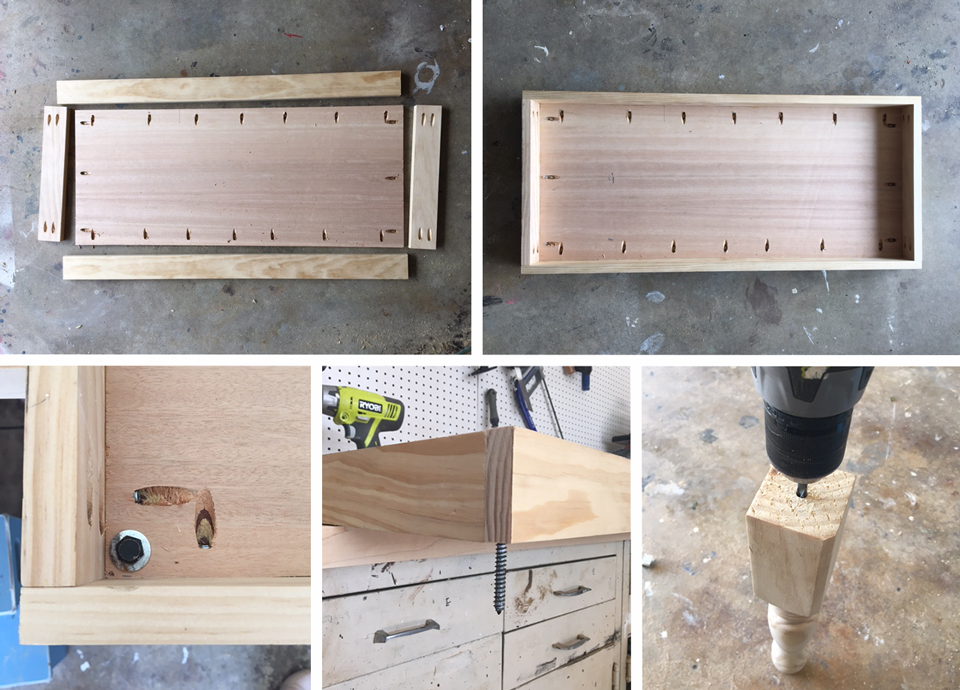
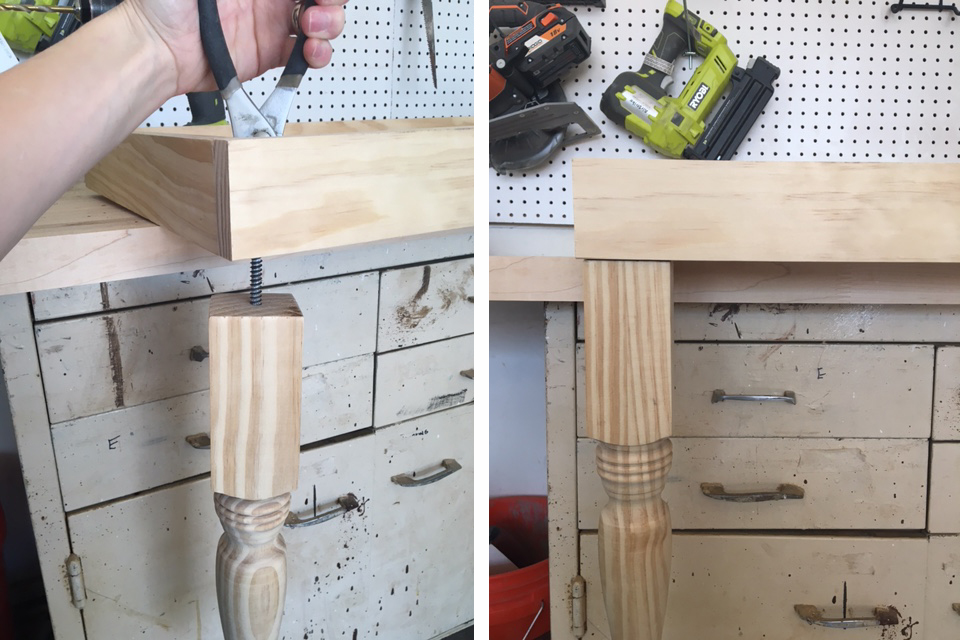
Step 2: Attach Legs to Base
Securing the bolt with pliers, place the screw-end of the bolt into the hole in the leg and twist until it is completely tightened and square to the corner of the base. Repeat for all 3 remaining legs.
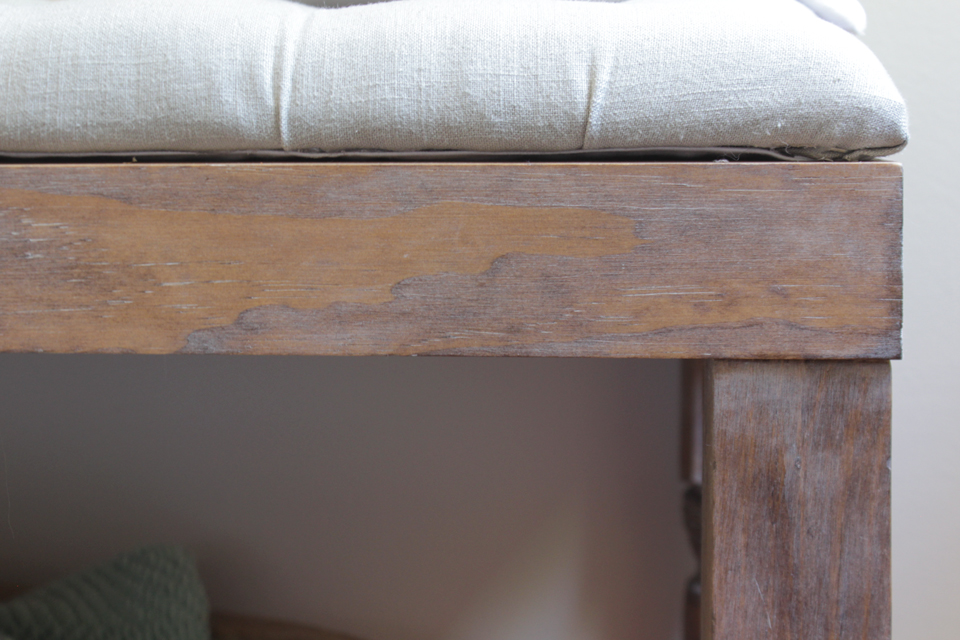
Step 3: Stain and Poly Wood Base and Legs
To achieve the same white washed, weathered oak finish that I did for this bench, follow the video tutorial I created HERE.
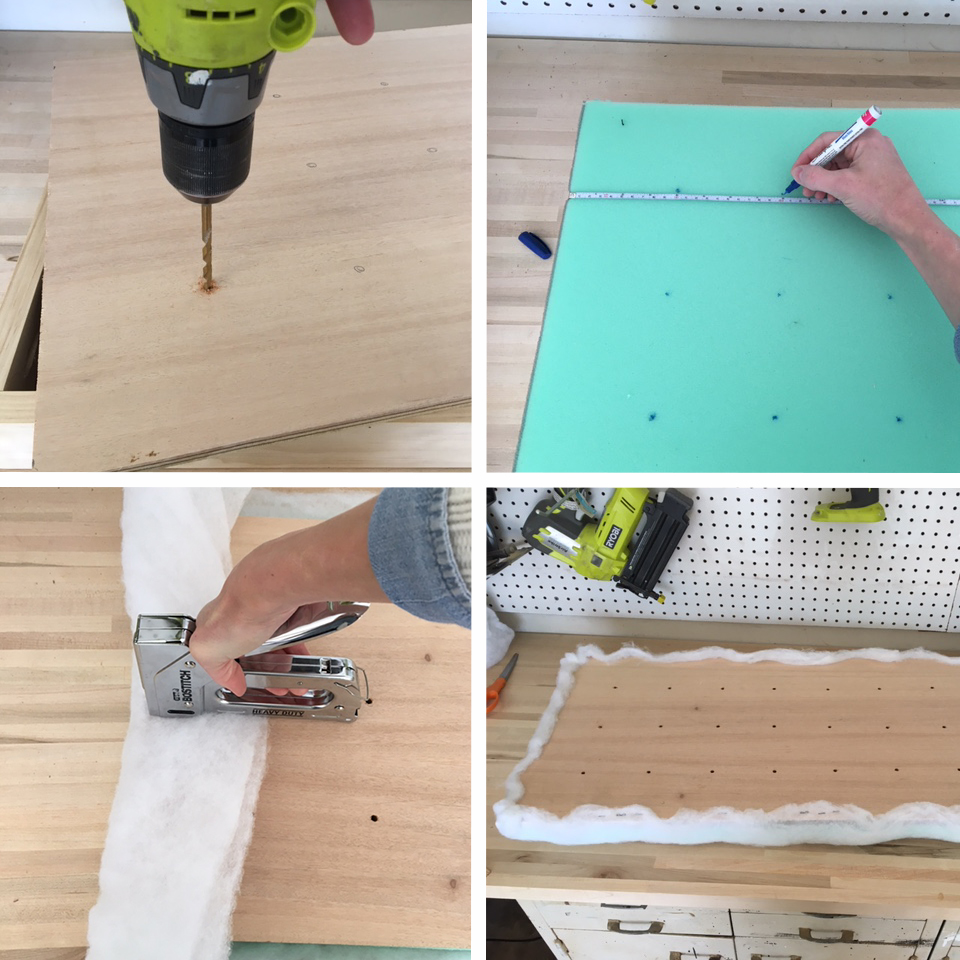
Step 4: Attach Foam and Batting to Lid
Measure and mark 24 holes on the 1/2″ plywood lid, each 4 inches apart. Use a 3/8″ drill bit to drill holes on each mark. Measure and mark the foam using the same measurements as the wood lid. Line up the foam on top of the wood and then cover with the batting so that they batting goes completely over each side and to the underside. Secure the batting with staples using a heavy duty stapler.
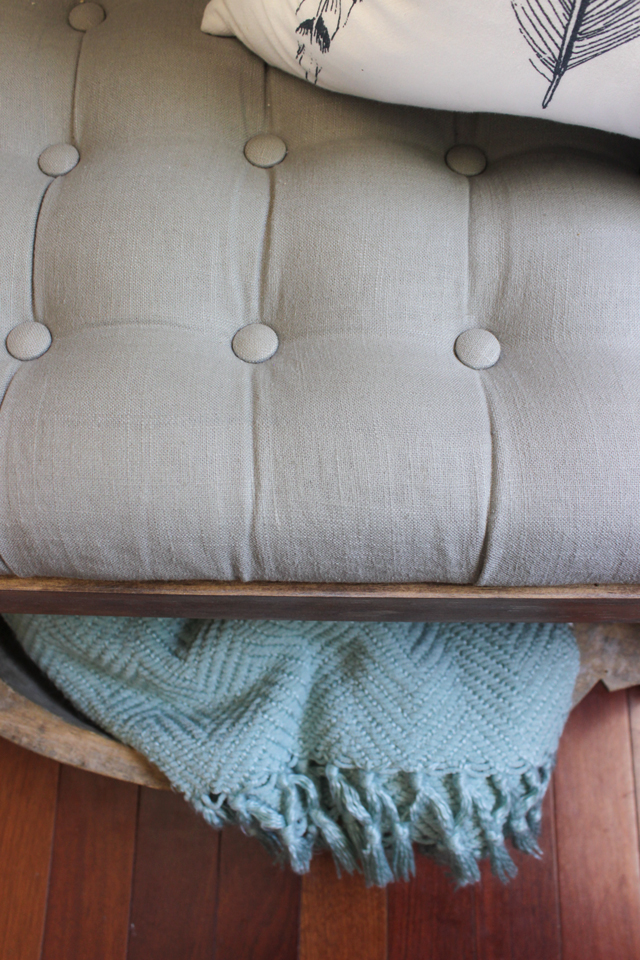
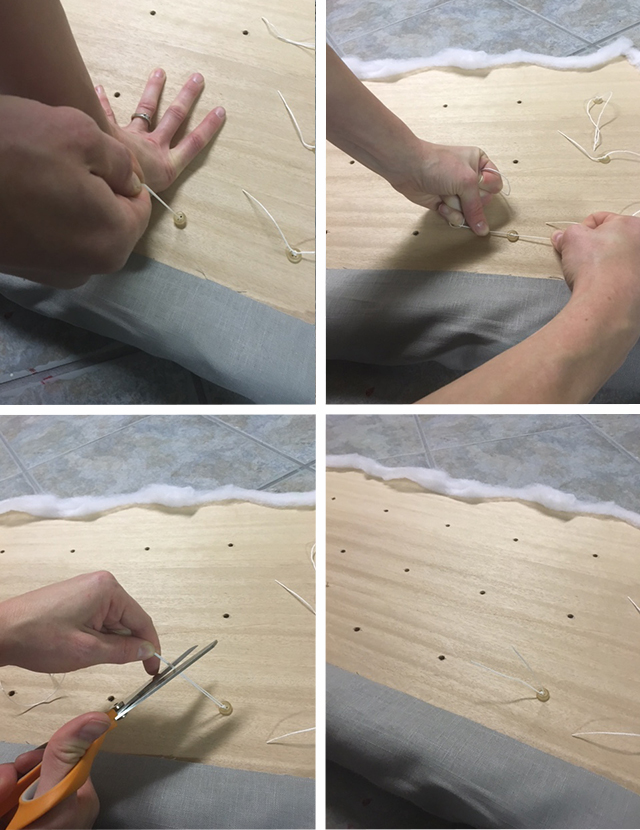
Step 5: Attach Tufting Buttons to Lid
Thread the upholstery needle with a couple feet of upholstery thread. Place the lid down on top of the fabric (making sure it is centered with several inches excess on all 4 sides) with the wood facing up. Starting on one end of the lid, push the needle straight down into one of the pre-drilled holes, all the way through the foam, batting, and fabric. Keep the needle as vertical as possible. Fold the fabric over the edge of the lid and grab it securely with one hand while you push the needle all the way through.
Once about 1″ of the needle is poking out the other side, let it go from the back side and then pull the needle all the way through. String one of the tufted buttons onto the thread, then go back down into the fabric (you only need about a 1/16″ space or so from where the needle and string came up, to where you go back down), batting, foam and through the wood hole. Step or push hard on the wood while you pull the string tight and tie and knot. This hurts your hands a little, so work slow.
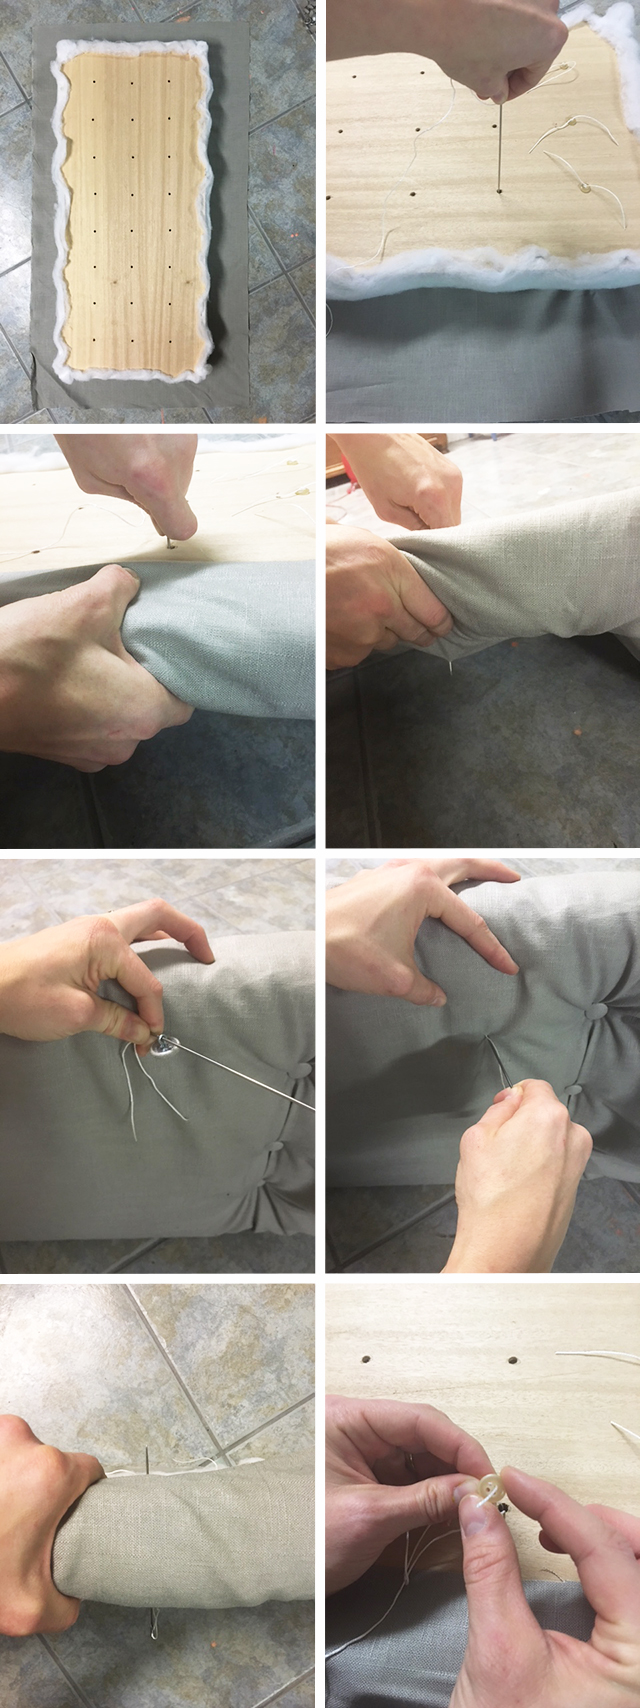
Make sure as you are securing each button-tuft, that you check and recheck the position of the fabric to ensure it always stays with an even excess on all 4 sides. You want the visible weave of the line to remain parallel with the edges of the lid.
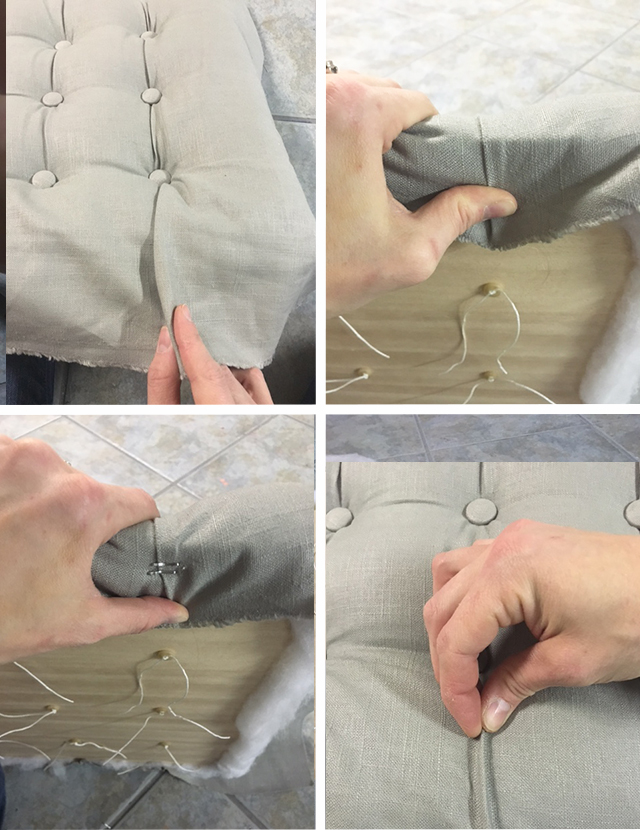
Step 6: Staple Creases of Fabric Under Lid
If folds or creases aren’t already evident in the fabric along the edges of the lid, pinch the fabric and create the crease, overlapping a little (1/4 inch or so) and pulling it down over the edge and holding taut on the underside. Secure the fold with a couple of staples. You may also need to pinch a little fold between tufts in the middle of the lid, so it will smooth out other areas and make the creases/folds looks ‘clean’ or controlled and not wrinkly.
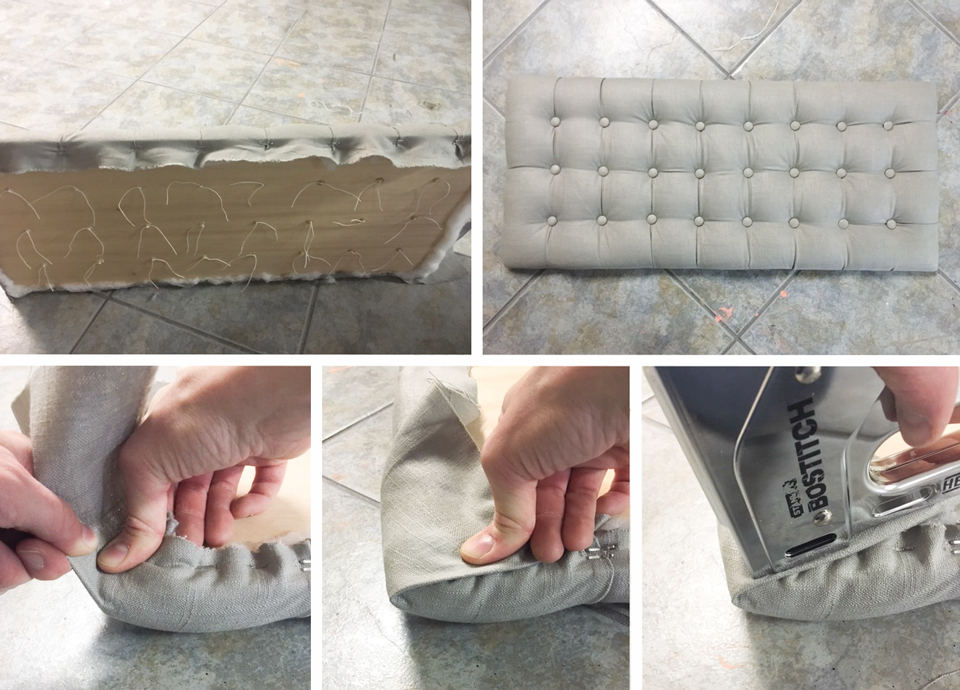
Step 7: Staple and Trim All Fabric Under Lid
Once all the folds are stapled down on all 4 sides, start securing the fabric between the creases with staples. When you get to the corners, pull one side tight inward, and while holding that side in place with your thumb, fold and pull the other side tight on top. Hold both in place with your thumb, and then staple that corner fabric fold down a couple times. Trim excess fabric once all 4 corners are stapled down.
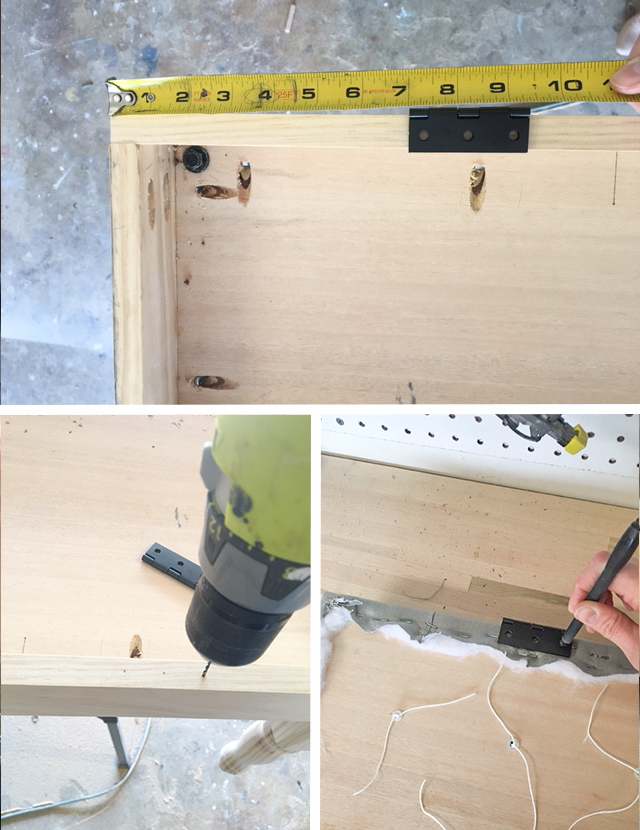
Step 7: Attach Hinges
Mark the placement of where you want the hinges to sit. I marked mine at 7 inches from each corner. Mark where the holes will be and pre-drill holes using the 1/16″ drill bit (or whatever is smaller than the screws that come with the hinges). Do the same for the lid, being especially careful when pre-drilling the holes on top of the fabric. You don’t want to catch a thread from the linen and go too fast, possibly ruining the fabric. Just drill slowly and it will make a hole in the linen and catch a bit of the batting, but won’t cause any problems. Attach the hinges to the lid first, then place it on top of the bench base frame, to make sure it sits evenly on all sides before attaching the other side of the hinges to the base.
Step 8: Glue Fabric on Lid’s Underside
To cover the upholstery edges and tufting strings, cut out some medium-weight white fabric (I used drapery lining) about 1 inches wider and longer than the underside of the lid. Fold over the edges 1 inch and iron them before gluing down that fold and then gluing it over the underside edges of the lid. Make sure to start on a long side, keeping the fabric even and straight. Then work on the opposite side, pulling the fabric taut but not too tight, as you glue it down. Do the same thing with the short sides.
And that is it! You can use this as a piano bench or an end-of-the-bed bench, an entry bench or simply as extra seating in your living room, as we do here.
If you liked this tutorial, be sure to pin this on Pinterest!

WOW! This looks so amazing, Rachel! I just love DIY – you can get exactly what you want – so much better than store-bought. See you soon beautiful friend! xoxo
Love the finish on the wood, and the hymn sign too 🙂 Makes for a great, cozy space!
This is beautiful!
You are amazing! Your desk and this bench are beautiful! Great job snd thanks for the tutorials 🙂
Hi! Could you please tell me the name of the fabric and where you got it… looking at Joann’s and the options are overwhelming. I’d love to go with the exact fabric you have used, it looks stunning!
Lovely. And it’s the first bench I’ve ever seen to for near a door, which is just like our front narrow entry way, which makes it hard to find the right fit. Love your decorating as well.
This is amazing! Thanks for such a detailed tutorial. I have been searching for the right size bench for my entry wihout any luck due to it’s awkward length. This might be the answer to my problem- making my own bench! 🙂
I just love everything about this space!
This is exactly what I was looking for to put in out entry! Can you tell me where you got the table legs from?
Home Depot!
Beautiful!! When you ordered the sign, are the words handpainted onto it or printed/stenciled??
I’m not sure the method they use… maybe it would be best to ask them?
Beautiful! I love the hidden storage, not something I would have thought of for a front entrance bench.
Love it; thank you for the detailed instructions! I have a 1950s telephone table I’m converting to a bench. Please would you share the paint color and brand of your living room desk? It’s fabulous!!
Hi! Your piece look Fabulous and I so appreciate this tutorial!
1 question – what is the purpose of marking the foam? The wood is drilled for each button, then the foam goes on top and then the batting. Why mark the foam when your lining up the edges, covering with batting and then the upholstery fabric.
I’m scheming for either 1 long one to use for Boudoir photography and extra seating in my Health Coaching area or 2 shorter ones to go at the end of twin beds and then all be pushed together when I have “couple” company.
Thanks
It makes sure your needle comes through at the right spot. You’d be surprised at how easy it is to get the angle of the needle off a little and then your tugging buttons are not evenly spaced.
This is so beautiful! would the same plan hold if i make a 48″ long instead of 36″? Will need additional support? Thank you!
Amazing idea and outcome! Do you recall how much all of the supplies were? I’m comparing to make versus purchase already made.
Thanks!
You are a wizard!
You are a superstar!
What a beautiful bench. People will not understand the work you put in to do this but I tell is so much work and you’ve really done a job.
I got inspired by your great work and I decided to make a tufted bench too, which I recently made and I would like you to see it and tell me what you think?
Here is a link: https://sassymirrorbyhilda.com/2019/03/01/tufting-hack-how-to-make-a-solid-buttoned-tufted-bench-that-will-last-long/
thank you very much for your project!