This post is sponsored by Home Depot.
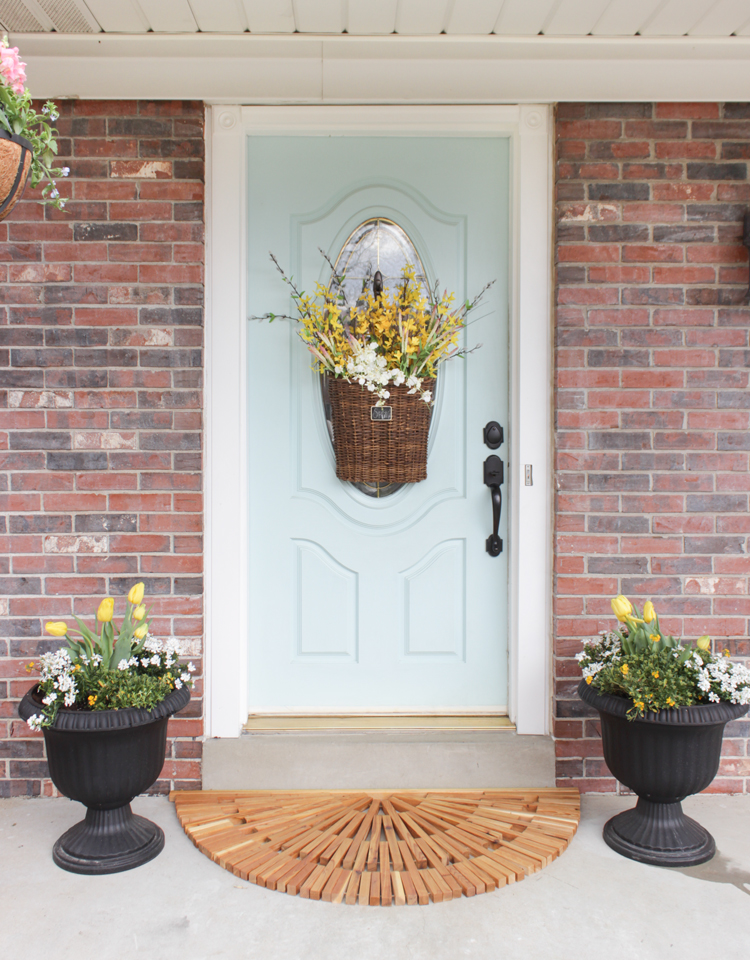
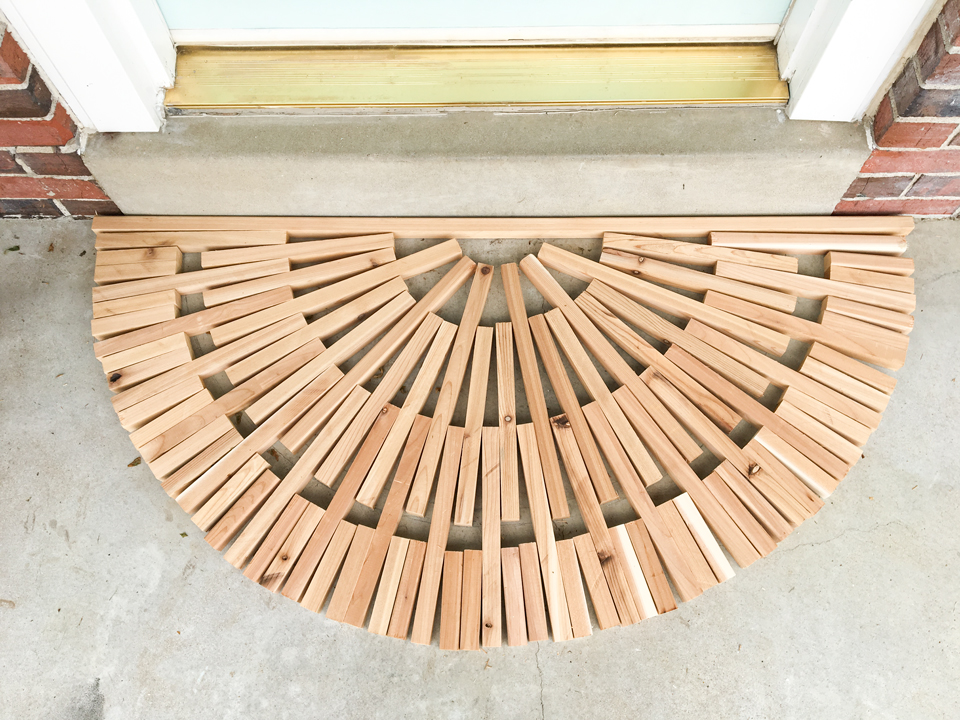
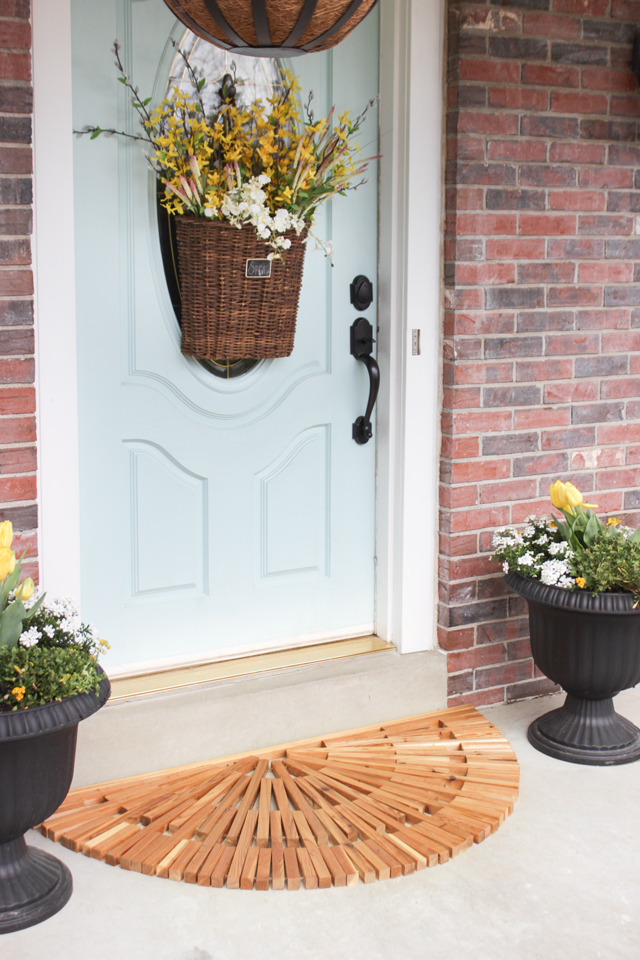
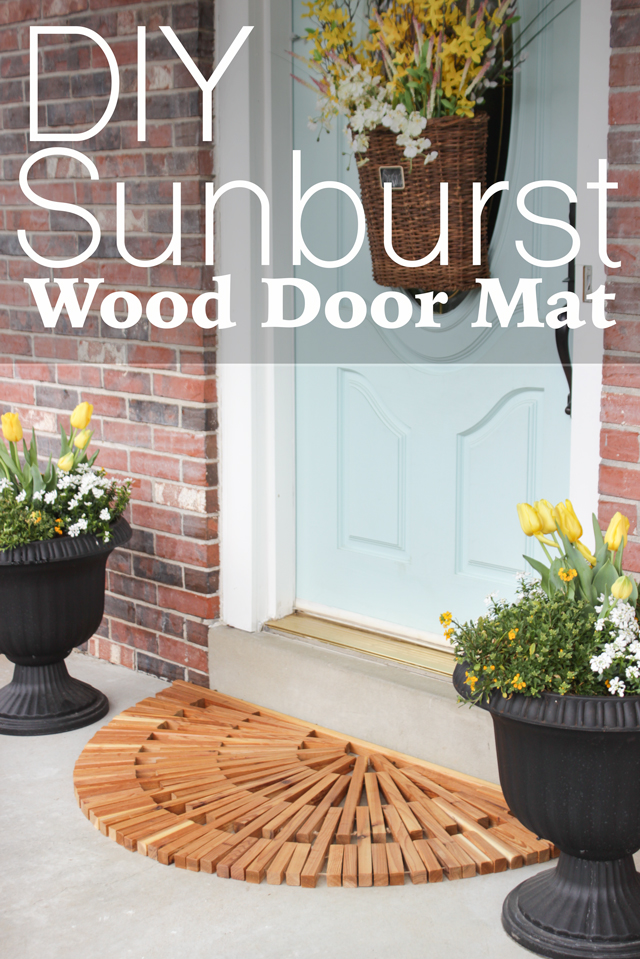
Today I’m sharing how I made this DIY Wooden Door Mat out of cedar wood in a sunburst shape. All you need to buy is a couple of cedar deck boards and jute twine!
As I mentioned yesterday, my friend, Jen Woodhouse is hosting this Home Depot #DIYWorkshop Virtual Party and invited me to join her and a few other super talented ladies in making a wooden door mat and of course I excitedly said yes!
You will FOR SURE want to see each of their unique takes on this project, linked to at the bottom of this post.
My door mats over the past couple of years have been just ‘meh’. With my patio refresh a couple weeks ago, and my new spring hanging basket I made, the mat was just sad before I created this sunburst wooden mat.
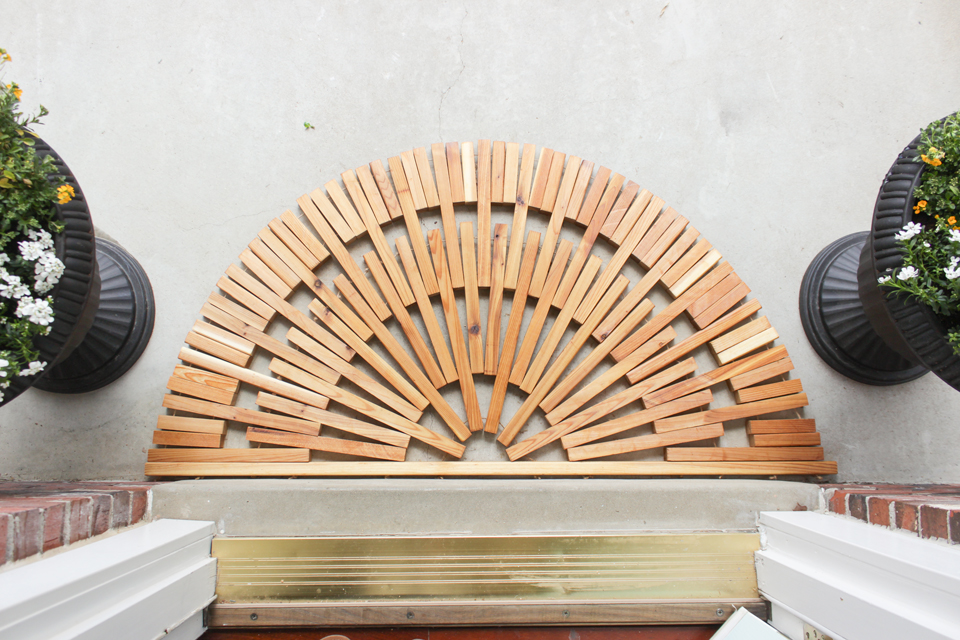
I seriously contemplated keeping with the rectangular shape, but I wanted to mimic the round bistro table just a few feet over, so I brainstormed ideas on how to make this work. Ultimately I started with a general idea, and then got to cutting pieces of wood and fitting things together until I found a pattern and design that I liked.
My daughter walked out when I finished and said, “I love the sun you made, mom!” 🙂
So here is how you make one!
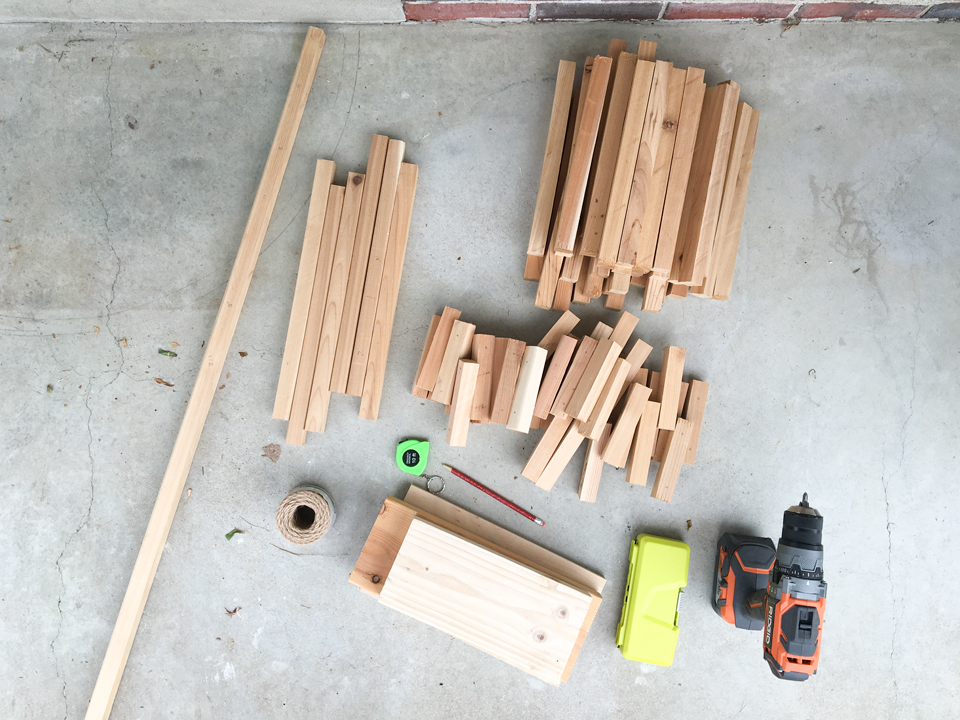
Supplies & Tools Needed:
2- 1×6 cedar deck boards @ 10′ (the thickness on these is *actually* 1 inch, not 3/4″ like most 1 x whatever boards)
Measuring tape
Table saw
1/4″ drill bit
Cordless drill
Sandpaper – 120 grit
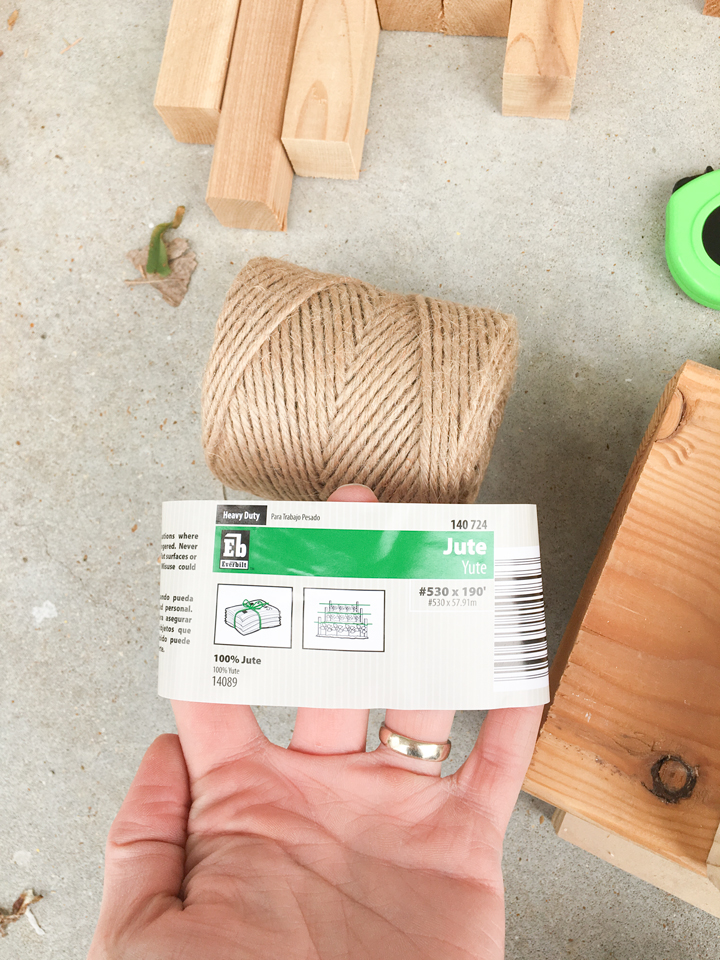
Heavy duty Jute twine – #530
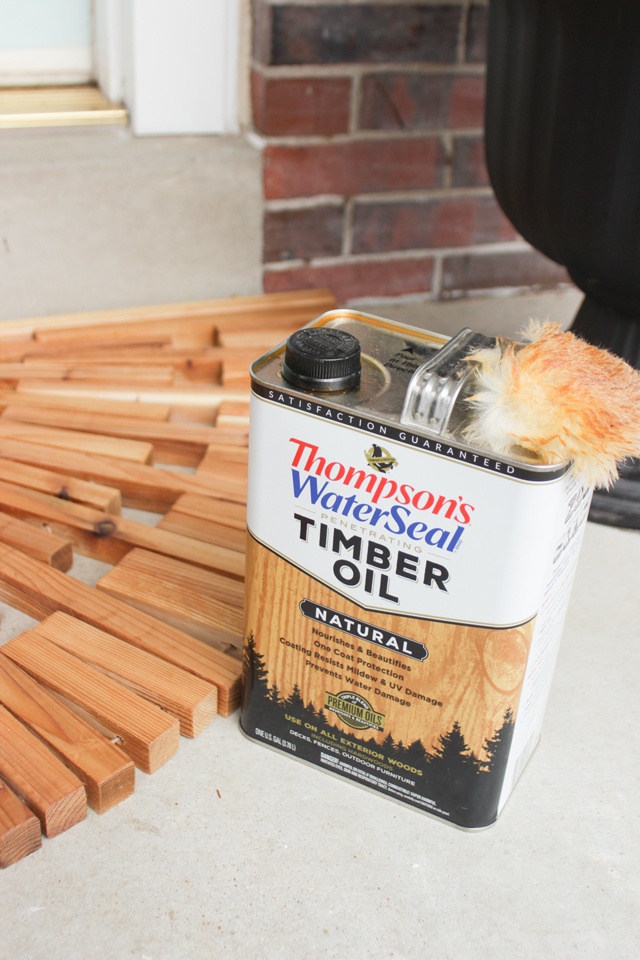
Thompson’s WaterSeal Timber Oil in Natural
Lamb’s wool for applying Timber Oil
Step 1: Cut Boards
Rip 1x6s down to 5, 1″ wide strips. Because the boards are 1″ thick, these will be 1″ square strips, 10′ long. You should have 10 strips total. Then cut 40- 5″ lengths, 35- 12″ lengths, 6- 16″ lengths, and 1- 51″ length.
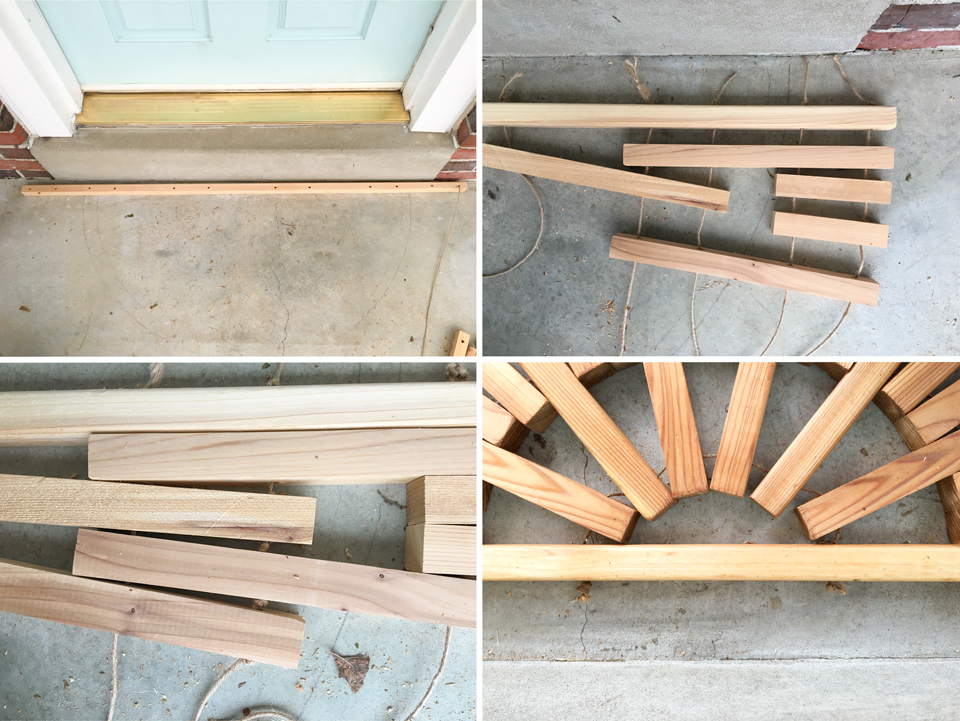
Step 2: Lay Out All Pieces For “Dry Fit”
Make note of the pattern below. The longest piece acts as a base, then there is a layer 5″ pieces on the outermost layer, then a layer of 12″ pieces, then 12″ pieces on the inner circle, with a 16″ piece every 3rd piece on the inner circle.
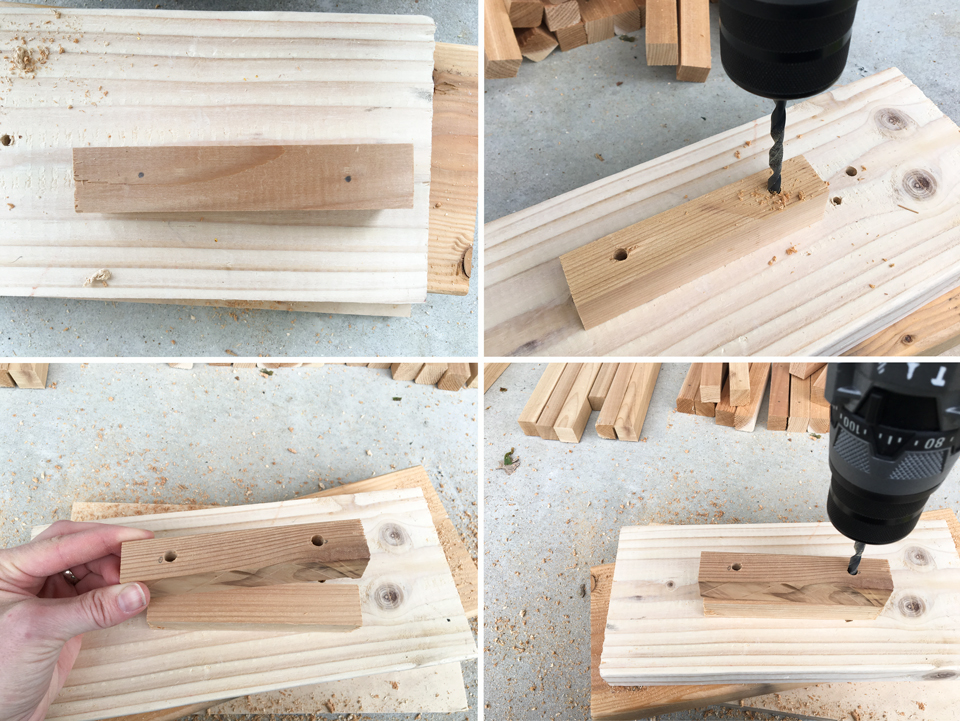
Step 3: Mark and Drill Holes
Measure and mark only 1- 5″ piece (for the outmost layer) for holes at 1″ from either side . Measure and mark a 12″ piece for holes at 1″ and 4″ from either side (these will be the outer layer between the 5″ pieces). Measure and mark a 12″ piece for holes at 1″ and 4″ from one side and then 1″ from the other side (inner layer). Measure and mark a 16″ piece for holes at 1″ and 4″ from one side and 1″ and 5″ from the other side. Drill holes in the longest (51″) piece of wood at 1″ mark, 4″ mark, 8″ mark, 11″ mark, 18″ mark, and 22″ mark from both ends (so a total of 12 holes on the entire length).
With the marked pieces of wood, drill holes in each marked spot with a 1/4″ drill bit. This will be your template. With each of the remaining 5″ pieces of wood, line them up underneath the piece that has holes in it, hold it firmly and drill matching holes on the piece underneath. This will save time from measuring and marking all 40 pieces.
**You will need 21 outer layer 12″ pieces and 14 inner layer 12″ pieces**
Step 4: Sand Each Piece
Using 120 grit sandpaper, sand each piece of wood to remove splinters and rough edges so they won’t cause harm if bare-feet step on them. 🙂
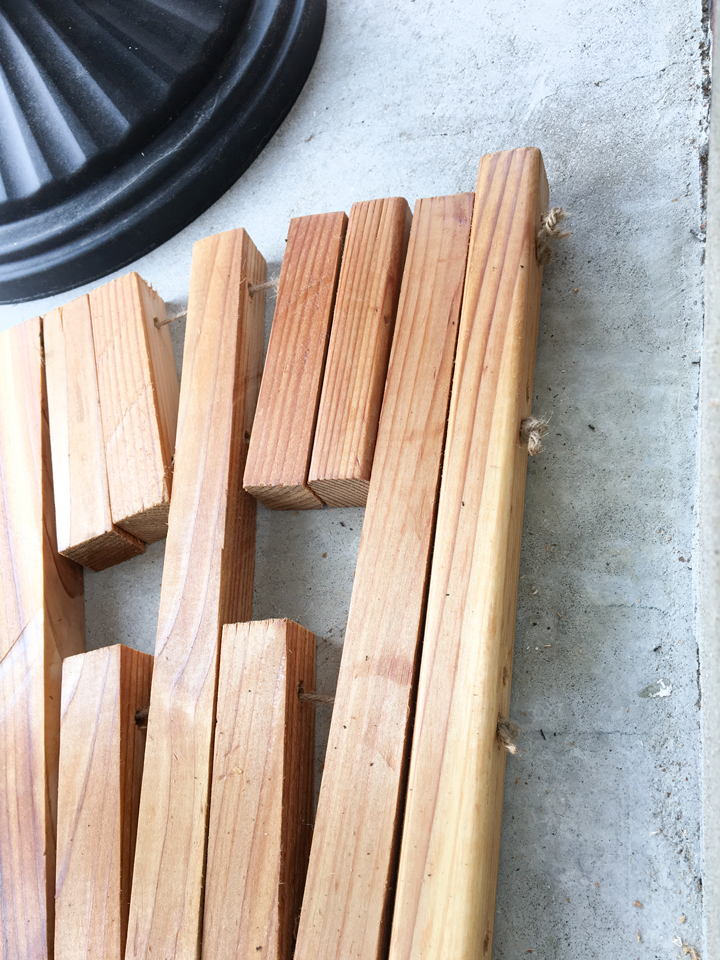
Step 5: Assemble Mat with Jute
Tie knots and run long, separate pieces of jute twine in each of the 6 holes on one end of the 51″ piece of cedar. String the pieces of wood in the order that they go, as pictured below: 12″ outer, 5″ outer, 5″ outer, 12″ inner, 12″ outer, 5″ outer, 5″ outer, 12″ inner, 12″ outer, 5″ outer, 5″ outer, 16″ inner, AND REPEAT the pattern all the way around. Make sure the 16″ piece has the 1″ and 5″ holes closest to the center of the mat. After all the wood is strung on the string, tie knots on the other side of the long, 51″ base piece.
Here is what the knots on the other end look like:
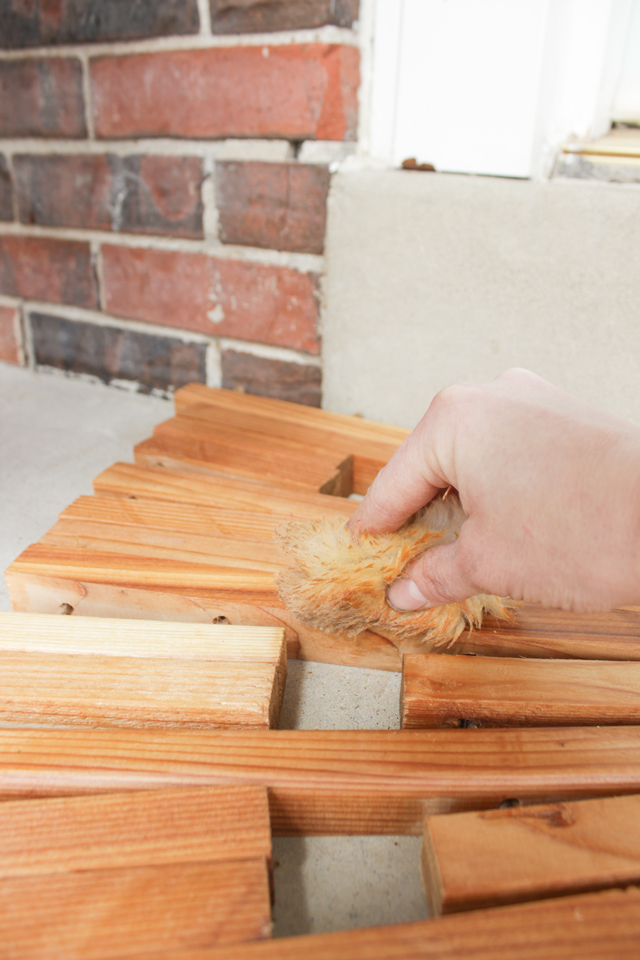
Step 6: Seal Wood
Generously apply Thomson’s WaterSeal Timber Oil with lamb’s wool on both sides of the mat. I mean, technically you should apply this before you assemble it but I was impatient and wanted to see how it looked with the natural wood before I decided to seal it. Either way works… I applied lots so it would seep down the sides. Let dry 24 hours before using the mat. You can also apply a second coat for added protection. Cedar wood is naturally rot and insect resistant but it does fade over time if left untreated and becomes grayish in tone. The Timber Oil prevents that from happening, keeping the wood a nice natural cedar-tone.
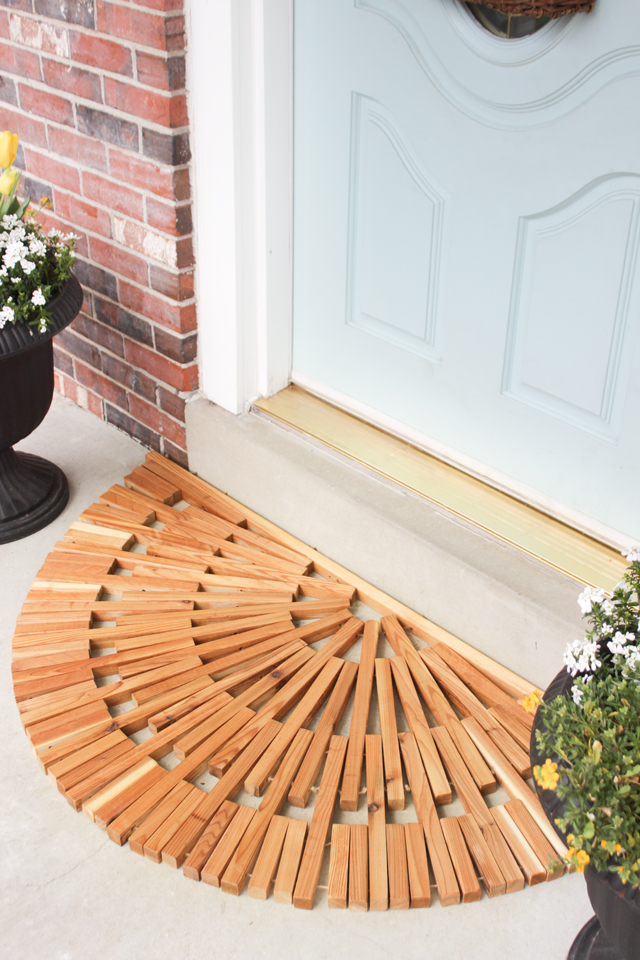
The end result is pretty fantastic, if I do say so myself…
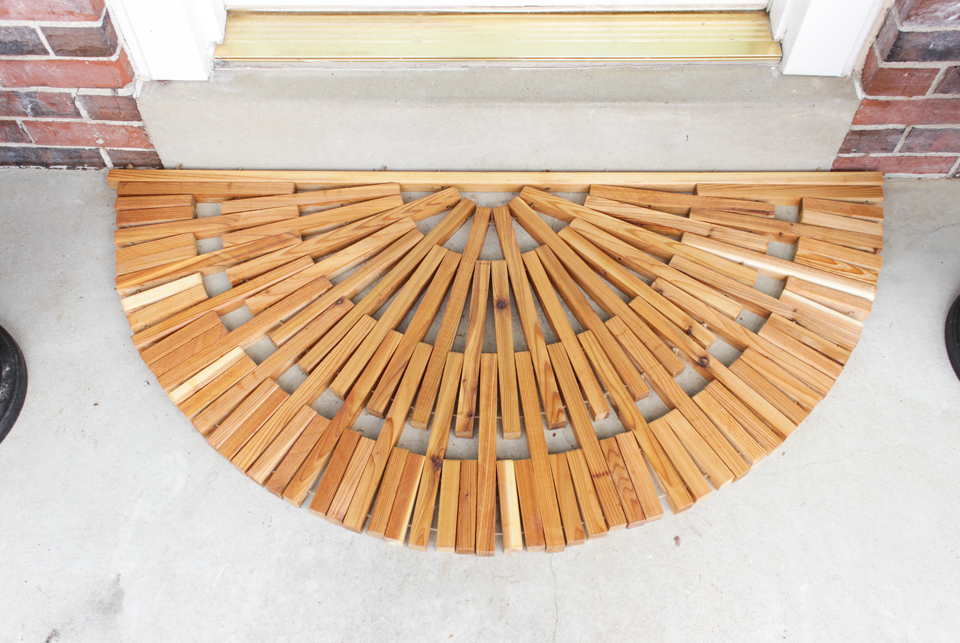
I love the tone of the wood and the texture it adds to our front entrance, don’t you?
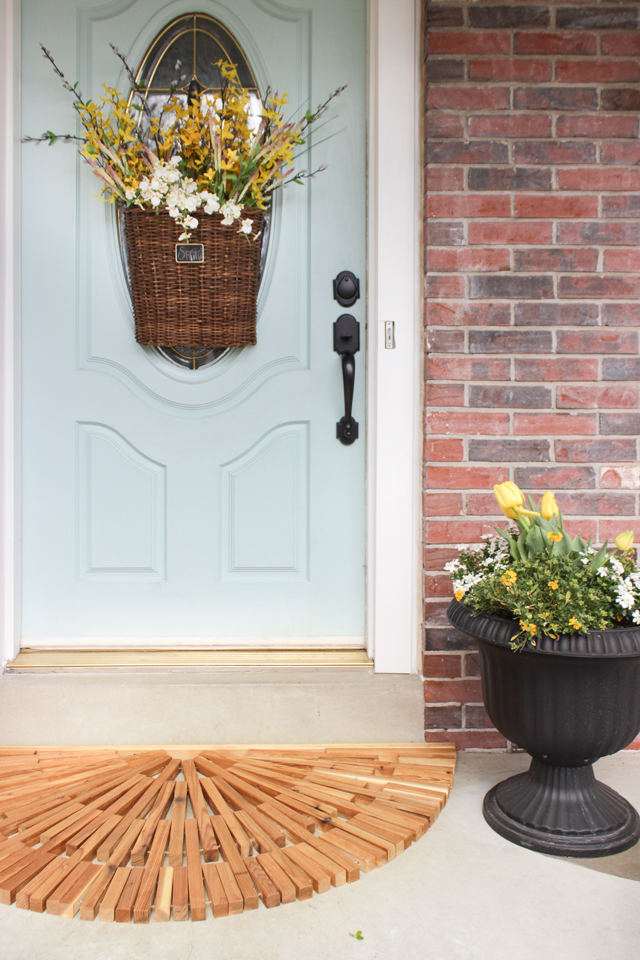
I also decided to add some fresh flowers to the pots I’ve had sitting out here. I had ferns in here a couple weeks ago but the temps got below freezing the week after I put them out and I forgot to bring them in, so they turned completely brown. They aren’t 100% dead though so I’m nursing them back to life inside… trying at least!
One of my favorite parts about using cedar is the pretty variation in wood tone you can get. I tried picking out boards that had some good contrast in the grain, so that you could see it when I created the mat. It makes it look so much better than the uniform wood mats you see in stores, no?
If YOU would like to make your own mat, Home Depot is having a DIY Workshop THIS Saturday, 3/26, and will help you make this simpler version. Register HERE!
Haven’t heard of The Home Depot Workshops before? Here is a little about them:
-The Home Depot offers Workshops at all of their locations for do-it-yourselfers of all ages and all experience levels.
-There are three types of Workshops offered: Do-It-Yourself (DIY), Do-It-Herself, and Kids.
-Customers can learn how to build decor projects, how to make easy home repairs, and how to operate tools through demonstrations and step-by-step instructions.
-Visit http://workshops.homedepot.com to learn more!
If you make one, would you please let me know? I’d love to hear about it or see it– just use the hashtag #DIYWorkshop so we can easily find it!
Be sure and check out all these other amazing bloggers and their creative take on this same project:
House of Wood —- Shades of Blue Interiors, Place of My Taste, Bower Power Blog, Making Home Base
Build Basic —- Sawdust 2 Stitches, My Love 2 Create, Her Toolbelt, Addicted 2 DIY
That’s My Letter —- Ciburbanity, Brooklyn Limestone, Wills Casa, The Bold Abode
Fix This Build That —- Glued N Screwed, Build It, Craft It, Love It, DIY Huntress, Sawdust To Sequins,
Remodelando La Casa —- The Batchelor Way, The Kim Six Fix, Heathered Nest, Creatively Living
*I acknowledge that The Home Depot is partnering with me to participate in this Workshops Program. As a part of the Program, I am receiving compensation in the form of products and services, for the purpose of promoting TheHome Depot. All expressed opinions and experiences are my own words. This post complies with the Word Of Mouth Marketing Association (WOMMA) Ethics Code and applicable Federal Trade Commission guidelines.
Amazing sunburst idea!
What an awesome project! I love the sunburst design, such a perfect way to execute it.
It is stunning! I love the design!
Such a great idea and execution!! The natural wood looks so good with your front door color!
SO SO SO GOOD! You rocked it girlfriend! Love this 🙂
xo – kb
I think I’m crowning you winner. This was awesome! SO ORIGINAL! I love how it turned out!!!
This is crazytown. I can’t even imagine the amount of drilling and don’t even get me started with the pattern… makes my head hurt! SO PRETTY! xx
Thank you SO much for bringing your A-game, Rachel – you always do. Thanks for joining me for this Virtual party! Your mat is absolutely stunning!
This design is fabulous! Amazing door mat.
Beautiful door mat to grace your front door! Now that you’ve had it awhile, I was wondering how the jute you used is holding up? I’m thinking about making one but wondered if I should use thicker jute. What do you think?
It’s held up great! Everything is still intact!
Built this today, used copper wire instead of Jute. Also sawed up a redwood 2×6 in 1″ squares, looks good at the front door. Cool idea, thanks!
I came here just to post that we made it work with copper as well; happy to see other creative folks here!
I’m just wondering, how does this wooden door mat look like right now? Can you provide an update/picture?
I have been in my first house for 6 months now. We chose a lovely cream carpet for the hall stairs and landing. I know I know, every warned it wasn’t practical, but it is our first house and we have no pets or kids (yet!) so when else will we get the chance to have such lovely light stain free carpets!! Anyway we have be using an offcut as a front door mat but it gets dirty very quickly & gets caught on the door and is generally very annoying! I am looking to get a sunken/fitted door mat (you know the ones that have a metal frame) but they seem to be very difficult to find (have searched every possiblity I can think of on google.) Has anyone had one installed or suggest where I can get one?
Great looking mat is it hardwood? would like to see what it looks like after it has some wear on it. Thanks for sharing.
Great post Rachel!
Hi Rachel, It will definitely solve the slippery doormat problem. Can I use any type of wood or you have any recommendation for making it long lasting?
BTW Great Work indeed (y) Thank you. I will definitely make it.
Wow! I love how that doormat blends in well with the floor. Absolutely beautiful.
I am so lazy when it comes to DIYs but maybe I should give this one a shot. Looks so good. It’s easy to clean as well considering the fact that its made of wood. I should get started on the materials. Might take be long to complete it but I think I should make this my goal of the year!
Thank you so much!
Do you have more detail plans
Good job!
Awesome guide. SO quick and easy details!
What a great article I found today and I think it will increase the beauty of house bcz natural things attract the most.. And all the readers will definitely like this wooden door mat…
Thanks for sharing this article to us..
Interesting post! The design is just awesome. The best part of this blog is your daughter’s quote. Thank you for sharing
This wooden door mat has my heart am so happy to read this post .
Its really so informative you help us a lot
Thank you so much
I’ll try the Timber Oil.
Can’t wait to try this DIY Wooden Door Mat, amazing craft. Thank you for sharing this DIY Wooden Door mat craft.
Oh, this looks gorgeous! I am definitely going to try my hand at this to beautify our front entry. This would also be pretty painted in either a solid or gradient pattern to match season or holiday (my first thought was red, white, and blue)!
I see it’s been a few years.
This is simply beautiful!!!!
Of course there’s questions…
For those who do not have a covered porch, 🙋🏼♀️, I believe the jute will get sun rot!
Why didn’t you stain wood before assembling it …🤷🏼♀️
Beautiful work!
Thanks so much for sharing.
Even though I’m a little late with this!