This post has been sponsored by Collective Bias, Inc. All opinions are mine. #CollectiveBias
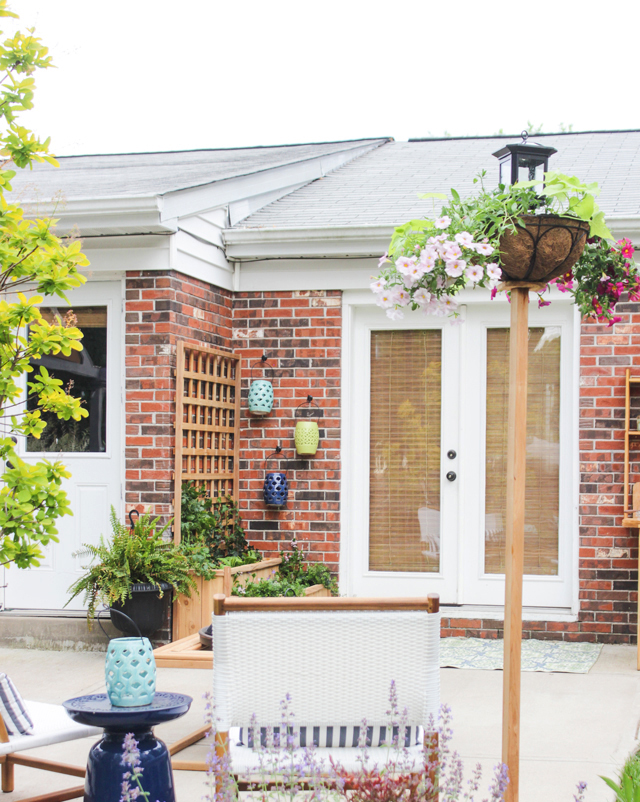
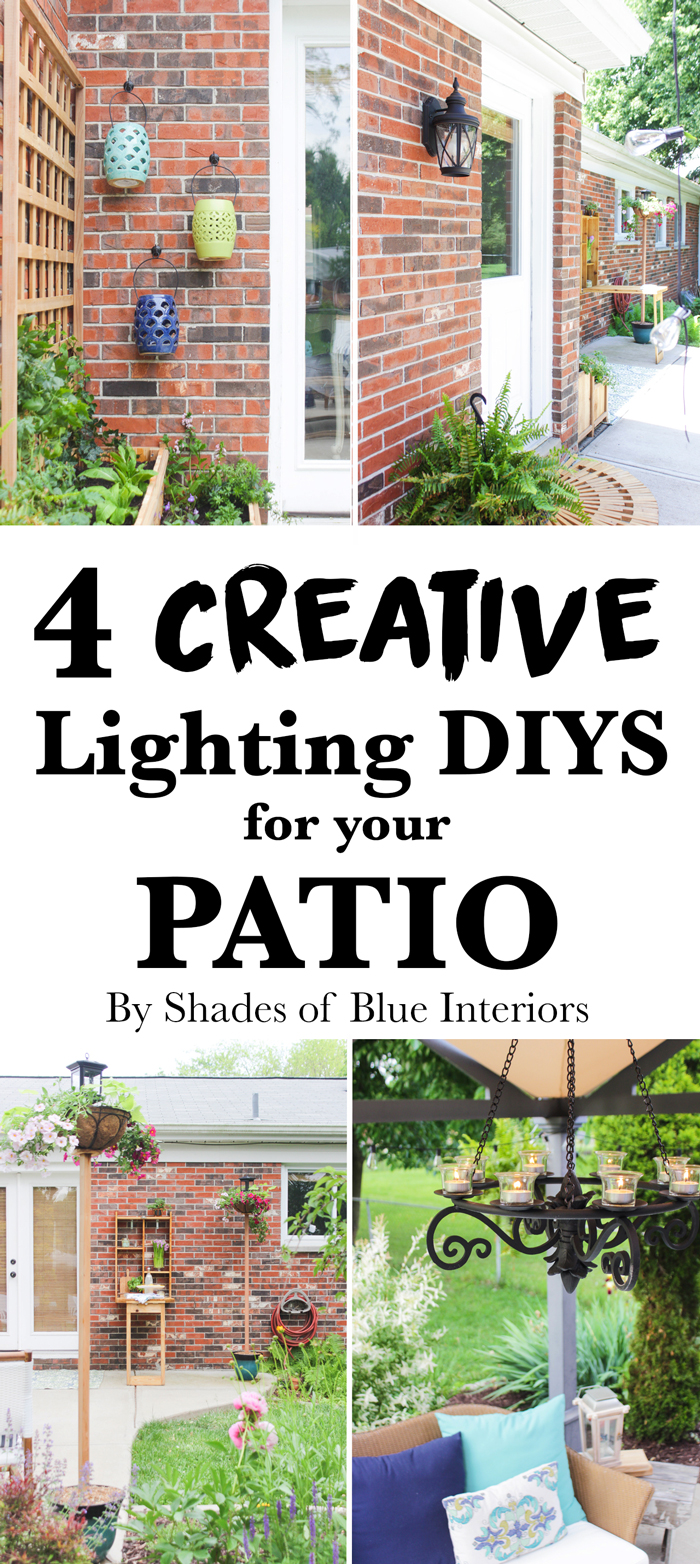
Today I’m super excited to share with you 4 creative lighting DIYs to add some extra ambiance to your patio! If you remember a few weeks ago, I updated the seating areas in my patio with a color palette of navy, aqua, citron, bright white, and natural cedar-toned wood. I continued that theme but added some extra fun features I’ll share with you!
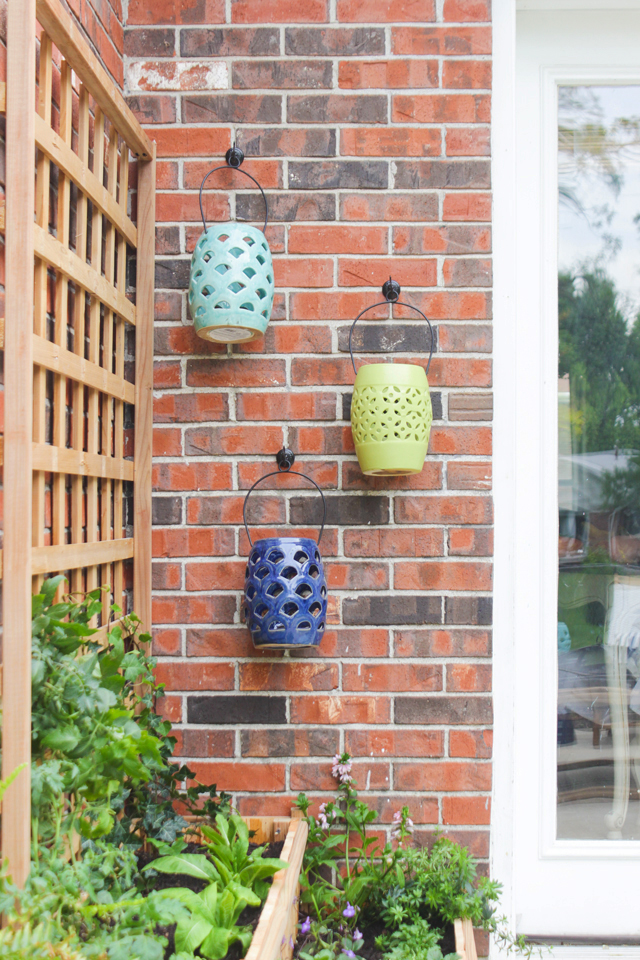
Creative Patio Lighting #1: Hanging Ceramic Lanterns
This project is super simple and could be completed in just a few hours (or less)! You will need:
-3 Allen + Roth Ceramic Outdoor Ceramic Lanterns of coordinating colors
-Valspar Outdoor Anti-Rust Paint & Primer in color of choice
-Valspar Indoor/Outdoor Project Perfect Top Coat in Clear Satin
-3 outdoor planter hooks
-Masonry drill bit
-Cordless drill
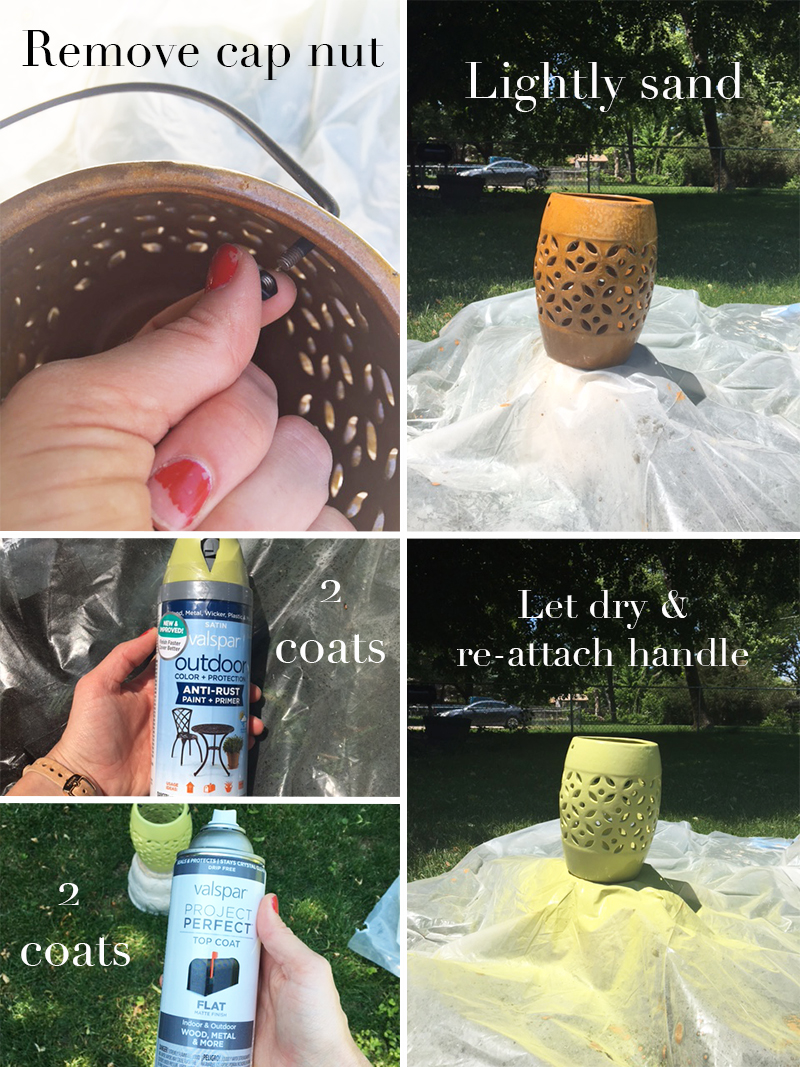
Step 1: Paint Brown Ceramic Lantern
Remove cap nut on metal handle of ceramic lantern. Lightly sand exterior shiny surface with 120 grit sandpaper. Place on top of plastic drop cloth in a well-ventilated area. Spray with 2 coats of Valspar Outdoor spray paint, and then 2 coats of of Valspar Top Coat, making sure to let it dry between each coat. Reattach metal handle and secure with cap nuts that were removed previously.
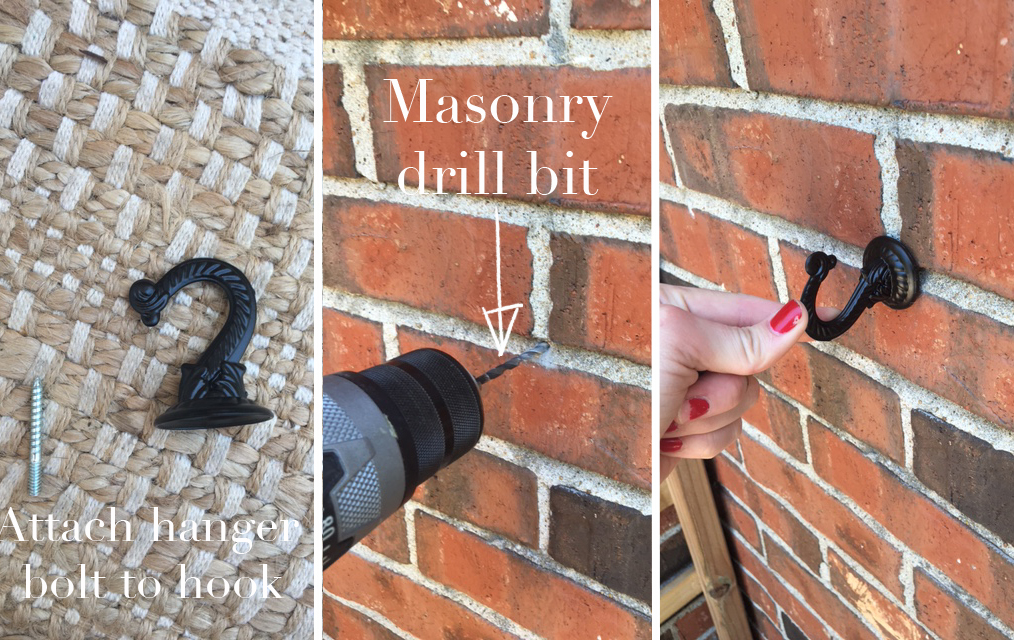
Step 2: Attach Hooks to Exterior Wall
The outdoor planter hooks come with hardware for 2 methods of attachment to a wall. Use the provided hanger bolt and screw the flat end into the hook until it is tight. This leaves the pointed screw end exposed, to attach to the wall. Decide the placement of the first hanging lantern and pre-drill a hole using 1 size smaller driller bit than the hanger bolt size, into the mortar. (If you have vinyl siding, you can use a regular drill bit, as it will go through the vinyl, then the wood with no problem.) Screw the hook into the pre-drilled hole and hang your lantern!
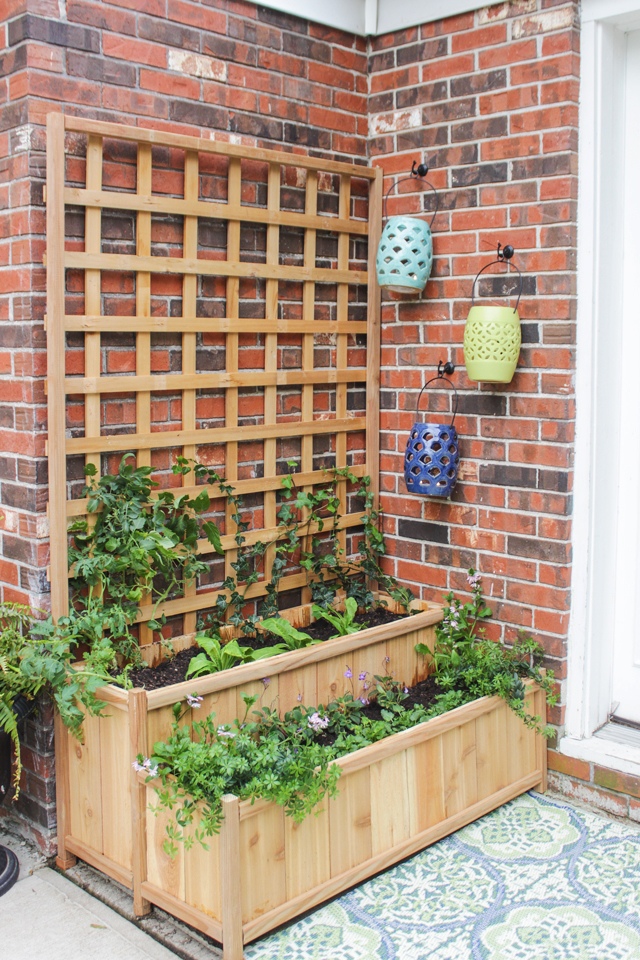
Tip: Stagger the placement of the lanterns for a more visually interesting display.
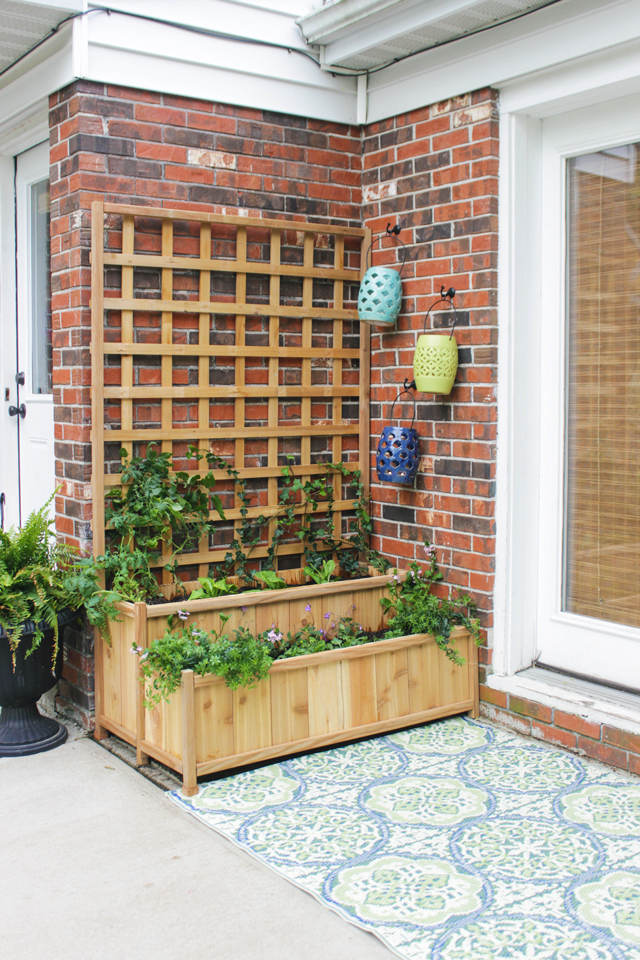
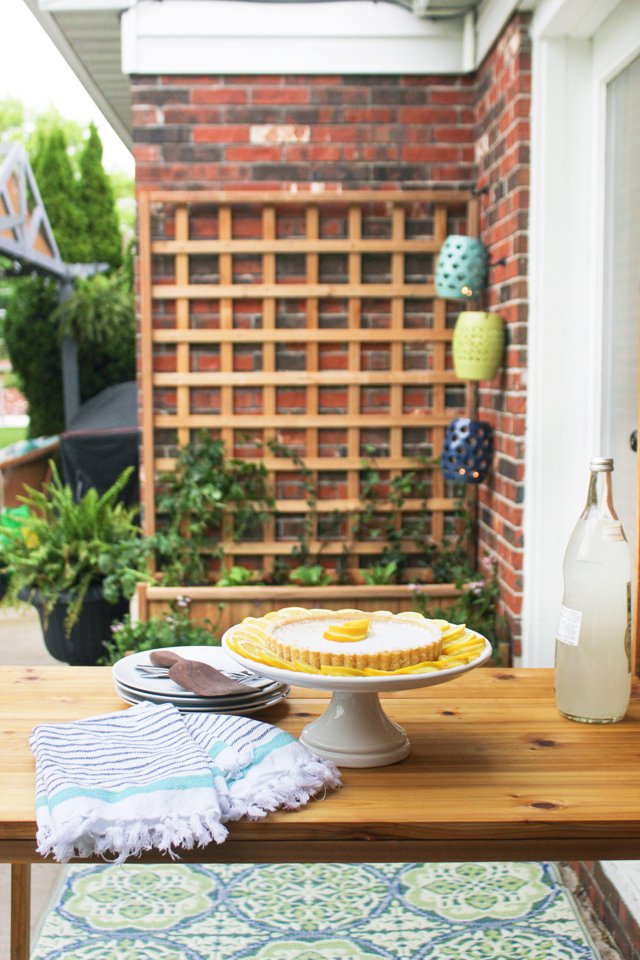
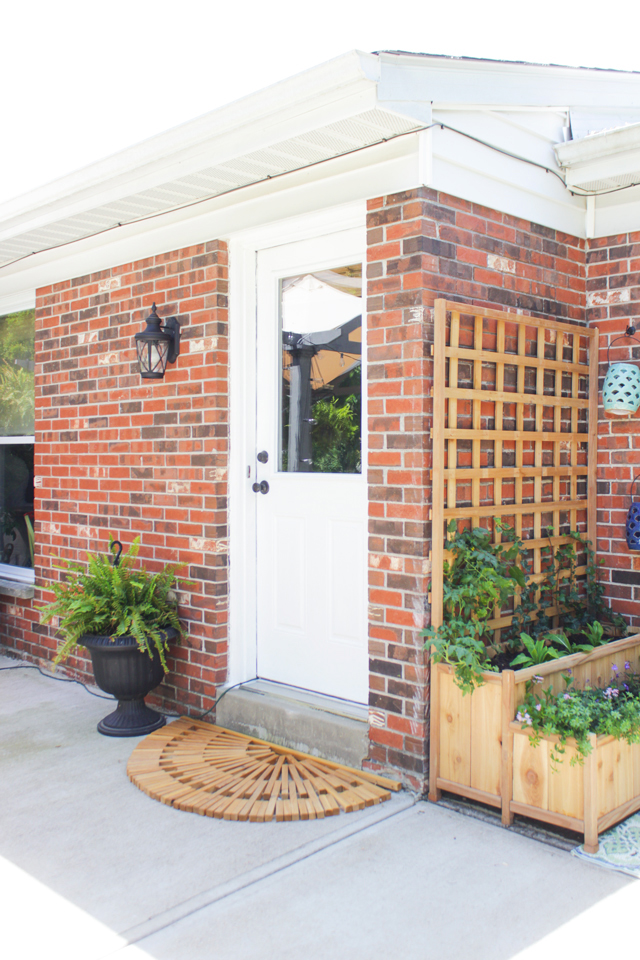
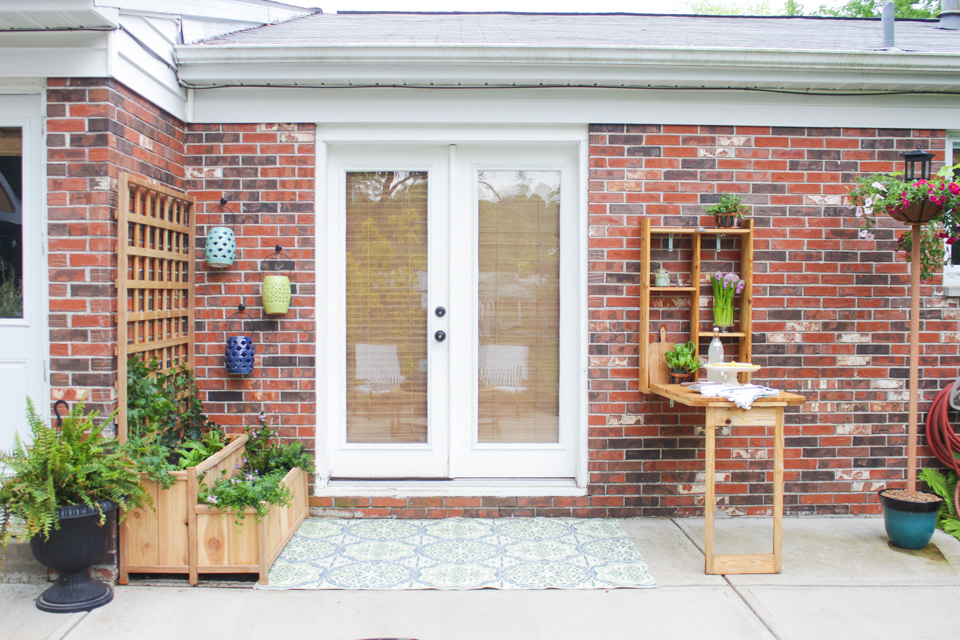
I put these alongside the patio doors that did not already have an electrical wall light installed. This made the most-used doors in our house (right off the dining room) now both pretty and inviting. I placed a few citronella tea lights in each lantern and it adds a lovely glow, as well as keeping mosquitos away!
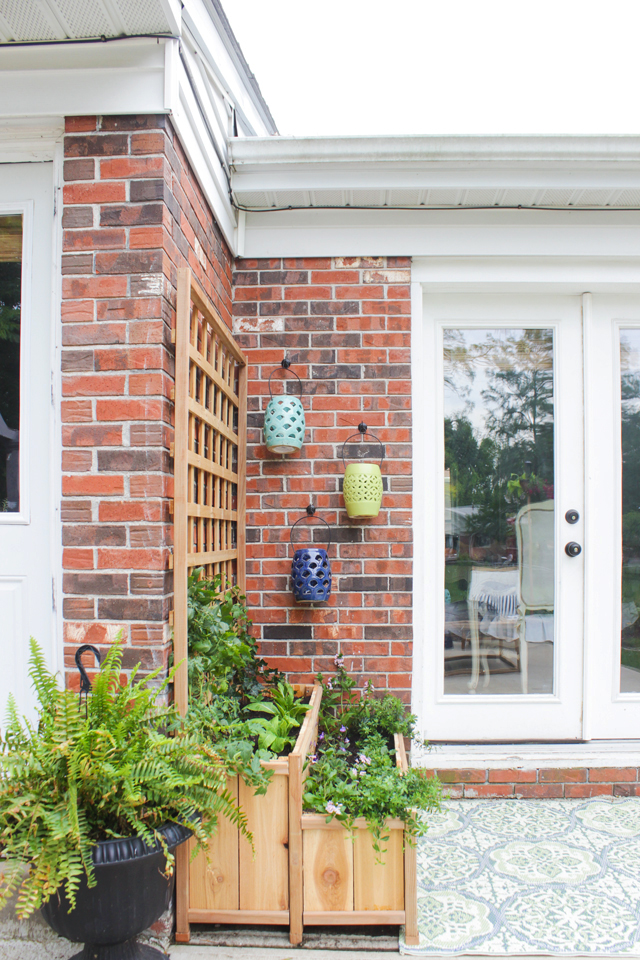
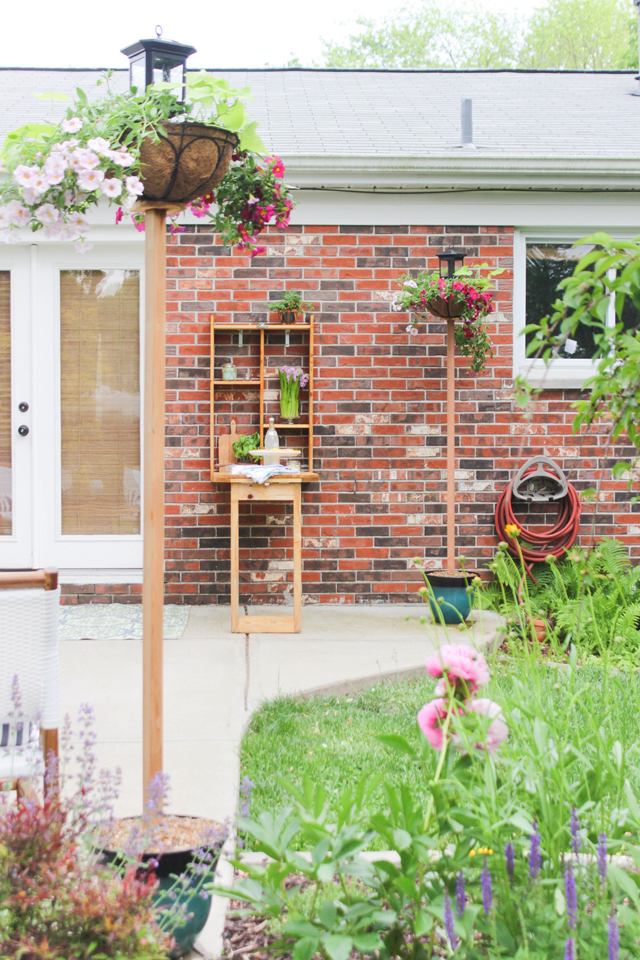
If you notice, I built this incredible tiered planter with trellis to spruce up this little forgotten corner. Now has a variety of flowers, vines and even a couple tomatoes growing. I added an outdoor rug to finish this space making it all-the-more inviting! I’ll have a tutorial up for this planter next week! 🙂
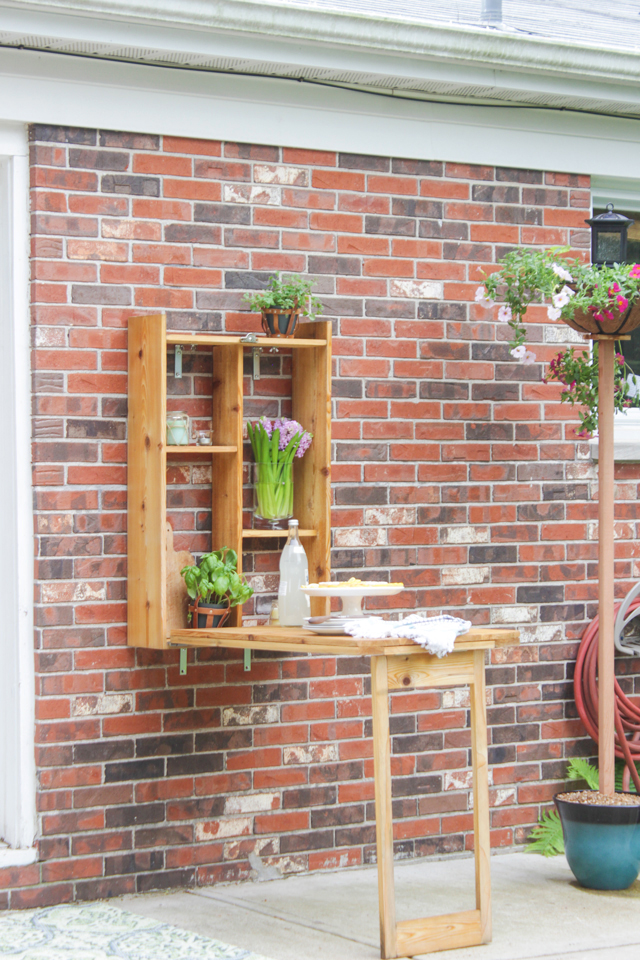
Just opposite this tiered planter is my outdoor murphy bar I built last summer which is a great spot to put out treats and drinks.
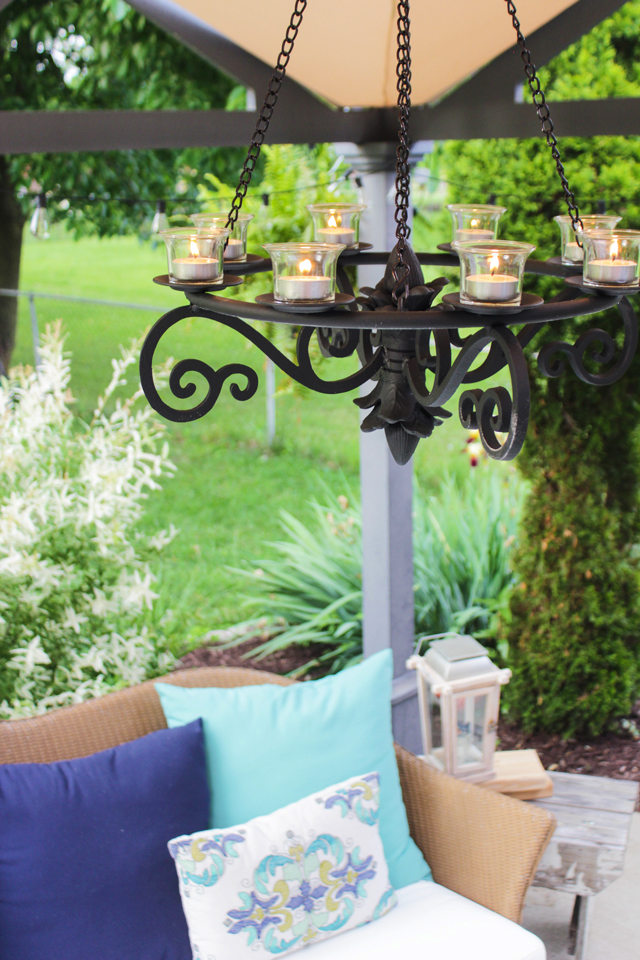
Creative Patio Lighting #2: Hanging Gazebo Chandelier

This spot under our pergola/gazebo is surrounded by some edison bulb string lights, but right under the canopy had zero lighting and a giant hook! It was begging for an outdoor chandelier. I spied this affordable Allen + Roth Hanging Gazebo Chandelier (but online it is listed as Black Metal Votive Candle outdoor Decorative Lantern) in the outdoor section at Lowe’s on the bottom shelf… Less than $50!! Can you believe it?
I was so excited! I filled it with more of those citronella tea lights (it fits 12) and couldn’t be happier with how it looks under our pergola! I can’t wait to build a coffee table so I can attach a chain to this chandelier and lower it a little more to be a glowing focal point. 🙂
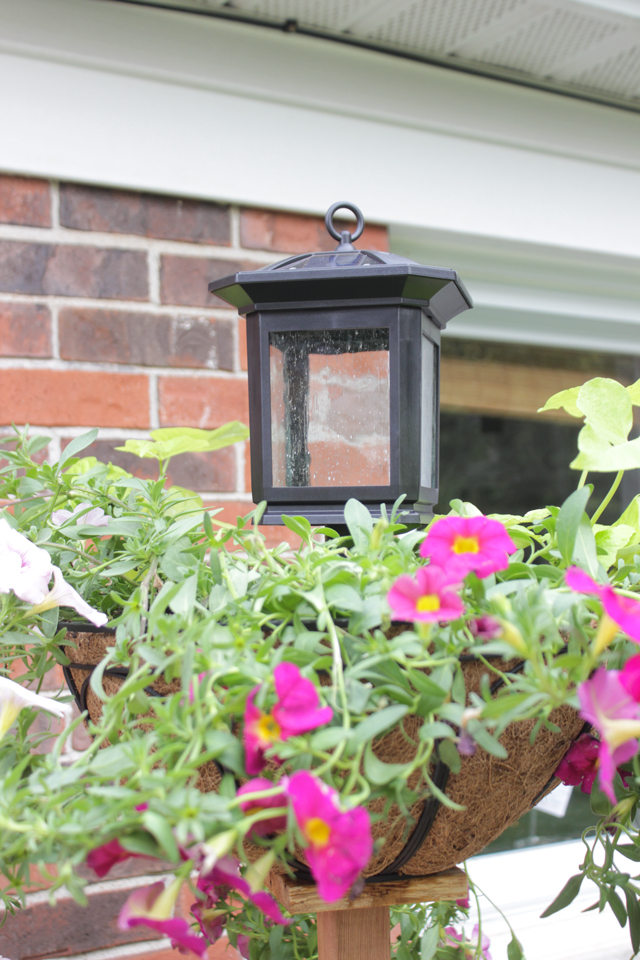
Creative DIY Lighting #3: Solar Light Pole
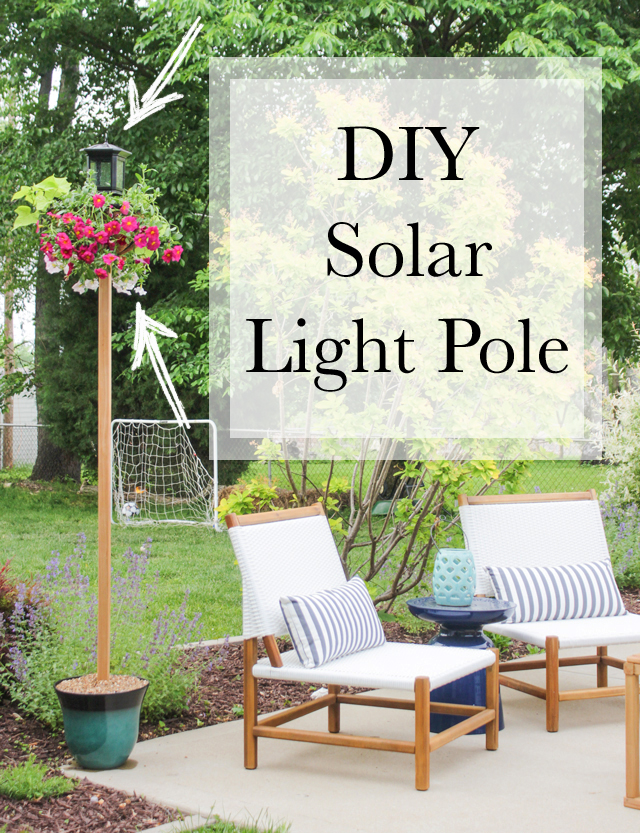
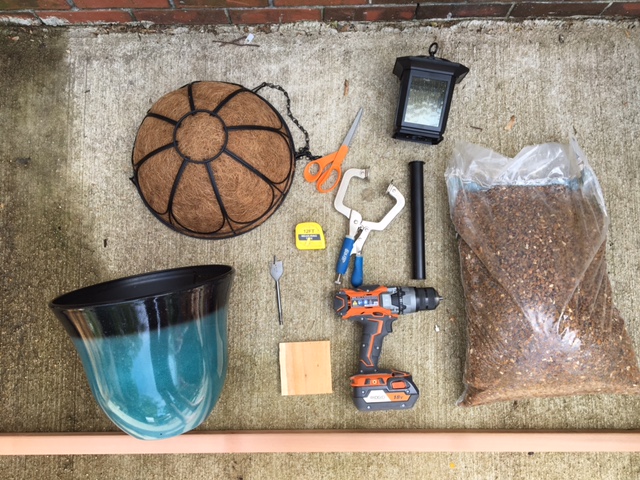
To make 1 solar light pole, you will need:
– 2×2 cedar pole @ 6′ 6″ long
-wood clamp
-cordless drill
-1 1/8″ spade drill bit
-4″ x 4″ cedar board, 1/2″ thick (cedar picket cut to size)
-hanging basket
-scissors
-solar path light with stake
–Allen + Roth plastic planter pot
-1/4″ twist drill bit
-pea gravel
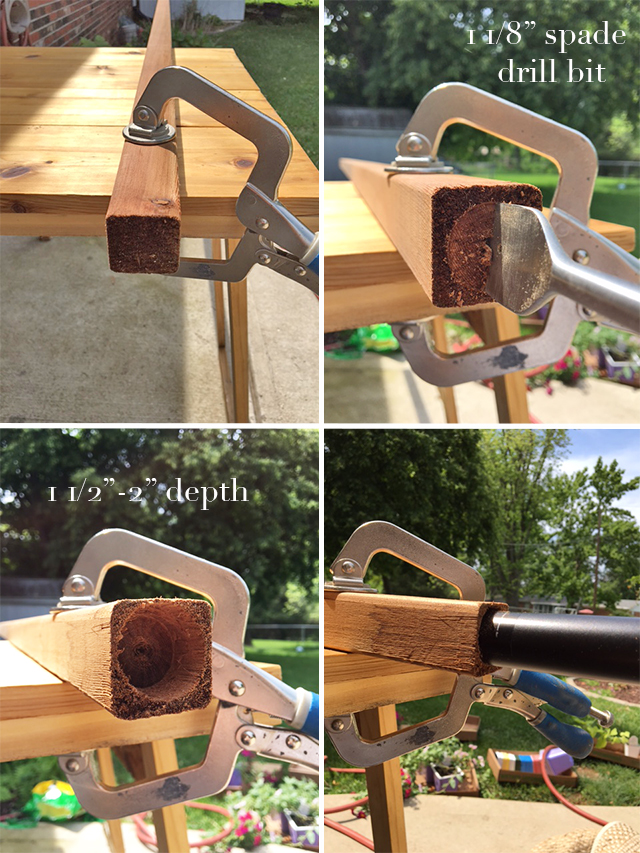
Step 1: Drill Hole in Pole
Clamp the cedar 2×2 pole to something sturdy. Mark the center of one end closest to the clamp and position the spade drill bit on that mark. Set your cordless drill to screw mode, not drill mode, so the speed isn’t too fast (otherwise you will shred the wood). Slowly start drilling into the top of the pole, making sure to not get off center so one of the sides (between the perimeter of the circle and the edge of the 2×2) isn’t too thin. Drill to about 2″ in depth and test fit the stake from the solar light, to ensure it has a snug fit. Work slowly to get this depth and fit right. You want it deep enough that is is sturdy but not too deep that the light won’t stick up far enough on top of the hanging basket that will slide over the stake later.
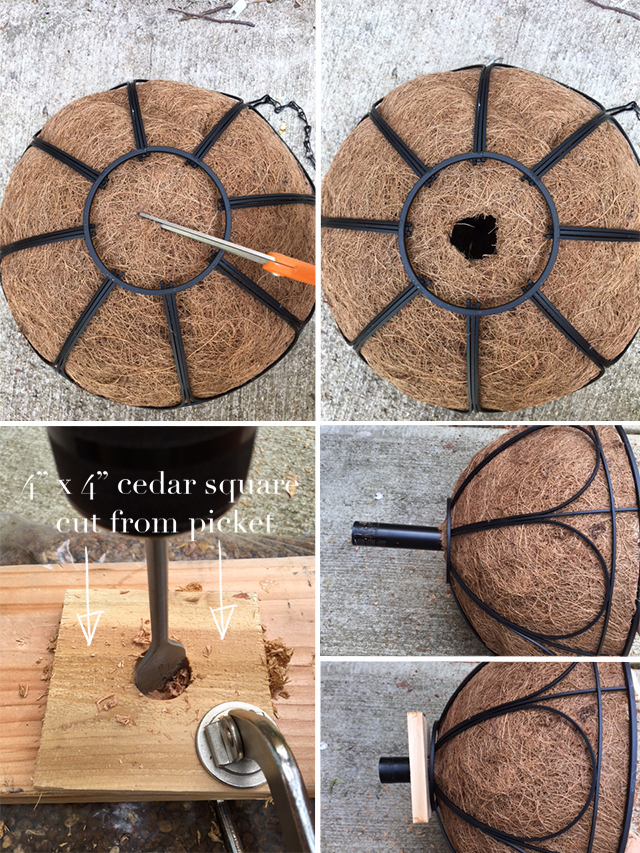
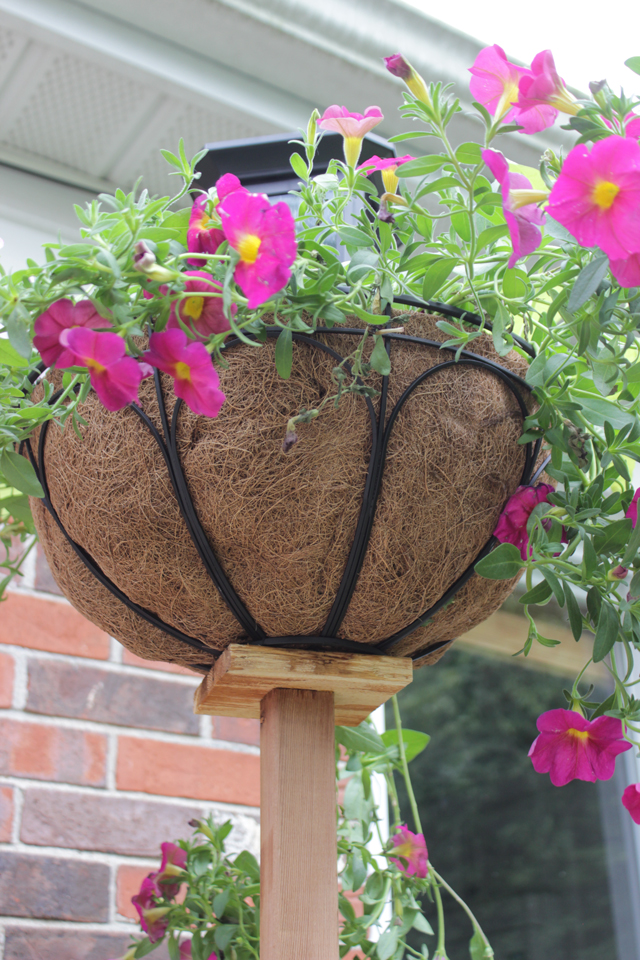
Step 2: Fit Hanging Basket with Cedar Support
At the bottom of the hanging basket, cut out a 1″ diameter hole in center of the brown basket liner. Then, clamp the 4″x4″ cedar square to a scrap piece of wood and drill a a hole in the center using the 1 1/8″ spade drill bit. This cedar square will support the base of the basket when it slides over the stake and on top of the pole.
Step 3: Position Pole & Fill Planter With Gravel
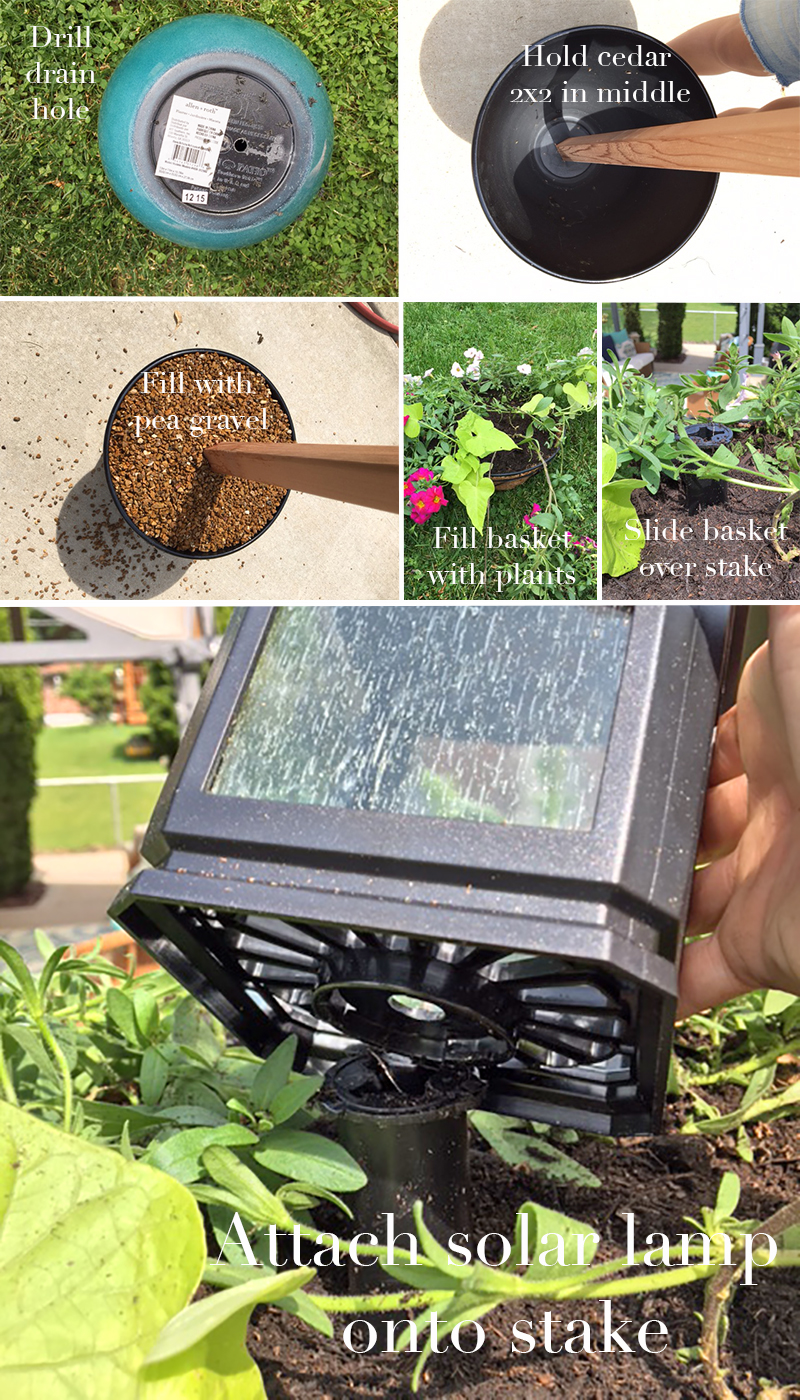
At the bottom of the plastic planter, drill a hole using a 1/4″ twist drill bit. This will prevent water from filling up the pot when it drains from the hanging basket. Turn the planter pot over and position the cedar pole in the middle. Two people will be needed for this part. While one person is securely holding the pole in the middle and vertically level, the other person will pour the entire bag of pea gravel into the pot. If a more secure and more permanent method is desired, you can fill with cement instead of gravel.
Transplant flowers into hanging basket, making sure to leave a space in the center of the basket for the stake to come up. Slide the basket full of flowers over the stake that should be securely placed into the hole at the top of the cedar pole (if desired, place wood glue in the drilled hole of the pole-end, before pushing the stake in) and have the cedar 4″x4″ square on top of that. The stake should stick up above the dirt about 2-3 inches. Lastly attach the solar lamp onto the stake (it should lock into place).
Bonus idea:
New Wall Sconce Light
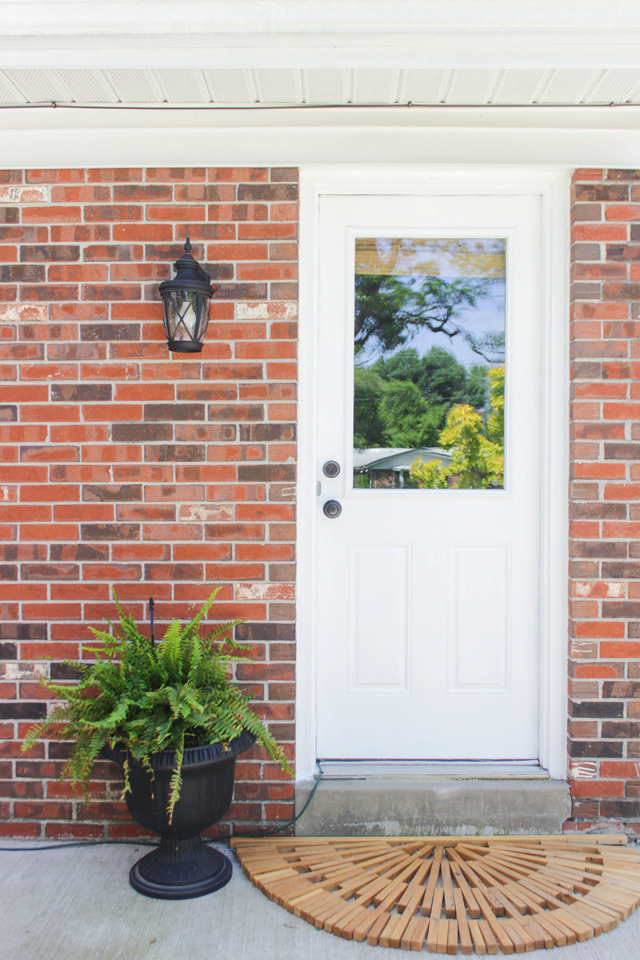
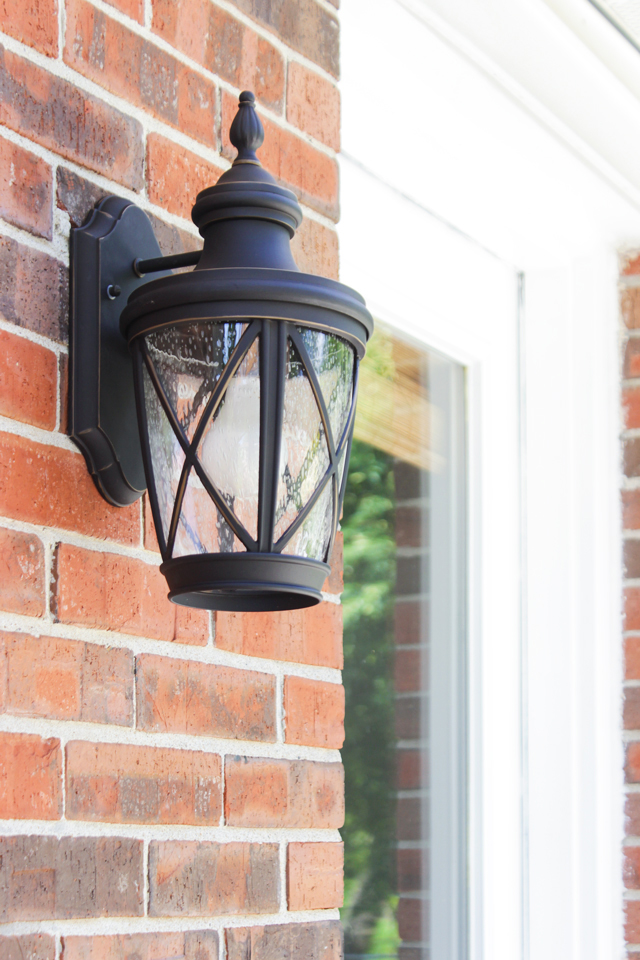
Our adjacent patio door had an older wall light that looked forgotten and it was loose, so wasps were always trying to find their way inside and make little nests. This gave me the perfect opportunity to update this light and it really makes all the lighting changes cohesive since they are all similar in style and black/oil-rubbed bronze.
I chose the Allen + Roth Castine Rubbed Bronze Outdoor Wall Light. I love the classic and timeless shape and style. It took me about an hour to install by myself using the provided instructions, but it would have gone so much faster if I had someone helping me.
What a difference right? Just by putting a little more effort into details like lighting, it can totally make your patio area more inviting and look ‘finished’.
I would LOVE to see if you add some of these ideas to your patio! Leave a comment below and let me know which one of the 4 are you most likely to incorporate into your outdoor space!
Love this post! Thanks for the inspiration girl!
Love all of it, especially the solar light planter.
I don’t know which one i love the most. Why guess when I am nuts fore all four of them. By the way, ( your pergola), what did you use to fasten your 4X4’s post to your concrete patio. We have 16X16 concrete patio pavers, and I want to build a pergola, but don’t know how to keep it from blowing down if we don’t remove the paver and dig holes. Please help!!!
Hi Rachel,
How much did end up everything costing you? Beautiful project. I’m considering doing something similar but want to look at the costs first.
Thanks,
Laurie
Laurie,
I had a specific budget they wanted me to use all of, and it was $300 for materials of everything mentioned in this post. The new outdoor wall light was around $100 (I think a little less), the solar light poles cost around $80 including flowers. The lanterns cost around $40 not including candles for the inside, and the candle chandelier cost $50, plus I spent about $15 on candles, and another $5 on extra chain (to make it longer).
Love everything dear !!! But do you know why nothing can be pinned to Pinterest ? Tried quite a few pics from different posts even and still no luck.
Great ideas! Thank you.
Not everyone has been gifted with creative juices, so it’s really nice how you poured an effort and presented these functional yet aesthetically pleasing ideas. Must say the solar light pole is the best one to go for especially for those who are leaning toward having a cost-effective solution that lasts.