This is the second in a 2-part series on how to turn a vintage glass jug into a table lamp. This tutorial will teach you how to apply a vintage-inspired label to the glass jug.
To learn how to turn a glass jug into a lamp, GO HERE.
When I first looked into applying a decal to my bottle lamp, I found an awesome tutorial on The Painted Hive where she wanted decals on clear jars. I decided to try out the MAGIC coating paper that is used with waterslide decal paper because I was pretty sure if I JUST used waterslide decal paper, the necessary spray clear coat would add unwanted texture to my bottle in a un-uniform fashion.
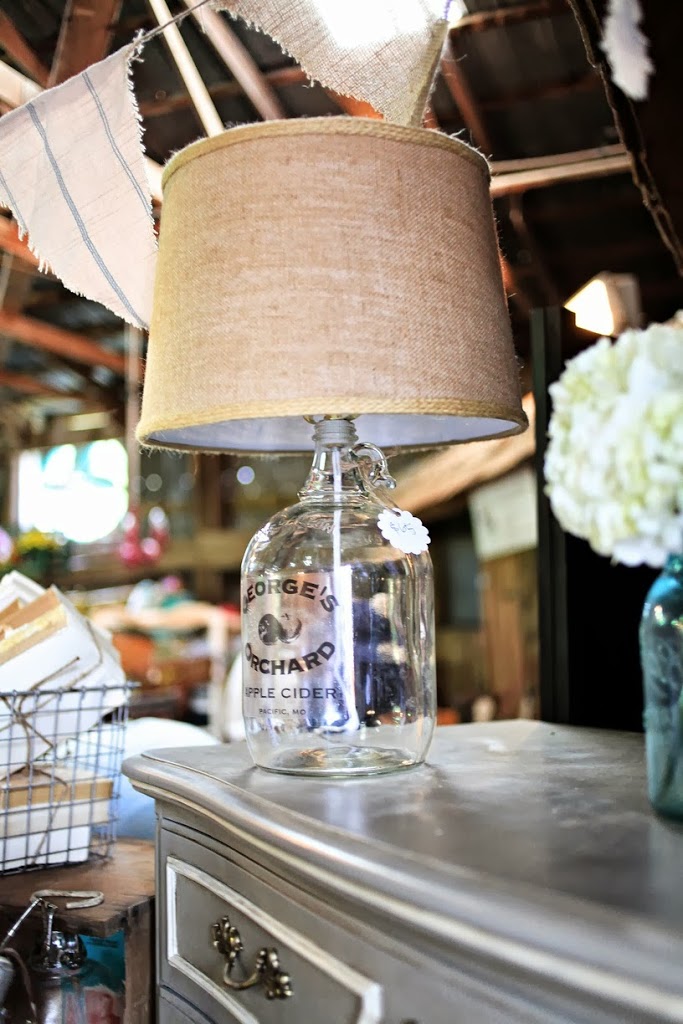
To learn how I made the jug into a lamp GO HERE
So I ordered both clear waterslide decal paper and MAGIC coating paper from Robin’s Eggcetera, which for 5 sheets of each cost me about $13 including shipping.
Here are the supplies you will need:
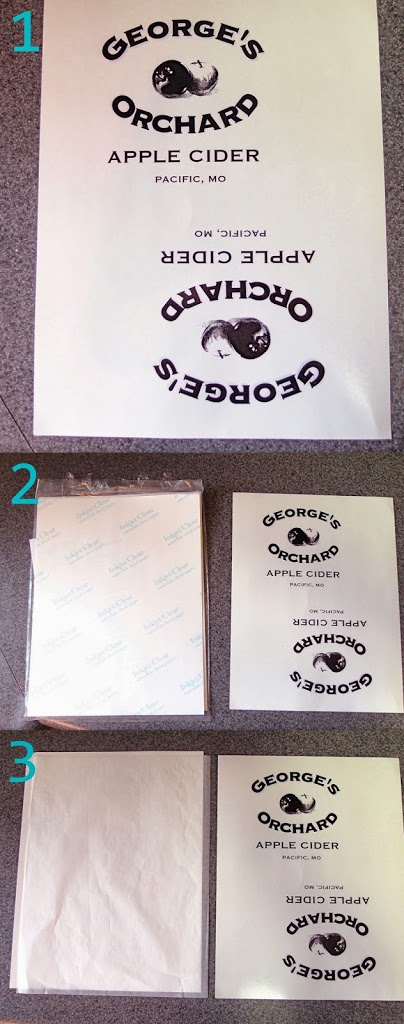
1. Graphic you want printed on the decal paper (I don’t have any fancy programs and was able to
design my vintage inspired logo on Word. Sometimes simpler is more authentic, but it depends on what
your decal will be for.)
2. Inkjet printer
3. Clear Waterslide decal paper (1 sheet will easily fit 2 large logos)
4. Clear MAGIC coating paper with translucent sheet that comes with it
5. Laminator (I borrowed a friend’s but it can be purchased for around $20.)
6. Scissors to cut out graphic
7. Small washcloth or clean rag
8. Bowl with some water in it
9. Hair dryer (only if you object won’t fit in an oven or microwave)
Now to get started!
1- Print off your image on the waterslide decal paper, making sure the graphic is on the shiny side. Change
your print settings to photo paper and use highest quality possible.
2- Let ink dry for about 30 minutes. Notice the opposite side of the paper has a watermark on it to easily
differentiate which side you need to print on. While you are waiting, turn on your laminator so it can
heat up.
3- Pull out your MAGIC coating paper and do NOT discard the transparent sheet. You will need it. Notice
the MAGIC coating paper has a glossy side. That is the side that will face your graphic.
4- Place your MAGIC coating paper so the shiny side is facing the graphic on the waterslide paper and the
translucent sheet is on top of the watermark of the waterslide paper. The translucent sheet will protect
your waterslide paper from getting too hot.
5- You DO NOT need the cardboard envelope that most laminator’s come with. Line up the papers and
send them through the laminator.
6- It will take about a minute or less for it to go all the way through.
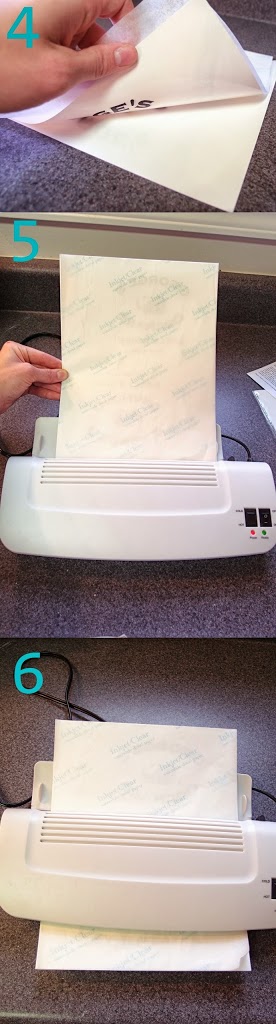
7- Now the waterslide paper and the MAGIC coating paper are fused together and you can discard the
translucent paper. Cut around the graphic. I chose to do a square around it because it made it easier to
position correctly.
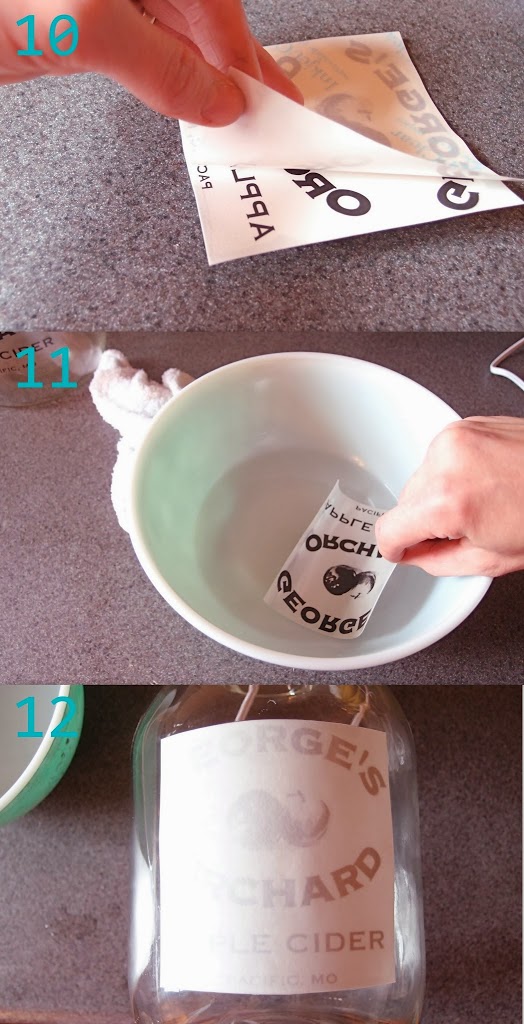
8- With a damp rag, start blotting the WATERMARK side of the waterslide paper. THIS IS VERY
IMPORTANT that you do not blot the MAGIC coating paper side with water. If you do the reverse you
will end up applying your graphic as a mirror image. No bueno. I made that mistake the first time
because I was following the first page of instructions that came with the MAGIC coating paper. On the
back it tells you the alternative method that I am explaining. I ended up having to throw it out and start
over! :/
9- Keep blotting until the entire sheet is wet. Wait a few seconds until the paper is fully wet but not
dripping.
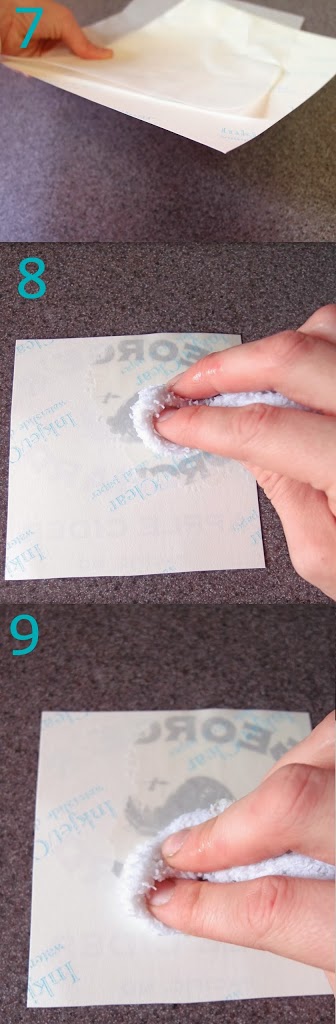
10- Carefully pull the waterslide paper off. It should come off easily. If it doesn’t, wait a few more seconds
and blot any area that appear lighter with a little more water. Basically, once the paper is wet, it will
release the clear film that holds the graphic.
11- Dip the entire graphic that has the MAGIC coating paper still on one side, in a bowl of shallow water.
Don’t let it sit in there, just dip it in and out, making sure entire thing is wet.
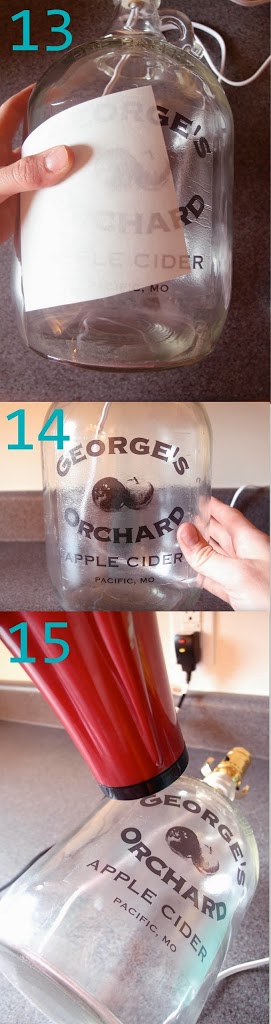
12- Position your graphic on the object (the bottle in this case). It will stick but can still be slid around into
place.
13- Carefully slide the MAGIC coating paper off. The decal has not set yet, so it will still be slightly
moveable, so work slowly and if it becomes a little crooked after you slide the paper off, just gently (so
as to not tear the decal) reposition it with your thumbs, sliding it back into place. Notice in the picture
you can see some wrinkles in the decal.
14- Smooth out said wrinkles and bubbles with wet fingers. Dry fingers can tear the decal easier and can
also move your decal out of place easier. It will feel a little slimy and gluey.
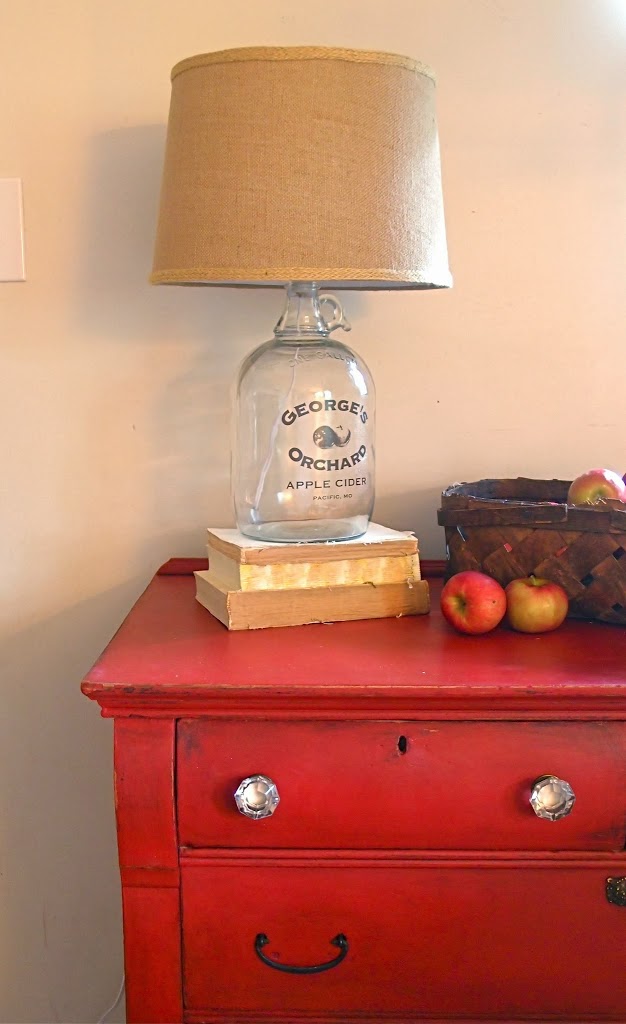
15- Set your decal by using heat. I used a hair dryer on low hot heat for about 20 minutes total (I divided it
into 4 sections and stayed on each section for about 5 minutes). If you have a smaller decal, you only
need to set it with heat for 5-10 minutes.
You are so clever! did you make/recover the lampshade for this project? I find it difficult to find the right size/shape /color lampshade for vintage lamps.
No I bought the lamp shade at target! 🙂
Where is Magic coating paper available in USA?