This is the first in a 2 part series on how to make a vintage decal glass jug lamp. Here you will learn how to turn a plain glass jug into a lamp.
To learn how to apply a vintage-style decal to the glass jug, GO HERE.
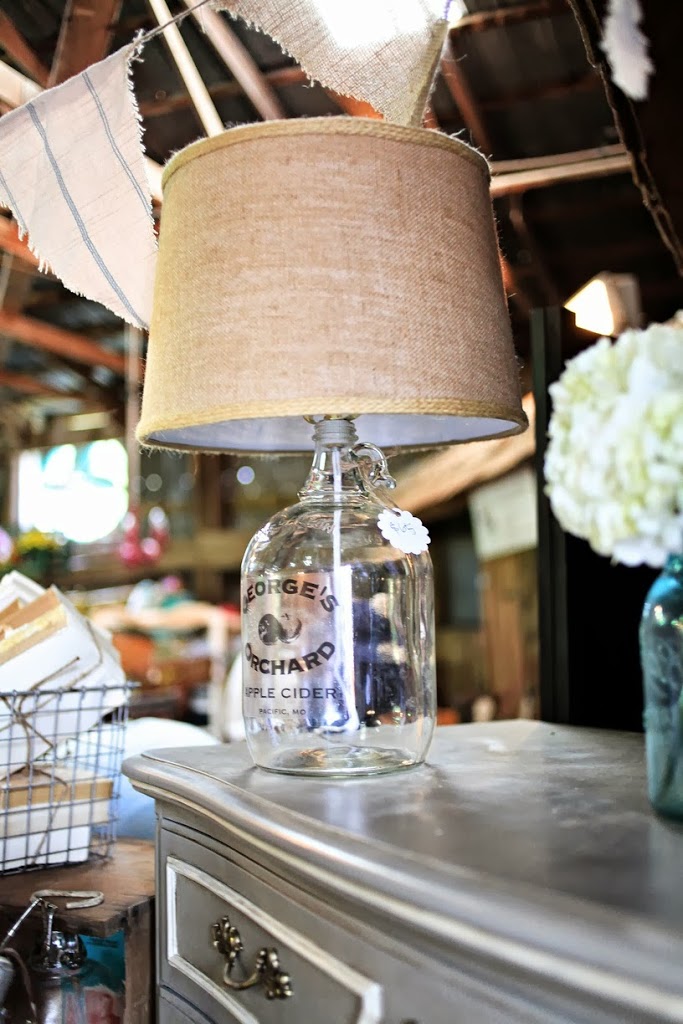
Awhile back after acquiring several vintage gallon cider bottles, I decided to make a lamp out of one. But I didn’t want it to be just a plain jug lamp. I wanted a vintage-inspired label on it. Why? Because I like to make my life difficult. 🙂
But really, there are all kinds of bottle lamps out there and I wanted something unique, one-of-a-kind that paid tribute to where these jugs came from. Here is what they looked like before I cleaned them out (a pain-staking process):

5. Light bulb
I chose to go with a method of drilling a hole in the glass because 1) I plan on making more than one bottle-lamp in the future, and 2) I’m impatient and didn’t want to order the lamp kit where the cord doesn’t need to go down into the neck of the bottle. They are out there, but harder to find and usually are ordered online. The basic lamp kit found at HD or Lowe’s is also cheaper than ordering one online and it would be even cheaper if you up-cycled lamp parts from an old lamp you have lying around or one you find at the thrift store! All these options will require the cord to go inside the bottle, hence needing a way out!
Okay, on to the instructions.
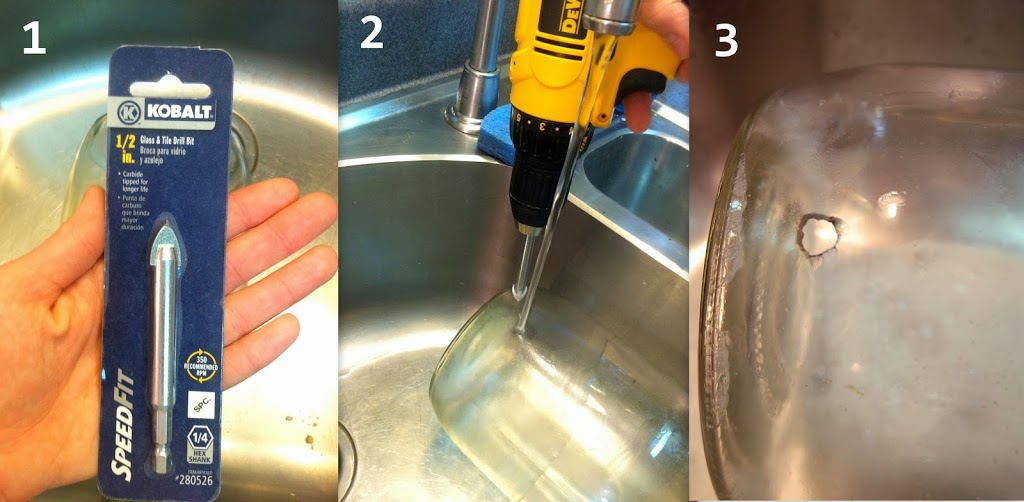
1) First, attach the glass/ceramic drill bit. Use a marker to make a dot at the place you will drill your hole.
2) Then, in your sink or bathtub or even outside with water running over where you are drilling, start drilling your hole. This process will take 5-7 minutes of steady pressure, but not too much. I wasn’t pushing because I didn’t want to force it and break the glass. I only added a little more pressure than the weight of the drill provided.
3)It will take awhile before you start to notice a tiny pin-prick of a hole. It will slowly get bigger and then when the tip of the bit gets through the glass, the hole quickly gets a lot bigger, so be careful, and go slowly!
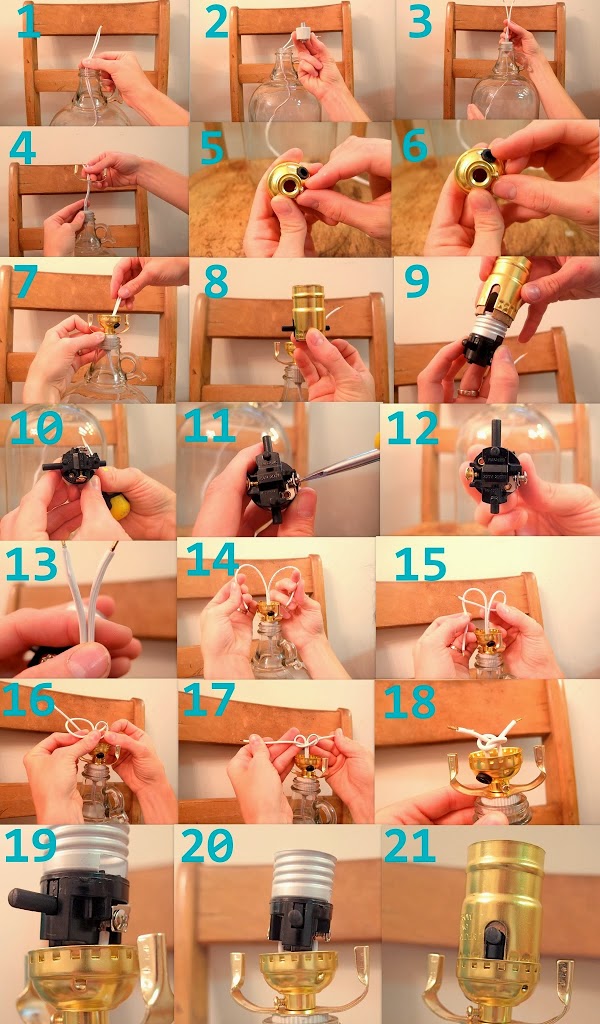
To install the lamp electrical parts, there are instructions on the package, but I am a visual person, so for those of you out there like me, here is pictorial instructions on putting that lamp kit together with your bottle! (You can click the picture to make it even larger in a separate window)

Because you like to make your life difficult….HAHA! I feel ya.
That lamp is super cute. I can’t believe how clean you got the glass.
Love the lamp! Great idea! Thanks for the shout out on Facebook!
Anne
Hi! Rachel, must say your patience worked off very well, those are amazing. Also great finish!
Would love it if you linked up: http://theculturedcavewoman.com/2013/09/27/simplified-saturdays-1/
Have a great weekend! 🙂
I love this idea! It turned out great. I would love to I invite you to share this at Modern Cottage Monday at http://www.curatebycarriecorson.com
Your lamp turned out awesome. Clever idea.
Love this!!! I always wanted to try drilling into a glass bottle but little shards of glass going all over the place put me off. Thank you for sharing and giving a link to the drill bit. You are my hero 🙂
I clicked over from HomeTalk to tell you how fabulous this project is! So good!
This is Amaaaaaaaazing!! I love it!!
I did some etching on the ones I have. But I have one that has like a hard water coating on the inside. I have tried everything to get it cleaned properly, but to no avail. Did any of yours have that or any ideas?
I’ve heard denture tabs works great!
I had some similar bottles that were really dirty and put a couple of handfuls of gravel/smallish stones in them, added a bit of water and swirled them around for a while and, presto – when I tipped them out and rinsed the bottles they were super clean.
a great way to clean the inside of your jug or bottle if it’s really dirty is to put a couple tabs of denture cleanser in them.
Would love to see more of your creations. Loved the lamp.
Thank you.
Really cool! Could you custom the name on the decal?
Great project. How did you clean the bottles?