**Update: Giveaway Closed**
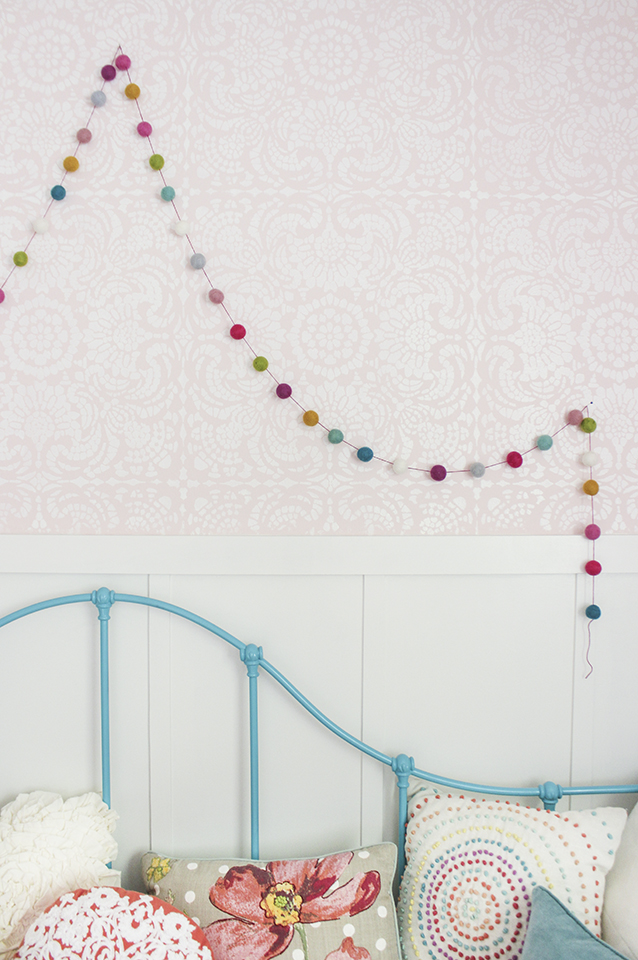
I have been planning my daughter’s room makeover for over a year, but really started solidifying details a couple months ago and shared my design plans last month for the room HERE. Part of my plan was to use an allover wall stencil, and I fell in love with the selection and beautiful designs that Royal Design Studio Stencils had. They were kind enough to send me my top pick, the Esperanza Lace Tile Stencil, in exchange for this post. AND because I loved the stencil so much, they are providing me with a GIVEAWAY for YOU, my beloved readers! One of you will get a free stencil valued at $50! Details are at the end of the post.
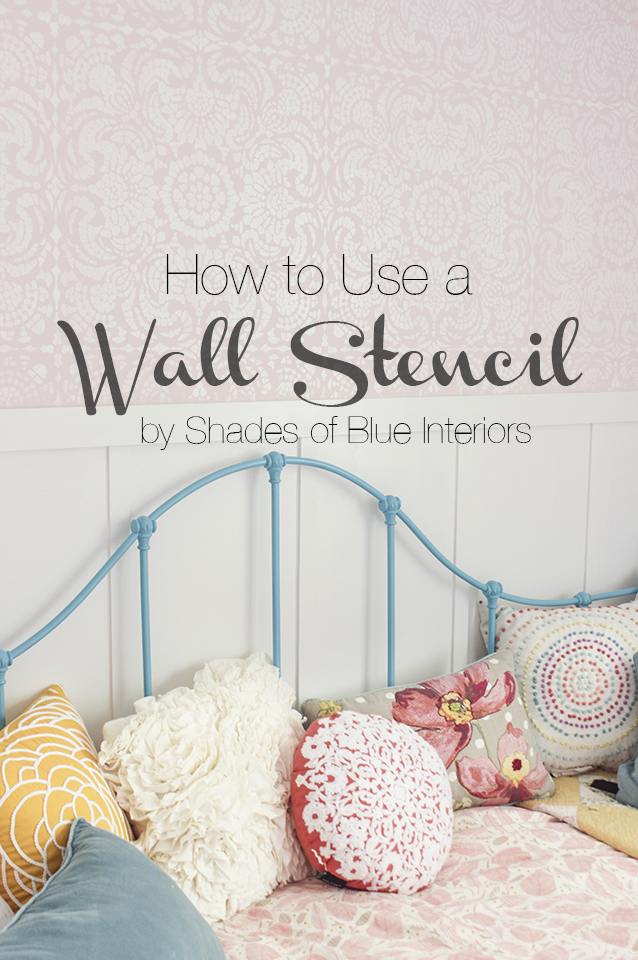
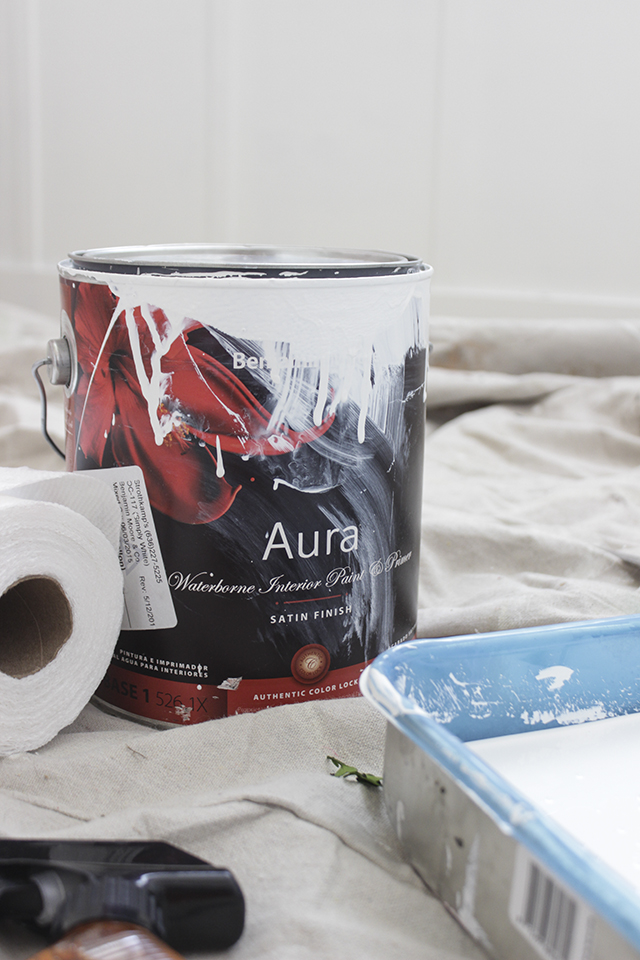
As you may or may not know, I’m passionate about paint. I’m a firm believer that high quality paint gives the best results. So when planning this room makeover, I knew my top choice for wall paint would be Benjamin Moore, who provided me with all the paint for this room makeover. I used Benjamin Moore Aura Interior Paint for the trim, board and batten, walls, and even for this stencil. Is is a very thick paint and goes a long way, while still having a rich, true color. Because BM Aura is so thick, it makes it a perfect choice with a wall stencil.
The steps I made to the walls and room before I was ready to stencil were the following:
-Remove old trim
-Fill holes with spackle
-Sand filled holes and entire wall with 150 grit sandpaper using a drywall hand sander.
(The walls in my home were all SUPER textured and bumpy… which is especially difficult to stencil over… so starting with a somewhat smooth surface is best)
-Install board and batten (I used 1x4s along the floor, 1x3s for the top boards, 1/4″ plywood on top of the textured wall between the top and bottom boards, and 2″ lattice strips on top of the plywood for the battens)
-Paint board and batten with 2 coats of BM Aura in White Dove, Semi Gloss
-Paint walls with 2 coats of BM Aura in Yours Truly, Matte
The color I used for the stencil on top of the pink, is BM Aura in Simply White, Satin Finish, with only 1 coat. That way there would be a subtle sheen different between the matte base coat and the satin stencil coat.
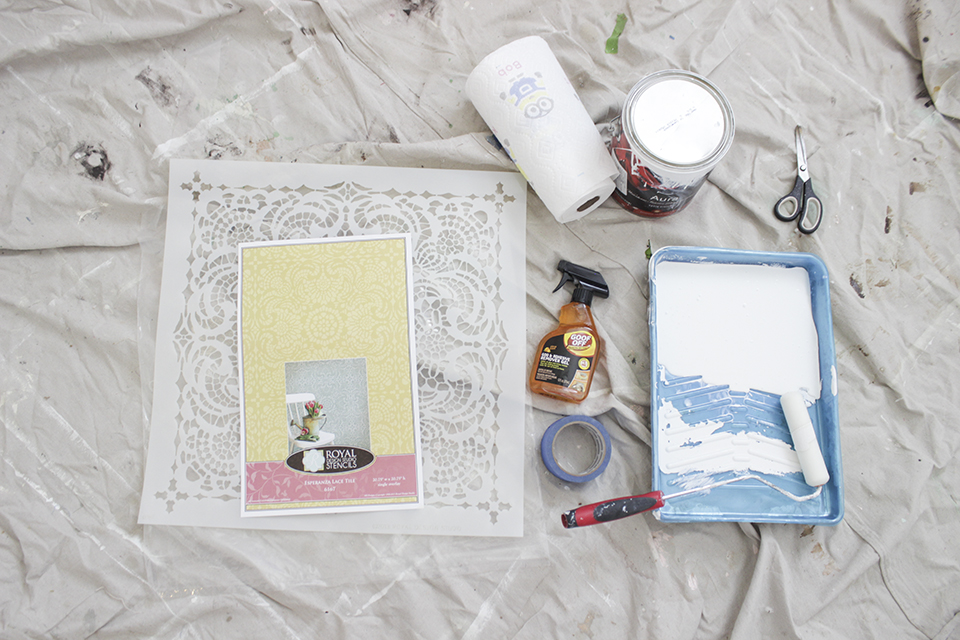
Step 1: Gather Your Supplies
1. Stencil
2. Painter’s tape
3. Small sponge roller(mine is about 4 inches wide)
4. Paint pan and liner
5. Thick-body interior paint (like BM Aura)
6. Paper towels
7. Small Stencil brush (stiff, thick, straight bristles)
8. Spray adhesive
9. Adhesive remover (to clean adhesive off stencil if it gums up after several uses)
10. Drop cloth or plastic to protect floors from accidental paint drips
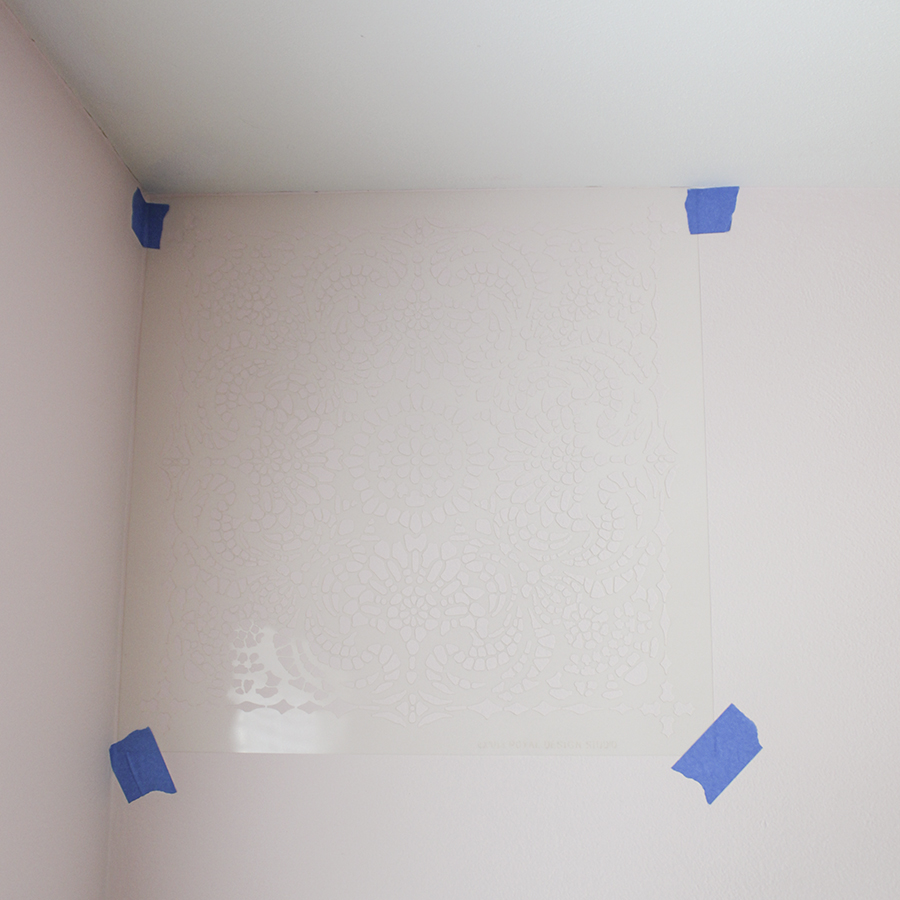
Step 2: Tape Stencil on Wall
Use painter’s tape to attach stencil to wall, evenly along ceiling line.
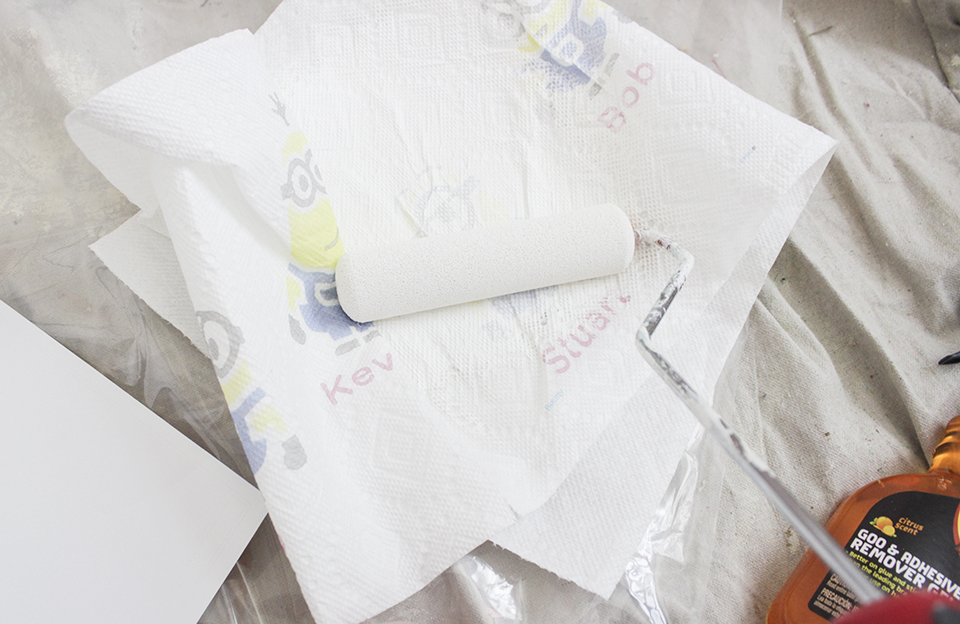
Step 3: Load Foam Roller with Paint
Make sure to get plenty of paint, evenly on all parts of the foam roller.
Step 4: Remove Excess Paint
Use absorbent paper towels to ‘roll’ off excess to prevent ‘bleed’ under stencil.
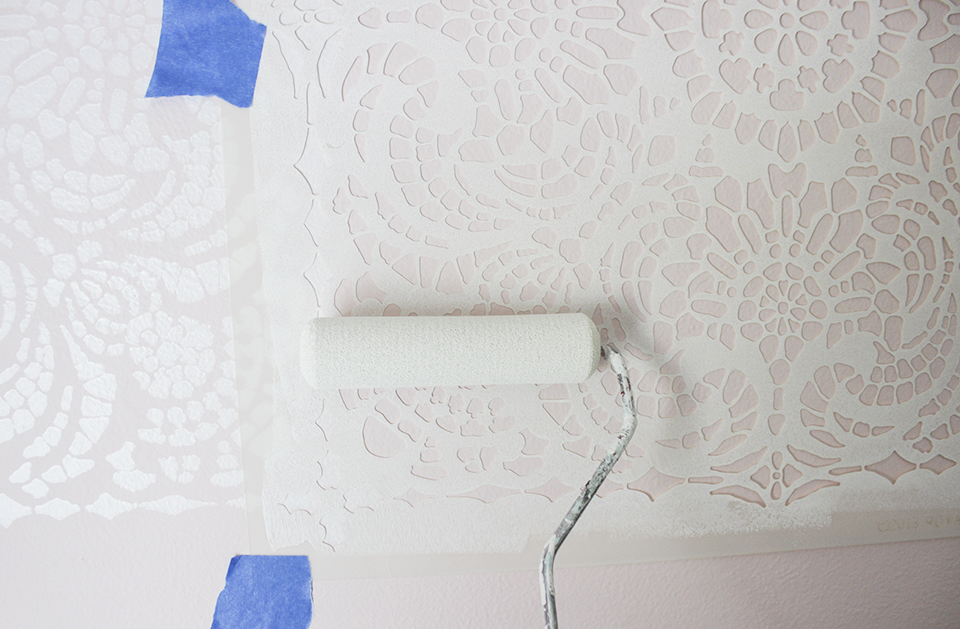
Step 5: Roll Paint on Stencil
Work bottom to top, using gentle pressure to begin with, and small strokes. Medium pressure will be needed about halfway through covering the entire stencil. Work slowly to start with until you get a feel for the process, so you can make sure to get enough paint on the stencil, but not too much so it doesn’t bleed under.
The nice thing about using 2 light colors and a lace pattern like this one, is some mild bleed-under is barely noticeable.
Step 6: Remove Stencil
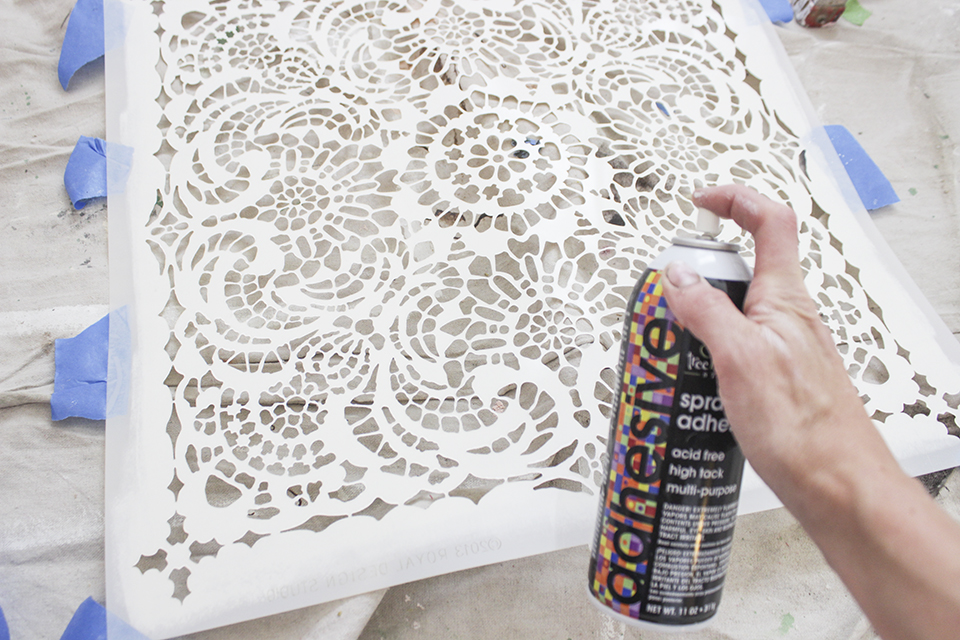
Step 7: For Corners and Edges Use Spray Adhesive
For trim, room corners, and edges, use a spray adhesive on the underside of the stencil, then position the stencil, overlapping the pattern edges, so that one part sticks, and the part that needs to bend is free.
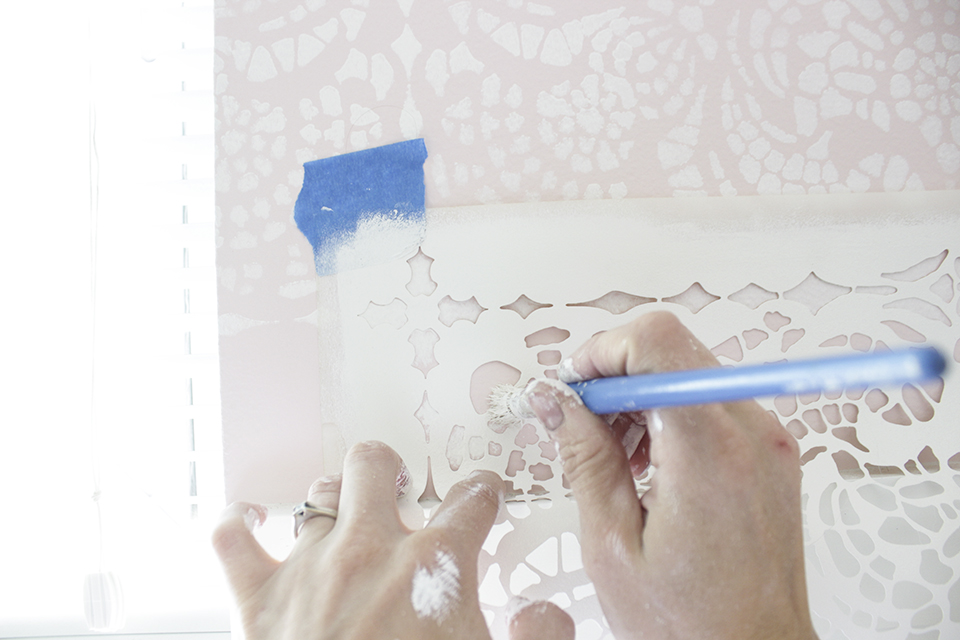
Step 8: Use Stencil Brush to Paint Corners and Edges
Use tape to further secure the stencil in place, then with one hand, push the stencil down into the corner or crevice as far as it will go without coming loose and bubbling up, and with the other hand use a small stencil brush to ‘pounce’ the paint into the stencil design. Don’t worry about breaking or bending the stencil, it is very high quality and sturdy, and will not crease unless you push very hard and try to crease it.
If you are using light colors, like I am, don’t worry about painting the design exactly flush with the trim or corner or crevice… it will be not be noticeable if you don’t have a the pattern perfect into a crevice.
Repeat steps 2-8, overlapping edges of pattern, until the entire room or entire wall (whichever you prefer ) is covered.
I’m SO excited to show you the rest of the room this week… stay tuned… 🙂
Here is a quick little video tutorial I did for you as well!
ok, so here are the details about the
Royal Design Studio Stencils Giveaway!
-Good for 1 stencil valued at $50 or less
-This giveaway is open to readers, 18 and older, in the U.S. and Canada
-Shipping is free for those in the contiguous U.S.
-This giveaway will run for 1 week, closing at 12pm CT on July 13th, 2015.
TO ENTER:
Browse their site HERE & comment below telling me which stencil you want and what you would use it for!
For extra entries, follow Royal Design Studios on Facebook
Follow Royal Design Studios on Pinterest
Pin an image from this post
…and include in your comment below which one(s) you did!
I love stencils! I would do the Italian Medallion Border stencil for my stair risers. I’ve been wanting to paint them for a while now and this would be my push to finally get it done.
I would get the Bloomers Furniture Stencil Set and would use it on a dresser in my daughter’s room. I also follow Royal Design Studios on Facebook.
French Love Letters!
In flight feather stencil
The Endless Vine wall stencil is my favorite and our bedroom is in desperate need of a makeover! As is the bathroom, guest rooms, hallway……that stencil would look awesome anywhere!
So many beautiful stencils that I’d love to have, but I’d start with Ribbon Damask. I have a sweet stereo cabinet turned storage chest that would be lovely stenciled.
This disqualifies me because my stencil choice is valued over $50… but it’s the one I would choose. The Petal & Plume Script is beautiful. I would stencil it (and distress it) lightly on a weathered old piece of barn wood. Then add another smaller piece of wood on top that is painted to allow the Petal & Plume Script to stand out and then attach a rusted element on top of it.
Hi Rachel! Thanks for your entry! Just wanted to let you know that you arent disqualified, but if you won’t you would get $50 credit to whatever stencil you loved plus free shipping! Xo
The French Love Letters stencil! I want to do a desk with it….my second favorite is the Persian Garden Damask.
I LOVE this!! Great job Rachel! It is a really TOUGH decision. But I’m thinking I’d go for the Herringbone shuffle. I’d do it in my office. In gold on the bottom half of the walls! I also Liked them on Facebook and Pinterest and pinned an image from this post! Yay for more entries!
The French Love Letters stencil! I want to do a small wall with it going into my kitchen – beautiful space and would be perfect there. 🙂 I’ve stenciled other walls in my home with just a water based varnish to get a slight gesture that there is something there when the light hits it, have had many compliments on them and I absolutely love them, This stencil would be stunning in a dark grey finish on our wall.
hi rachel,
beautiful tutorial!
i would choose the fleur de lace
http://www.royaldesignstudio.com/collections/lace-stencils/products/fleur-de-lace-furniture-stencil
i believe i have checked-off all entry requirements! many thanks for the opportunity. the r.d. stencils look like fun!
happy july wishes
xo
elyse
Great tutorial, Rachel! I love Royal Designs stencils – they are so easy to use and give an awesome look to walls and furniture. I CAN’T wait to see the rest of the room. xx
I love the Herringbone Shuffle stencil! I think it would be amazing for my bedroom curtains. I also pinned toe last pic of the bed, garlands, &stenciled wall & liked Royal Design Studios on fb.
Wow, the Grecian tile Damask wall stencil is so beautiful. I would use it not only for walls but for furniture tops and back-drop creation. I also follow their Pintrest now!
I have wanted the Rockin Roses forever for my bedroom!
Following on Facebook and Pinterest also!
I want the exact one you used on the walls. It will look great on the front of a dresser I am refinishing 😉
I did all the extra entries! Thanks!
hi rachel!
i am finally getting around to reviewing the royal design site and of course came right back here for inspiration. thank you so much! i’m so excited to be your lucky winner.
happy rest-of-summer wishes
xo
elyse