I’m so excited to share my latest build with you today: an X Media Console!
A couple months ago I did a design consult for a sweet gal named Sarah. Part of my design was a media console inspired from the plans for the Ana White X Console Table! I modified them slightly, but they are pretty much the same. I only made the table wider (to accommodate a TV better), and shorter in length (Modifications at end of post).

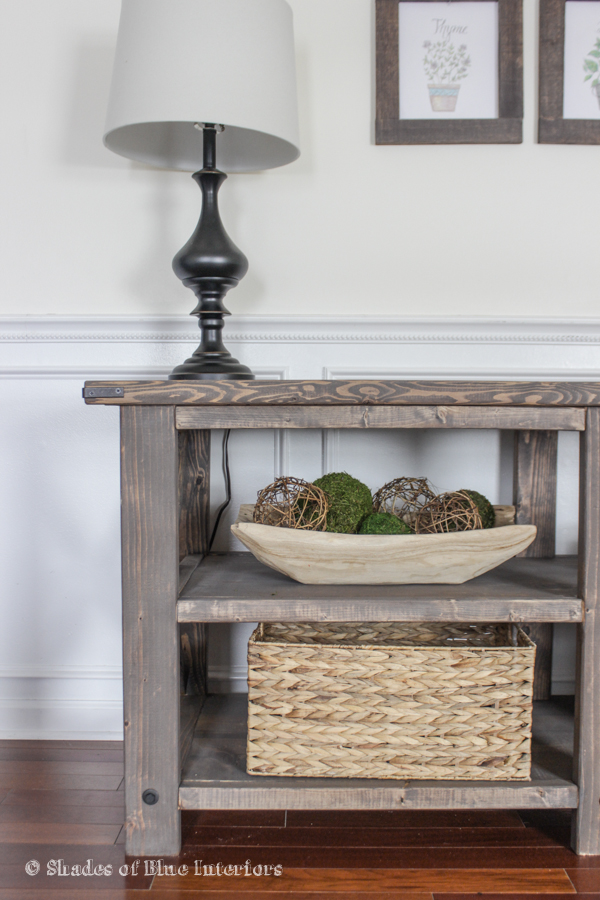
I’m IN LOVE with how this turned out. The stain is a combo of Minwax Weathered Gray and Special Walnut.

I would say the trickiest part of this whole thing was the X sides. Because I changed the width, the angle had to change. And I don’t have a miter saw that can cut more than 60 degree angles. So, I ended up doing a lot of trial and error, but I will be sharing soon how to get the proper angles for the “X” on any table.
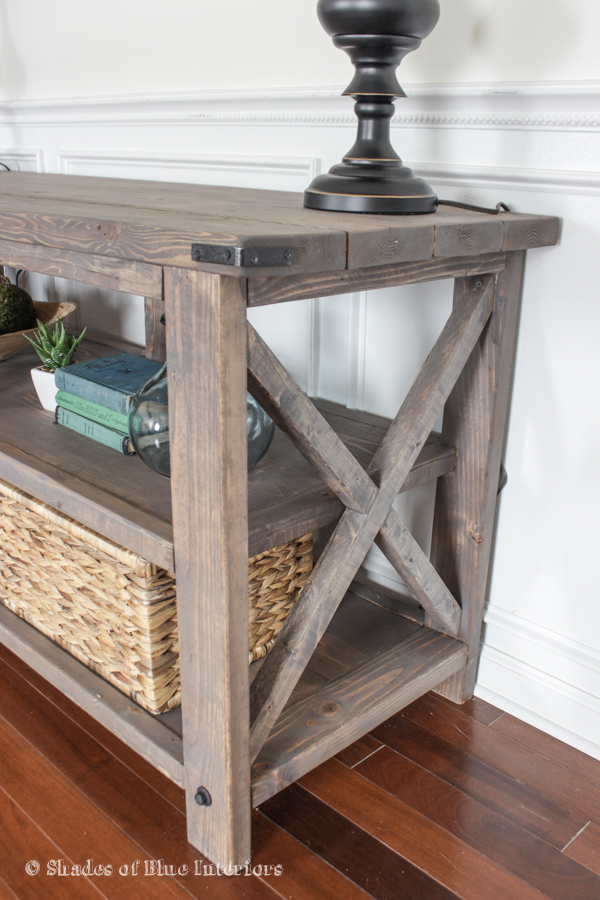
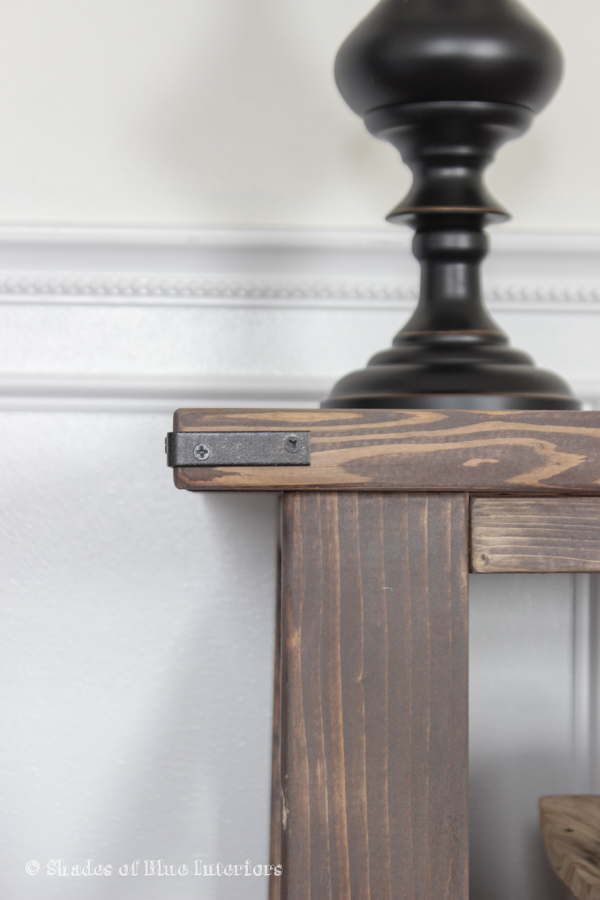
For the decorative hardware, I used L brackets (found in the hinge section of HD or Lowes) and sprayed them black. For the bolts, I found some that were already black being sold separately. I just drilled a hole that was larger than the 1 inch depth, and glued them in place.
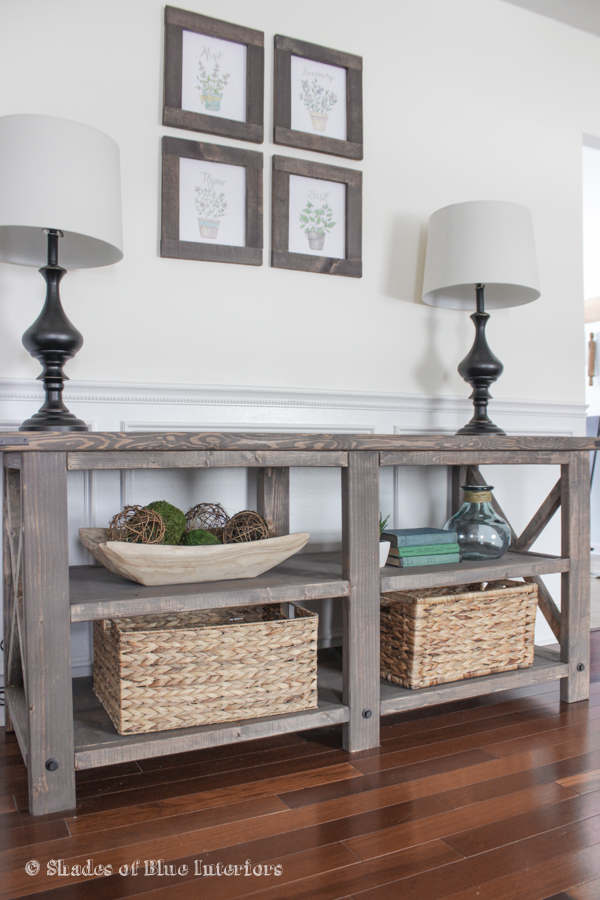
So, do you love it as much as I do? Those frames I made last week with my botanical prints look awesome above it too!
I’m currently in the process of building a couple of different end tables for my living room and developing plans!
Modifications to the Ana White X Console Table to a media console:
Dimensions: 65″ long x 22″ deep x 30″ tall
Shopping List:
2 – 1 x 12 @ 12 feet long
3- 2×4 @ 8 ft
4- 2×6 @ 8 ft
6 – 2×2 @ 8 ft
(hardware and screws same as Ana’s plan)
Cut List:
6- 2×4 @ 28 1/2″ (legs)
12- 2×2 @ 25 1/4″ (replaces the 30″ measurement)
5- 2×4 @ 18″ (replaces the 11 1/4″ measurement)
2 – 2X2 @ 18″ (replaces the 11 1/4″ measurement)
** rip the 1×12 to 9″ width**
4- 1×9 @ 54″ (replaces 2 – 1×12 @ 63 1/2″)
4 – 2×6 @ 65″ (replaces 3 2×6 @ 74 1/2″)
2- 2×2 @ ~ 27″ –long cross support, about 50 degrees off square– cut longer, then trim to ensure snug fit (replaces 2- 2×2 @ 22 1/2″)
4 – 2×2 @ ~18″ — short cross supports, about 50 degrees off square on one end, 10 degrees other end (replaces 4- 2×2 @ 11 1/4)
Follow same build instructions on Ana’s plan.
Gorgeous!!
LOVE how this came out! x
How exaclty did you get this color?
I’m popping over from Miss Mustard Seed. I LOVE how this piece turned out- the weathered gray finish is perfection. I’d like to build something similar for behind one of my couches. Pretty sure I own the same mossy/wicker balls and the basket underneath them 😉 Happy to have found you! -Ashlea
Lovely! “Brag Post of the Day” on our Facebook page, thank you for sharing!
Thank you so much Ana! You are the best!!
It looks beautiful! How did you do the combo of the stains? Is there a key to getting the beautiful result?
Thanks! Just special walnut first then wipe on gray let it sit a couple min and wipe off excess!
Did you wipe off the walnut before putting on the weathered gray? Also, did you use wood conditioner or just sanding?
Jade, I did wipe the walnut before putting on the weathered gray and I didn’t use wood conditioner.
Hi! Just wondering do you could share how you figured out the x’s? We made this same table according to Ana’s plans except we raised it by 2 inches and now the x’s have been crazy hard to get! Any recommendations on how to get them right? Beautiful table by the way – love the stain choices!
The easiest way to figure out the angle that you need is to lay the piece of wood you are going to use, exactly over the spot it will reside, then taking a pencil and marking on the other side of the wood, so you know where to cut. Sometimes you won’t get a perfect flush fit, but it will be pretty close and you can staple it/nail it, then use wood filler to fill in any gaps. I had a mathematician friend figure out the formula for me, so it would be exactly right when offering plans. And I know there is a couple formulas plus some graphing involved to figure out the exact angle… but that would be a bit complicated to explain here. Good luck!
Hello,
I love the modifications you made; they are slight changes but I prefer them. Do you wipe on both stains using an old rag? I’ve never done staining before.
Also, I would be interested in how you cut the X’s as well.
Many thanks!
Yes, I use an old rag. Make sure to sand down any rough areas, which is pretty common for these pine boards. Also use wood filler on deep knots, screw holes, etc. and sand smooth. Start with 150 and finish with 220 everywhere so you get a consistent application of the stain. If some areas are rougher, they will absorb more stain and it won’t look as good. Also, be careful about wiping excess glue up immediately, because dried glue, even if minimal, won’t take stain at all. The X’s you cut with a miter saw, with the angle measurements provided. If you aren’t used to cutting angles, I suggest practicing on scrap wood. Also, if you mess up, 2x2s are pretty cheap and you can just scrap it and start with a new piece. Good luck!
Did you seal the stain with anything like polycrylic or polyurethane or something else?
yes I used wipe-on-poly.
What is the paint color on the walls? The off white color is beautiful! 🙂 LOVE this table – I really like the weathered grey/walnut mix stain. That turned out perfectly!
Thank you! The color is Mascarpone by Benjamin Moore!
Where did you get your baskets?
Home goods!
How did you attach the 2- 1×9 shelves in the middle?
With 3/4″ pocket holes and 1 1/4″ pocket hole screws along along the length. So one of the boards would have pocket holes on all 4 sides, and the other would have them on 3 sides.
Where can I buy a media table that looks like that? I would love to know thanks
Can u make me one lol…How much would u charge…
I am looking all over for minwax weathered gray and cannot find it. I know this post was a while ago. All I see is weathered oak. Is that what u used! I have varathane weathered oak but was trying to duplicate your color because I love it so much. Any suggestions?
Weathered Gray is NOT a Minwax product. It is a Rustoleum product.