If you remember from a couple weeks ago, I shared my master bathroom plans. Well, progress is well under way. In fact we are almost done, but I thought I’d share some ‘in progress’ shots we caught on our phones, so you can see how we are doing it.
First up, something I didn’t share in the plans , was the fact we removed the door to the bathroom and are using a vintage door on sliding barn door track hardware. This frees up a lot of space that the door would normally take when open and makes the room feel bigger. So, we found a vintage door on a Facebook group for $30. It was covered in white paint. I didn’t want a plain white door, so I got to scraping…
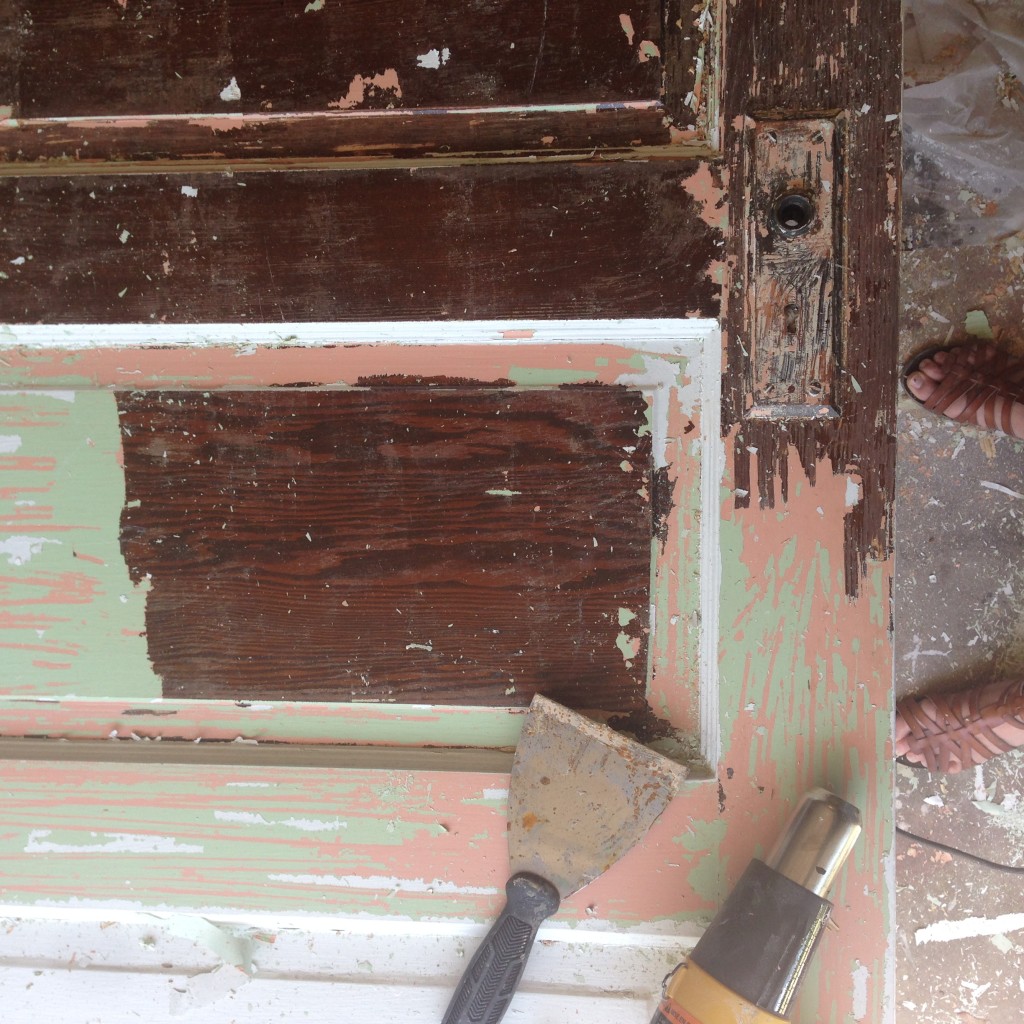
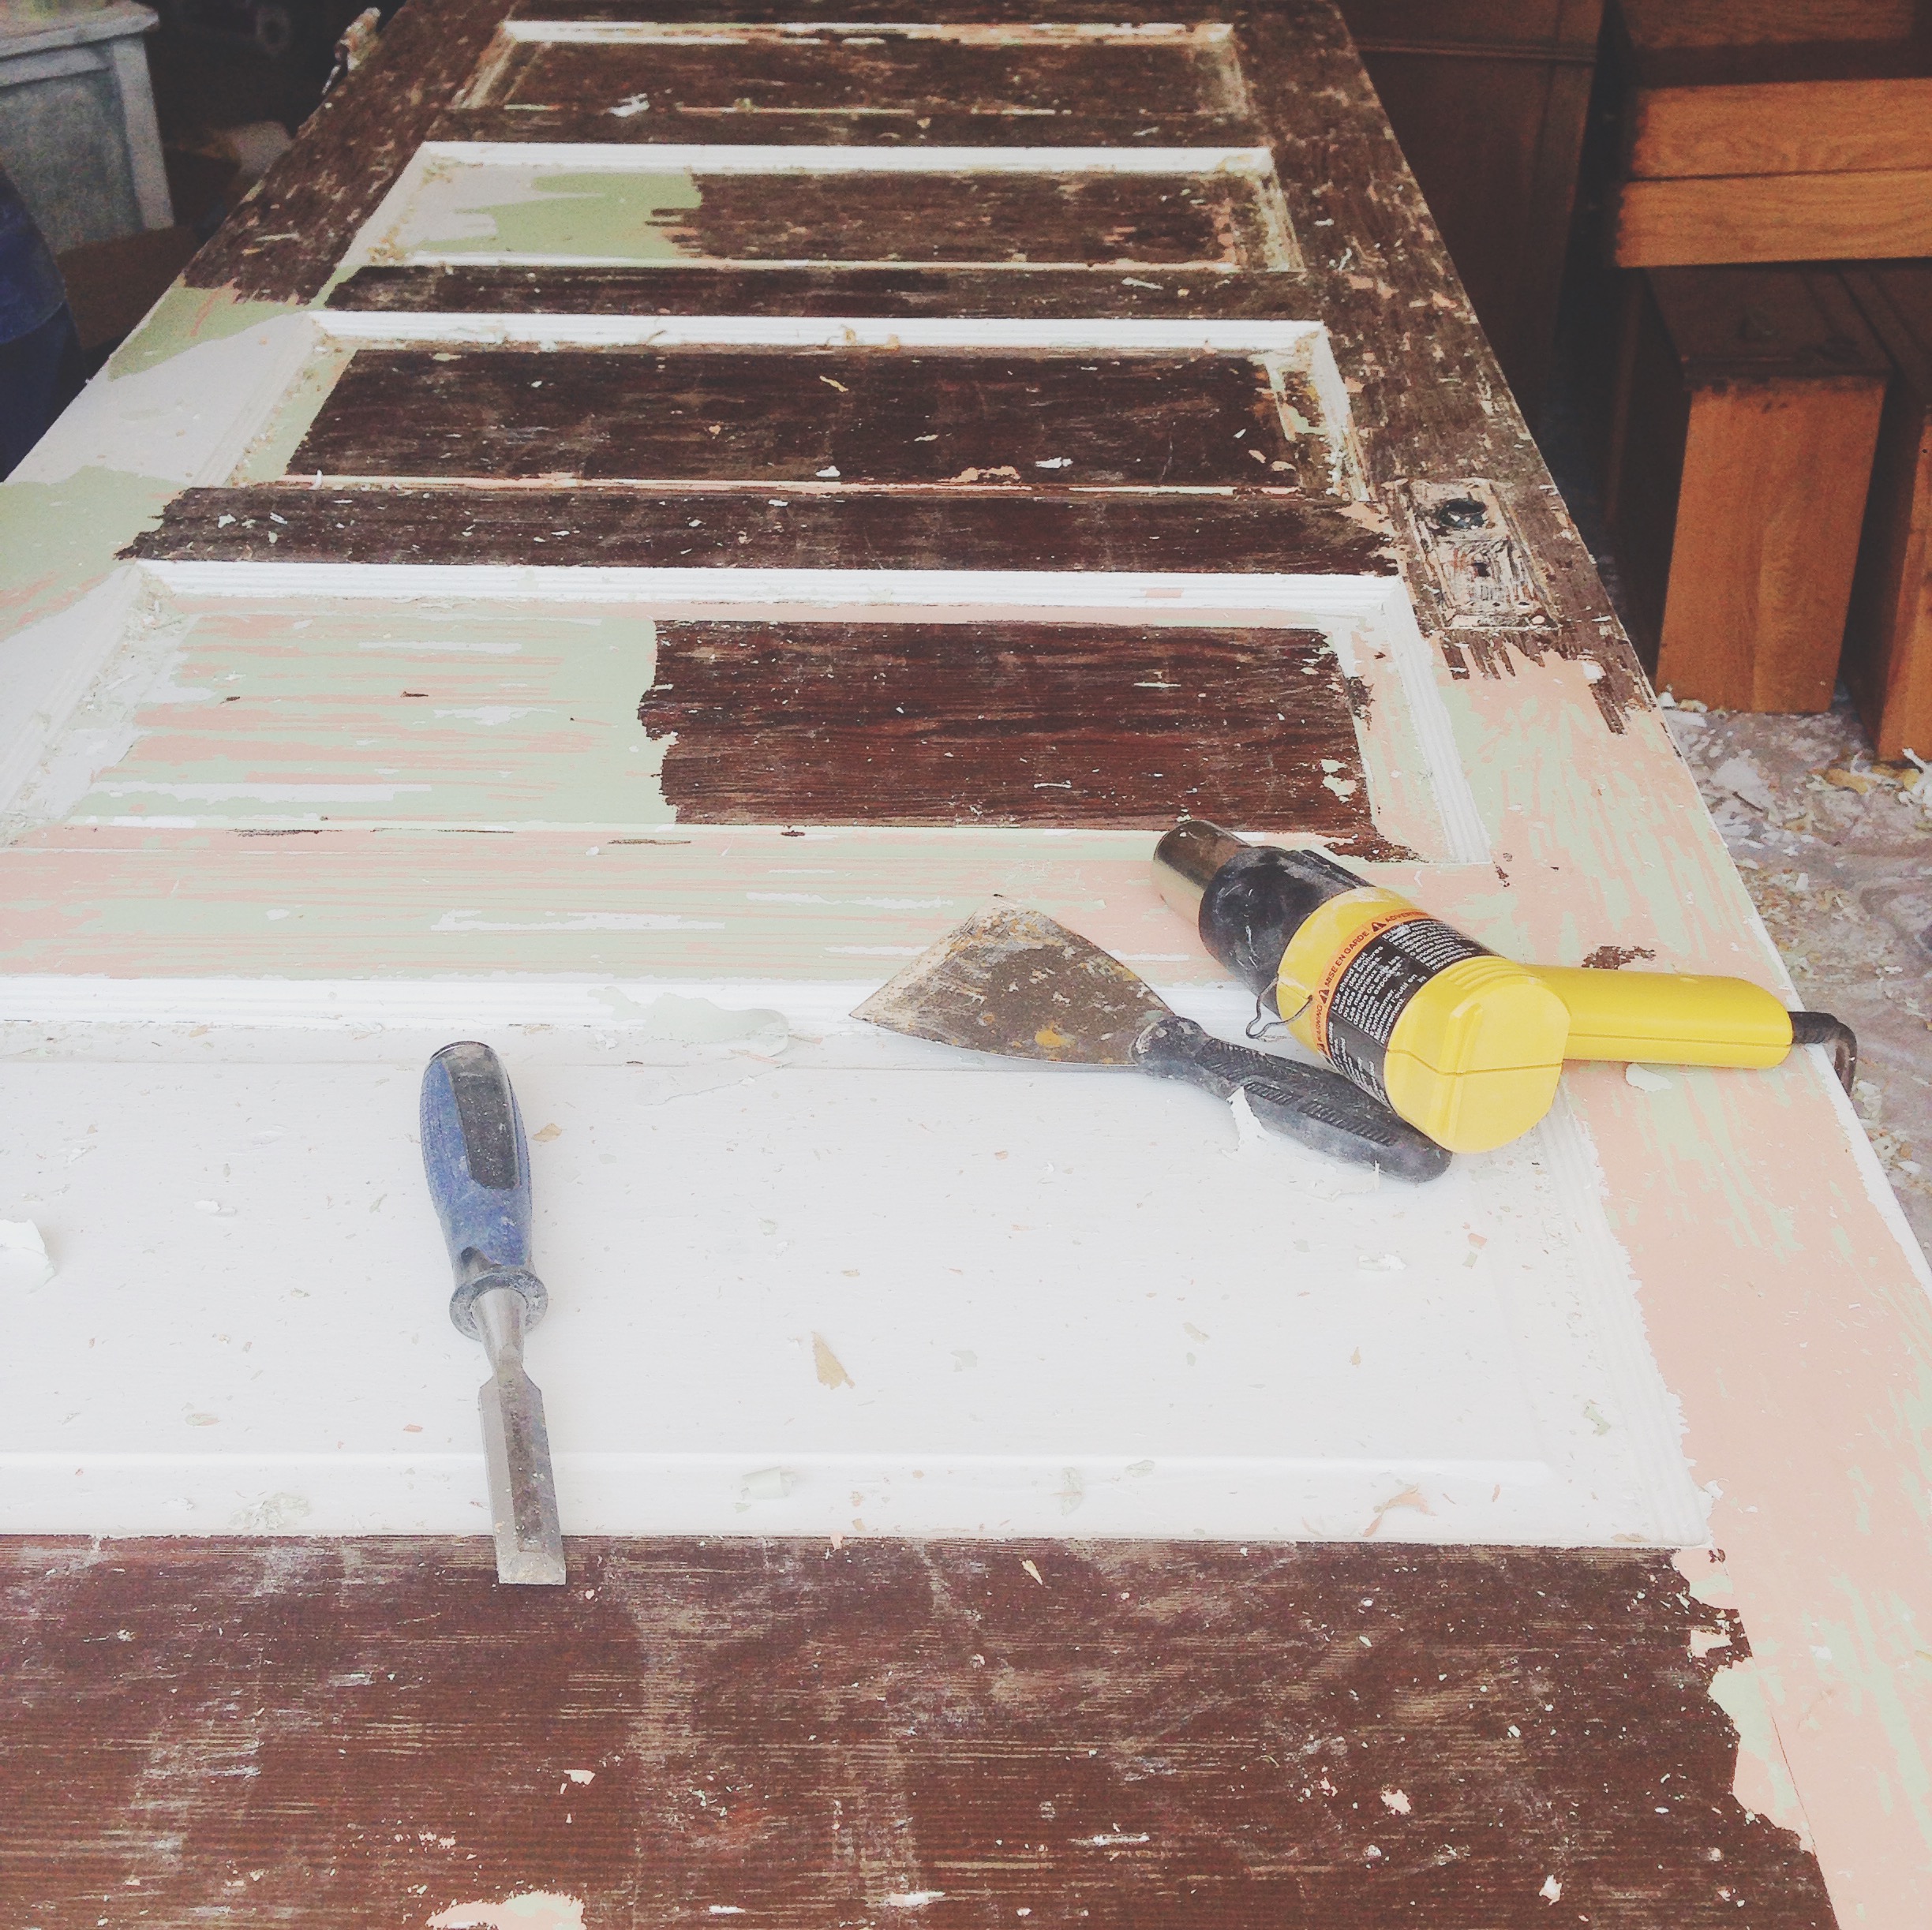
…and scraping… for many hours. Basically one side of the door had like 3-4 layers of different colors of paint and the other side only had 1 layer of white paint fortunately. So I scraped off most of it on both sides, then repainted in a very artistic, haphazard, layered fashion on one side, and left it natural wood with bits of chippy paint on the other side.
Then, we discovered that there wasn’t enough studs detected by our stud finder, to attach a normal mirror, and to attach floating shelves above the toilet. So we opened up the wall to find…

… the main sewer vent and pipes. 🙁 However, we noticed the studs a little deeper into the wall that backs against our kitchen. So, we decided to just extend those studs out around the necessary pipes, using some ingenuity and pocketholes. It worked. We measured and wrote down where those studs were, so when we would later attach the shelves, we would know where to place the screws.
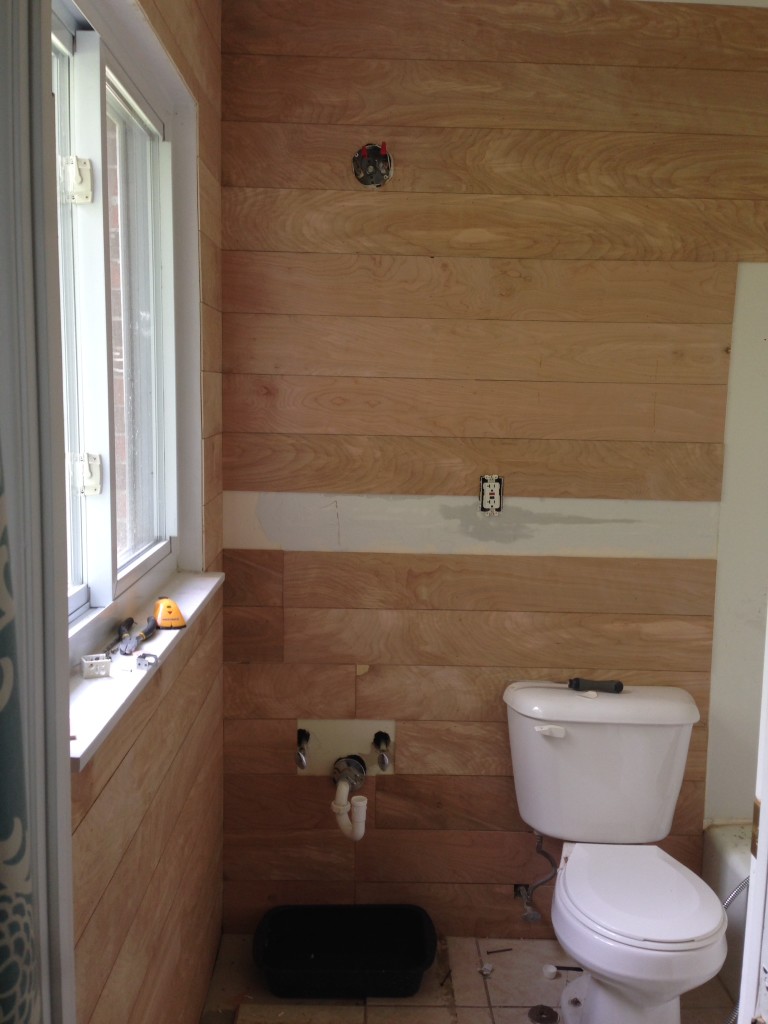
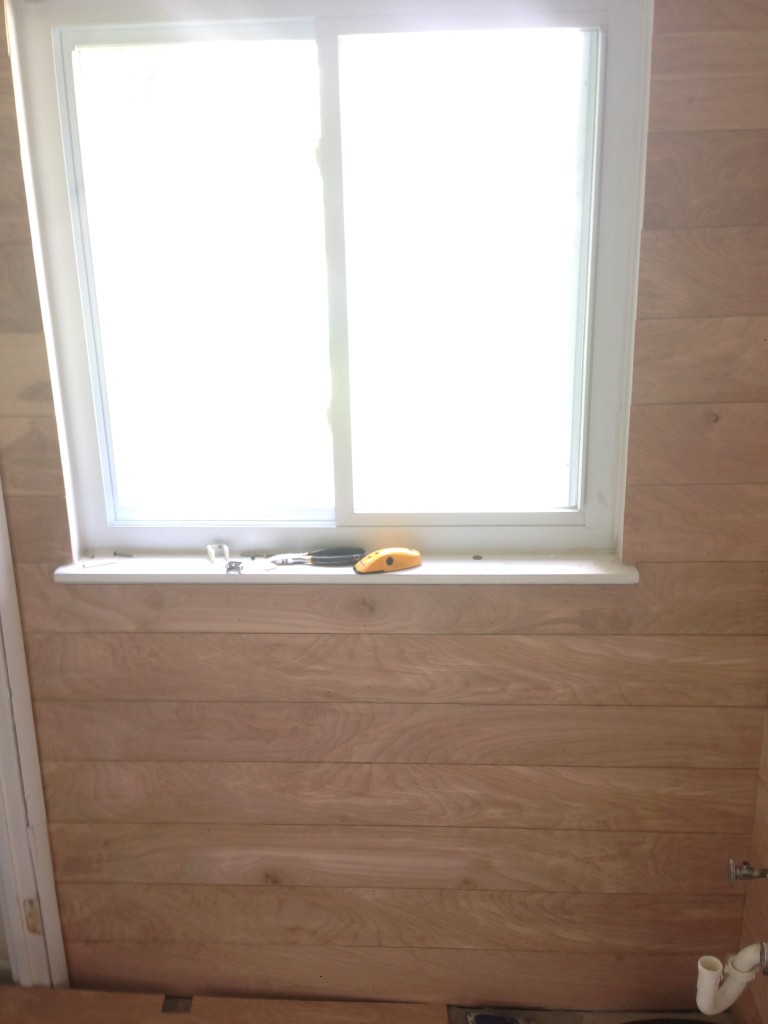
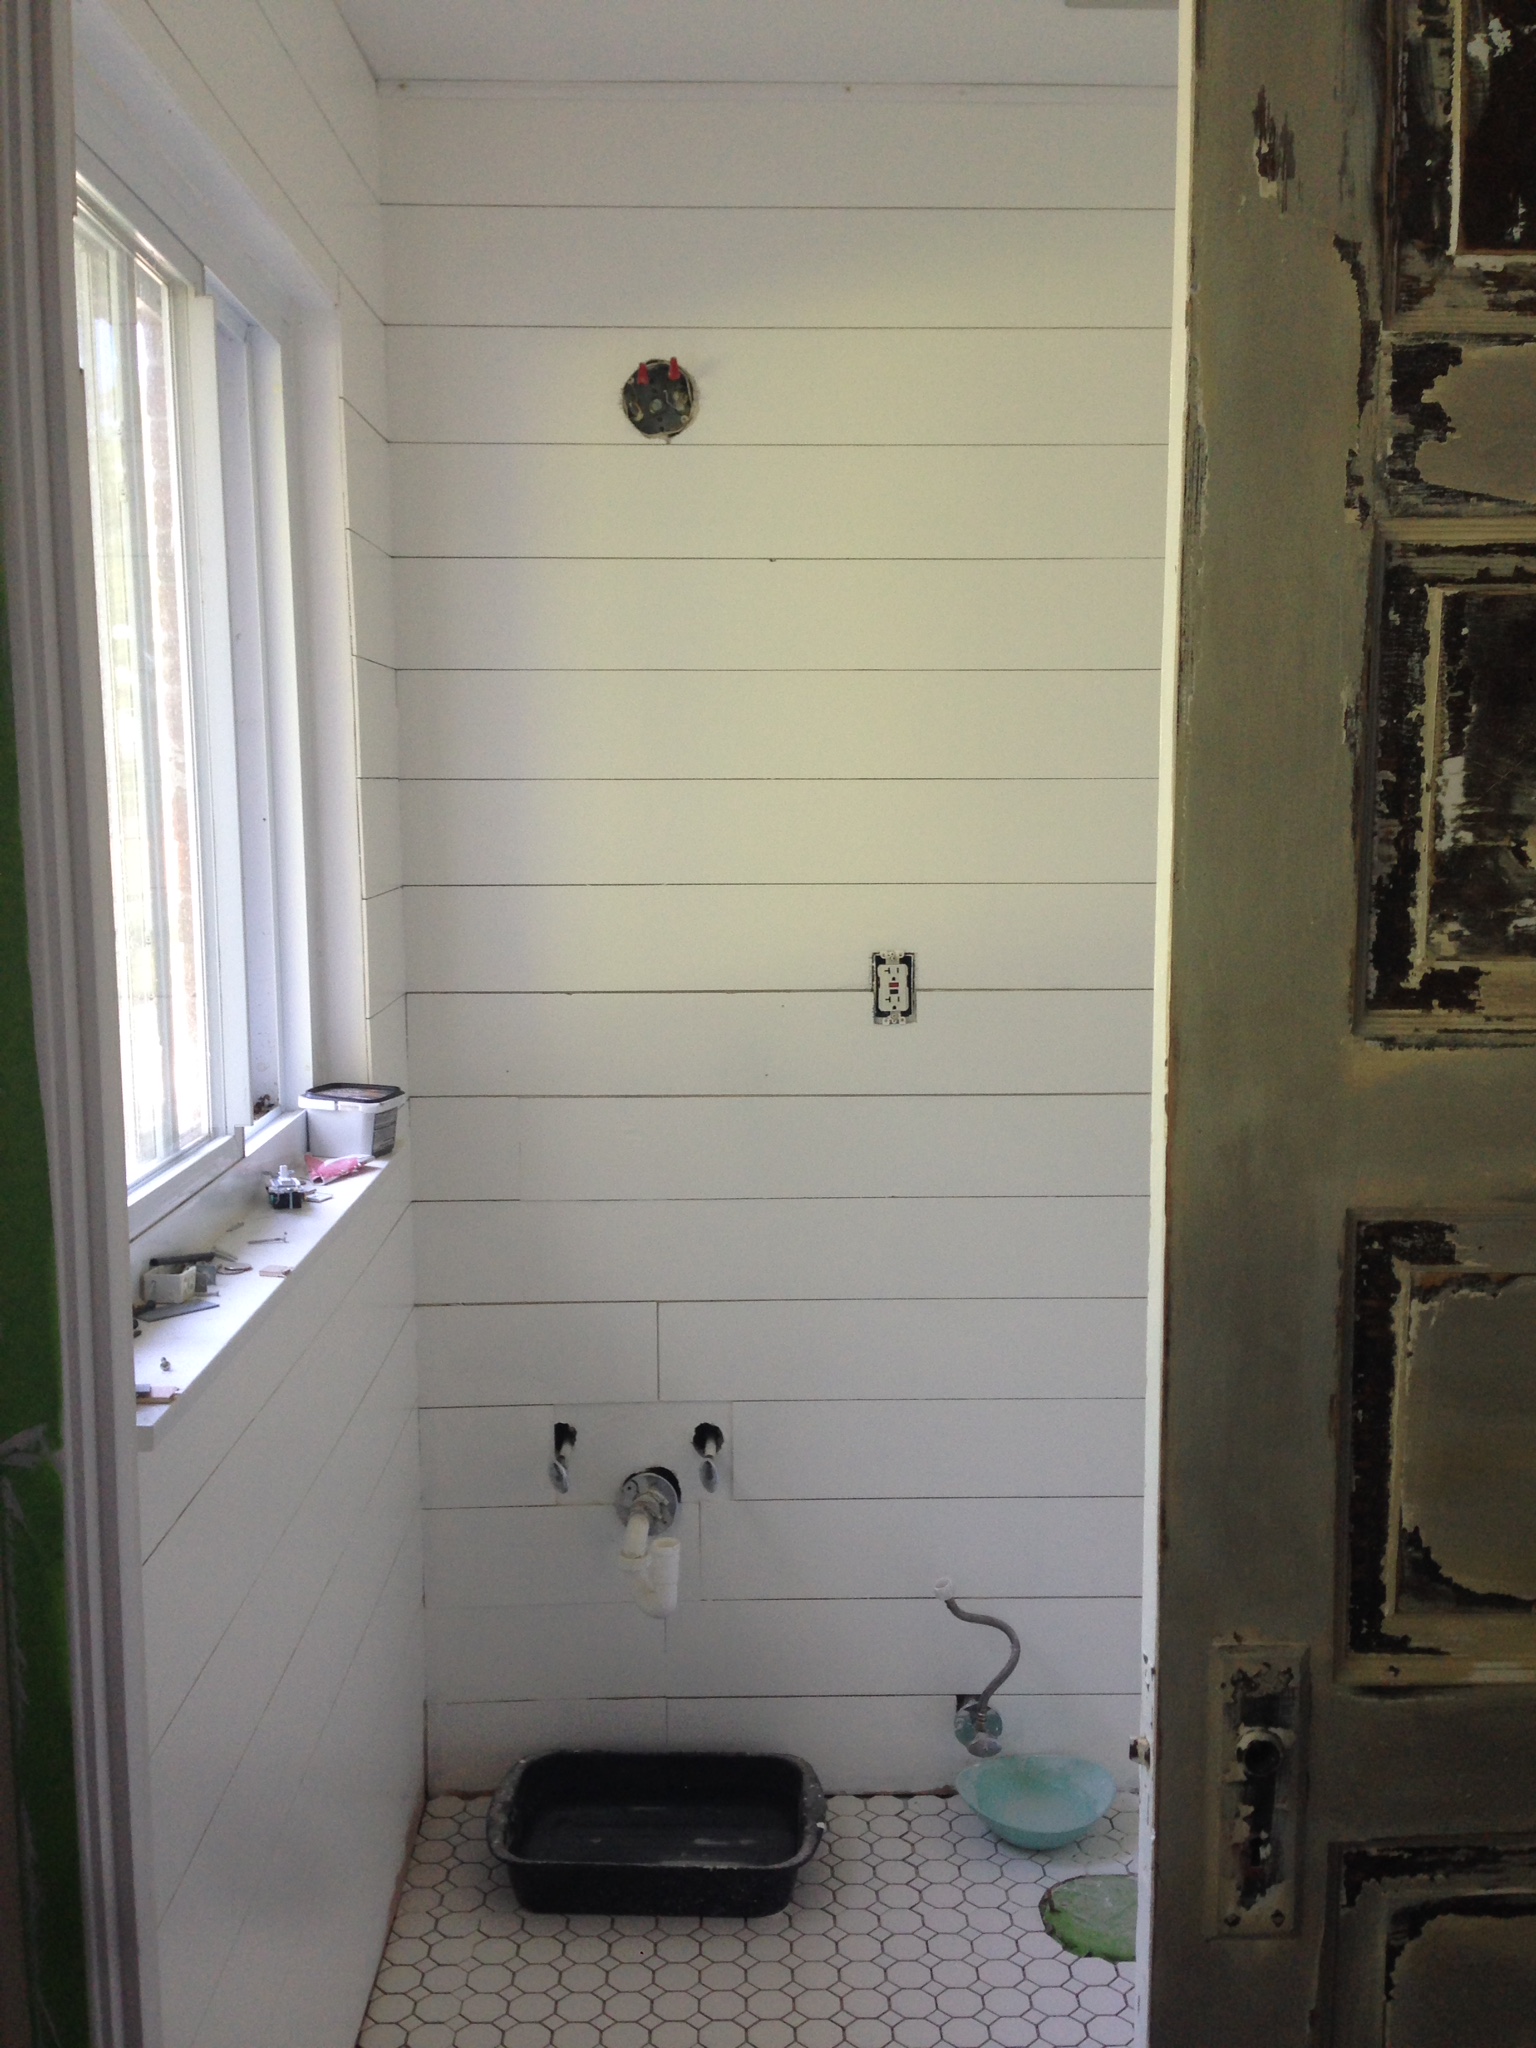
Then, instead of ordering shiplap (which isn’t carried at Lowe’s or HD here locally), I opted for a much cheaper route:
FAUX SHIPLAP
Here is how you do it:
- 1/4 plywood cut in 6″ strips.
- Mark the studs on the wall.
- Spread liquid nails on the back of the plywood and attach to wall using 1 1/2″ 18 gauge nails and a nail gun going into the studs as much as possible. If I needed to secure it into the wall where there wasn’t a stud, I made sure to ANGLE the nails going downward. That way, the nail would still offer some support. If I angled up, gravity will let the board slip down.
- Space each plank with a coin (I used quarters).
- Paint with 3 coats of mildew-resistent satin finish or semi-gloss white paint. I used BM Simply White.
- Calk all edges so the moisture doesn’t go in the planks.
You can see I was still waiting on some spackle to dry, so I hadn’t attached that one last piece.
Then came the tile. Because our bathroom already had tile, but it was all basically loose (we pulled it all up without much effort at all… most piece just lifted right up), the most difficult part was removing the old mortar. Bruno, my husband, started out using a chisel and a metal stiff spatula. It was taking hours! But then my brother (he’s a professional flooring installer), told us about this tool, which was a game changer:
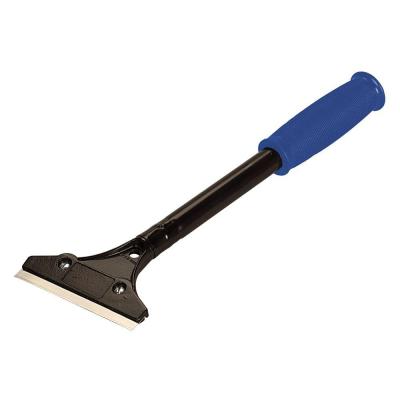
It is a 4″ wide razor scraper and stripper. I found my at Home Depot for about $7. Finished the scraping up SO much faster!!
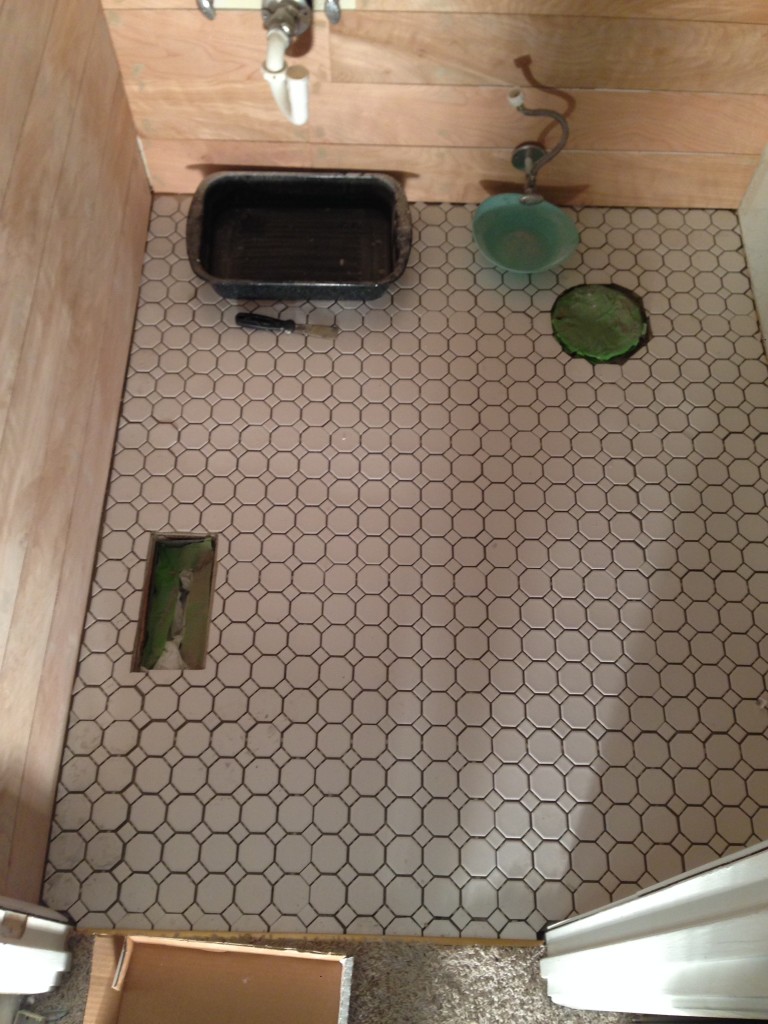
We borrowed a friend’s tile saw and tools, and completely dry set the bathroom, per my brother’s recommendation also. This was a lot easier than I thought it would be. We ended up using 23 sq. feet of tile. Pictured below is the tile, dry-set.
We mixed up our mortar and got to laying tile at about 2am… here is Bruno handing me the trowel…
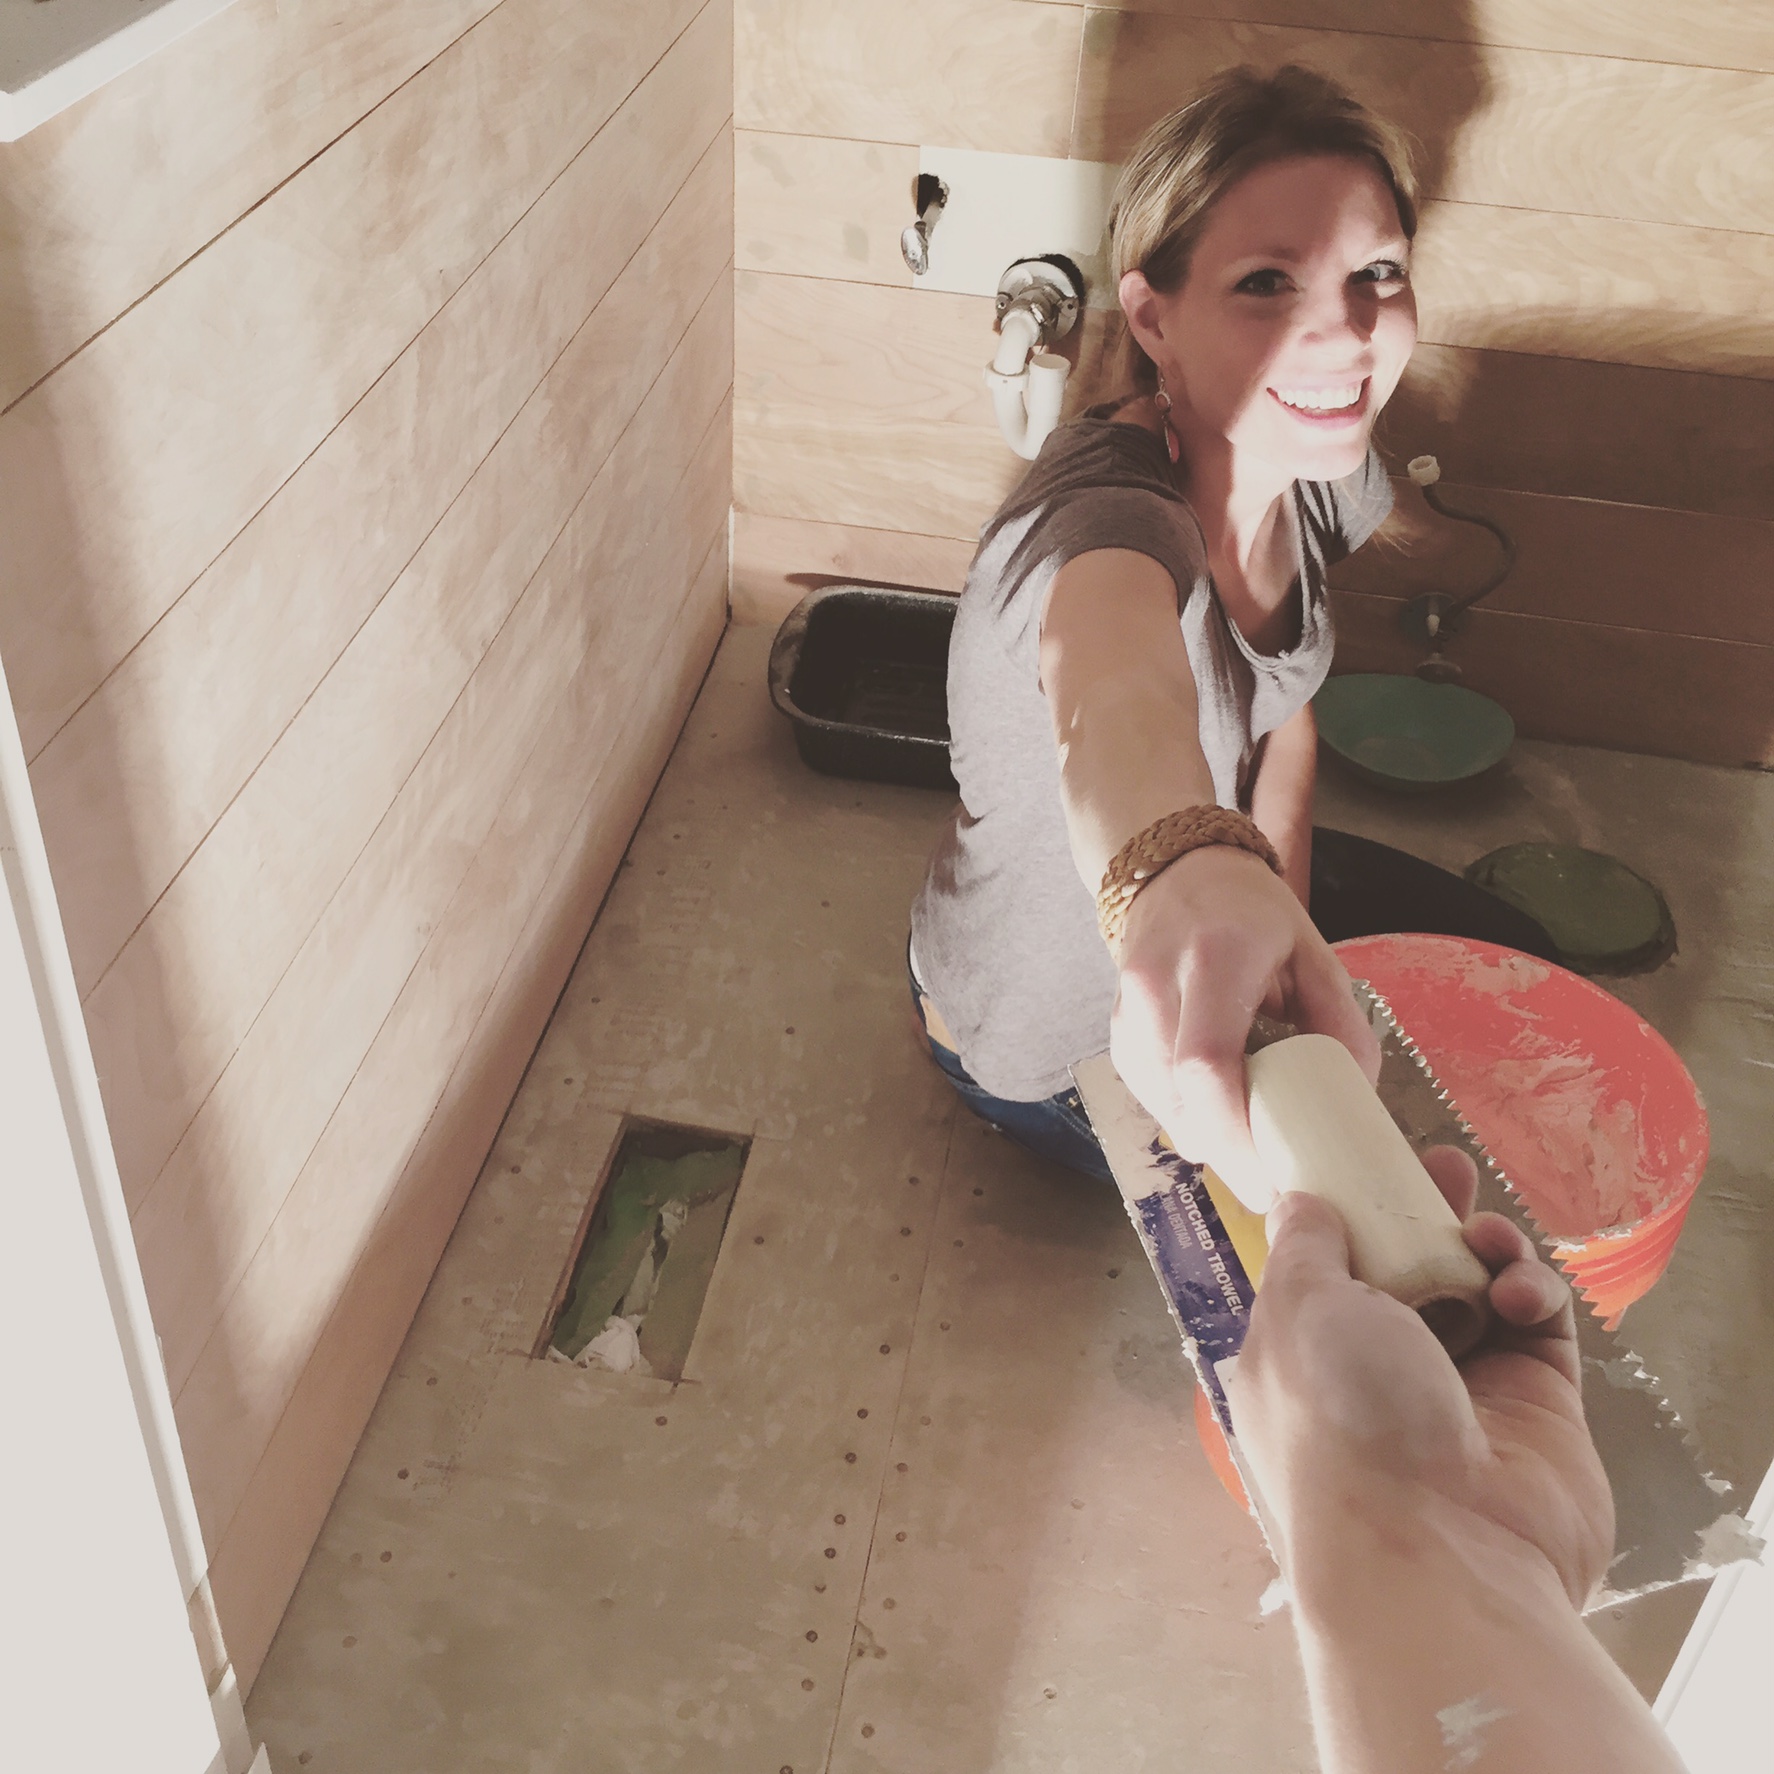
Note the teeth on that trowel. Small mosaic tile like what we used should have the mortar applied with a ‘V’ tooth notched trowel. Ours was 1/4″ wide ‘V’. Make sure you push the small tiles into the mortar, hard enough that it sticks good but not too hard that the mortar squeezes up in between tiles a lot.
After more than 24 hours, I set out to painting the planks. Bruno filled in all the nail holes with wood filler, we sanded them smooth, then 2 coats of paint did the trick. I’m pretty sure Benjamin Moore Aura paint is my BFF for only needing 2 coats.
For the grout the next day, we used Fusion Pro Grout (sold at HD) which has the sealer pre-mixed into it. Basically with white or light grout, a sealer is a must, and this eliminates that complicated step. It applies similar to regular grout, except there is no wait time and you can start removing the excess grout pretty much immediately. You DO have to be careful that no residue is left to dry on it, but even so, you can remove it with Aqua Mix Haze Remover also sold at HD.
I’ll be back next week with plans for the vanity and a peek at the finished product!
oh wow~ love the tile and walls! it is going to be gorgeous!
What a transformation already! And holy wow I love that tile.
Rachel, Wow! LOVE the progress and I’m so excited to see how it all comes out. Great tips too by the way! x
Love how you did the plank wall and your pretty floor! Can’t wait to see your vanity!
I love your bathroom remodel! Everything looks gorgeous. We actually just installed plywood planks on one of our bathroom walls today. I was wondering if we’d need to treat the wood at all before we started painting it our final color? Have you had any swelling or warping? I’d love to know if we need to do anything else before we start painting our planks sherwin Williams pure white. Thanks in advance!
Hi Olivia! Make sure you use a paint that is mold and mildew resistant with a primer built-in. This type of paint is often more expensive, but totally worth it when using it in a bathroom. We used Aura paint which is mold/mildew resistant and I also sealed the exposed ends of the planks with white waterproof bathroom calk, then I painted 2 good coats of the paint. We DO have a fan that we use when taking a shower, but other than that, we haven’t had any problems with wood warping or collecting moisture. Thanks for the question!