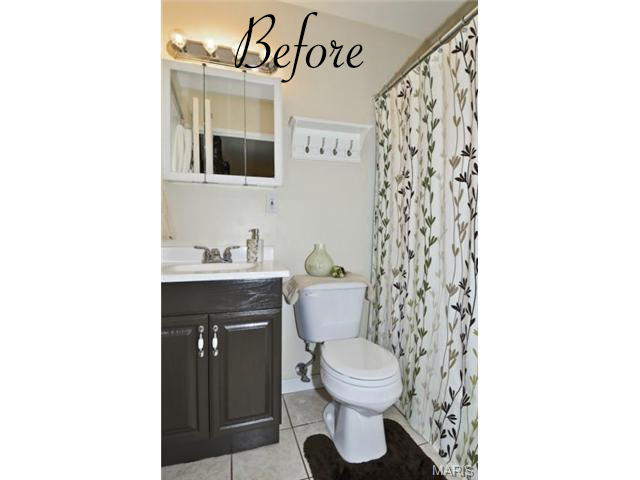
Our master bathroom has been driving me crazy since we moved in, last January. It is extremely tiny (like 20 square feet), has the cheapest fixtures possible, and over the past year since we moved in, the brown painted vanity has been chipping around the handles, the tiles were not set properly, so every single one has several cracks, and the floor isn’t level so the toilet rocked back and forth whenever you sat on it. A little disconcerting to say the least.
This pic was taken when the house was listed but looked mostly the same when we moved in, only it didn’t have the little hook thing above the toilet.
Well, the time has finally come. I’m embarking on some change in the TINIEST room in our home (and maybe the tiniest master bath in existence). If you follow me on Instagram, you have seen sneak peeks to the changes happening. I saved pictures on my phone about a month ago of my design inspiration for this room, and am JUST NOW getting around to blogging about it! It’s been crazy ya’ll.
So here is the plan to completely change the look of this room on a meager budget:

First thing’s first, the vanity. Once I realized I wanted to make a new vanity, I searched over on Ana White for her Turned Leg Vanity. I WISH I had enough room for something that big, but since size is my main obstacle, I fell in love with inspiration from Pottery Barn– the Newport Sink Console.

Only, I am going to use a stain and paint combination to get a slate gray finish. The design is pretty straight forward, but what makes this piece really special are those turned legs. Just like from Ana White’s bathroom vanity, I found those exact legs are Osborne Wood. They are the Marshall Island Legs and I got them in soft maple. I will have free digital plans up for this vanity in a couple weeks once the bathroom is completely finished.
With such a small space, too much big bulky items or things with big punchy color, would do nothing to maximize the space. It would just make a small space feel smaller, so white walls was the best option. In order to add some texture, planked walls are in order, similar to this pic (only I won’t be planking the ceiling).

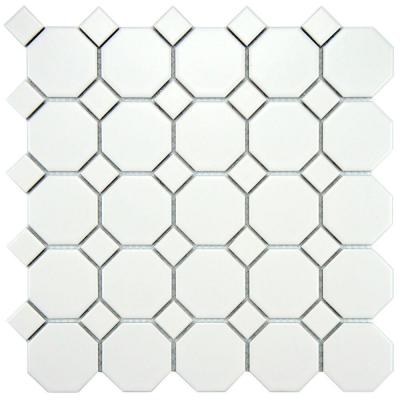
The nice thing about white walls is it gives you an opportunity to pick some key fixtures that will stand out because of the contrast. The white I plan on using on the planks and trim is Benjamin Moore Simply White in a Satin Finish. The floor will also be white…I’m tiling the floor with white Octagonal tile… you know the kind. It’s like $3 a square foot. It’s also probably the most popularly used bathroom tile in existence, but it has been popular for almost a century so it’s a timeless look that also goes well over uneven floors in older homes.
Unlike this picture implies, I won’t be using a gray grout… I love the tone-on-tone look, so I will be using an off-white grout, to just add the tiniest bit of contrast.
Because I’m going to reuse the sink top, the toilet, and will DIY many parts of the room, the splurge-worthy pieces are the faucet, light fixture, and vanity.
If you have been around here awhile, you know I have a thing for brass. It didn’t take me long to find this faucet in the perfect finish and style:
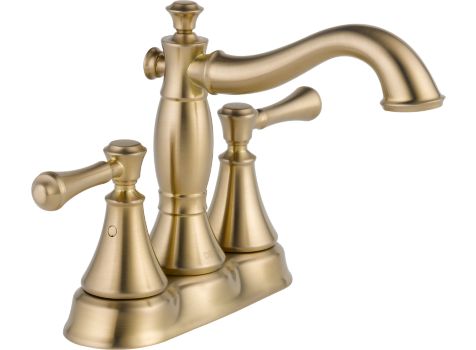
It is the Delta Cassidy Centerset Faucet in Champagne Bronze. Even the name sounds classy and rich. 🙂
I’m hoping to find a fixture like this one… still not sure if I can get this exact one or not, but I definitely want something with a brushed brass finish to match the faucet, but with an industrial-vintage flair. This one is from Lamps Plus and is the Feiss Urban Renewal Dark Antique Brass Sconce.

Some other DIY projects for the room will include moving the outlet a little bit over, so a larger mirror will fit, installing a vintage mirror I have from my stash of discarded ones from dresser makeovers, making a few floating shelves above the toilet like these:

…and building a little built-in shelf cubby in the wall.
The tub, shower, and surround won’t get their makeover till next year because a tile job that big isn’t in the budget this year. But I’m SO excited for these changes and I can’t WAIT to show you!
So, what do you think of the plan? What is your favorite part?
UPDATE!
To see the progress post go HERE.
To see build plans for the vanity I built go HERE.
To see how I installed a sliding Barn door go HERE.
To see the final reveal go HERE.
To see the bathroom decorated for Christmas go HERE.
Ooooh, it’s gonna be so good! I’ve had that faucet in my powder room for a few months now and I looove it. Can’t wait to see the vanity!
I LOOOOVE this look. After you do yours, come on over and do mine..even though my bathroom doesn’t need to be done, I’m in love with this look.
Hugs, Jamie
Where did you get the floating shelves?
I built them! Check out Shanty2Chic to learn how to build floating shelves…. I used 1x2s and 1/4 plywood.
Could you tell me where you got the floating shelves?