In my first *design-related* post of 2022, I’m sharing a teacher lounge makeover I recently completed at my son’s high school. This was a project completed with district maintenance funds for walls/electrical, PTA funds for furniture and decor, and design/DIY labor donated by myself. I will be sharing before/after pics, design plans, budget, and all the sources.
As I have mentioned earlier this year, I have taken this time away from my blog to volunteer in various capacities in my kids’ schools. One of the roles I took on at the high school is in the parent teacher organization, where there was a need for someone to head up the teacher lounge makeover.
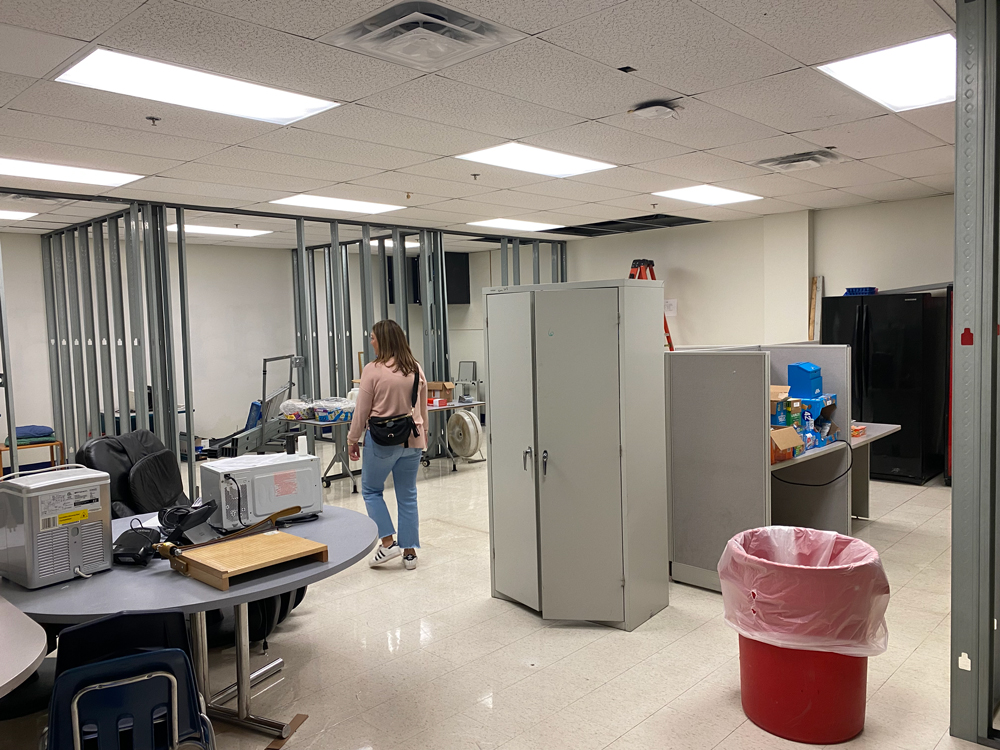
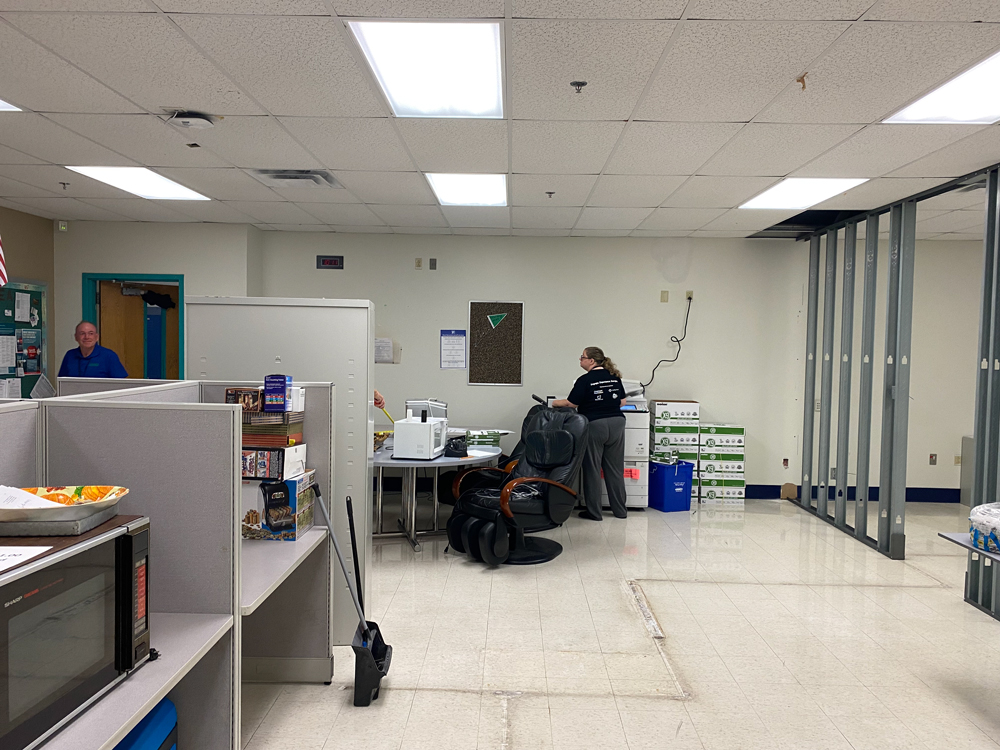
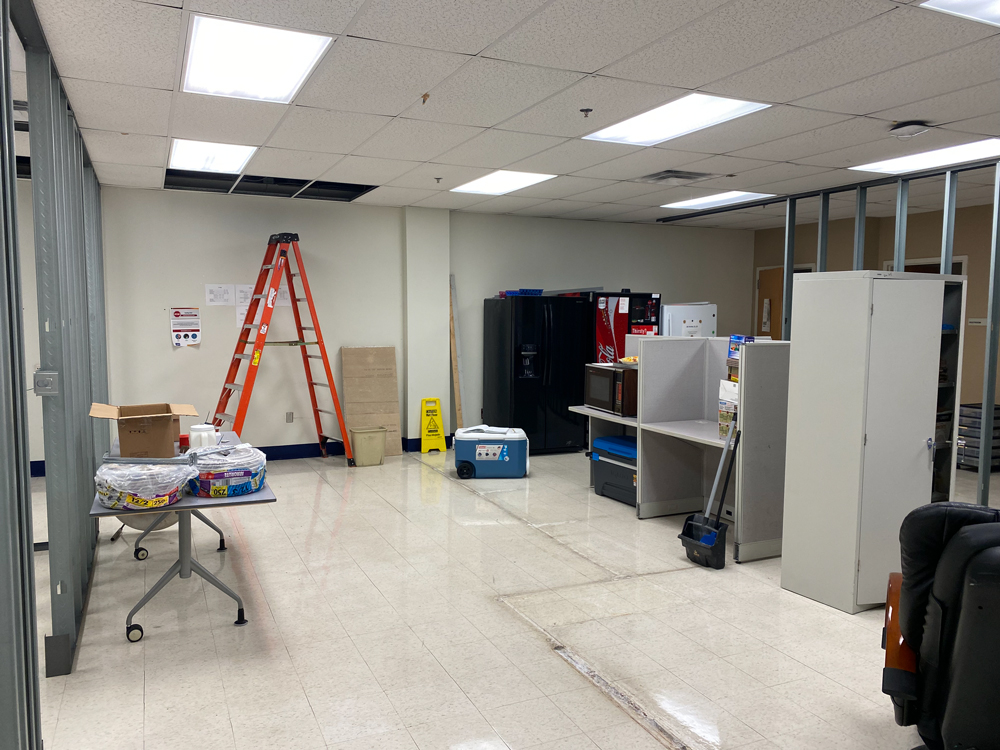
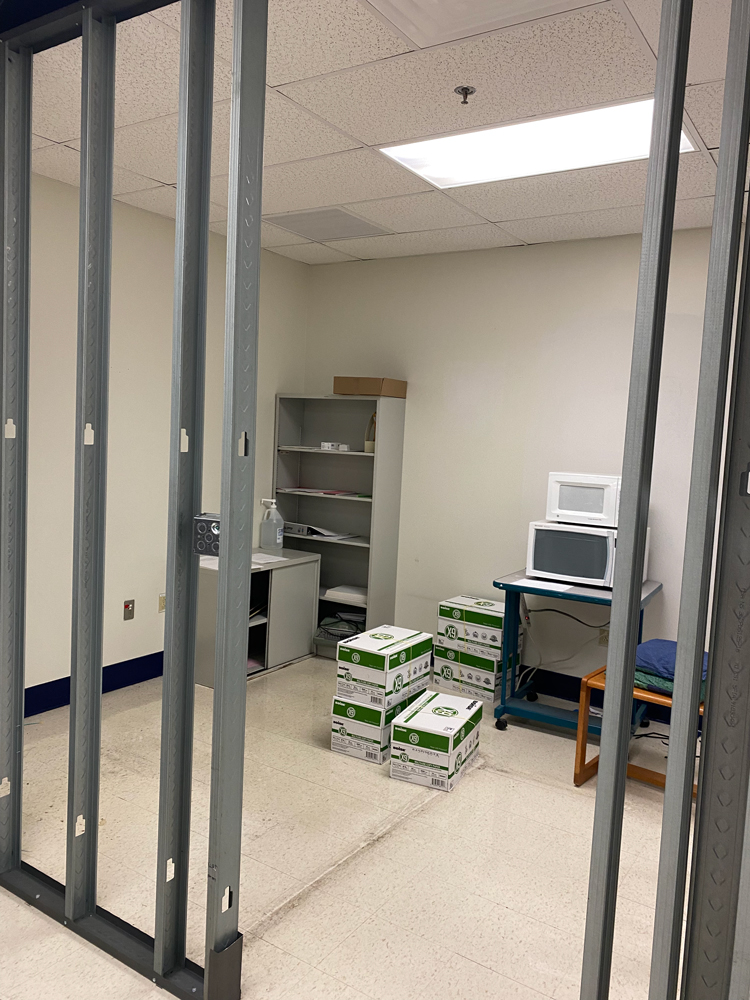
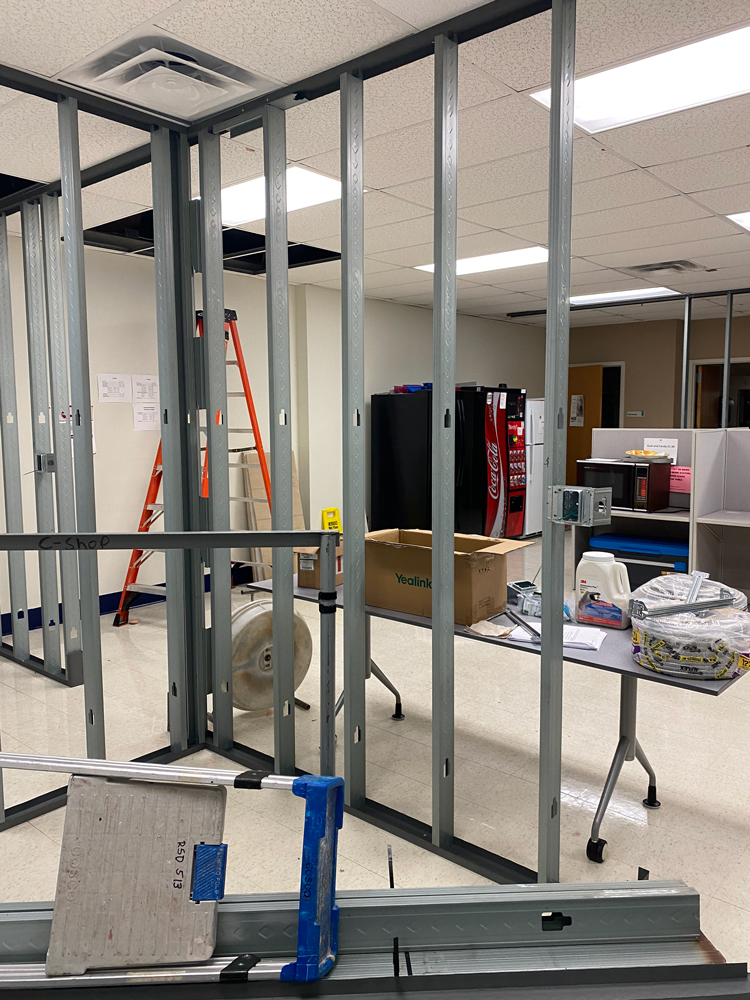
The PTA budget for this project was $10,000 and was approved last year. The leadership last year collaborated with building administration so that building improvement funds would pay for walls to be put up, new electrical work, and paint. What was once a large room with cubicles and bathrooms off to one side, now had a wall to separate the bathrooms (creating a corridor), and 3 small rooms on the opposite side leaving a large common space in the middle.
I volunteered to be the designer for finishing the space and do any DIY work. The goals were to create a relaxing atmosphere that was multi-functional for both working and socializing, and create cozy lactation rooms that could double as conference rooms.
The Design Plans
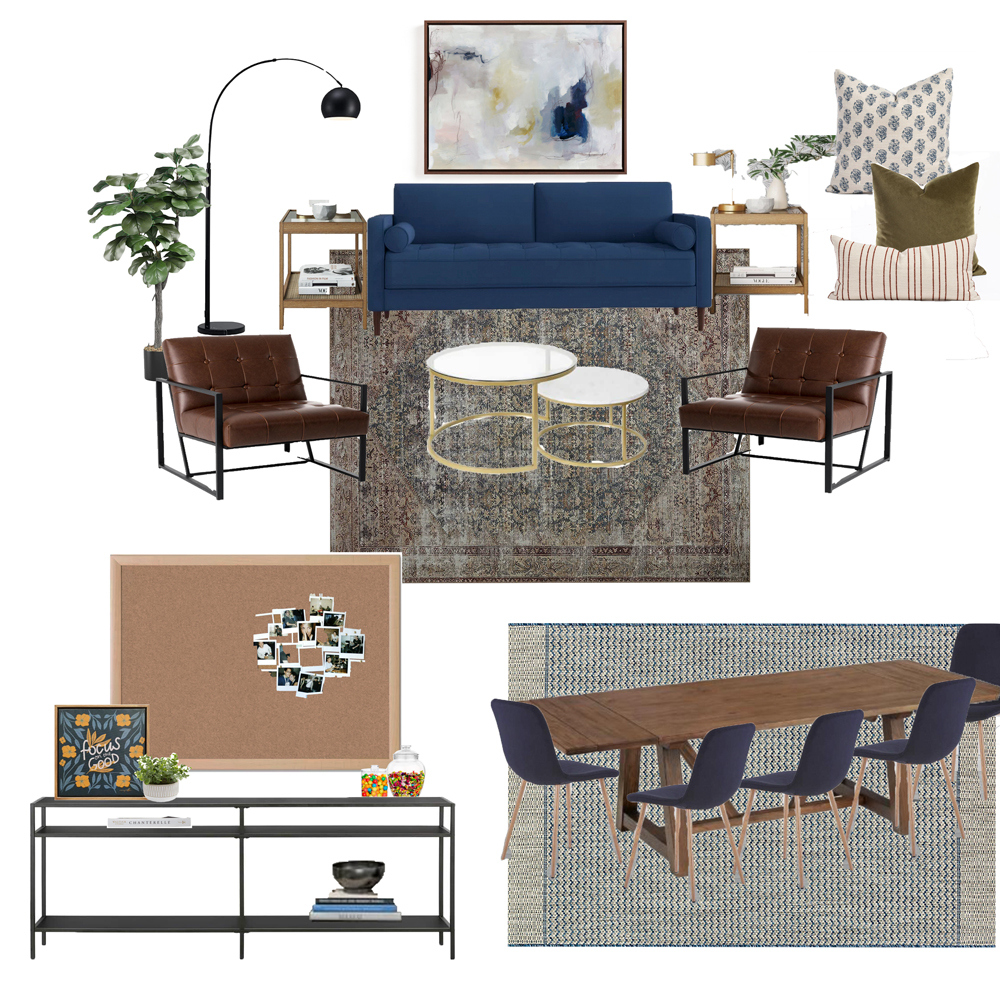
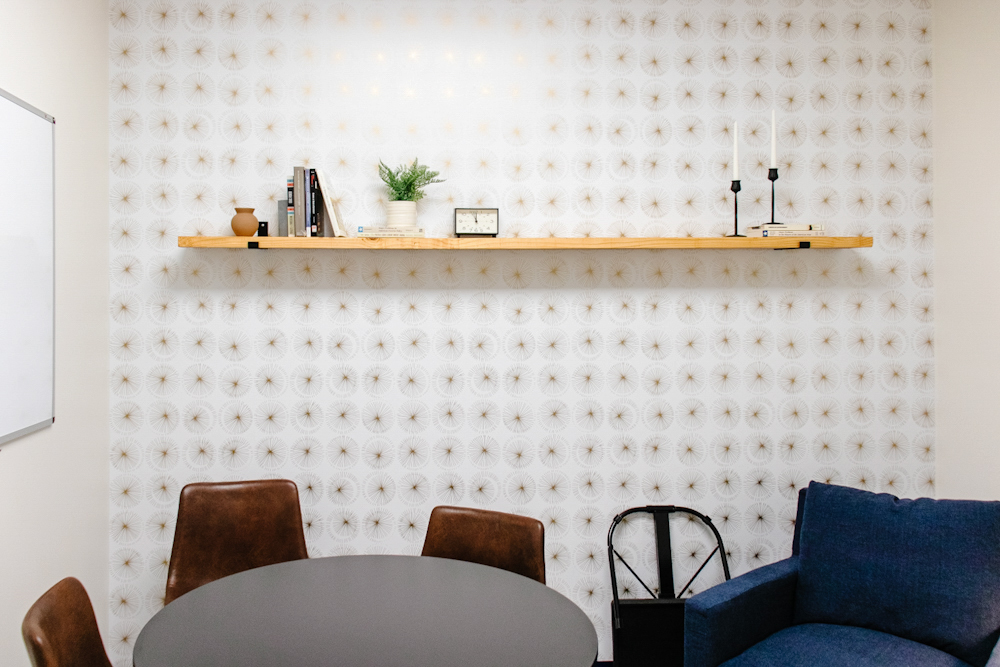
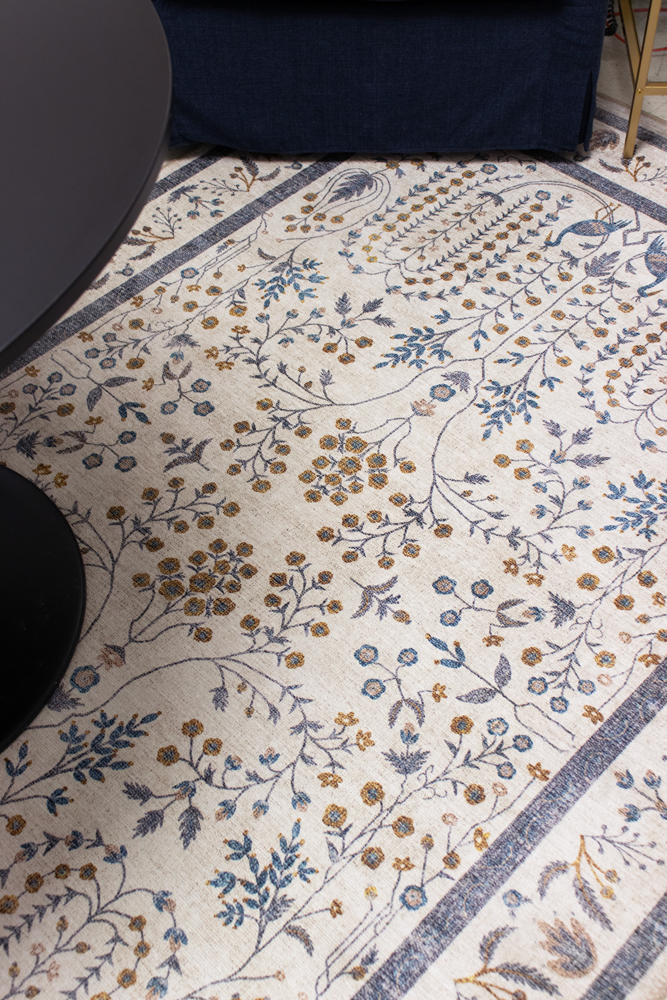
When creating the design plans I wanted to incorporate the school colors (blue and green), but in a professional, sophisticated, yet homey vibe. I chose both traditional and modern designs for furniture and textiles.
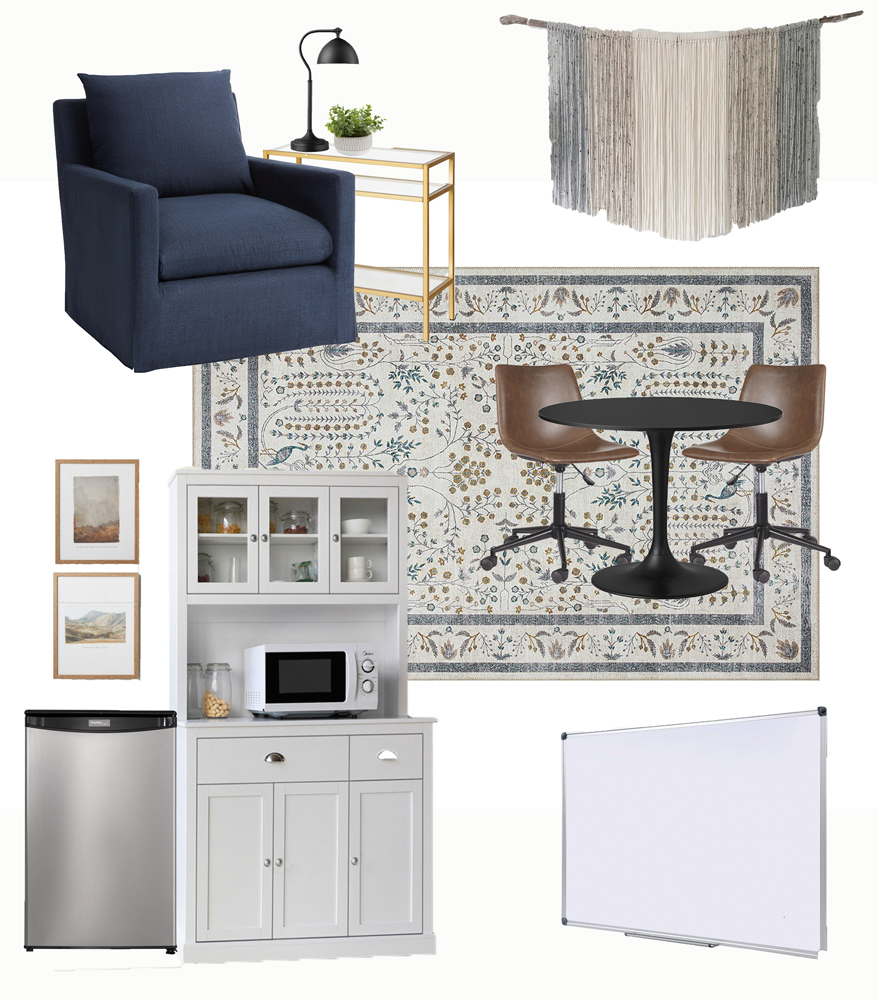
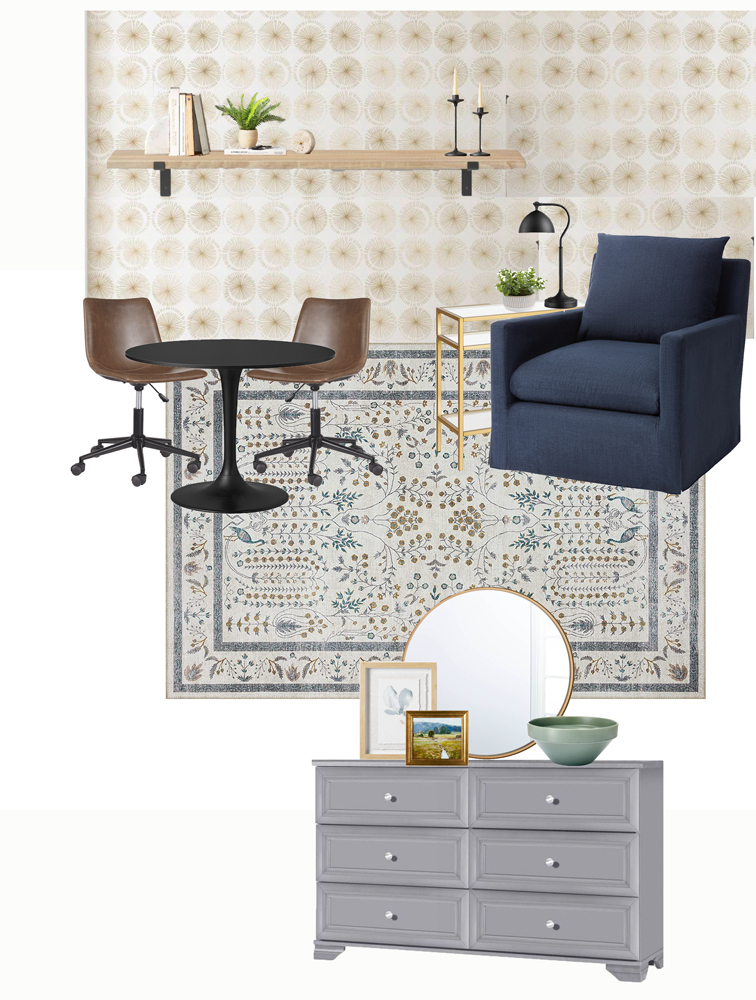
For the lactation rooms that would double at conference rooms, I wanted each to have some common and cohesive elements and pieces, but each feel slightly different as well. The room on the furthest left became the ‘suite’ since it is the largest and would have space for a mini fridge to store pumped milk, and a small microwave to sterilize pump parts. The middle room would be slightly more feminine with a wallpaper feature wall (peel and stick), and the room on the right would be mostly storage but be a bonus lactation room/private work space.
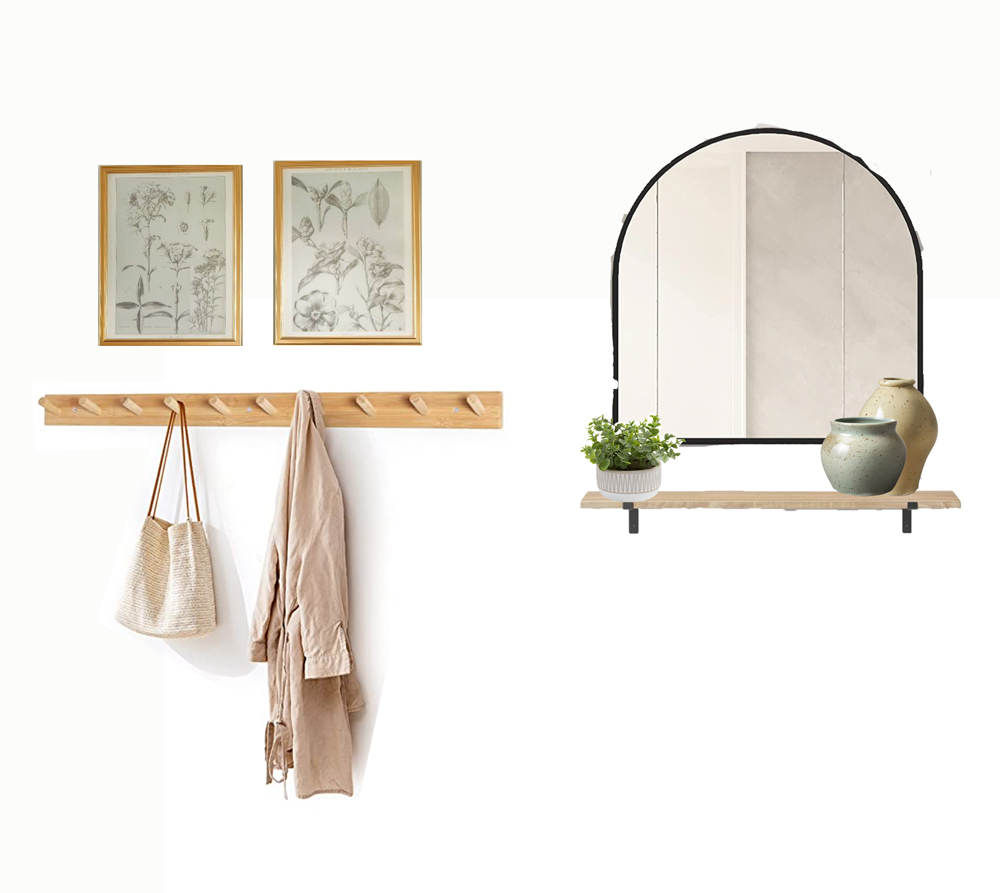
In the corridor, I kept things simple by adding a coat rack, a nice size mirror and some art.
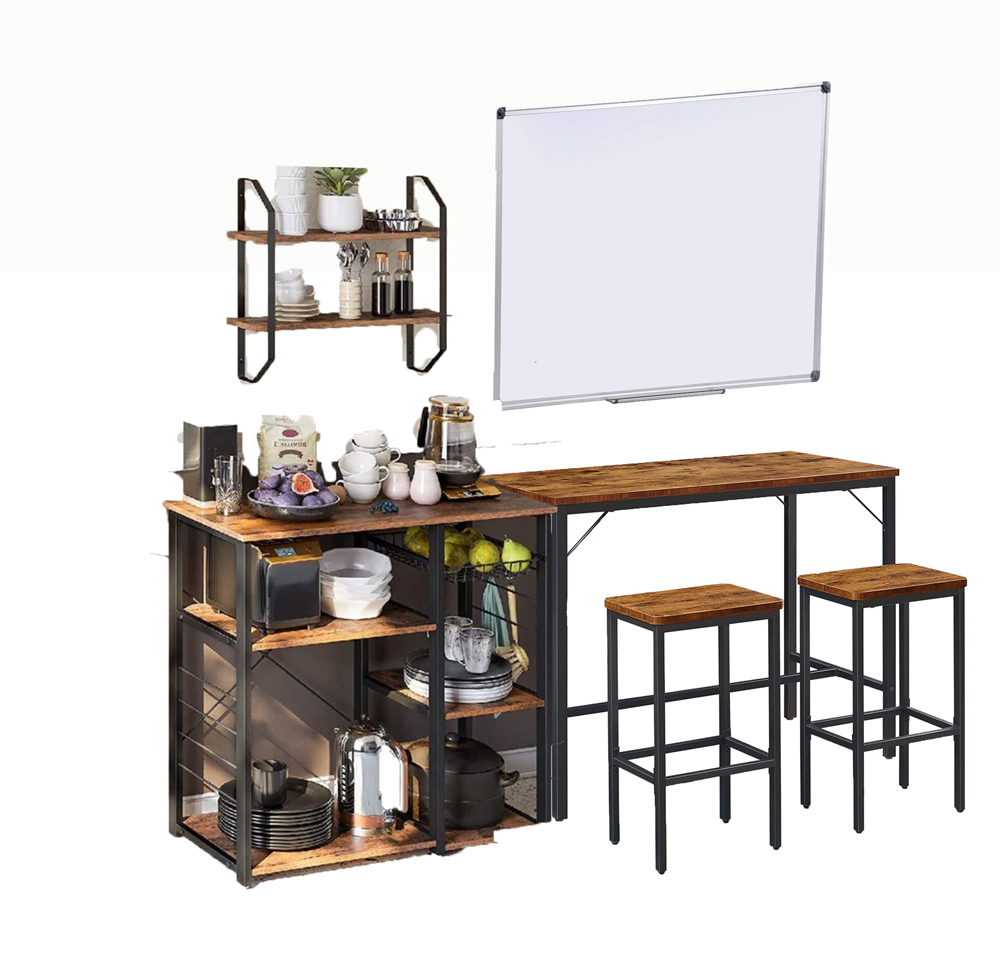
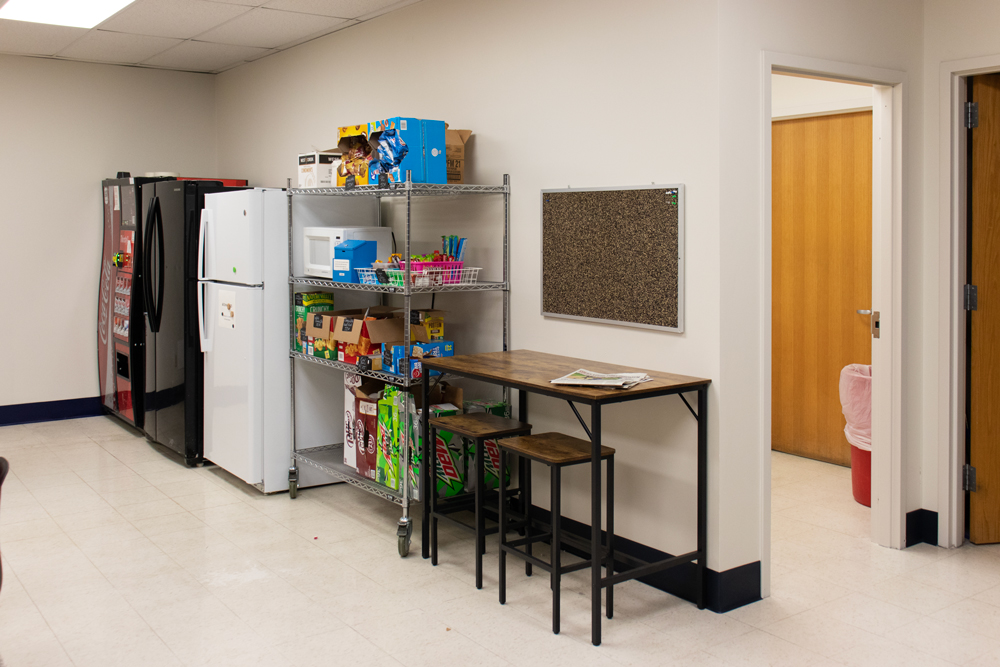
For the main common space on the one side of the large dining table, I knew I would have to work around 3 large fridges (one of which was a vending machine) so I had a small amount of space on that wall to utilize. Because of this, I added bar area with stools. While the coffee station was in my plan, because there is currently no kitchen in the lounge (next summer one will be added) to rinse coffee machine parts, we decided to nix the coffee bar for now and instead put in the existing shelving unit with snacks and drinks.
The only area I didn’t create a design board for was the work station where the printers/copier would go. I knew I needed a wall of lower cabinets, so my plan was to purchase used ones and refinish them.
Before/Afters
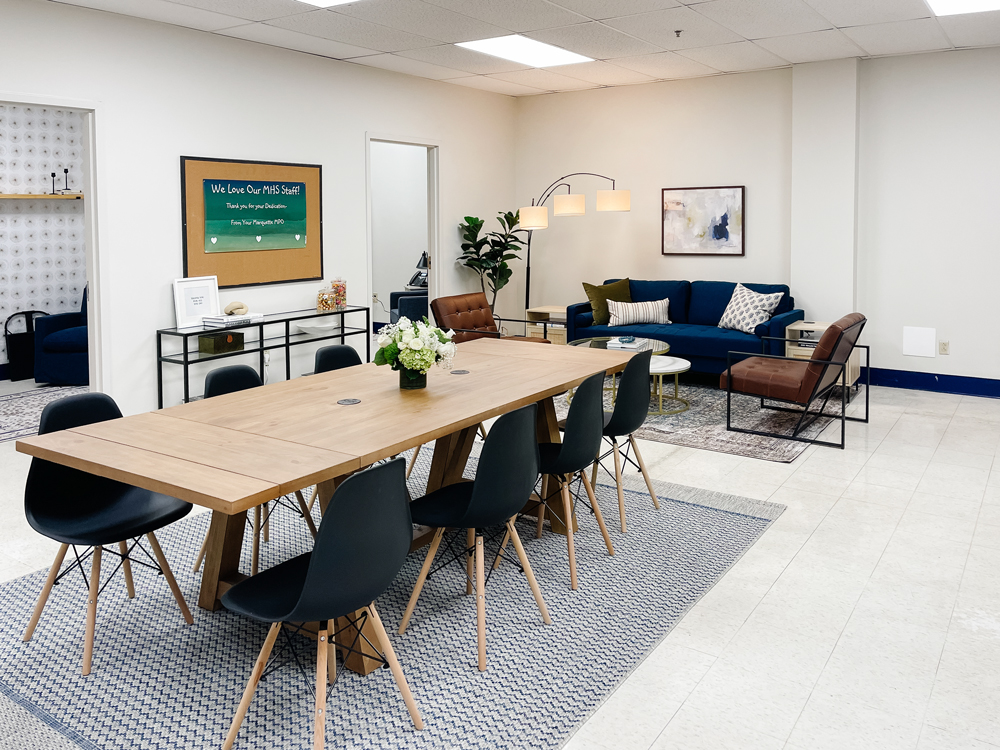
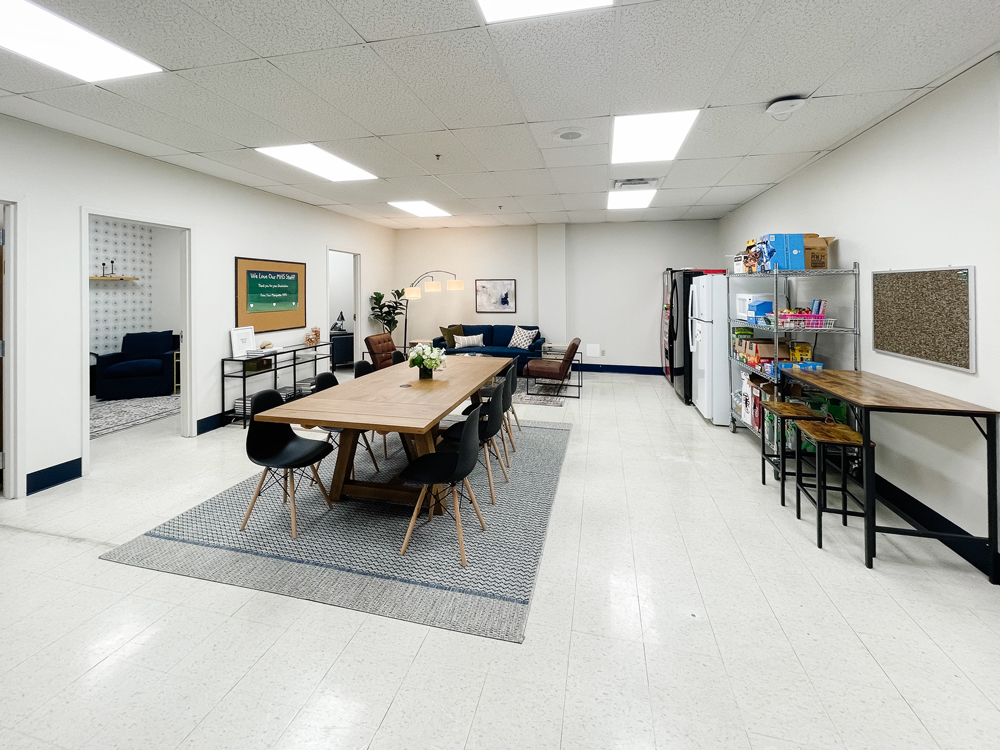
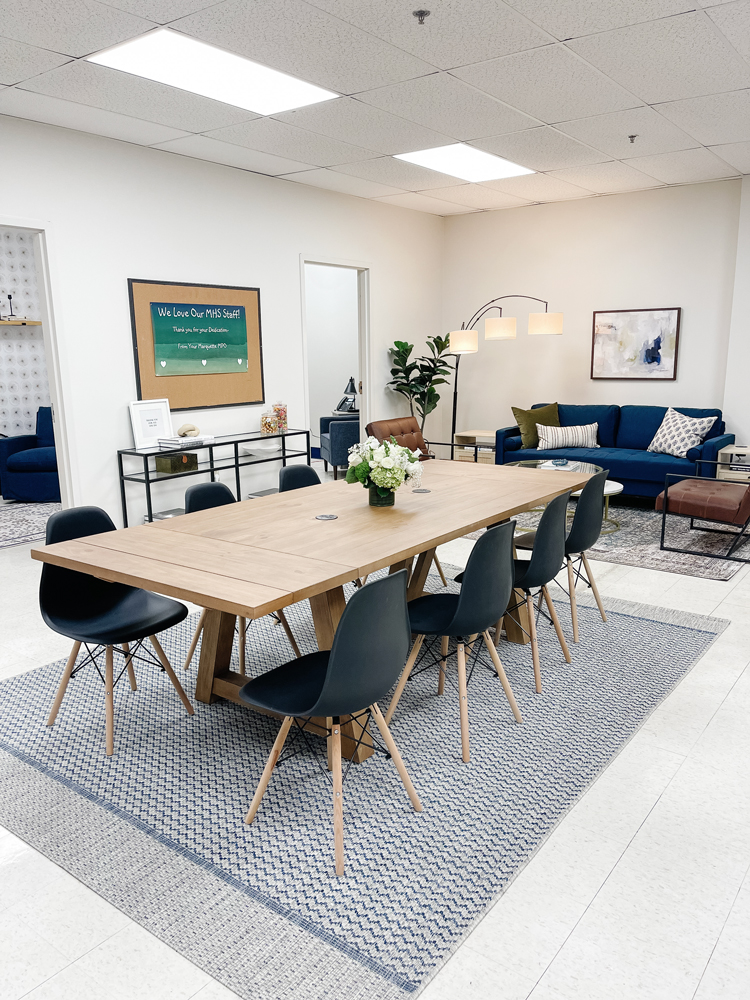
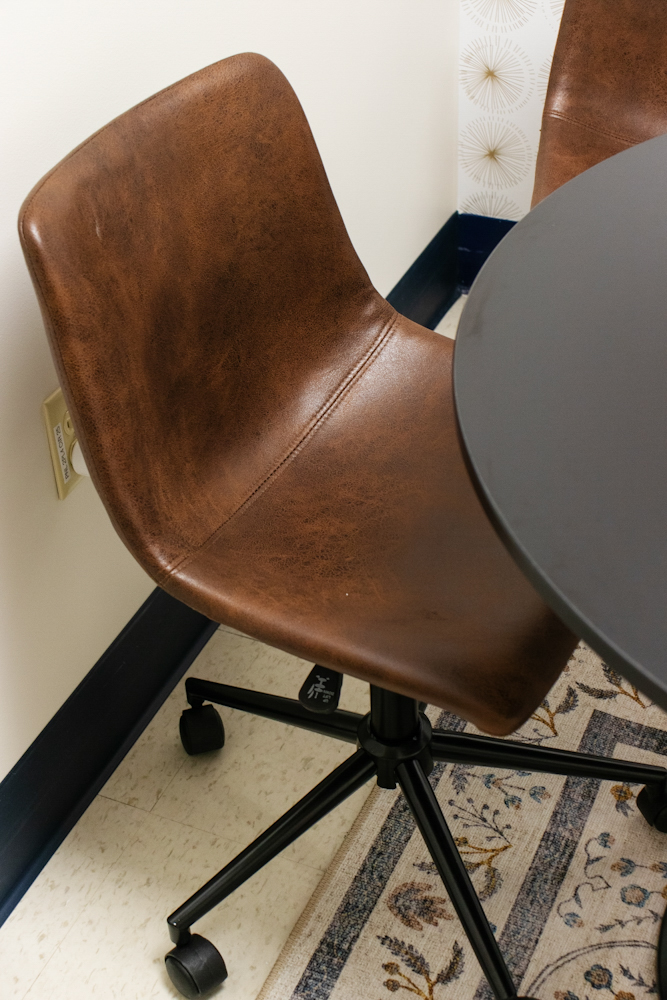
The Dining Area
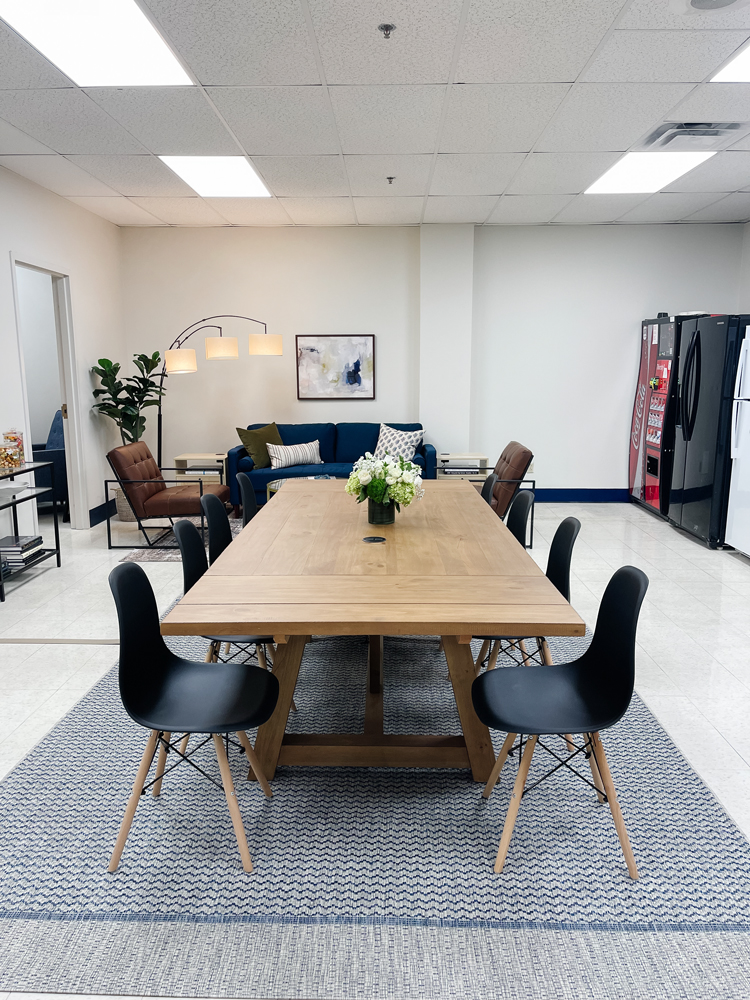
This entire project took me 3 weeks. I had help with some furniture assembly before the real work started, and I had a lot of help with clean-up, but I did everything else. It was a lot of work, dozens of hours, but I am so proud of how it turned out! It is incredibly gratifying to see my vision come to fruition.
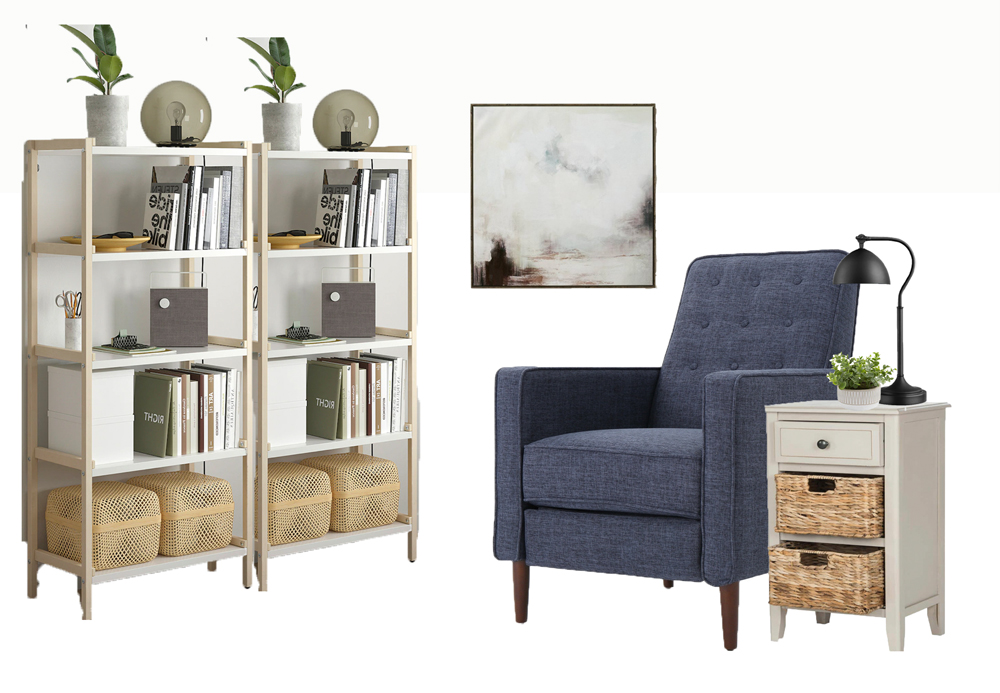
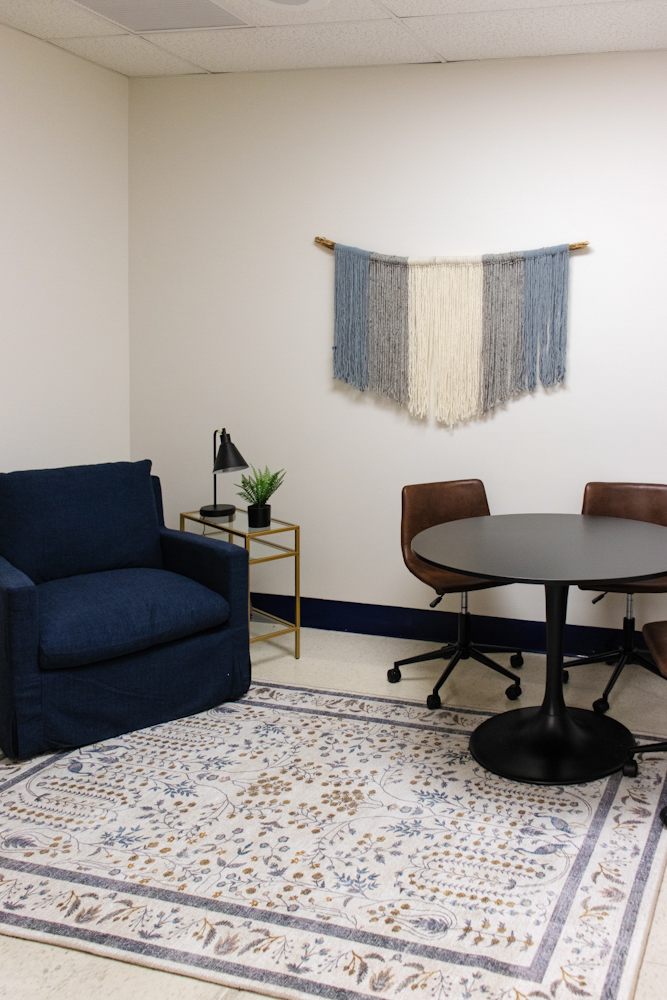
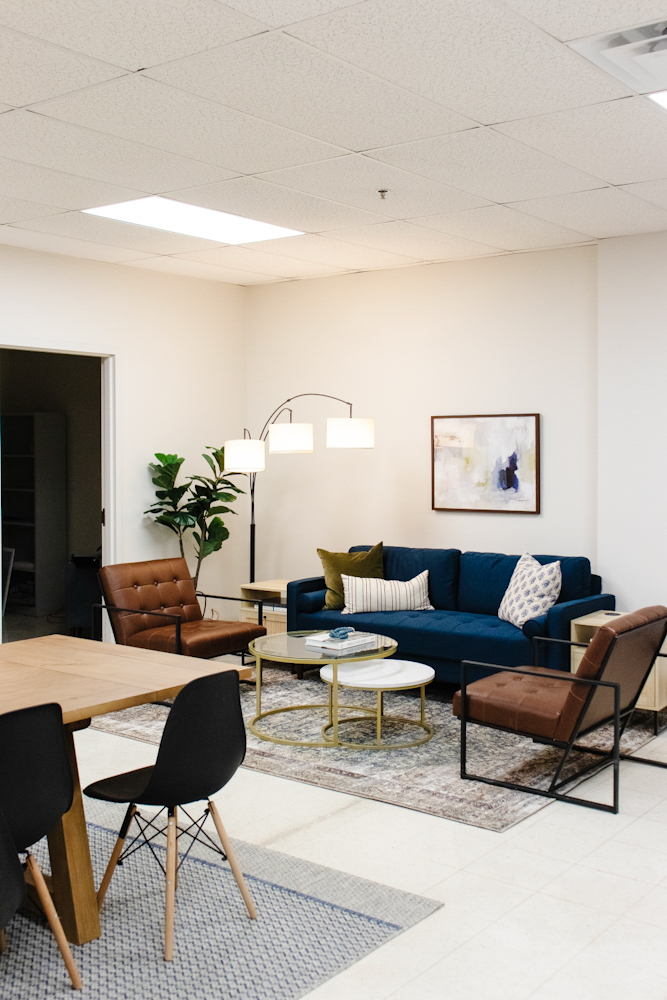
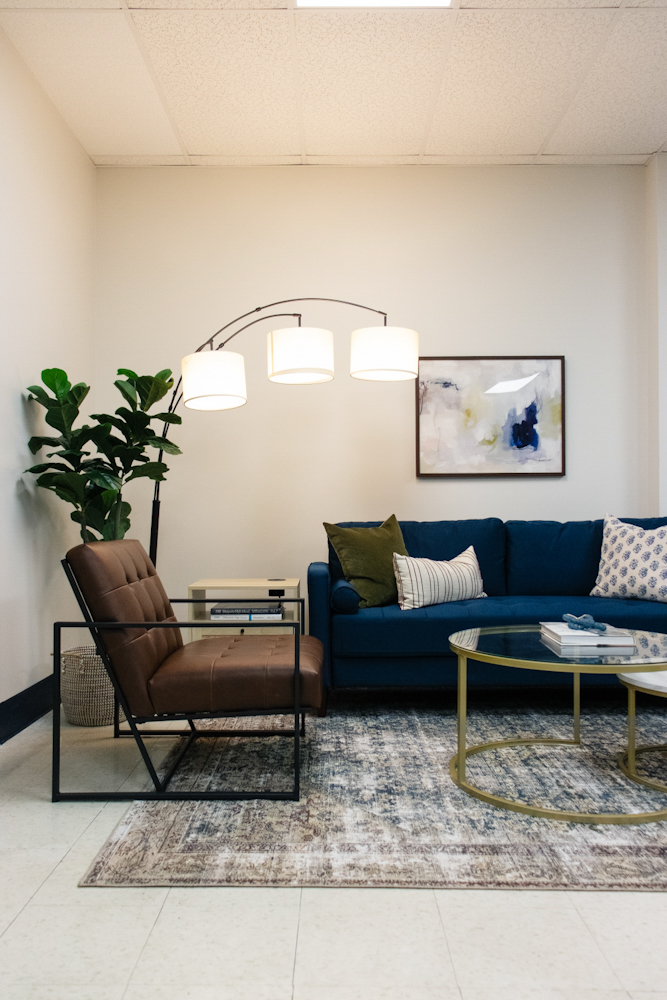
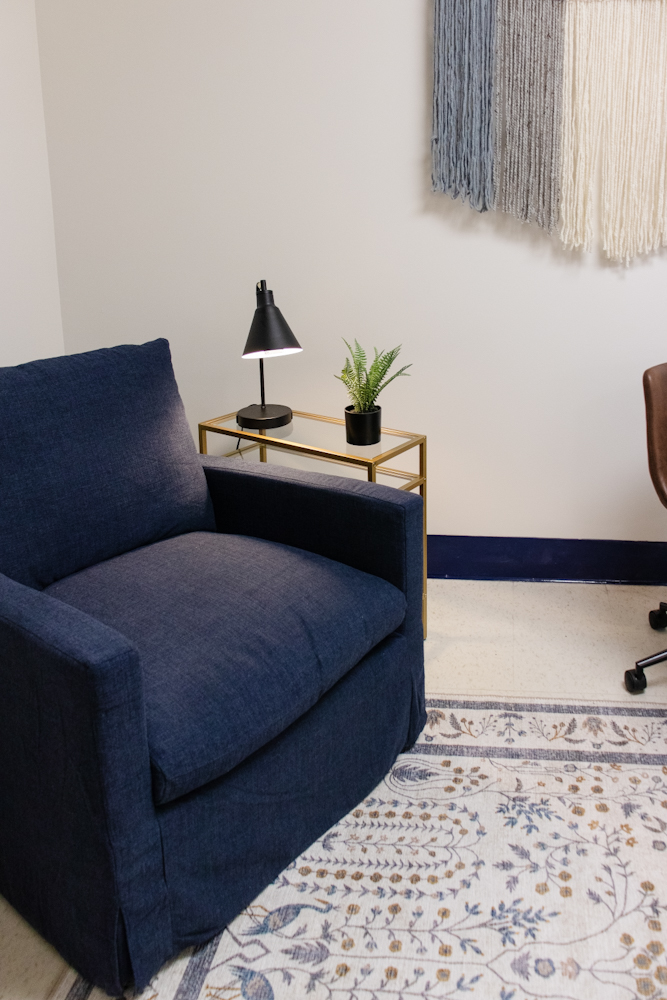
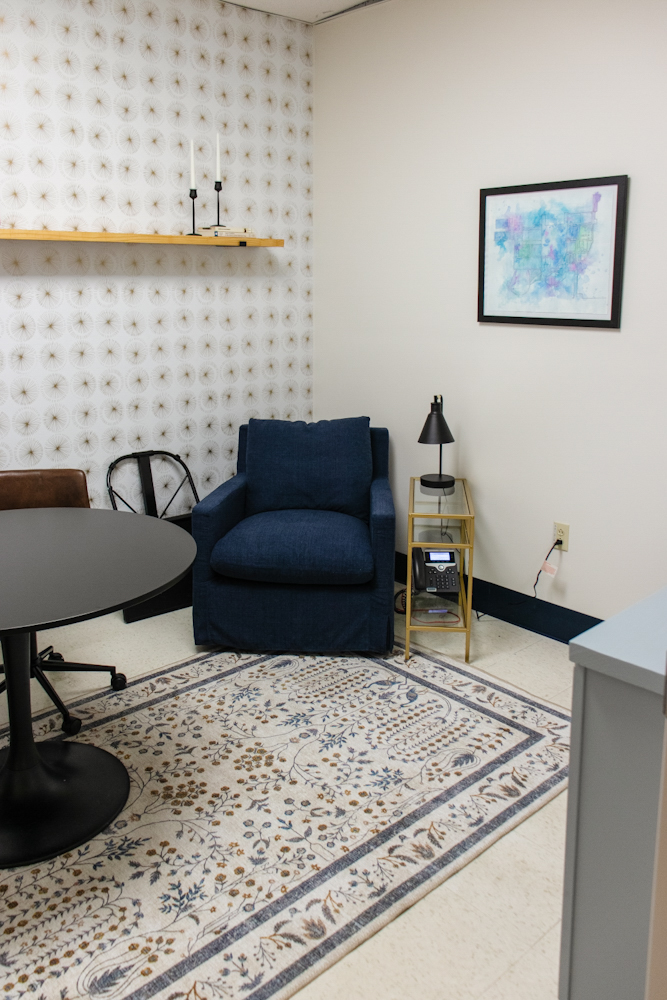
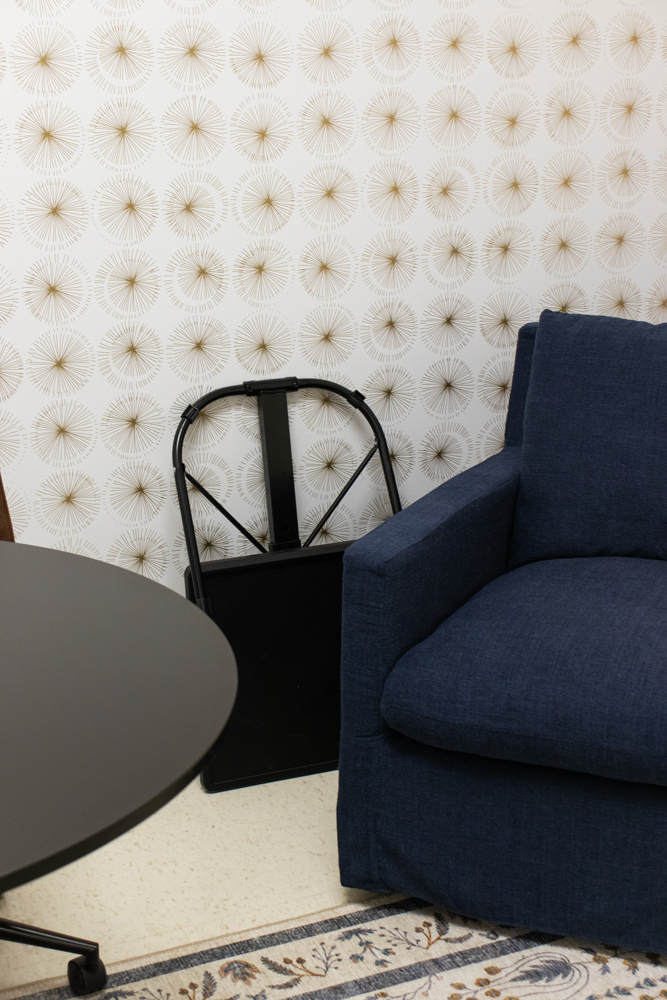
The Sitting Area
The sitting area is my favorite spot in the entire teacher’s lounge. I carefully selected furniture that was beautiful, durable, had good reviews, was comfortable, and most importantly the right price.

Electrical Conveniences
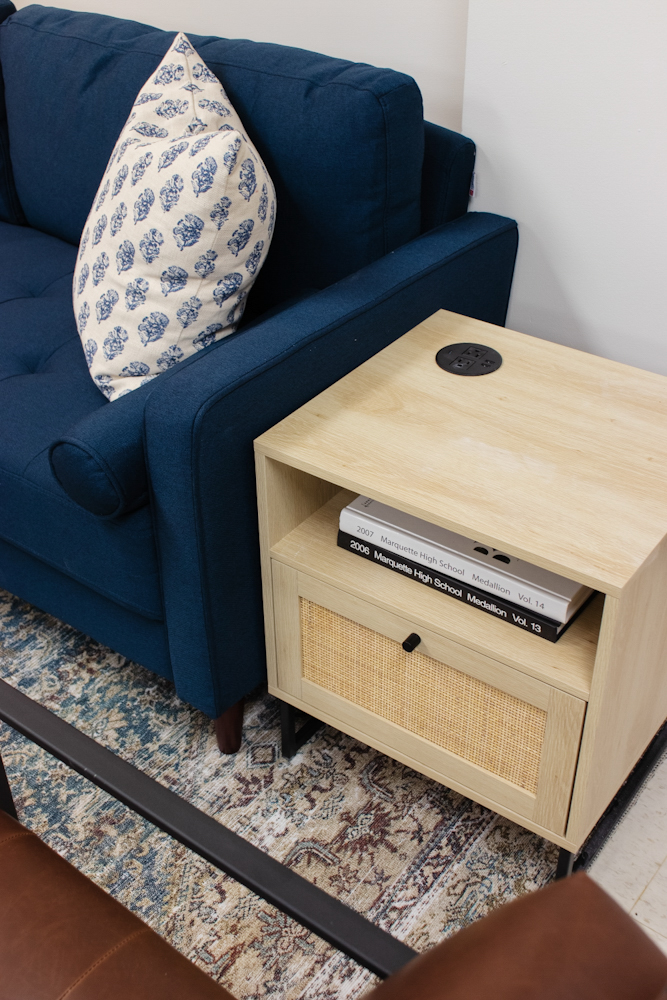
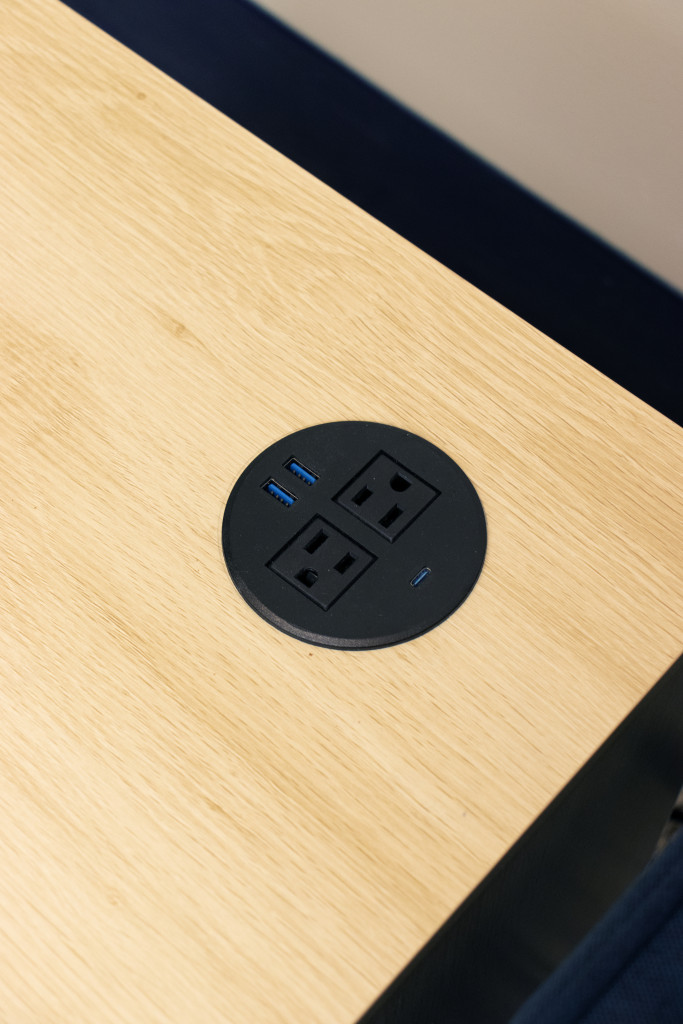
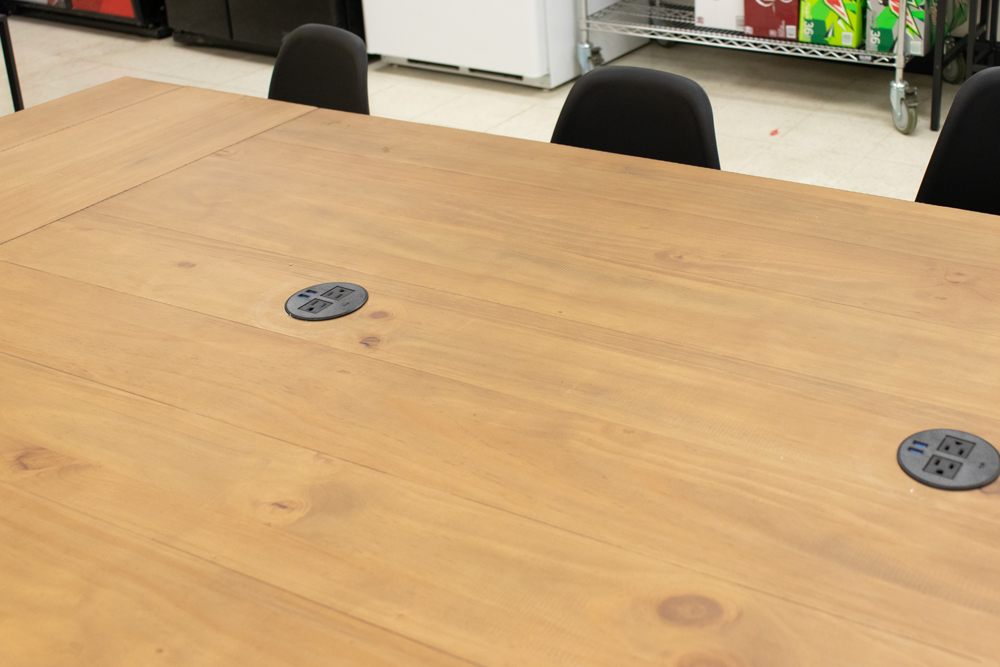
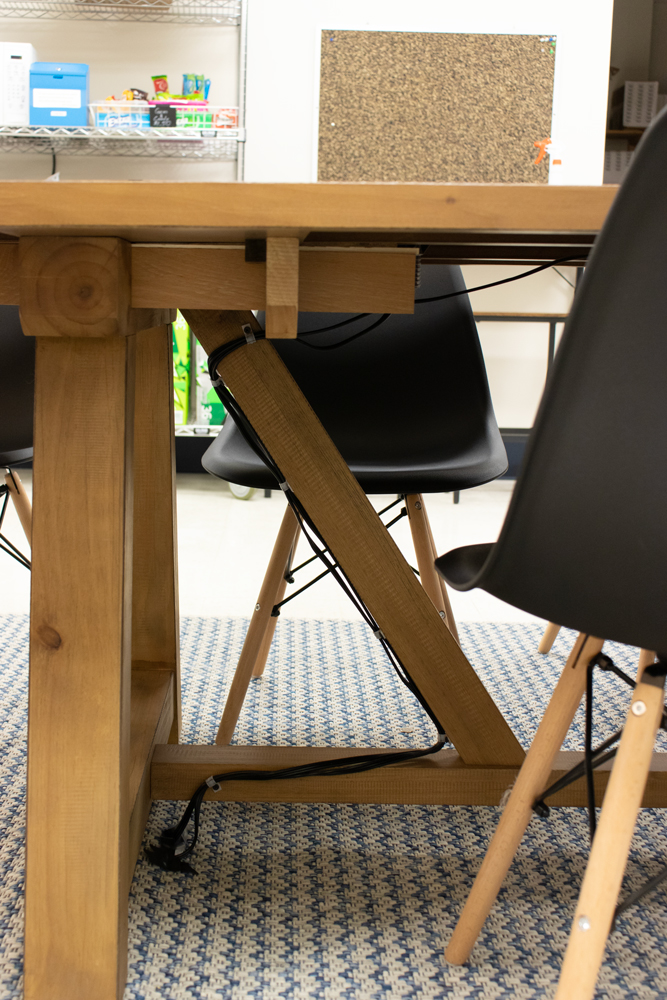
Something that the PTA president discussed with me was the need for as many outlets as possible to charge a variety of devices. She found these awesome recessed outlets for tables and I was able to retrofit the end tables and the dining table by cutting a hole in them with a jigsaw and attaching the outlets. They were SO easy to install, and increased functionality of each piece of furniture!
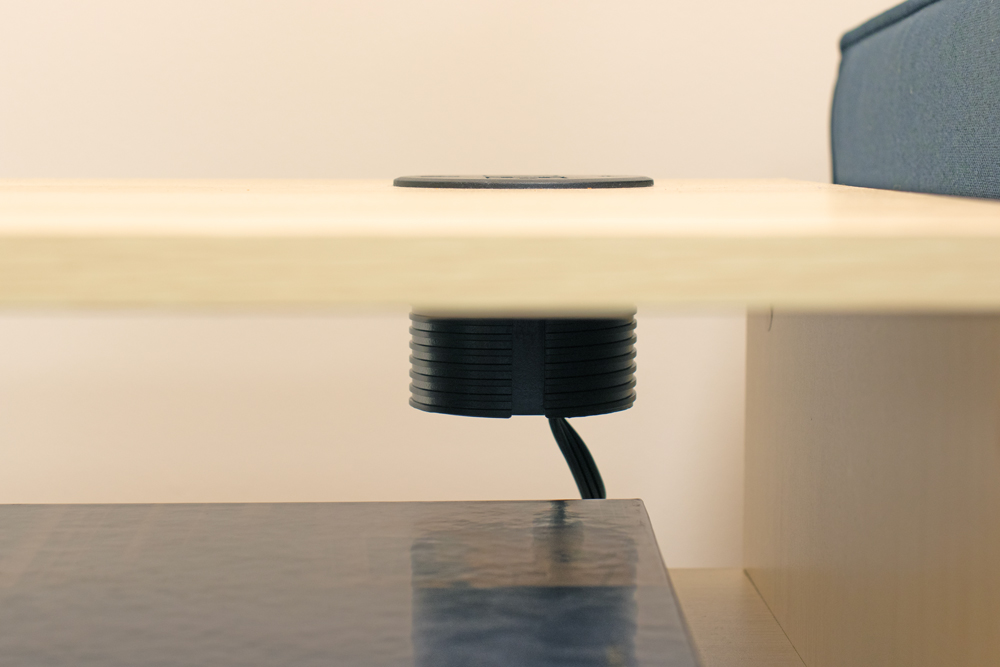
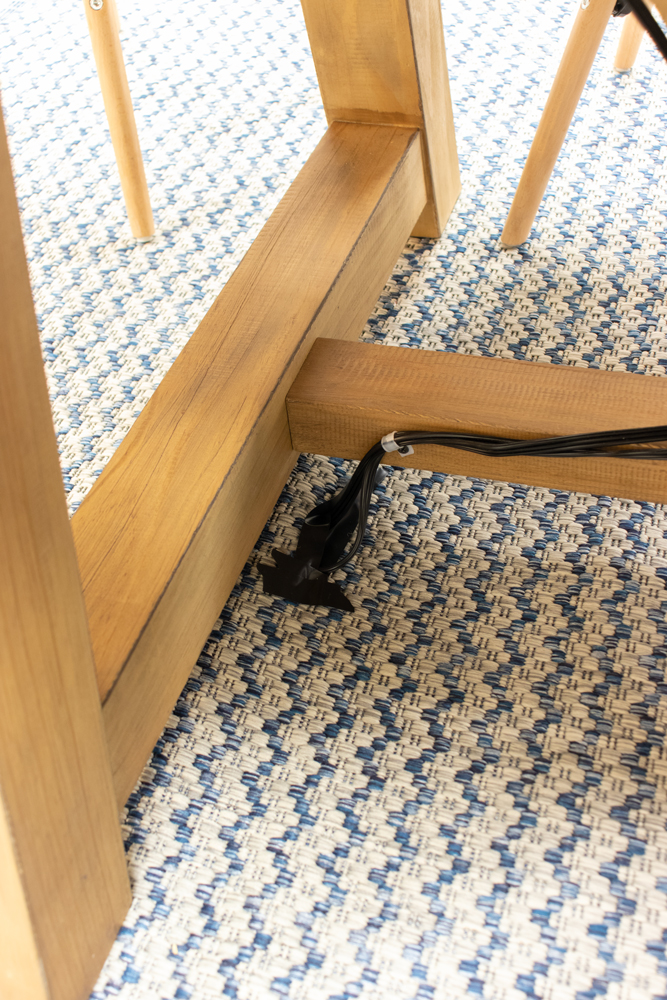
For the dining table, there wasn’t a floor outlet to plug the recessed outlets into, so I ran the cords down the legs, securing them with cable clamps. Then I cut a hole in the rug and attached the cords to a flat extension cord (wrapped with electrical tape at plug portion) which ran under the rug, covered by a floor cord protector adhered to the floor, which then plugged into a wall outlet.
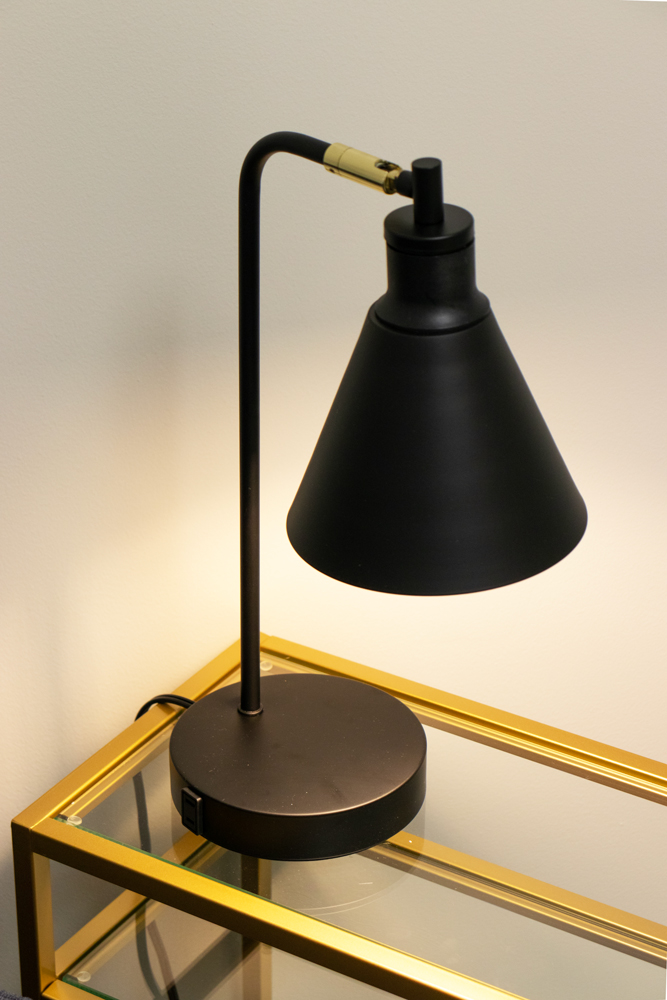
We also found these table lamps in the lactation rooms with have USB outlets on both sides of the lamp! Brilliant!
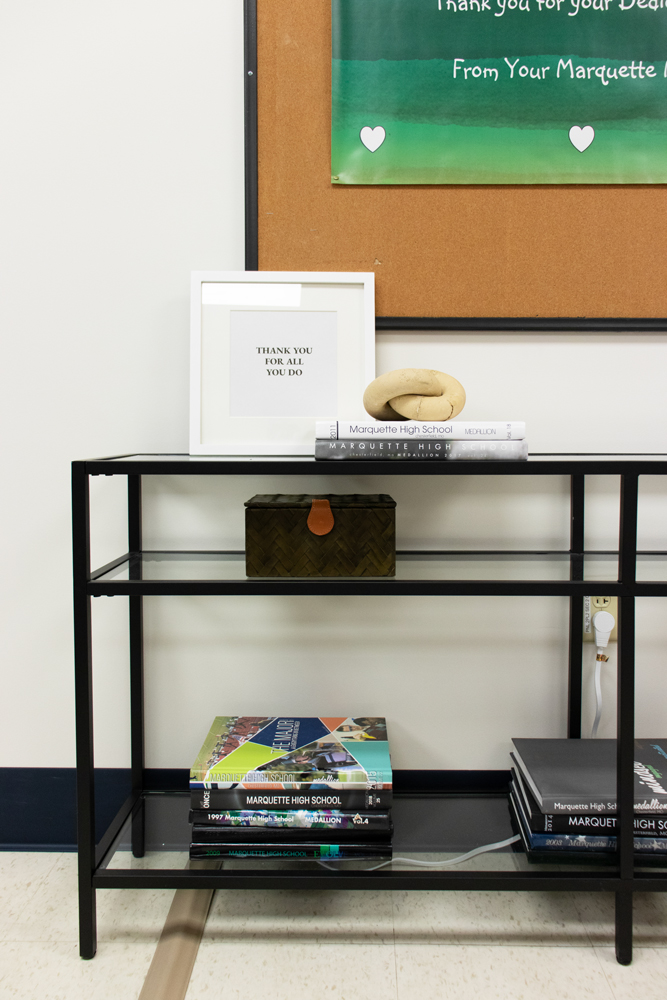
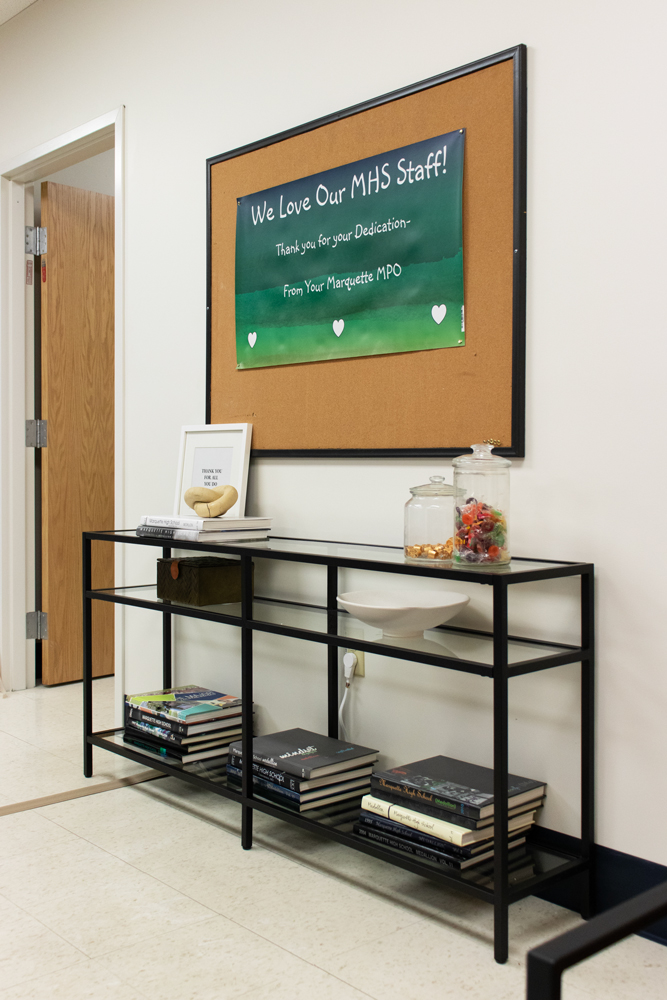
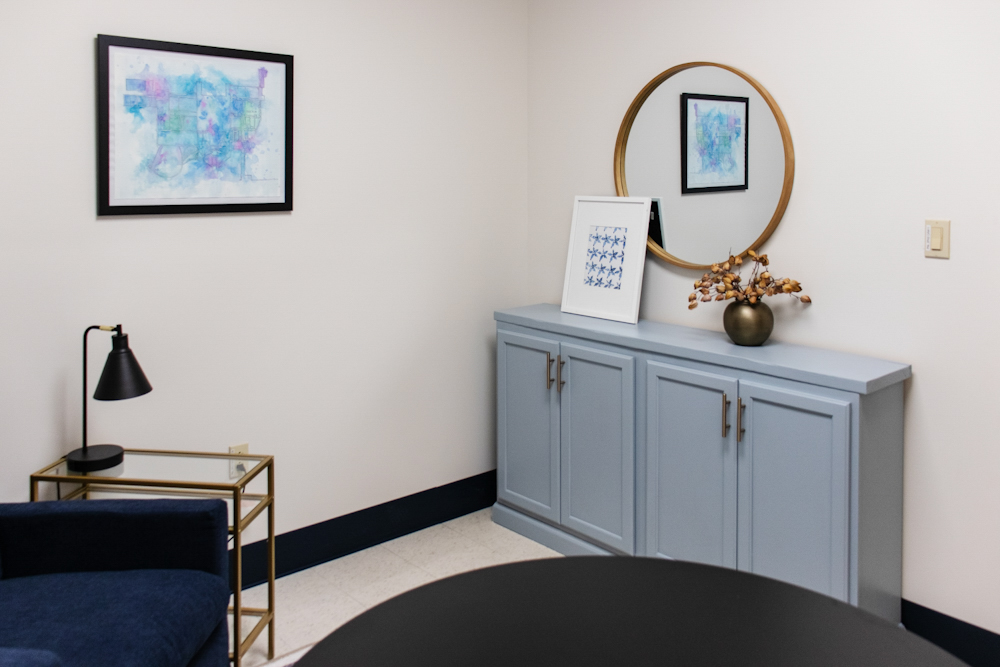
The Bulletin Board

Because the teachers and staff often have photos, quotes, and pictures that they periodically might want to display, I decided to use this enormous bulletin board that was already in the teacher’s lounge. All I did was paint the frame black. To ground the bulletin board, I used a narrow console table that can hold the school’s collection of past yearbooks, as well as some jars of candy.
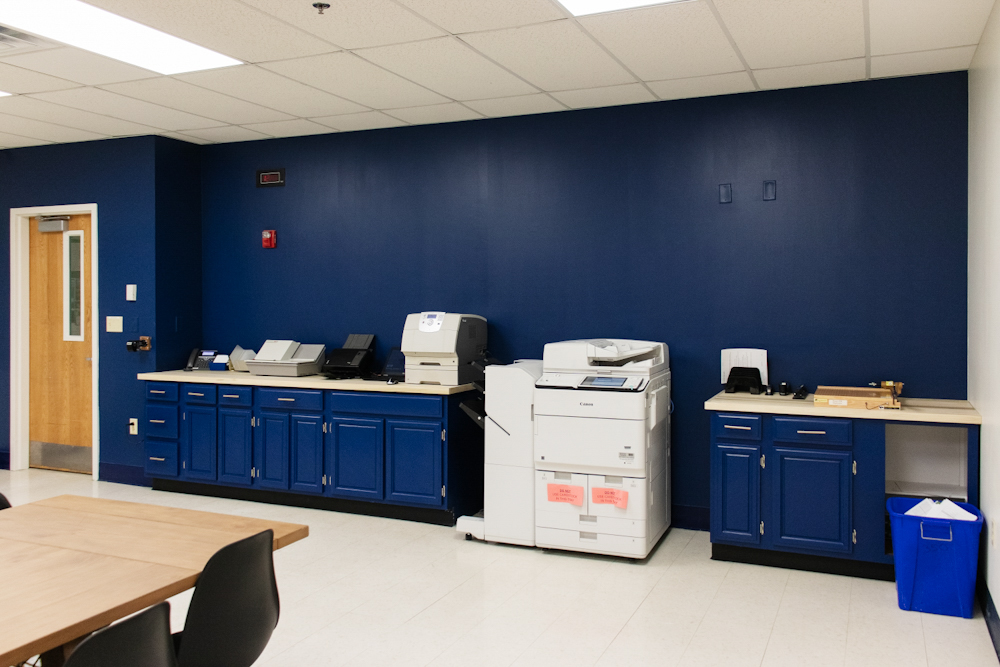
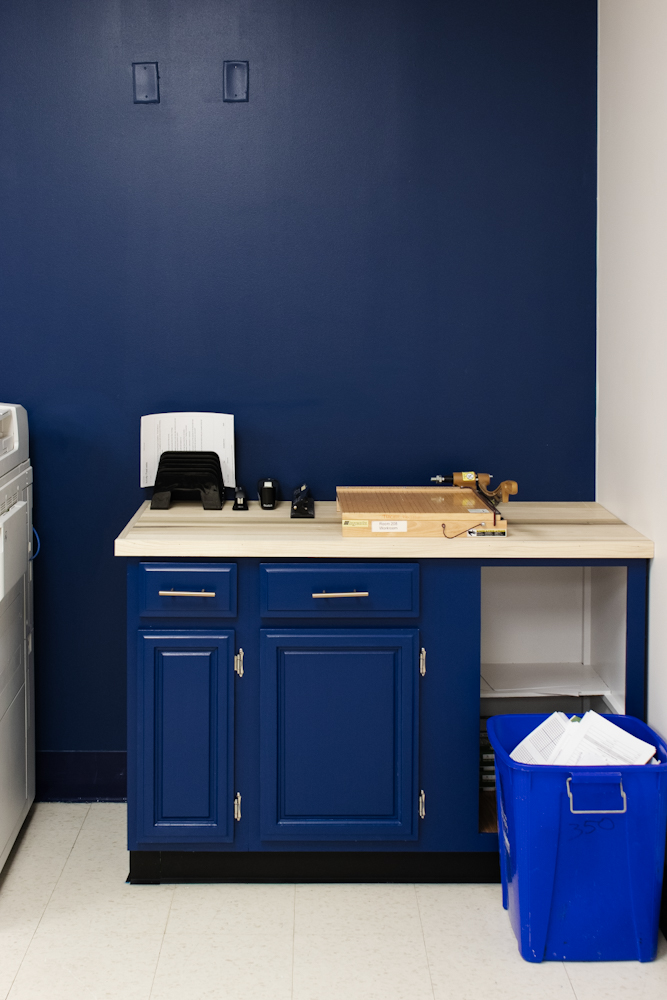
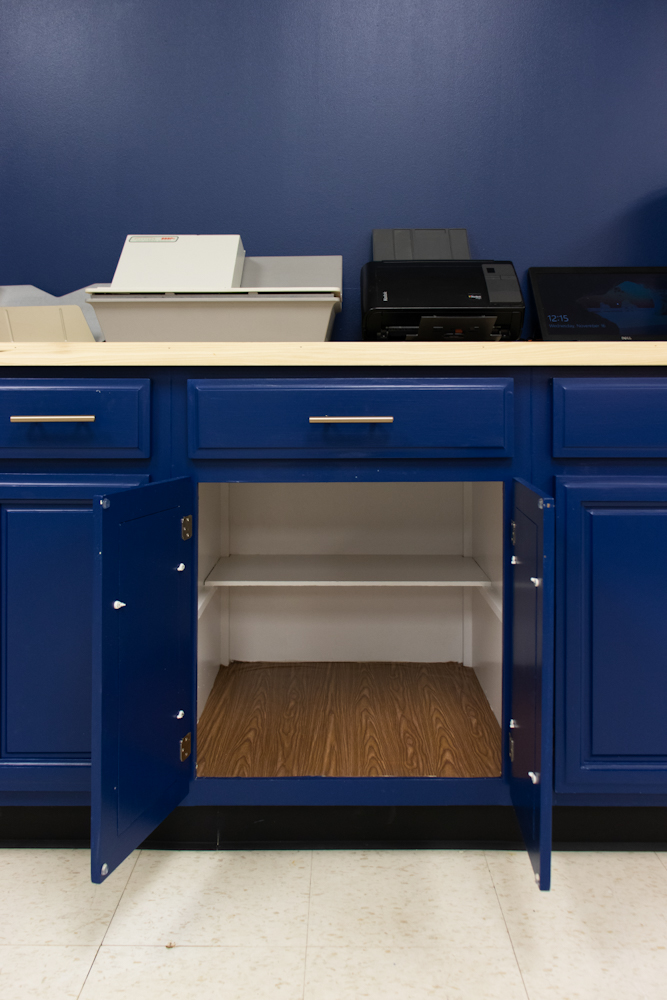
The Work Station

The hardest working area in the entire space is the work station painted navy to match the accent wall. Throughout the entire teacher’s lounge makeover, the room was actively being used by all staff because this room holds the main copier for them– it is used every day!
They also needed a space to hold grading machines, printers, and office supplies like the paper cutter, hold punch, stapler, etc.
I was able to find a row to lower cabinets (a total of 14′) that were solid and in decent shape for only $100 at Habitat for Humanity. I had to reinforce some parts, replace one cabinet bottom, remove linoleum from the bottoms of all of them, and sand them down, before they were ready for paint. It’s always the prep work that takes forever!

I was actually working on the final coat of paint the night before the reveal, and attached drawer pulls the morning of before most of the staff arrived.
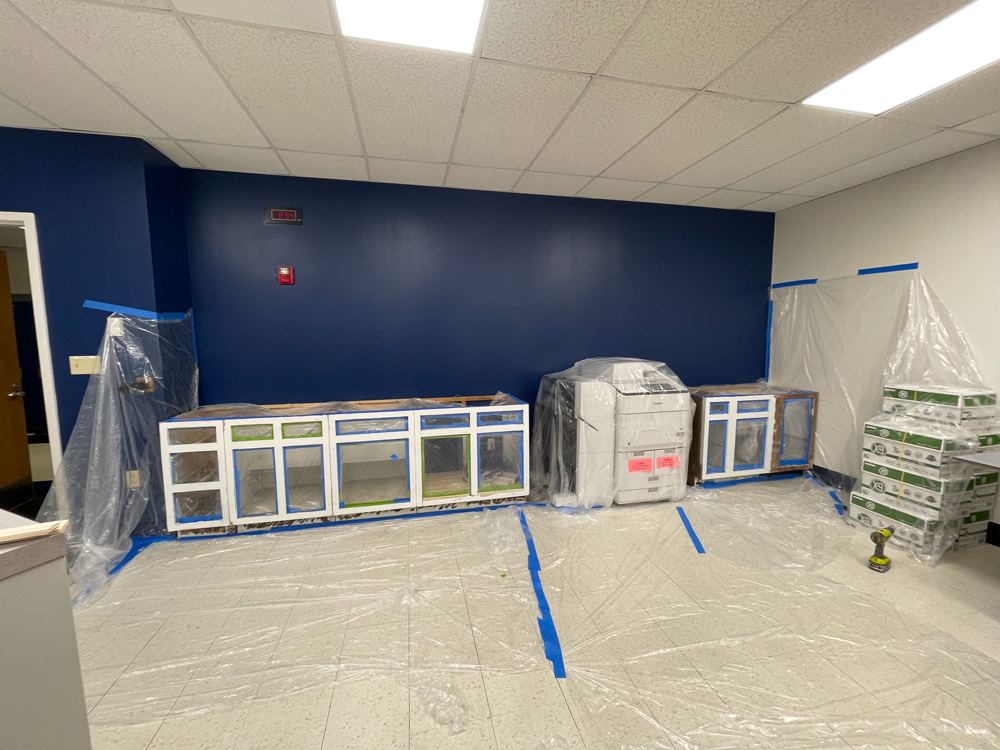
I built the counters since we couldn’t find the right length of formica available in time. On one side of the copier is about 9 feet of cabinets and the other side is about 4 feet of cabinets, and I was able to build the counters from poplar using the same method I did for the DIY desks in my basement, for about $200.

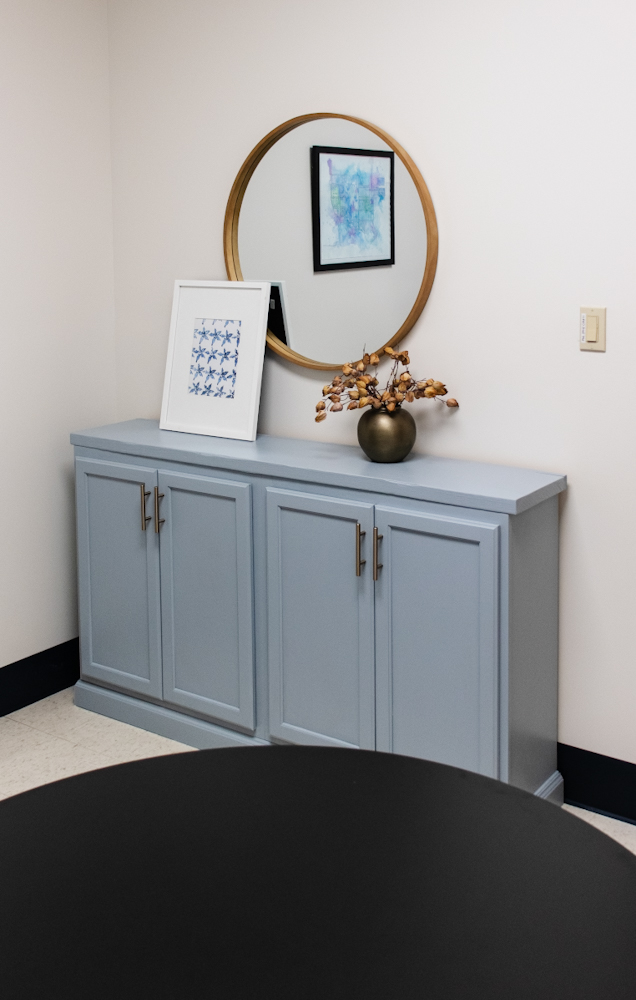
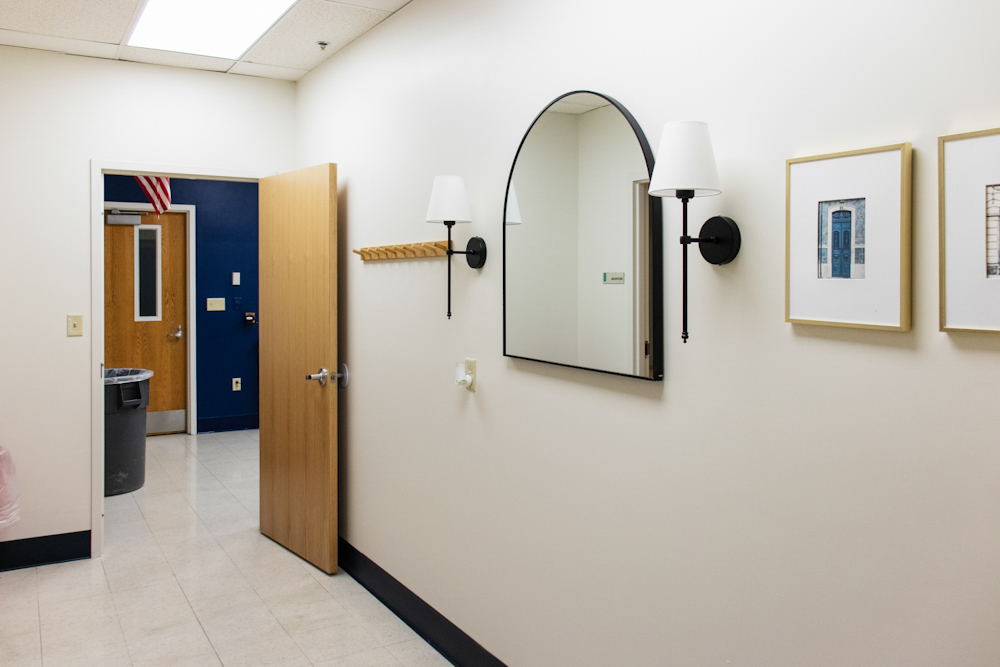
The Bathroom Corridor
This big blank wall in the bathroom corridor was not to be left neglected, even though it would have been easy to. Adding some hooks to hang coats and purses before using the bathrooms is convenient, and a nice big mirror beneath better lighting than the bathrooms have, is a nice touch. The art on the other side balances out the coat hooks, and the sconce lights are mostly for aesthetics– they add a 3-dimensional effect that draws you in when looking down the corridor. This wall has made a huge difference for the teacher lounge because the flushing of toilets is no longer heard when people are trying to eat lunch.

Conference/Lactation Suite
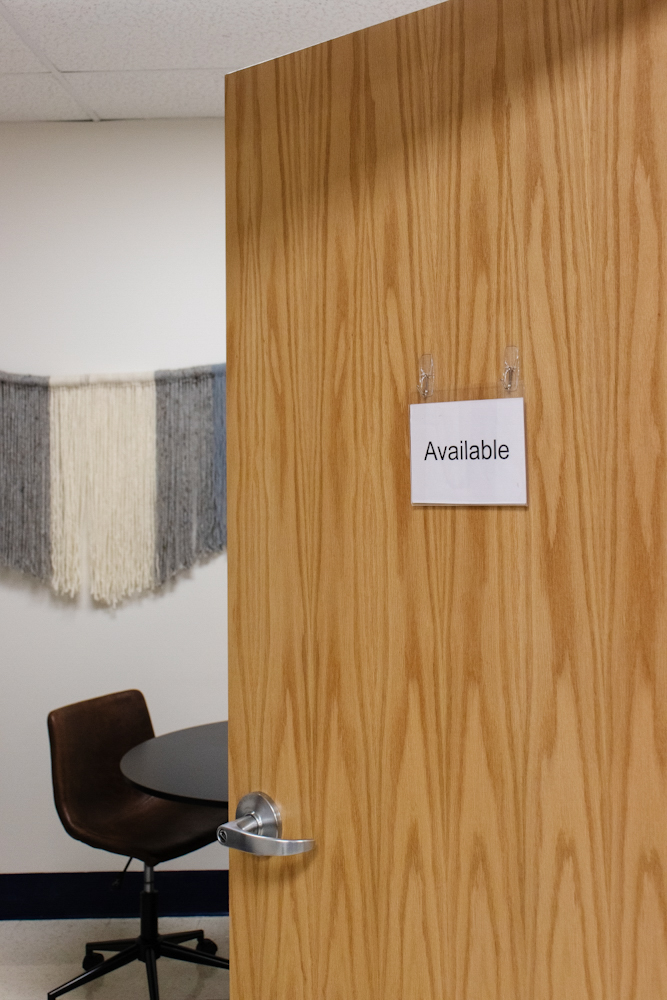
Reversible signs saying “available” and “in-use” are on the lactation and conference rooms, which is a necessity since the doors have no windows. These were simple sign holders I found at Office Depot and hung with command hooks.
One of the coolest and most memorable elements of both of the lactation/conference rooms is the incorporation of student artwork. The principal mentioned he wanted a student element in the teacher’s lounge, so I reached out to the art department and asked if any students would be willing to donate some art that fit within the color palette of the room. The president of the National Art Honor Society at our school drew an incredible rendition of the outside of the high school, and the Architecture club created a watercolor and ink drawing of the blueprints of the building. You can see a partial view of one of the pieces of art above on the left.

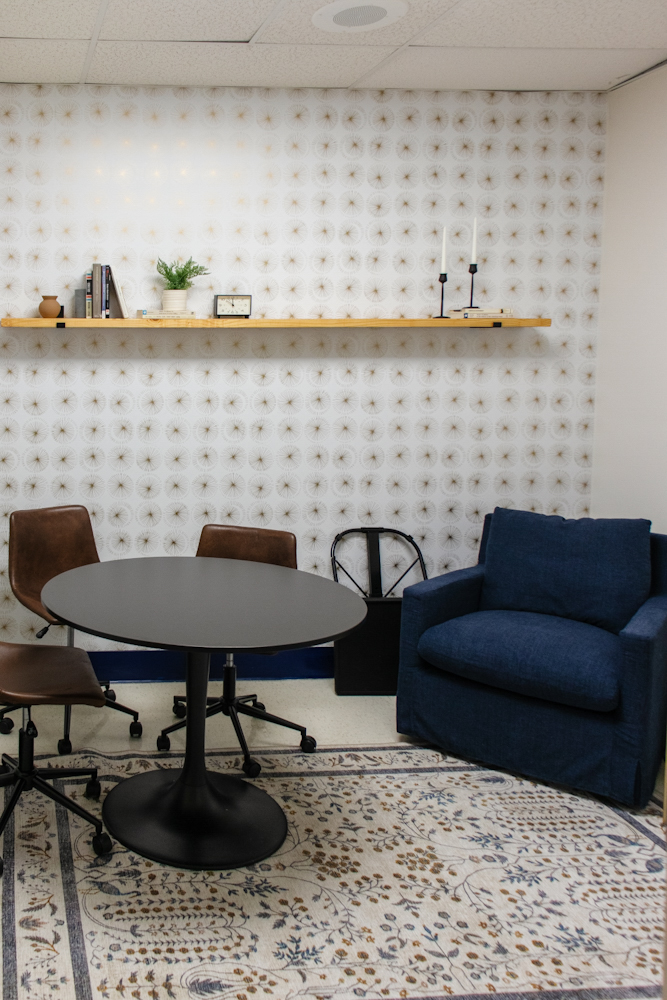
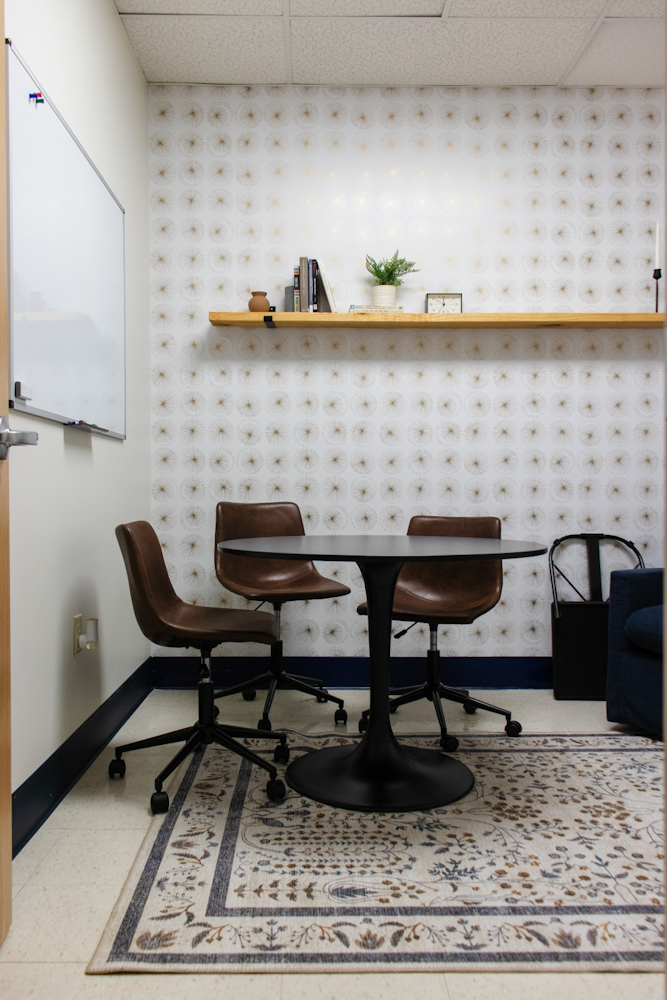
Two of the small rooms that will also serve as conference rooms have a small table that can easily fit 4 chairs around it (although we only got 3 for now), and a very large magnetic white board. This is great for those who want to eat a private lunch, have a small meeting for brainstorming, etc.
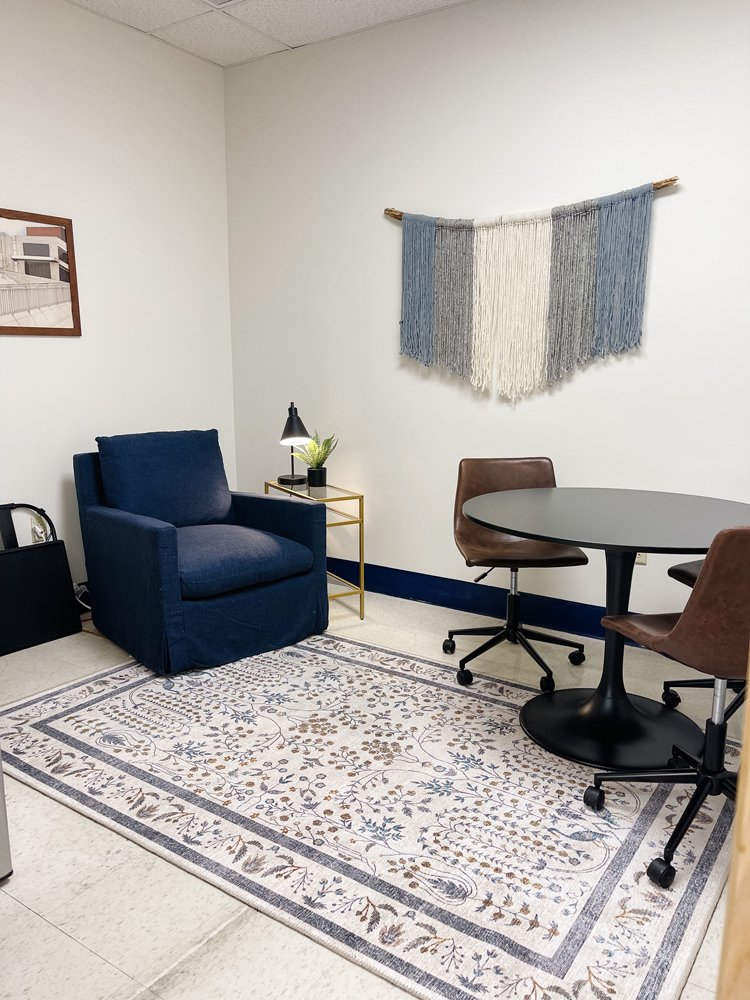
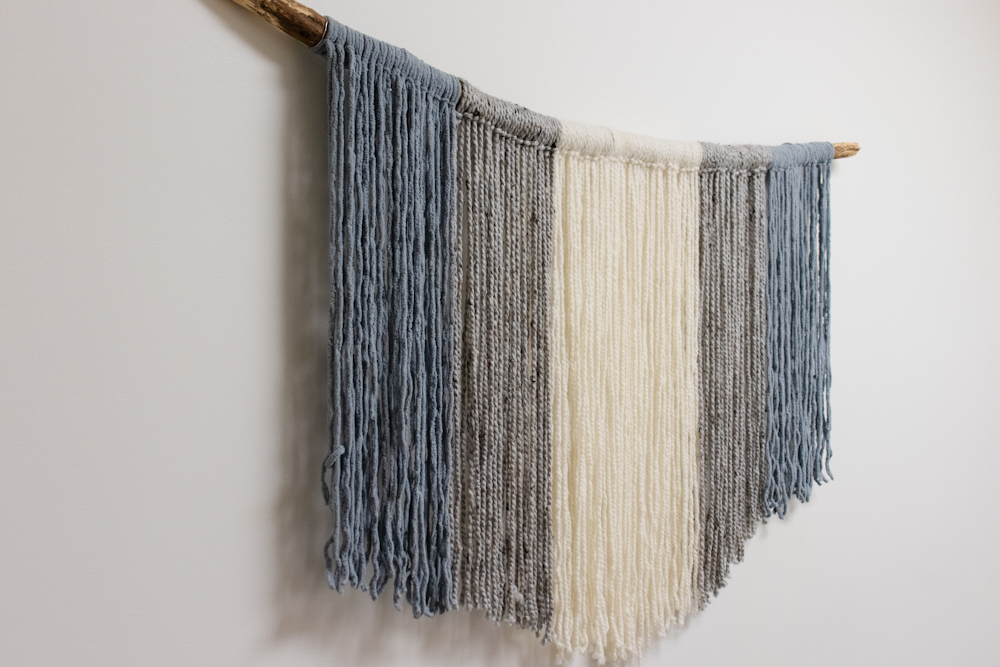
An important part of making small rooms more soundproof, and to make it feel homey, is to add art and textiles. I saw this awesome hanging yarn art on Etsy, but our budget was already limited, so I was able to find a long branch on a walk, sand and scrape off all the bark, bought some yarn, and created this hanging in 1 afternoon by just tying simple knots.
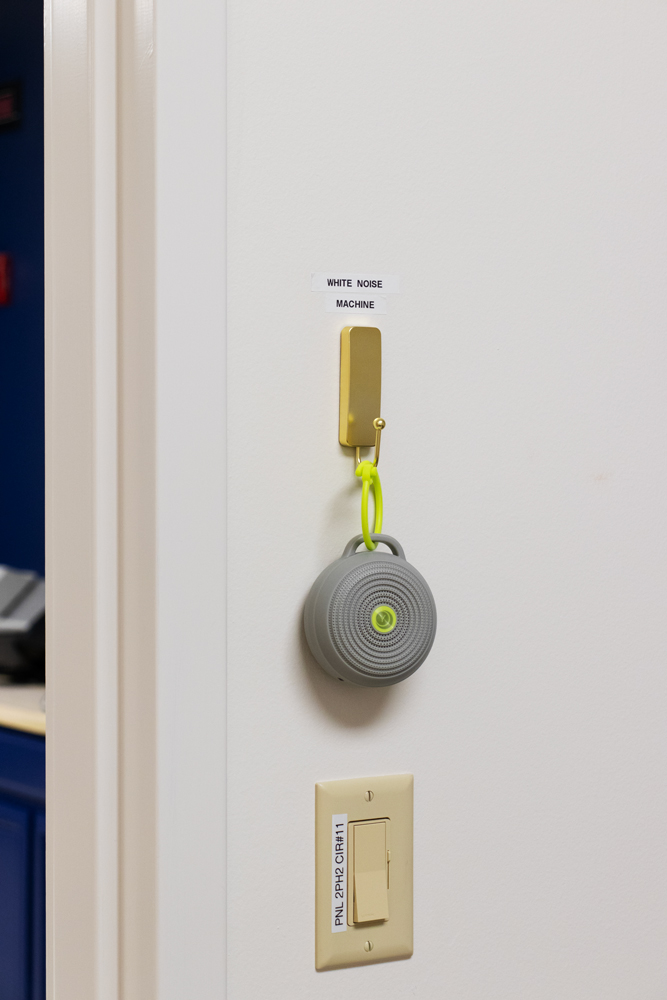
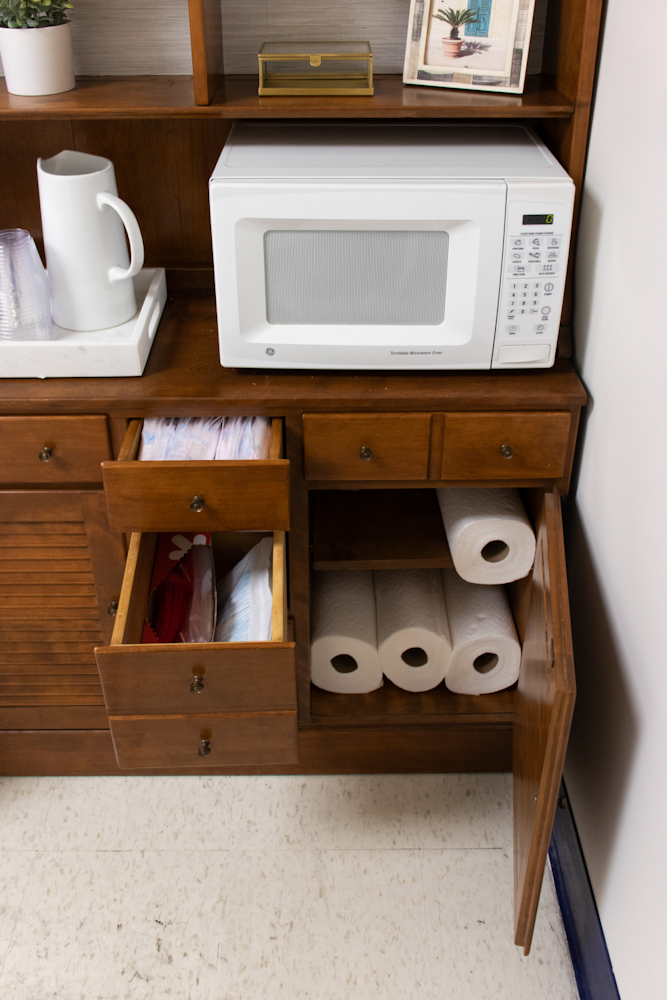
Each lactation room includes several thoughtful elements that make the experience relaxing and convenient. A deep comfy chair, a side table to hold a pump, USB ports on the touch lamp, a laptop table and accessible outlets, and close-by storage with nursing pads, milk storage bags, paper towels, and large ziplock bags. I also have a hook by the door which holds a re-chargable white noise machine to create a buffer noise for privacy.
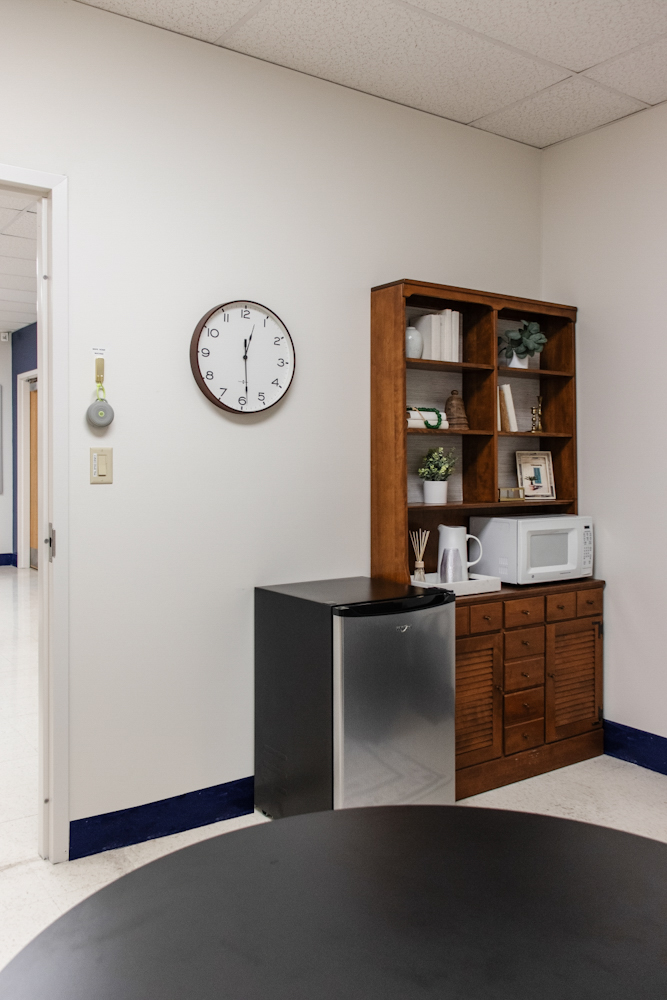
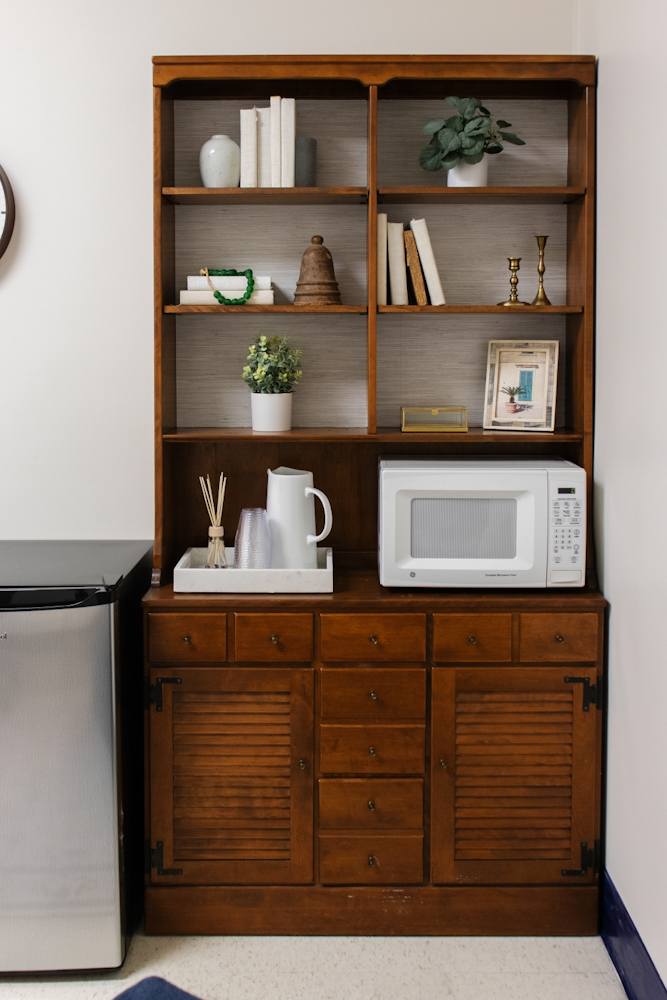
I found this hutch on Facebook marketplace and was able to purchase for a great price for the condition (basically perfect). To modernize the look, I added some peel-and-stick wallpaper to the back of the shelves, and drilled a hole in the back to fit the microwave cord.

Lactation/Conference Room #2
Most of what I included in the Lactation Suite is the same for Lactation Room #2, except instead of a hutch with a mini fridge and microwave, I put in a console table made from upper cabinets with plenty of storage, taking up minimal floor space.
Originally, I wanted to refinish a dresser to put on this wall but once we had all the furniture in the room (besides the dresser) I saw how tight things would be if I put in something that was 15″ deep (pretty standard depth for a dresser). So I pivoted and decided to build this console table from upper cabinets to keep the depth at 12″. The base was made from 2x4s and baseboard, and the top is made from a 2×12 with a 1×2 added on the back. The paint color is Nimbus Gray by Benjamin Moore.


Storage/Lactation Room #3
The last room is primarily used as storage for various textbooks and materials, but the principal asked specifically that it also be a bonus room for lactating individuals and/or those who want a private room for phone calls or to work. I chose a smaller armchair but that was still comfortable and could recline. The side table drawers and baskets are filled with the same pumping supplies as the other two rooms.

I cannot believe how much I was able to accomplish in such a short period of time, working mostly at night and weekends. It was truly a labor of love. I have tremendous respect and admiration for our teachers everywhere and know they work incredibly hard to give our kids their best, despite abysmal pay. I wish I could double all their pay. They are tired and burnt out from the pandemic and being villainized by politicians and some community members. They deserve NONE of it. Qualified public school teachers are incredibly valuable to our society, no matter if you have children in public schools or not. I can’t fix the teacher shortage problem everywhere, but I can make a difference in my community. I can use my talents to make a difference, however small. So can you.
I hope this space offers some respite and a continuous reminder that they are loved and supported.
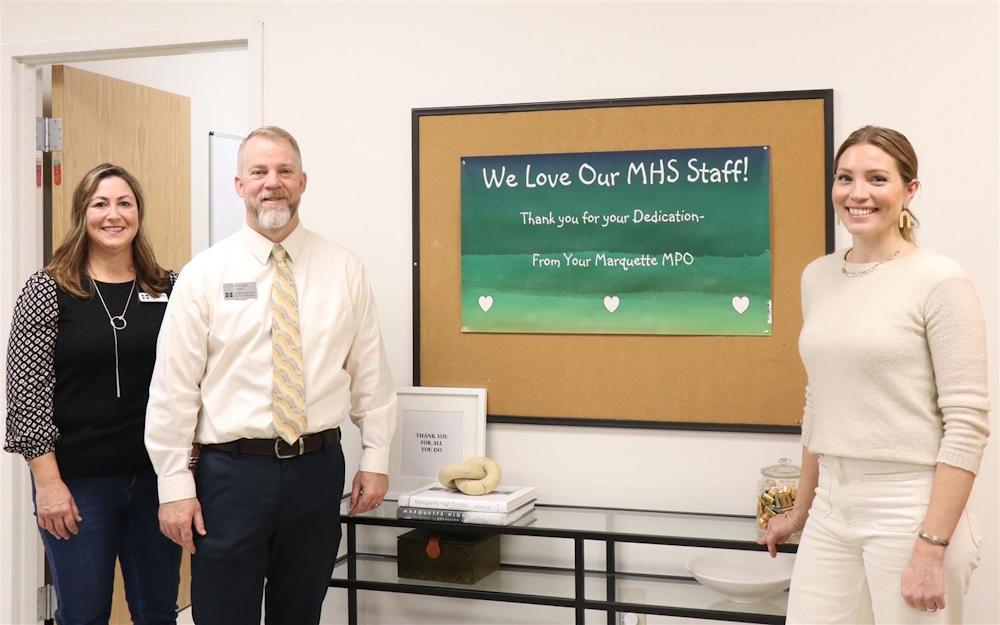
The PTA President, our high school principal, and myself, below.
I hope you enjoyed this extensive tour of the teacher lounge makeover! Please let me know if you have any questions!
Good for you! Looks fabulous. I served 14 consecutive years at my children’s schools on the PTA board and have never seen such a nice multi-use teachers’ lounge.
This project looks like it was a labor of love. You did an amazing job. I know that the school and all staff are grateful for such a beautiful place to work and relax.
How wonderful! I worked in a school where there was no area to eat, let alone a lounge. We sat at a table at the end of the hall to eat lunch or in the classroom. Supplies and copy machine were in the hall. This is such a great project. The results are beautiful. Thank you for doing this for your kid’s school.
May you continue to have energy and creativity to continue with your wonderful work!
It appears that a lot of passion and effort went into creating this project. You performed a wonderful job. I have no doubt that the faculty and staff of the school are appreciative of having such a lovely location in which to carry out their jobs and unwind.
Thank you so much for this inspiration! I hope to spearhead a teacher lounge make over at my daughter’s elementary school this year and will use some of your ideas! We’ve already sent out a teacher survey and so far the responses show it is clearly something they want.
This year, I intend to take the initiative to revamp the teacher lounge at the primary school where my daughter attends, and I will incorporate some of your suggestions.
My sincere gratitude is sent to you for the constructive approach you have taken and the incredible aid you have provided for your professional development. I would like to take this opportunity to express my gratitude to you.
his year, I intend to take the initiative to revamp the teacher lounge at the primary