Today I’m sharing a tutorial for simple and beautiful weathered plank stained word sign that can be completed in just a couple hours. These signs can be customized to coordinate with seasonal decor and/or your home decor, but using a variety of stain colors and a variety of laser cut wood words.

A couple weeks ago at Haven Conference (a DIY and home decor blogger conference), I taught the Rust-Oleum Make-and-Take Staining Class with Katie from Bower Power Blog.
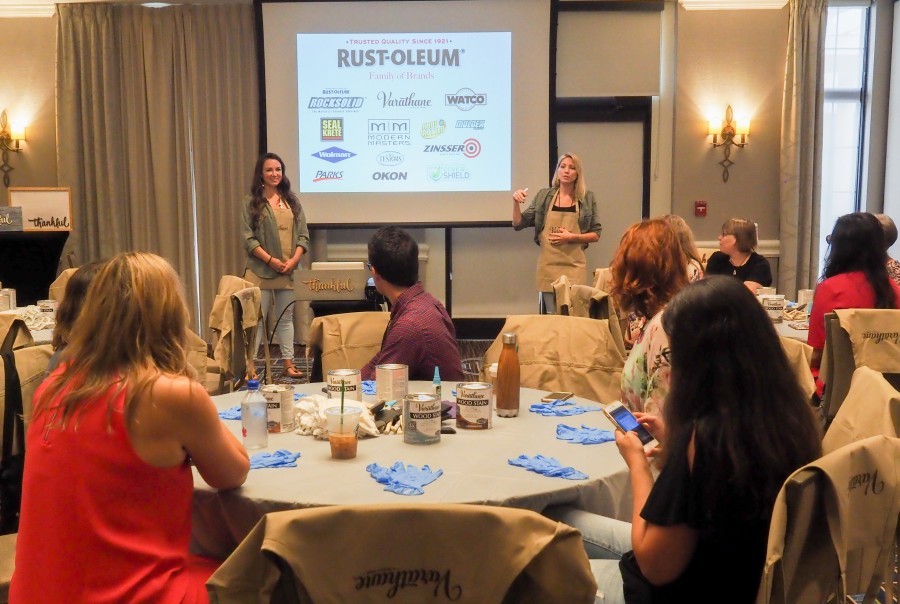
During the class we got to play around with the newly available Varathane Premium Fast Dry Wood Stain (Varathane is a brand owned by the Rust-Oleum parent company). This Fast Dry Wood Stain is the only stain on the market that doesn’t need a wood conditioner, dries in 1 hour, and only needs 1 coat to achieve the target color, so were were able to start and finish these signs in less than 2 hours!
Rust-Oleum sponsored this post, so I could share with you what we taught in our class, and my customized variation! They wanted to get the word out that this stain, that used to only be found at some midwest Home Depot location, is now offered nationwide!
They offer 24 different stain colors in the quart size can but they have a handy 1:1 Color Blends guide that expands your options to 156 different stain colors!
Below is a screen shot of what this feature on their site looks like– on the left you can select the color family you want, then select the target stain color you want, and it will tell you what two stains you need to achieve that specific color.

So for this navy white-washed wood thankful sign, I used 2 stain colors and just a few supplies.

Supplies:
Varathane Premium Fast Dry Wood Stain in Worn Navy
Varathane Premium Fast Dry Wood Stain in Antique White
Stirring stick
Rubber gloves
Rag, foam brush, or lint-free cloth
1- 1×8 wood board @ 17″ long
12″ long laser cut wood word from CraftCutConcepts
5- 1/8″ thick x 2″ wide oak slats @ 17″ long
DAP RapidFuse Multi-Purpose Adhesive
3/4″ nails (18 gauge if using a cordless brad nailer)
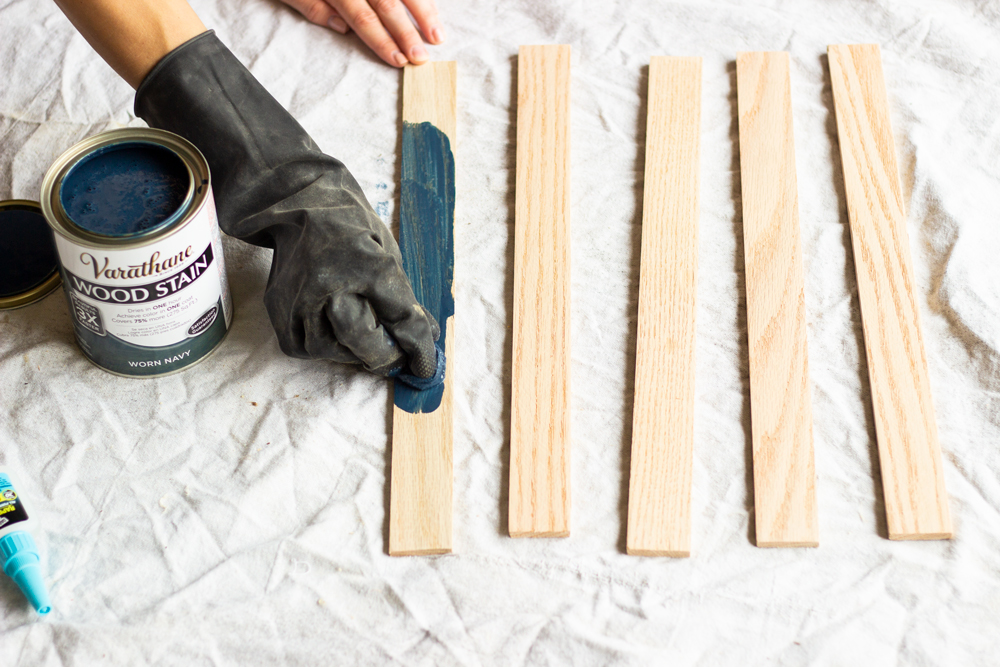
Step 1: Stain Oak Slats
Before dipping the rag in the stain, make sure to stir the stains so the color pigments are evenly distributed throughout the can. Wearing rubber gloves, dip the rag, brush, or lint-free cloth in the stain and apply the stain on the oak slats in the direction of the grain. Make sure to stain the sides of each slat as well. Let dry for 10-15 minutes.
Step 2: Apply White-Wash
Dip a small corner of the rag in the Antique White stain and apply the white over the Worn Navy stained slats. Apply the Antique White stain in splotches going in the direction of the grain, but not all-over. Then, use a clean part of the rag to rub those areas into the Worn Navy stain, to soften the look. Let dry for 1 hour.


Once slats are dry, lightly distress their edges with 120 grit sandpaper or a sanding sponge. Because this stain has a higher concentration of color pigments, you can achieve a beautiful weathered finish by distressing the edges, even though only 1 coat of stain has been applied!
Step 3: Stain Wood Word
While slats are drying, carefully wrap a paper towel around your index finger and dip your fingertip into the Antique White stain (or whatever stain you choose for the wood word). Apply the stain on one side of the wood word, being careful not to press too hard to apply too much stain. If too much is applied, it will drip down the dark side and will show (if using a lighter color stain). Once the entire word is stained, carefully wipe off excess (if there is any) and let dry for 1 hour.
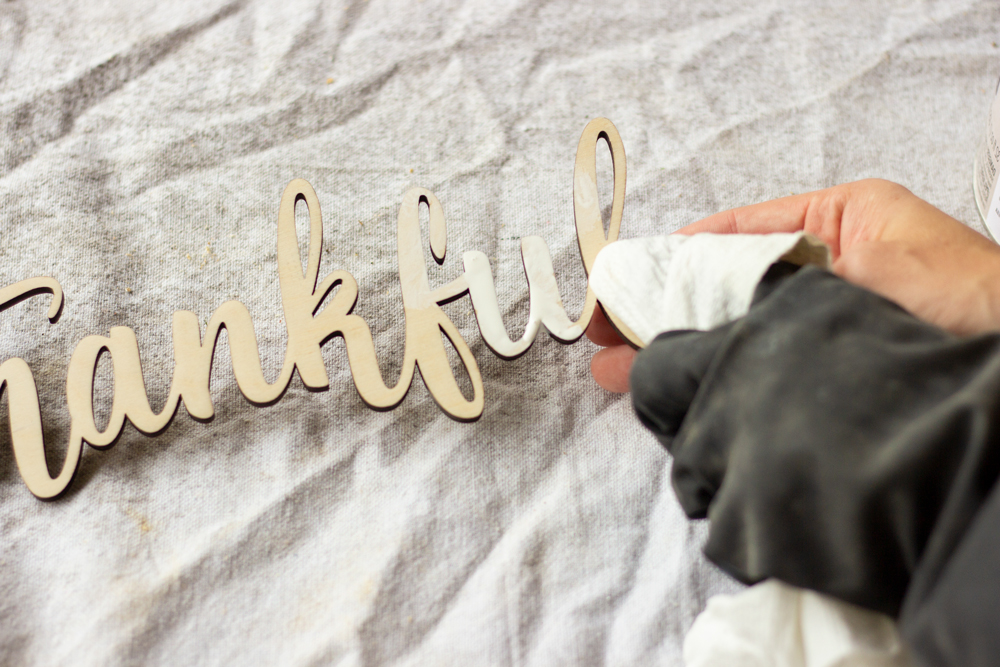
**This laser cut wood word is 18″ thick and 12″ long and was created by CraftCutConcepts on Etsy. Andrea was awesome to work with and if you want a larger word, a custom word, or any other script word offered in her shop, make sure to check here out!
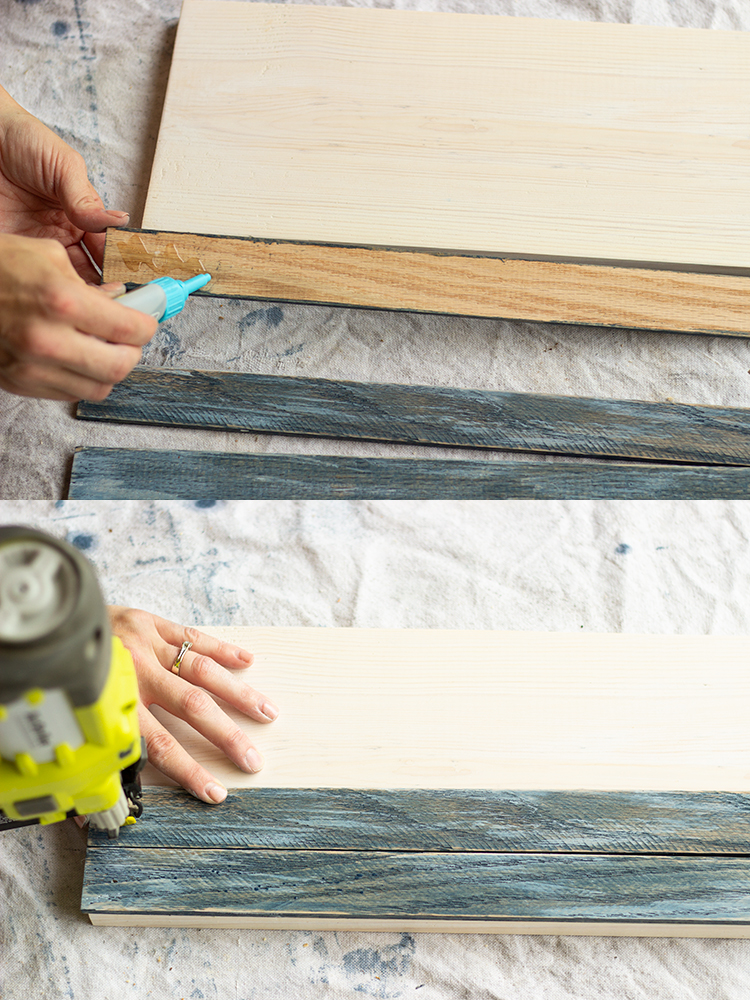
Step 4: Attach Slats to Board
Using the DAP RapidFuse Adhesive, apply glue to the back of each slat and press them onto the board, spacing them out about 1 1/16″ of an inch. You can use a penny as a spacer or just eyeball it. As each slat is put into position, nail each end into place using 3/4″ nails.
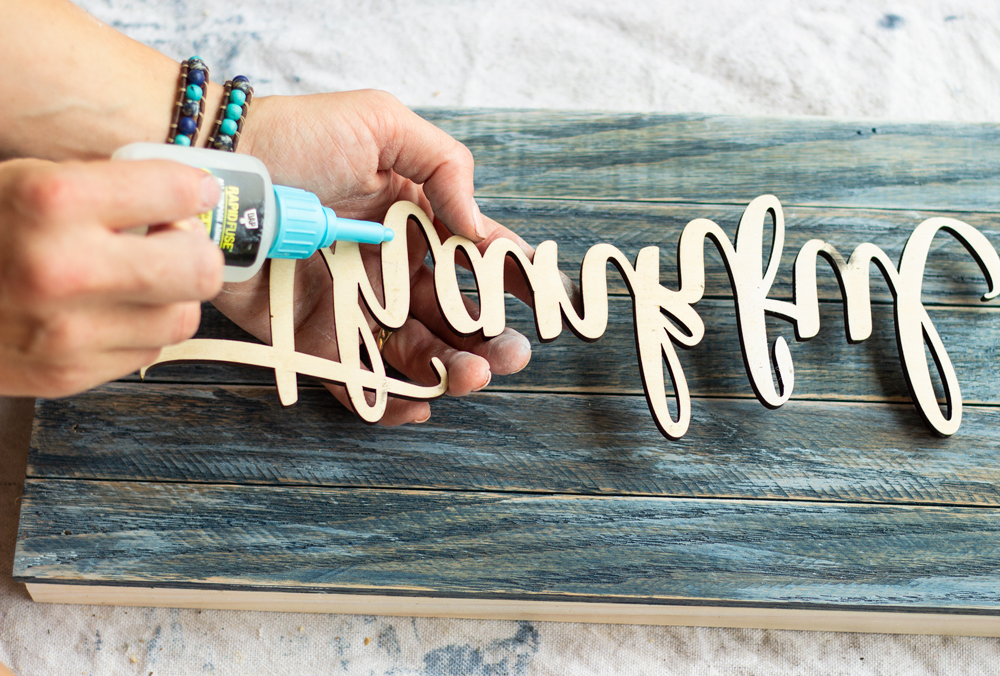
Step 5: Glue Wood Word Onto the Board
Apply the glue on the thicker parks of the wood word and after centered on the wood slats, press into place and hold for 30 seconds.

Install picture hanger hooks or a couple eye screws and wire to the back to hang it wherever you desire.
The sign can now be hung in a gallery wall, propped on a console table, or even hung on a wreath!

I love the layered finish this sign has and the Worn Navy is a beautiful, unique stain color!

I also hung the wreath on my square Wood Art I made earlier this year, to see how it would look.

What do you think? Do you like the door better? Or on top of the piano on the wood art?

I’m in love with how simple and fast this project was to make thanks for Varathane Premium Fast Dry Stain and how it required no power tools! And did you know 1 quart of stain covers 275 square feet? The coverage is incredible!

For the class, I also shared this other variation as well, where I used 1/2″ plywood cut into a larger rectangle and glued the word to the bottom right corner and attached a frame of 1x2s. The stain colors I used were: frame- Summer Oak, back- Antique White, and word- Ebony.

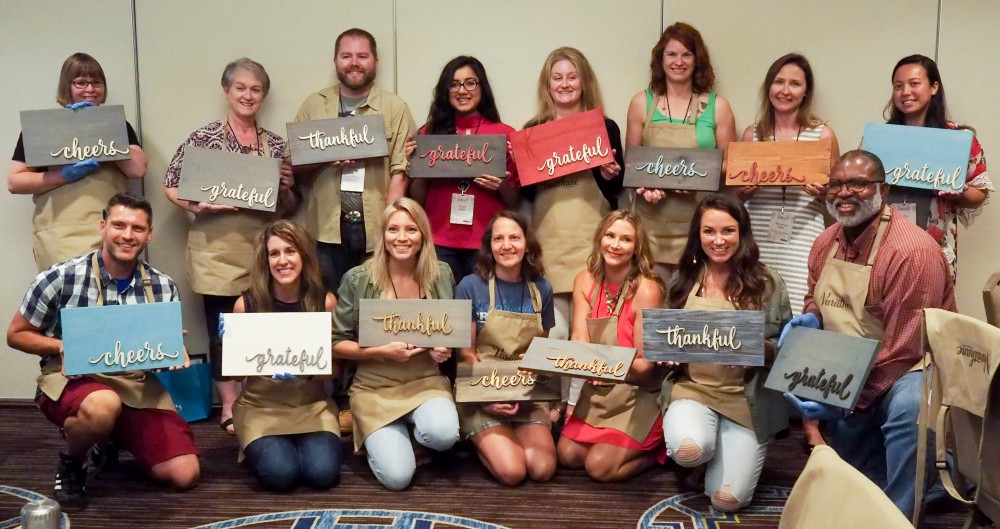
These basic versions are what we made in class, using 1x8s and gluing the word down. I used Weathered Gray for the board and Summer Oak for the word.

Katie and I shared a bit about the Varathane Premium Fast Dry Wood Stain and some signs that were made in class in our Facebook Live! We are also offering a giveaway, so make sure to watch the Facebook Live video to find out how you can enter! A winner will be picked on July 31st!
In addition to the giveaway on our Facebook Live video, Rust-Oleum is offering 2 giveaway contests on Instagram!
1- Share a project using Varathane’s Premium Fast Dry Wood Stain and use the hashtag #VarathaneIt and tag @RustOleum to be entered into a $500 Home Depot Gift Card Giveaway (winner to be chosen on August 1st)!
2- Share a project using any of Rust-Oleum’s spray paints and use the hashtag #SprayNewLife and tag @RustOleum to be entered into ANOTHER $500 Home Depot Gift Card Giveaway (winner to be chosen on August 1st)!

I like both versions. But, I do think the wood art on the piano shows it off a little better.
either way works – piano against wood art or door. beautiful finish and striking contrast to your wreath/wood backgrounds. those are some beautiful stains! can’t wait to try them.
Would LOVE to have either version for my home!
I like it on the wreath on the door. Beautiful!
Love it all. Hard to pick the perfect place, so rotate into different areas & give it a new prespective. Change is great.
Love how your beautiful sign turned out. The white washed blue is so beautiful! Thanks for the wonderful class at Haven — it was so nice to meet and chat with you!
I loved taking the class! You guys did a great job of highlighting the product uses and properties.