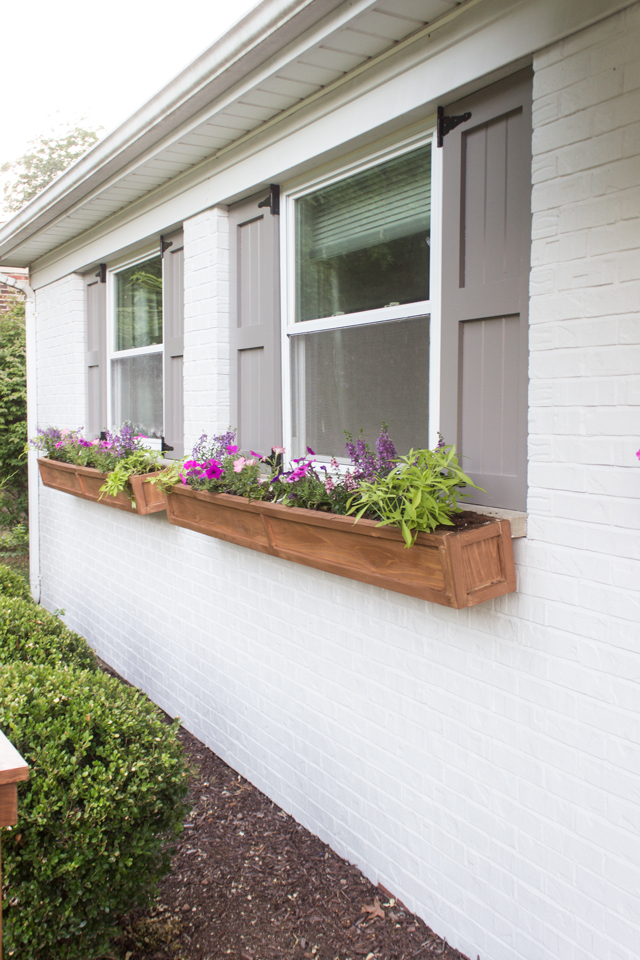
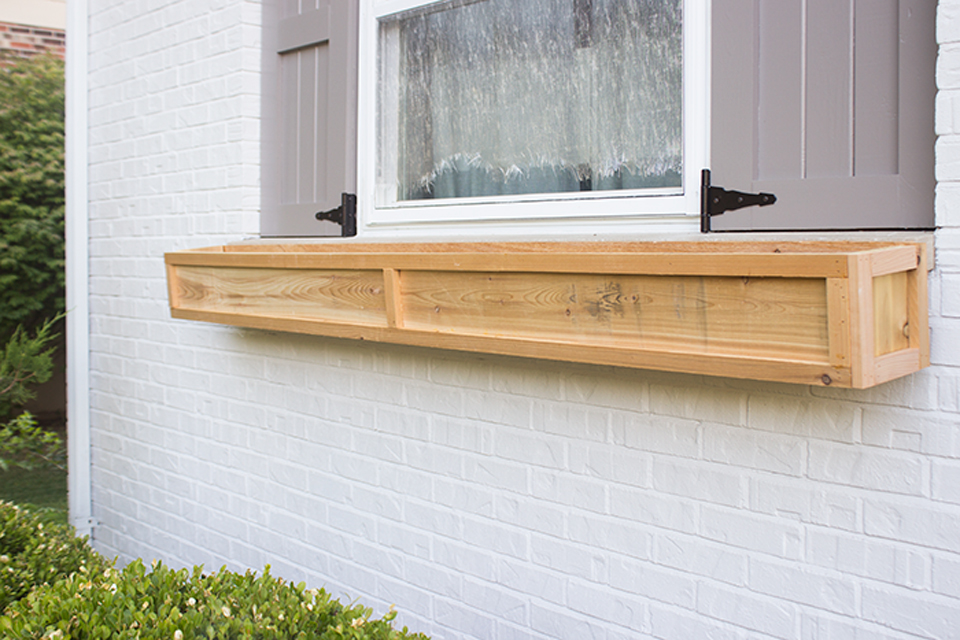
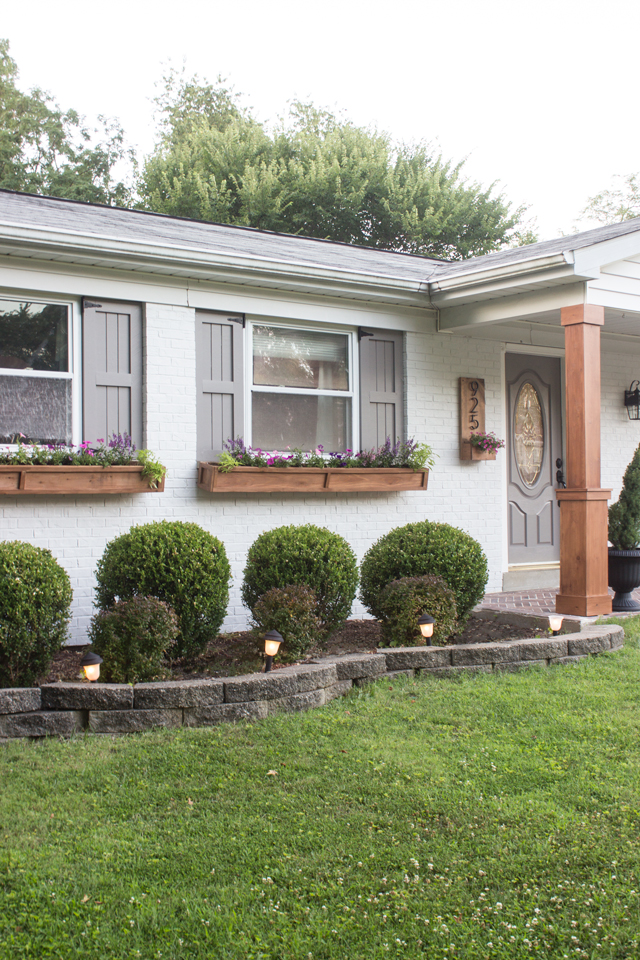
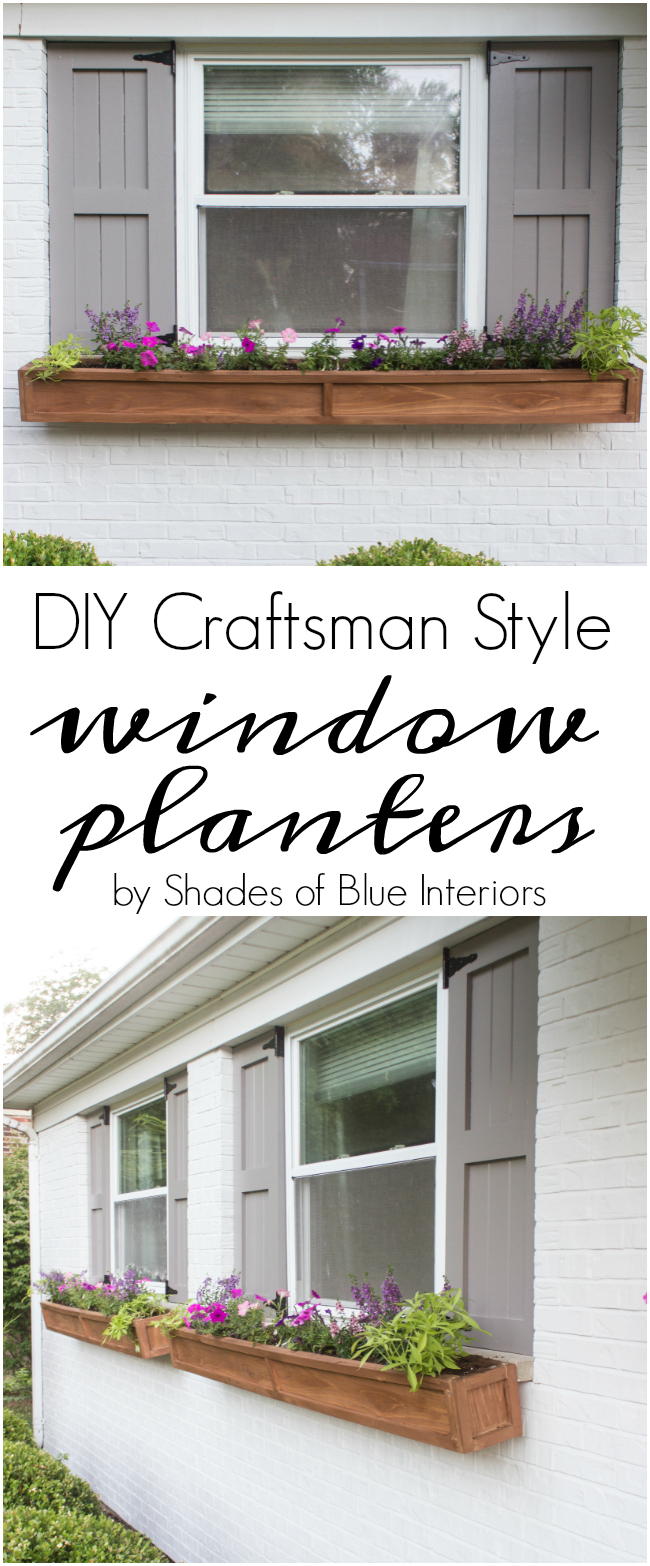
Window planters are an inexpensive way to add color and character to your home. With today’s tutorial, I will show you how I made a pair of 80″ long cedar window planters that I attached to my brick home, then stained them to match the stained columns on my front porch.
Working on the exterior of my home has been an on-going process. Soon after first moving into our house I painted the door and shutters. Then, last summer, I created my dream design plans for a full makeover. It didn’t take me long to update the shutters with new Craftsman style ones and a number sign planter. Major progress was made a few weeks ago when I gave my front porch a makeover with painted brick, new columns, and a faux brick tile on the cement slab (tile details at bottom of post).
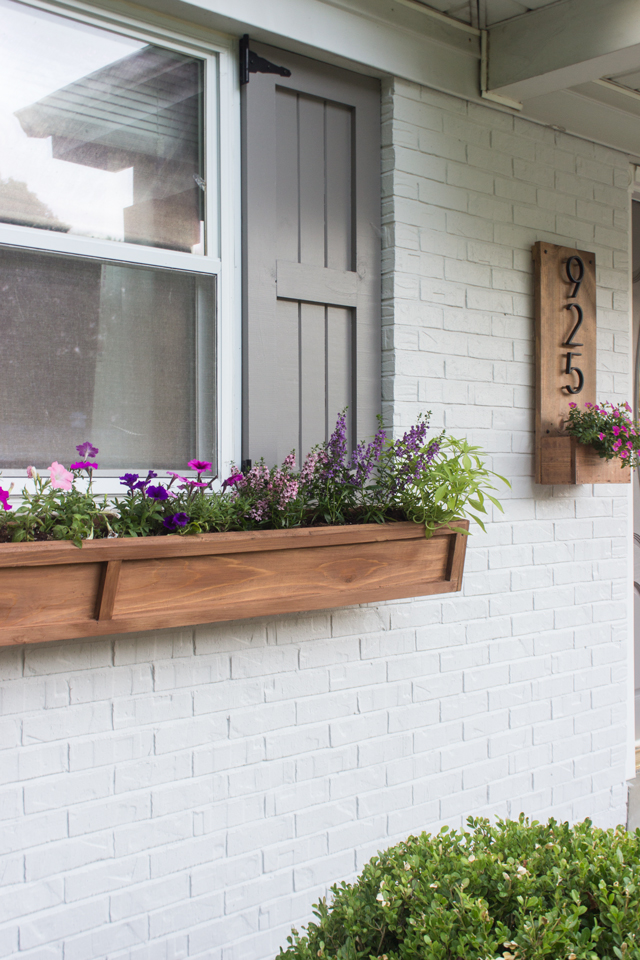
But these cedar window planters really pull the whole thing today, don’t you think?
I love how simple they were to build, and what a great impact they make!
Let’s get started with the how-to shall we?
First, your…
Shopping list
2- 1×6 cedar deck boards @ 8′ (you can use regular outdoor treated pine if you want)
6- 1×8 cedar boards @ 8′ (OR 4 – 1×8 @ 8′ cedar boards and 5- 1 1/2″ wide trim @ 8′ cedar or outdoor treated pine)
1- 2×4 outdoor treated pine @ 6′
2 3/4″ (or around there) long concrete anchor screws (if your house is brick like mine otherwise you can use wood screws)
12- 3″ long exterior wood screws
75- 2″ long exterior wood screws
drill bit- (just smaller than the diameter of the screws you got above)
1/2″ drill bit
1 1/4″ long nails, 18 gauge
Exterior wood glue
Wood filler
220 grit sandpaper
Tools Needed:
(Affiliate links of what tools I use below)
Electric brad nailer (or pneumatic nail gun)
Paint brush
Safety glasses
Cut List (for 2- 80″ window planters):
4- 2×4 @ 12″
4- 1×8 @ 80″
2- 1×6 @ 80″
4- 1×6 @ 5 1/2″
4- 1×2 trim pieces (that are actually 1 1/2″ wide) @ 80″
6- 1×2 trim pieces @ 4 1/2″
8- 1×2 trim pieces @ 7 1/2″
8- 1×2 trim pieces @ 4 3/4″ (cut a little bigger than 4 3/4″ and then trim to fit)
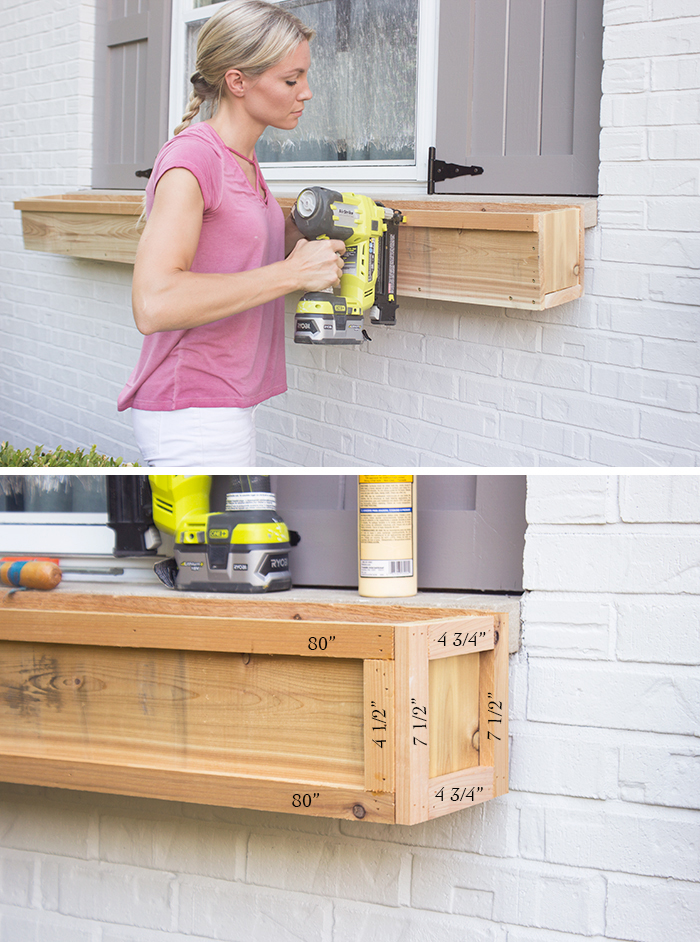
Step 1: Attach Cleats Under Windows
If attaching your cleats (2x4s) to brick, pre-drill holes in the mortar between the bricks under your window. You will want to attach 2 cleats on either end of your window. For extra strength, add an additional cleat in the middle. Measure and mark to see where corresponding holes should go on the cleats, pre-drill holes, then attach the cleats to the brick using the concrete anchor screws.

Step 2: Build 3 sides of Planter
Place the 1×6 flat on the ground. Place one of the 1x8s along the side of the 1×6, sitting upright. Pre-drill holes along the bottom, long side of the 1×8 and attach with wood glue and 7- 2″ long exterior wood screws. Attach the sides of the planter by placing them on top of the 1×6 on either end and inside the edge of the 1×8. Pre-drill holes, glue, and attach on the one side and the bottom using 2″ exterior screws.
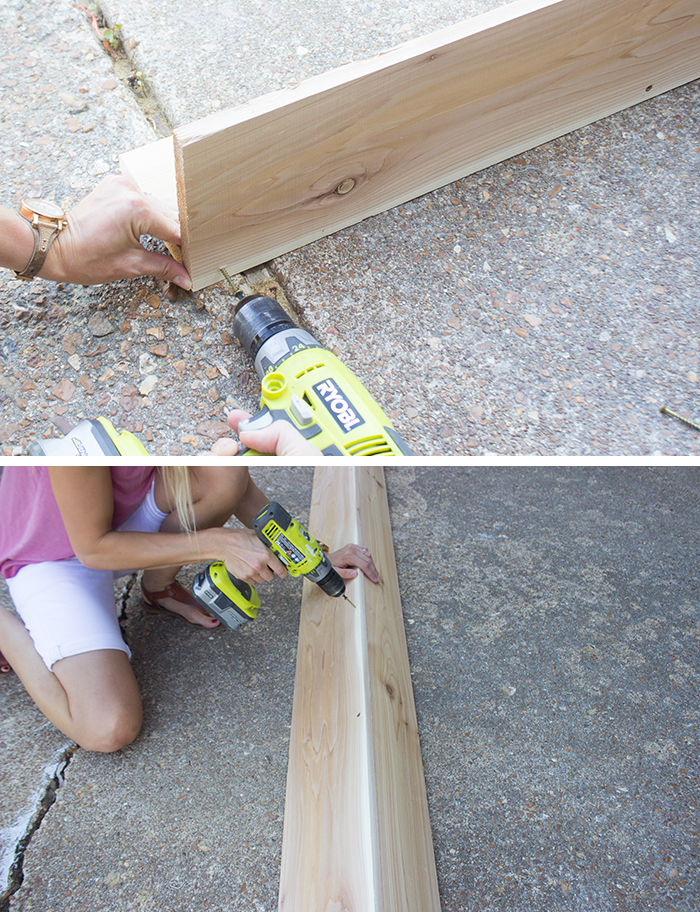
(pictured above I rotated the planter after the first 2 screws on either end were in place, so it would be easier to drive in the remaining screws.)
Step 3: Attach Planter To House & Attach Face
While someone holds the planter in place, drive 3″ long wooden screws from the back of the planter into the cleats, driven in at an angle (going down). I recommend 3 screws for each side of each planter. Attach the face of the planter (the other 1×8) using wood glue and 2″ wood screws (pre-drilling holes before you attach) along the bottom and on each side.

Step 4: Attach Trim to Face
Attach 1×2 trim to the top and bottom of the face using wood glue and 1 1/4″ nails. Place the 4 1/2″ long trim pieces in between the top and bottom trim on either end, and directly in the middle of the planter box. Attach using wood glue and nails. Attach trim on both ends of planter box (covering the seams of the side) with the 7 1/2″ long pieces on the front and back, and the 4 3/4″ long pieces on the top and bottom.
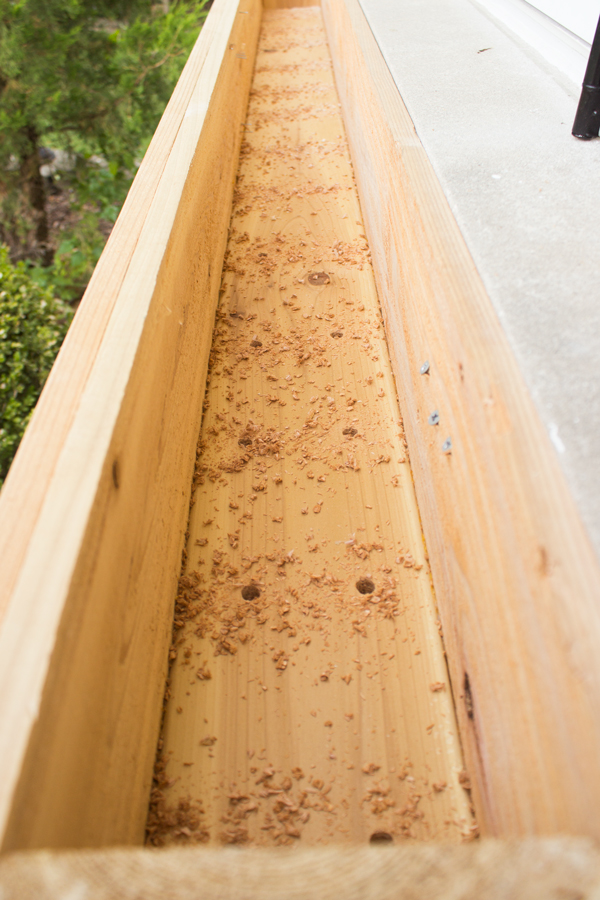
Step 5: Drill Holes in Planter Bottom
Using the 1/2″ drill bit, drill 2 holes every 6″ along the bottom of the planter box for plant drainage.
Step 6: Fill Holes, Stain, Seal
Fill nail holes with wood filler. Let dry and sand entire thing smooth with 220 grit sandpaper. Apply waterproofing stain and sealer combo (2 coats) with a brush. Let planter box completely dry for 34 hours before filling with plants.
Don’t forget to put a thin layer of pebbles or rocks at the bottom of the planters for better drainage (prevents dirt from clogging the drain holes).
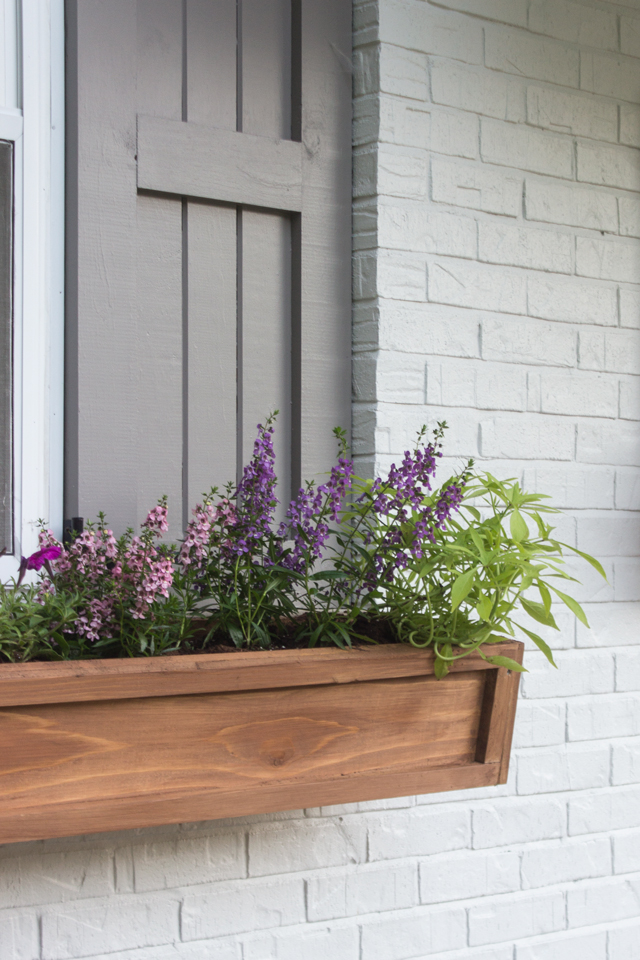
So pretty right?
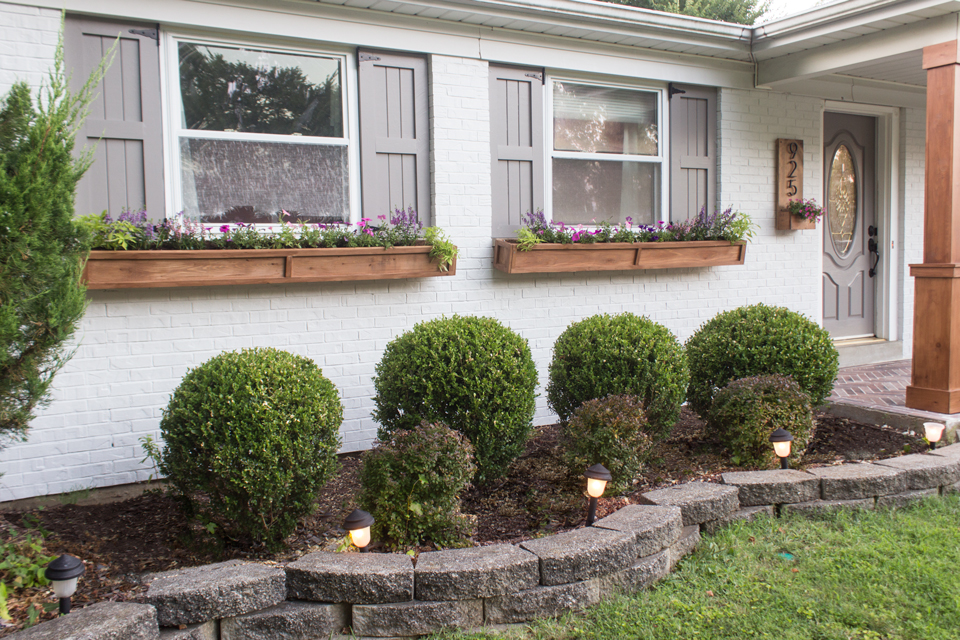
Now all I gotta do is re-do the plant bed in front of the porch! Planting season is pretty much over though, so I may tackle that in the spring!

Here is the before (from when we first bought the house) and AFTER!!
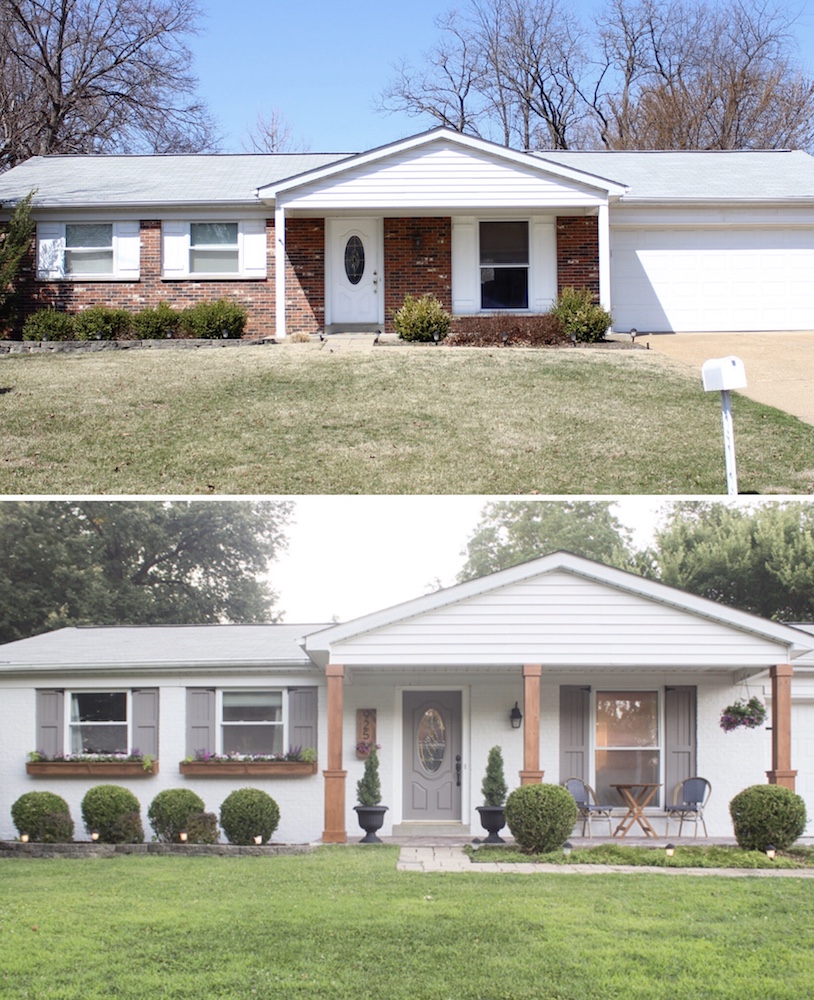
Exterior Brick Paint – Behr Masonry, Stucco and Brick Paint in Dove Gray
Door and Shutter Paint – Behr Marquee Exterior Satin Enamel Paint in Creek Bend
Stain for Columns and Planters – Behr Semi-Transparant Waterproofing Sealer and Stain in Chocolate
Porch Tile – MSI Brick Porcelain Tile in Red
Number Sign Numbers – Hillman Group Black Elevated House Numbers
Shutter Hardware – Richelieu Black Gate Hardware
If you thought this tutorial was helpful, I would love if you pinned this or shared it with others!
Love what you’ve done to the front exterior of your house! Those planters are beautiful and don’t seem to complicated to make.
Hi Rachel,
Your planters look wonderful and really enhance your home. So amazing to me that you build all the stuff you do. Also saw you in Better Homes andGardens magazine recently……….good for you!
What a sweet and fun surprise for you and your family.
You go girl……….
The exterior of your home really looks great from all that you have done. Very welcoming and inviiting.
Have a lovely week,
Blessings, Nellie
Amazing what a little pop of color will do!! I love these, you must have an eye for decorating to match the flower boxes with the posts! Beautiful!!
The window boxes are gorgeous! I love flower boxes anywhere – under every window possible. The color really draws your eye to the windows and the whole house. Job well done!
I just found your blog and I love it! You have such a great style and I have enjoyed looking through your posts. These window boxes are so beautiful. They really pop on your white brick and the gray shutters go with it perfectly. Great job!
Looks amazing! I have a question, do you find that when the water drains, it gets on the house at all? We have white siding and my husband is against me putting up planter boxes because he says it will cause the drainage water to run down the (white) house and look messy…
I saw an episode on Home Town HGTV where Erin uses inexpensive silk flowers and it looks amazing and then you do not need drainage…you can use Styrofoam instead of dirt too.
It’s a great idea if you don’t want your flowers/plants to trail down!
I made these and also have a white house. I filled my window box with a layer of old water bottles, very light weight for filler, then topped with soil. I have never had a problem with soil/dirt underneath showing on the house.
I’m definitely pinning this!!! Easy but beautiful project! Thanks for the tutorial 🙂
Hi Rachel,
What color are your shutters painted? I love that grey color and am planning to do this type of shutter on our home. Thank you!
Great project! My son and his wife’s 5th Anniversary is coming up. Wood is the traditional gift, so I am building this over a 9-1/2 foot span.
Could you recommend a reinforcing strategy so it doesn’t bow out in the middle when filled with soil and plants?
Yes, I would attach a couple extra cleats to the house and then attach large L brackets to them and screw to the underside of the planter.
Hi!
Where did you find/purchase the columns?
Looks great!
What color stain did you use on the boxes?
Would you consider making others for sale?
Sorry, I cannot.
Do you have a link for the solar lights in your front flower beds? there are so many on in Home Depot but many have poor reviews. Thanks for any help.
Where did you find that cute address planter with house numbers on it ?! So beautiful!
I made it! Tutorial found here: https://www.shadesofblueinteriors.com/diy-house-number-sign/
I followed your link for the shutter hinges and they’re discontinued. I was just wondering if you could tell me what the size Of them? Thanks! Everything you e done looks great!
Hey I cant find this tutorial on Home Depot anywhere. Do you have it linked anywhere else? I have been searching for EXACTLY these shutter for my home! Thank you in advance!!
https://www.homedepot.com/c/ap/build-these-craftsman-exterior-shutters-to-boost-your-curb-appeal/9ba683603be9fa5395fab9011d116e02
Hello, what type of wood did you use for the 1×2 trim pieces? I wasn’t exactly sure what to buy. Thanks!
Great tutorial ! Are the cleats visible from the side?
Partially visible if you are looking low.