Today I’m be sharing photos of our new vinyl-plank flooring that is 100% waterproof and perfect for a basement. I’m also sharing installation tips and features of this new flooring by Mannington.
Our basement has taken a back seat to makeovers and updates for the past few years, but this year I decided that would change. I wanted to make it more comfortable, livable, and more my style. So, at the beginning of the year I came up with a makeover plan! I was over the moon excited when Mannington Floors reached out to me for a partnership, since I’ve been familiar with their quality for years. They sponsored the new floors in my entire basement and I am so thrilled with how they turned out!
Mannington Floors have been around for 100 years and they are known for their high quality products in the flooring industry. Coincidentally, about a month before I was contacted by Mannington I was asked by a design client to recommend some flooring for her living, entry, dining and kitchen areas (she wanted one type for nearly the whole main floor). She was leaning toward tile but wanted to know some other options.
So I called my brother, who has been a professional flooring installer in Juneau, Alaska for the past 15+ years (Charlie Chenoweth with Install-It-All if you are in Southeast Alaska. I wanted to know what his favorites were. Guess what is #1 favorite was? Mannington’s Adura Max luxury vinyl plank. No joke! He loves the simple, mess-free install, the quality, finish, durability, and the fact it is 100% waterproof. Vinyl floors have come a long way from what they used to be 20-30 years ago!
I ended up flying him out to install the floors because I wanted them installed professionally.
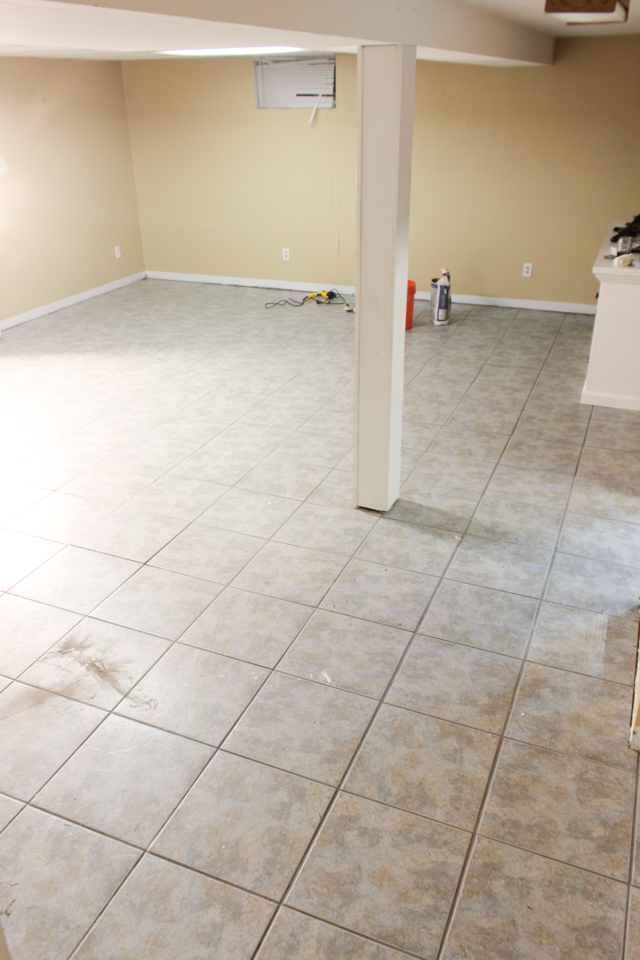
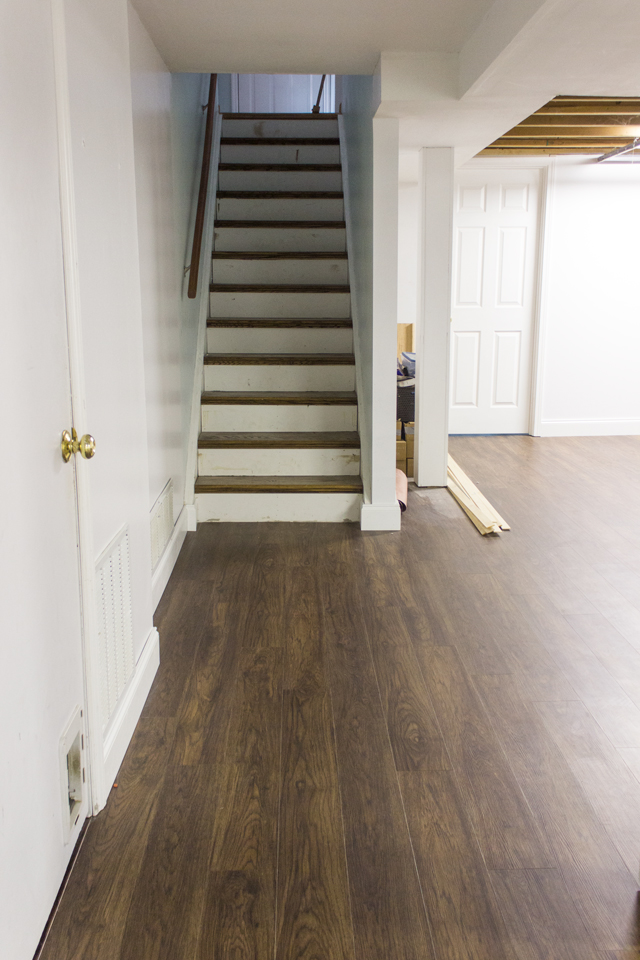
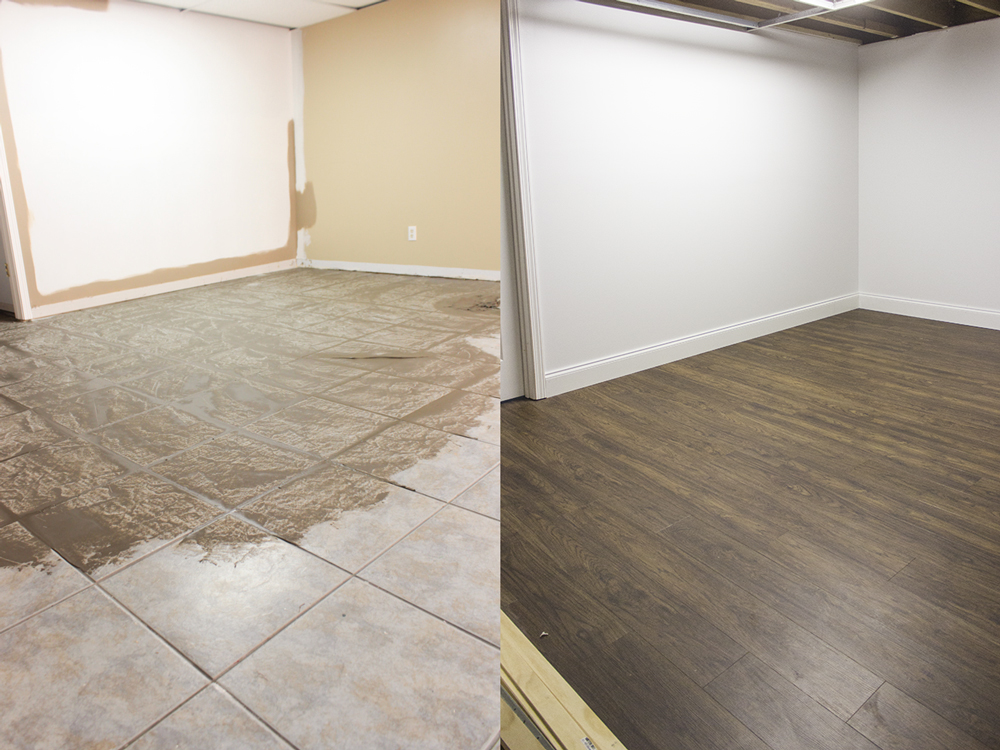
The Before
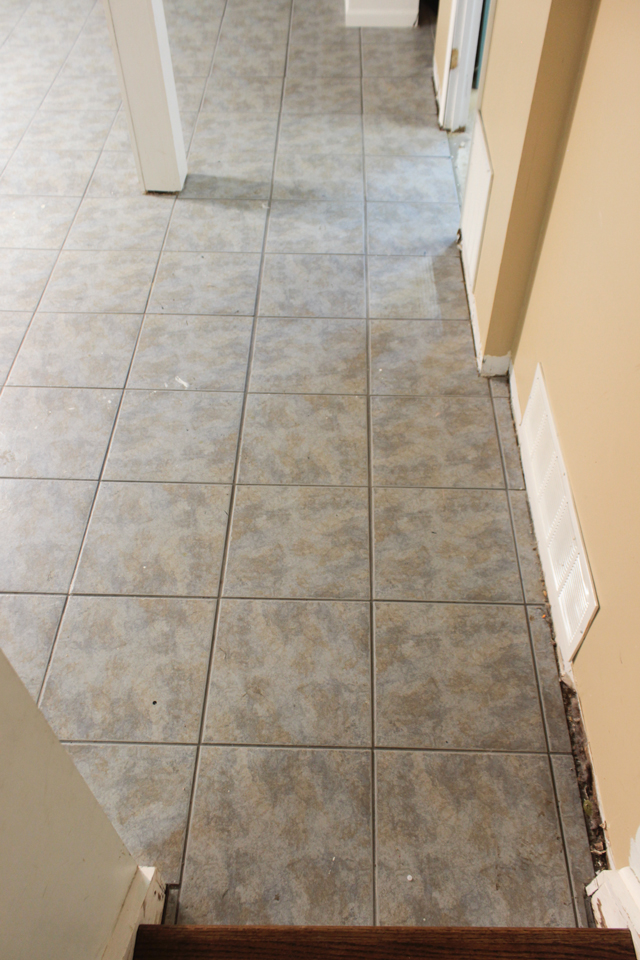
As you can see we had large multi-colored porcelain tile everywhere in our basement. It was durable but very cold underfoot, especially in the winter, and the color is quite dated.
Prepping Before Install
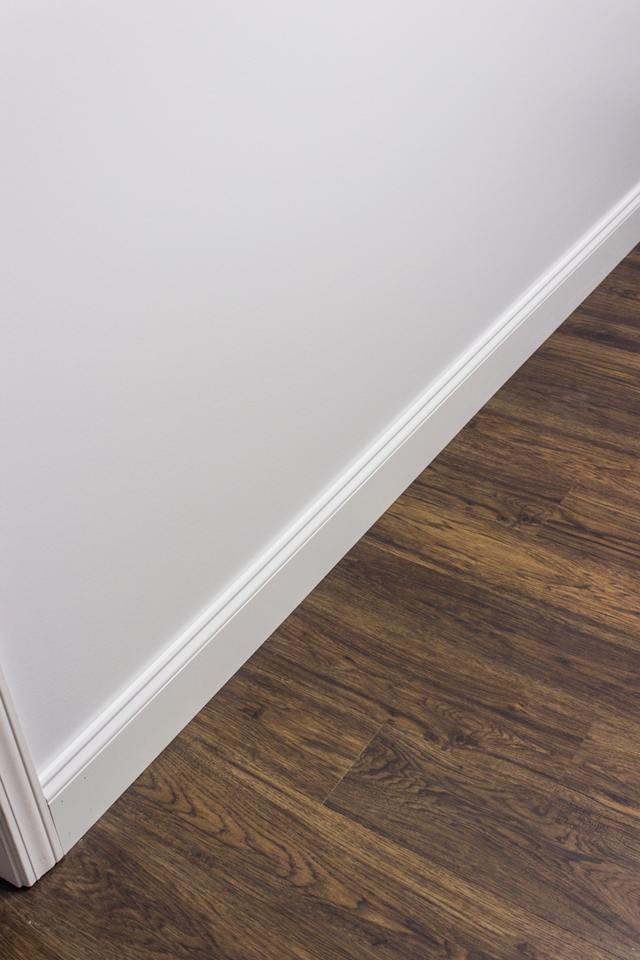
After everything was removed from the room, and we swept up any debris and dirt, we removed the baseboards. My brother used a multi-tool to cut the bottom 1/2″ of the posts so the planks would slide underneath.
Then to the next step is somewhat optional. In order to ensure the grout lines or high points in the tile wouldn’t telegraph through the vinyl planks years from now, we decided to level out the floor. This is not as big of a job as it sounds, especially when a professional does it– it was quick (1 hour for our entire basement) and not very messy. He filled the grout lines with a product called Webcrete which is a floor leveling compound that is very thin and made of portland cement and other additives that make it adhere. You smooth it over the tile with a large trowel and let it dry completely (about 6-8 or so hours depending on air flow and humidity).
You can see how it settles in the grout lines and any area that isn’t perfectly even or level. This picture was taken when it was still wet.

Vinyl Plank Install
Since this was not a DIY project, I will just give a basic overview of what my brother did and show it in the video below.
1- Install at a stagger.
2- When cutting, use a utility knife to score the top of the plank where you need to cut, the hit it against your knee to break it off.
3- The locking mechanism that the planks fit together is enabled by joining them at a slight angle, then pushing the new one down, and tapping the seam together tight using a mallet. Tap evenly along the entire plank for a proper fit.
Press play below to watch the video of the whole process:
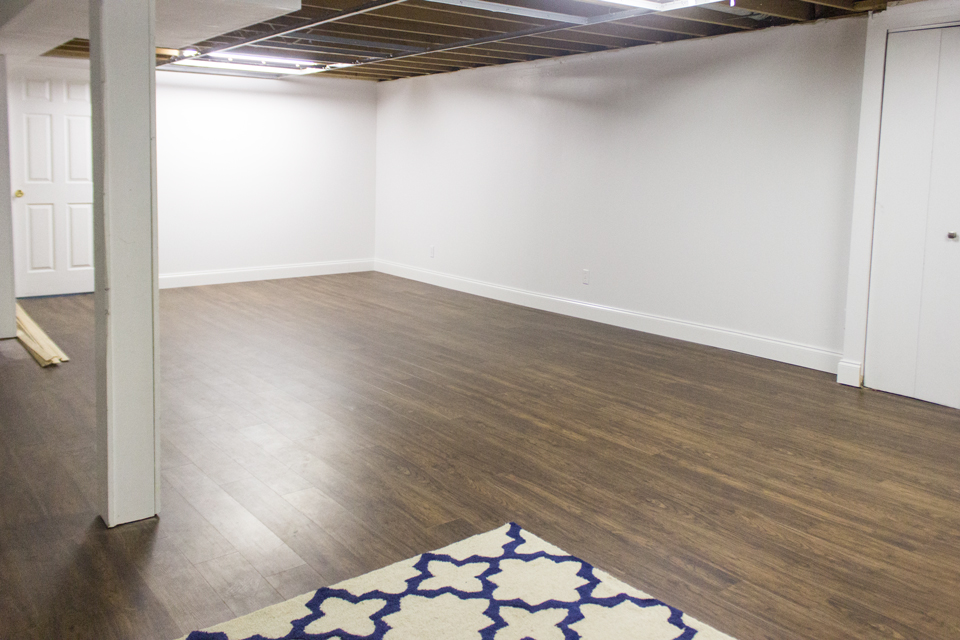
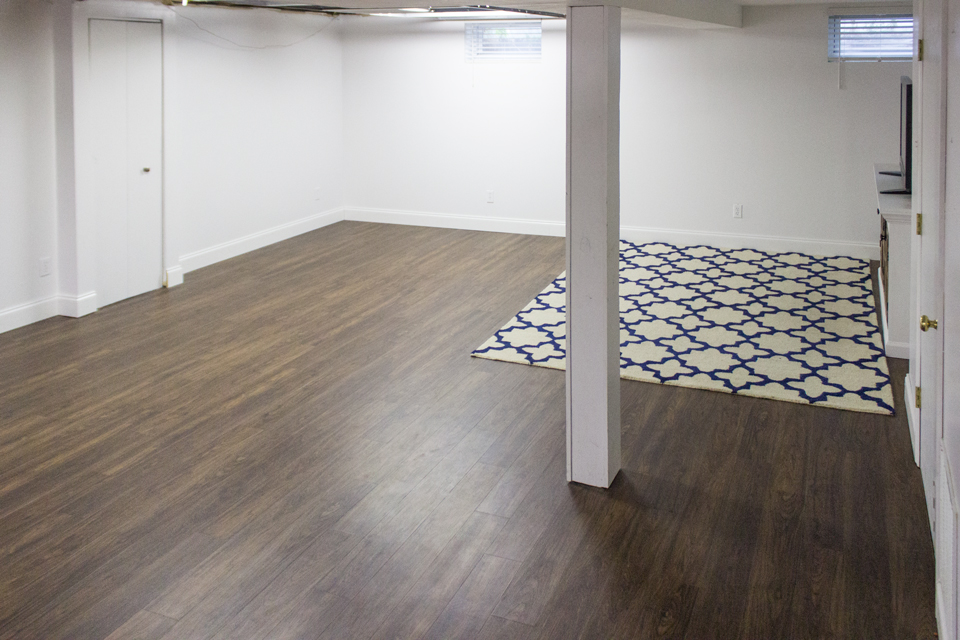
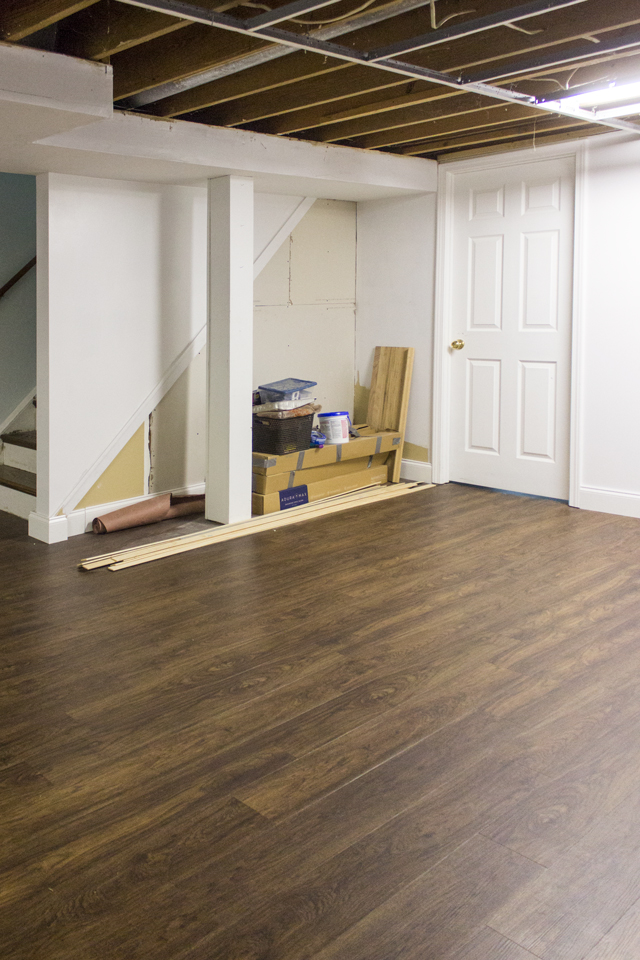
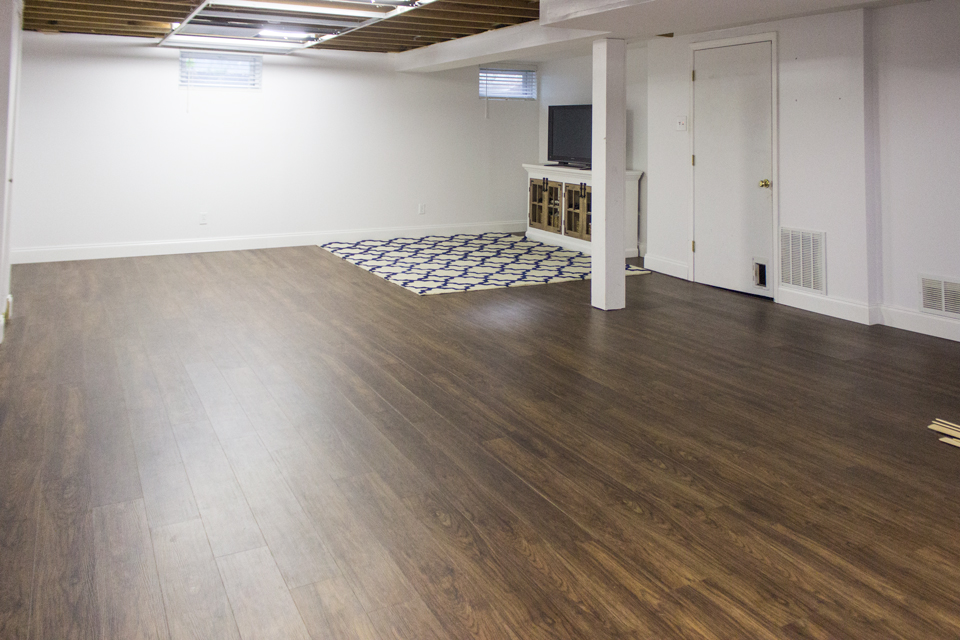
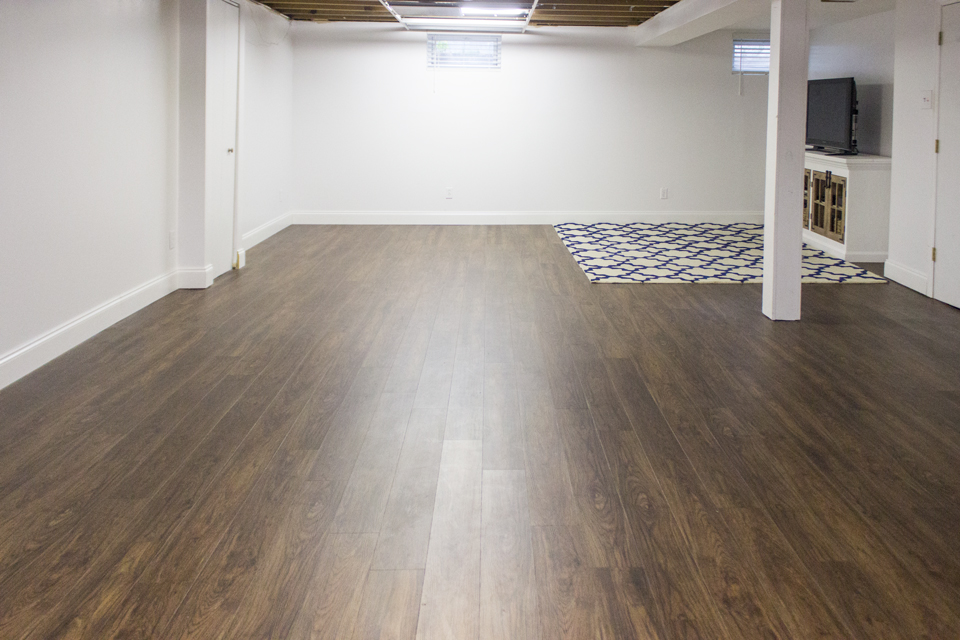
For the main living areas, I chose
Adura Max Luxury Vinyl Plank– color: Sundance Gunstock
Mannington Floors are only sold through independent flooring retailers, and they recommend that a professional install their floors. He was tons faster than the local estimates I got too– he did the whole basement in 1 day! I will say from people I have talked to– there is a learning curve and my brother is so fast because he’s been doing it for years. He admitted to me it took him a lot longer in the beginning.
I chose this color because it matched very closely to the dark walnut stain I used on my oak stair treads. (I still haven’t finished them as you can see from the risers).
Features of Mannington Luxury Vinyl Plank
I mentioned some of these details/advantages in the video, but here are my favorite features of
Adura Max luxury vinyl plank:
-100% waterproof (both underside and topside)
-Quiet underfoot (the built-in thick luxury padding on the back of each plank makes it virtually noise-proof)
-Warmer underfoot than tile
-Simple click install (no glue!) that ‘floats’ on top of any flat surface
-Thicker and more rigid than typical vinyl plank
-Realistic wood finish with wood grain texture
-Stain and scratch resistant finish (SO thankful for this since it’s the main place the kids play)
As you can see, not only are these an ideal option for basements, but for anywhere in your home!
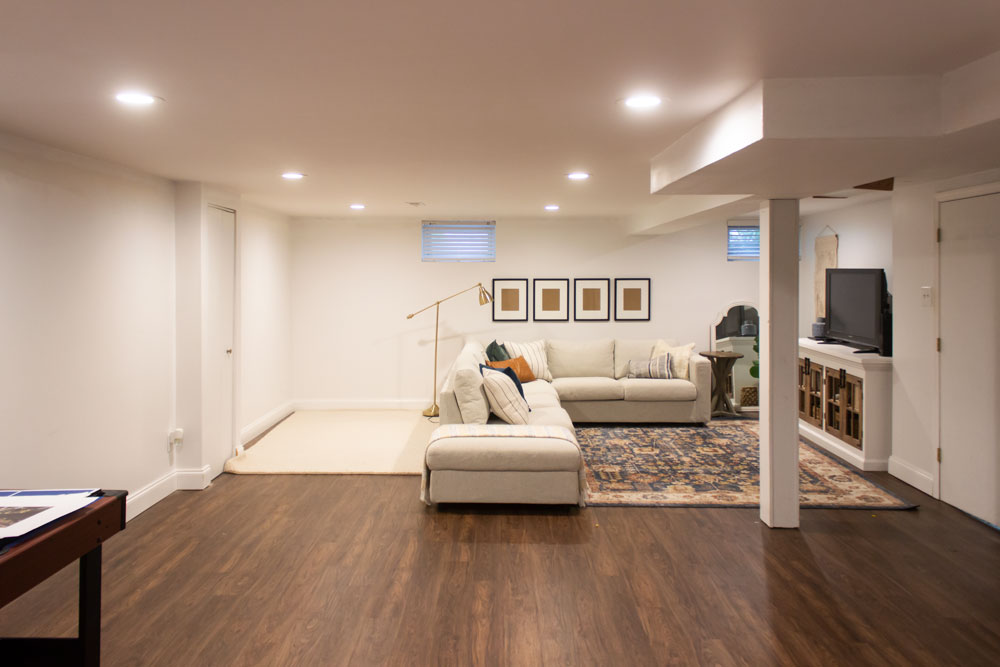
Tour Around the Basement & Plans
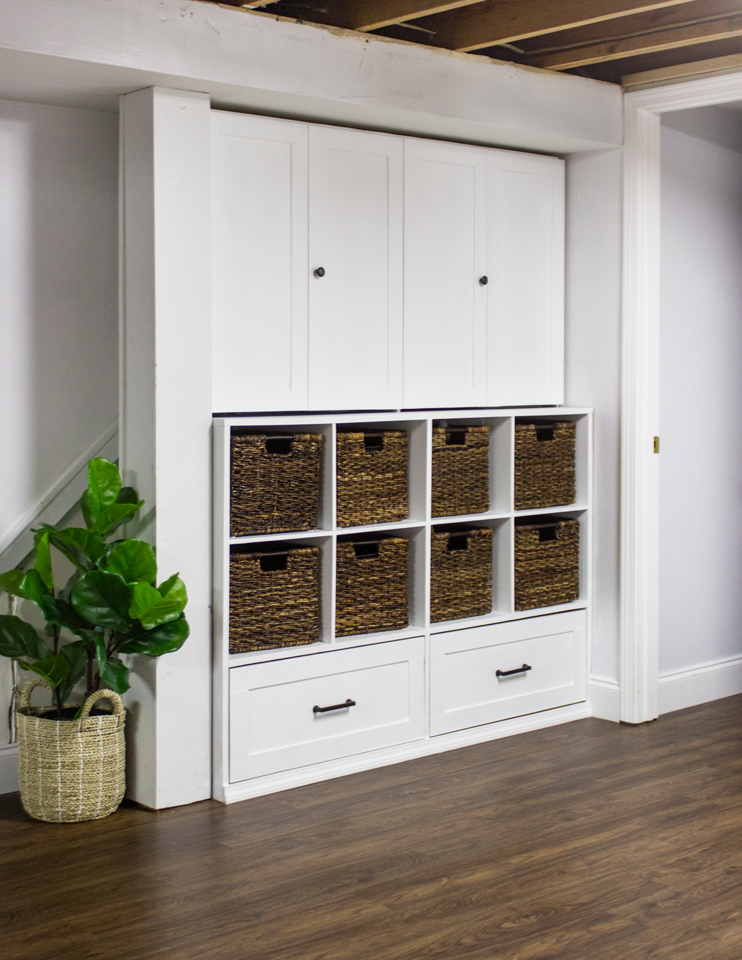
This little spot against the stairs was all open from when we were repairing the steps a couple years ago, and I finally put some drywall up. I still have to finish taping, mudding, and paint it, but I am building a toy storage unit for this area.
UPDATE: Here is what the toy/craft storage unit looks like (although I still need to do the additional unit to the right of the post):
I also plan on building a little art/craft station in this corner:
Still left on the list to do, is put in some can lights to replace the fluorescent lighting, install drywall on ceiling and paint, replace door into laundry area, install board and batten to the ceiling, and of course furnish the space.
I have my eye set on a awesome slipcovered sectional for the TV area, and a skinny long table and chairs behind it for games.
The media cabinet is one that I built last year and the plans are found here.

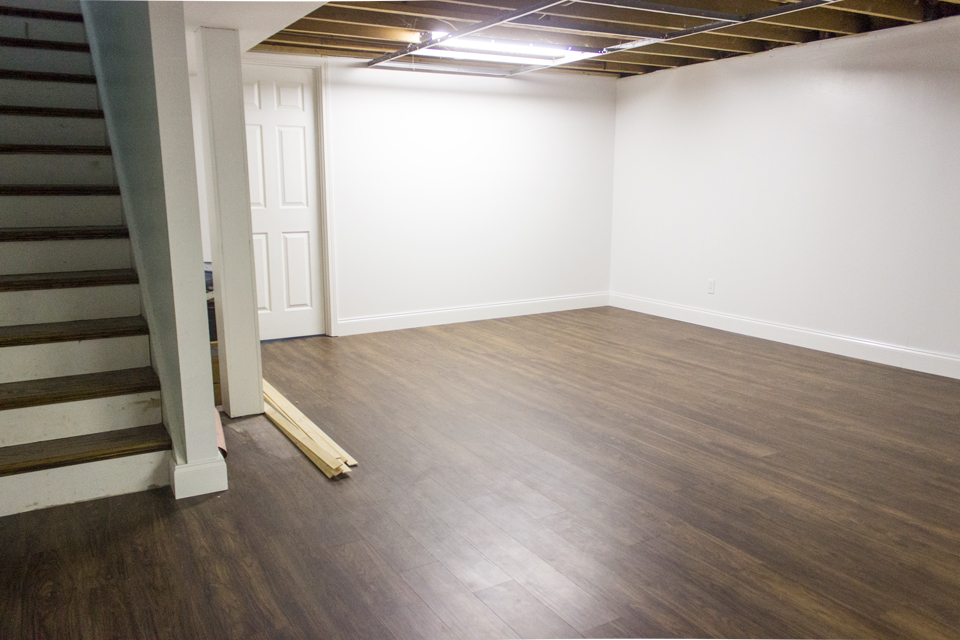
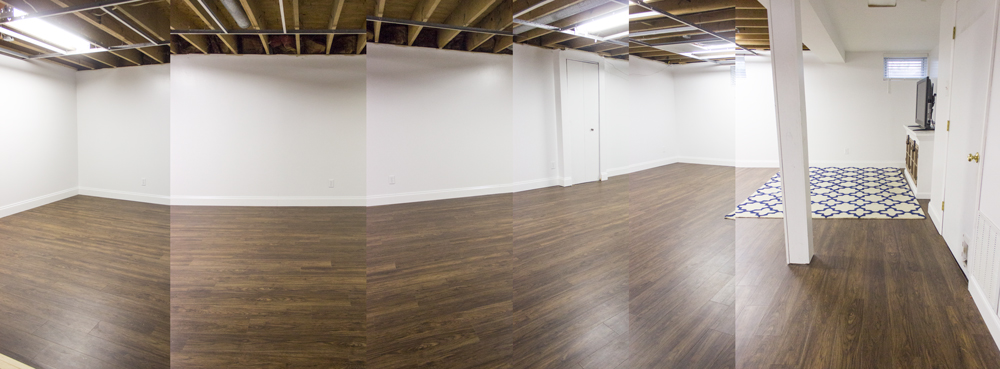
Here is a little panorama collage I quickly put together so you can get an idea of what a HUGE difference new floors and freshly painted white walls make!
A little side-by-side before and after:
A huge thank you to Mannington Floors for sponsoring our basement floor install, we love these beautiful floors and the warmth they bring to our home.
See my 2019 Basement Progress post HERE.
And here is what it looks like now:

Also, coming soon is the basement bathroom makeover! Mannington Floors partnered with me for the floors in there and the theme is vintage modern. See our Basement Basement Makeover here.

Looks fantastic! And yay for a professional installer brother! I’ll look into the same floor when I get the chance to redo mine. It seems ideal to have one flooring from kitchen to bathrooms and everything in between.
Ooooooo, I am excited about this! Thanks for sharing:)
what is the dark substance being spread on old floor?
It’s called Webcrete. In the video I explained it is a composite material that fills in grout lines of tile so that it makes the surface more smooth and even. It’s not required but it’s just an extra step that will make sure the grout lines don’t telegraph through the vinyl planks over time.
Wow, what a fantastic job you did here, I love it!
Your remodel is so pretty can’t wait to see finished product!! I will check out the local stores Mannington flooring. Thank you.
It’s amazing. You did a great job. Thanks for sharing this post.
Wow, gorgeous . I to, can’t wait to see the end results. Simply fabulous, I know it will be.
What is the name of the paint color? I love it! Great job!
It is Magnolia Paint True White.
We have Adura tiles in one of our bathrooms, and I love it. We are doing a home remodel, and I already plan to use it in the kitchen, but wondered about using it in the basement. Your project makes it an easy choice for me. We have been looking at fleck epoxy on concrete, carpet, and Adura.
I’m curious about where you got the couch and rig. Any links to these products?
The couch is Ikea and the rug is discontinued sadly.
I love how this turned out. Do you mind sharing which ilea couch this is? And how is it holding up so far…