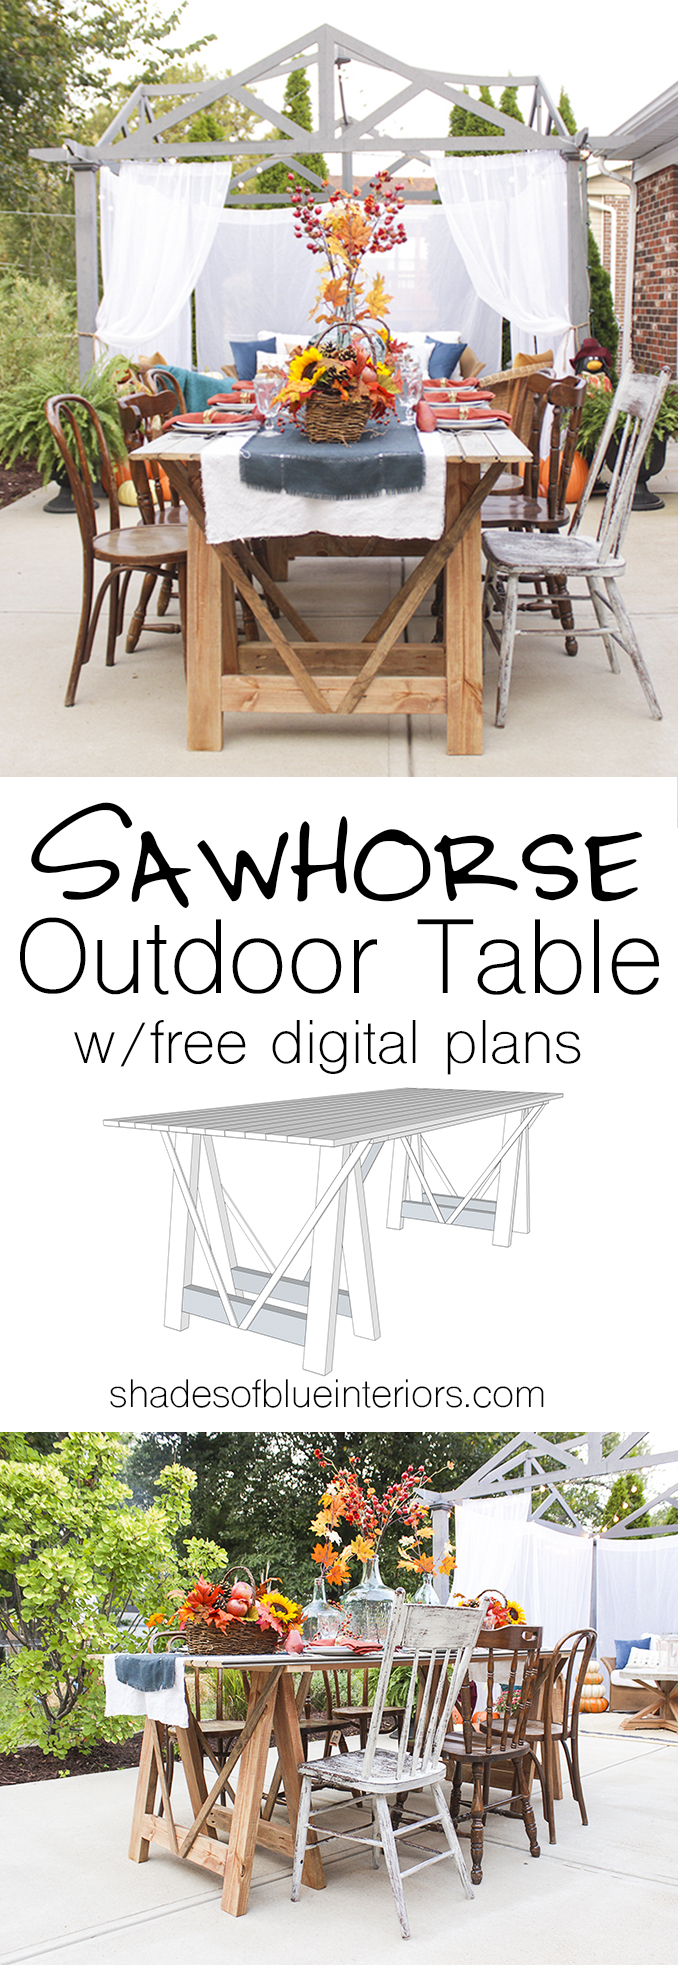
I’m so excited to share with you plans for this super simple sawhorse outdoor table! It is sturdy but can easily be disassembled to store for the winter. The legs are designed so you can simply unscrew them from the top and the top will slide against your garage wall and the sawhorse legs be stored alongside. I designed and built this as part of my patio makeover a few weeks ago, sponsored by The Home Depot.
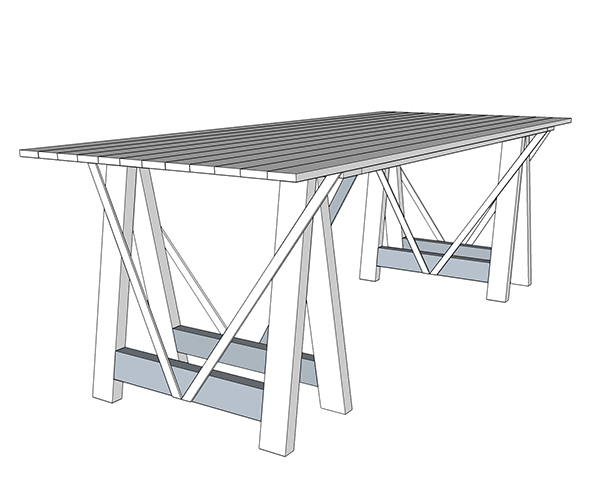
Click Here to Download Digital Plans for Sawhorse Outdoor Table
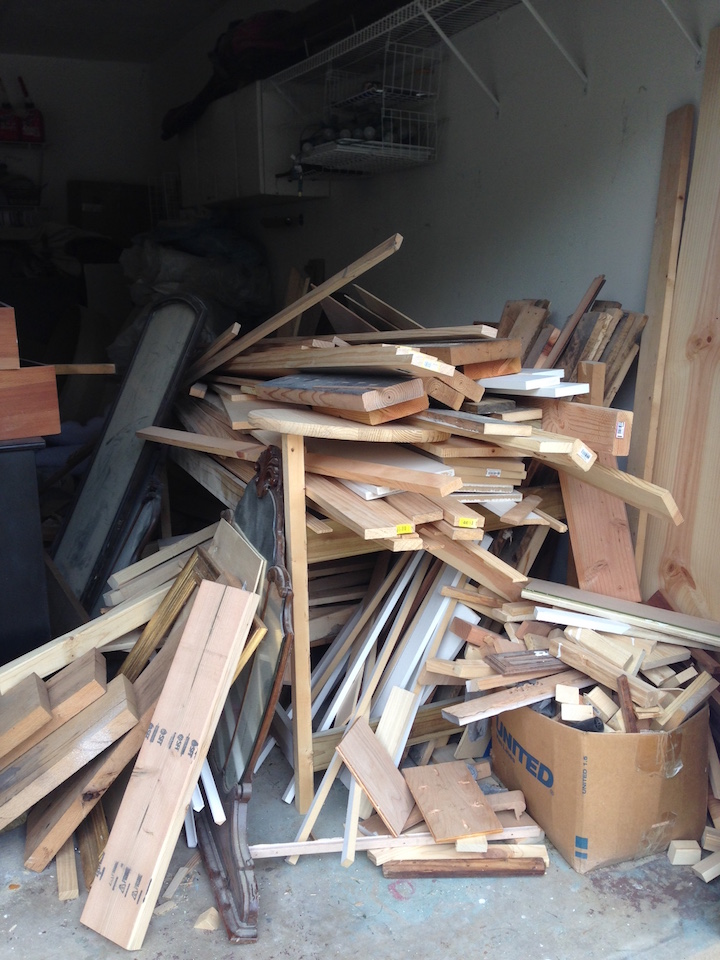
My favorite part about this table is the top. I was contacted about 2 months ago by a reader who met me at Vintage Market Days last fall and told me that I had helped her get confidence to start her own blog! She was tearing apart her deck and since the deck was all tongue and groove boards and had a really awesome gray patina, she contacted me to see if I wanted them. Of course I said yes!! I didn’t know what I wanted to do with them, but I just loaded them in the back of my SUV and took them home. Here is a peek at my wood pile BEFORE I added the gray deck boards, so you can understand why my husband rolled his eyes when I brought home more, without a clear idea of what I was going to do.
Everything came together though, when I started The Home Depot Style Challenge and I realized I wanted to build some tables. The PB Knockoff Coffee Table was something I knew I wanted for a while, and I shared those plans last week. I was unsure about building a big dining table because where was I going to put it during the winter? I looked around online and found my biggest inspiration from vintage sawhorse legs. I decided to create my own simplified version and just put the deck wood on top, with all it’s perfectly imperfect patina. It had been deck wood for years, after all, so it certainly wouldn’t hurt to keep it outside!
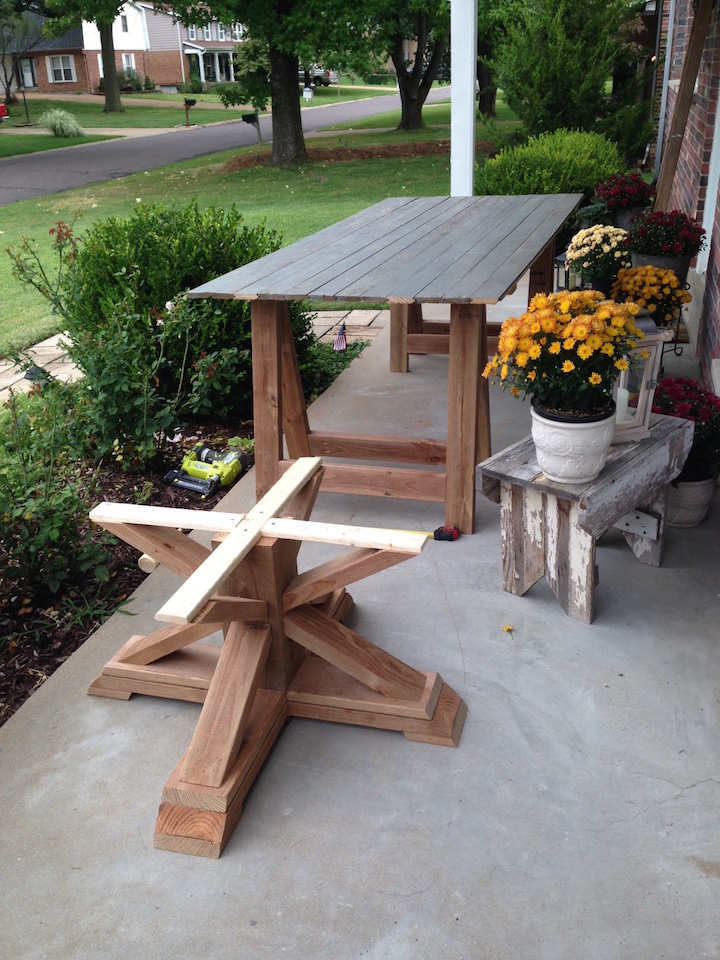
Here is a progress shot that I took… so proud of myself to get this far on a Saturday afternoon!
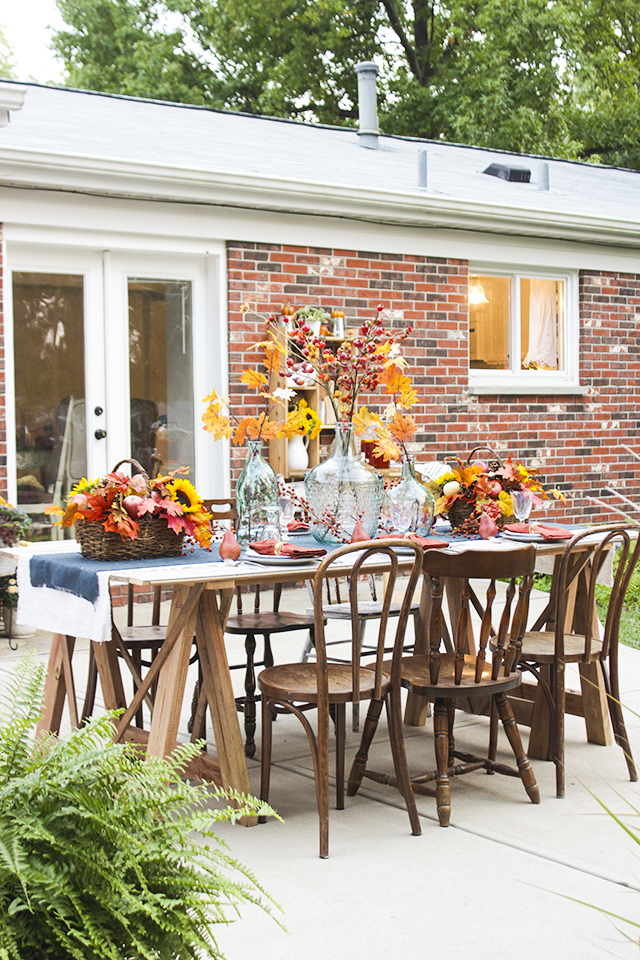
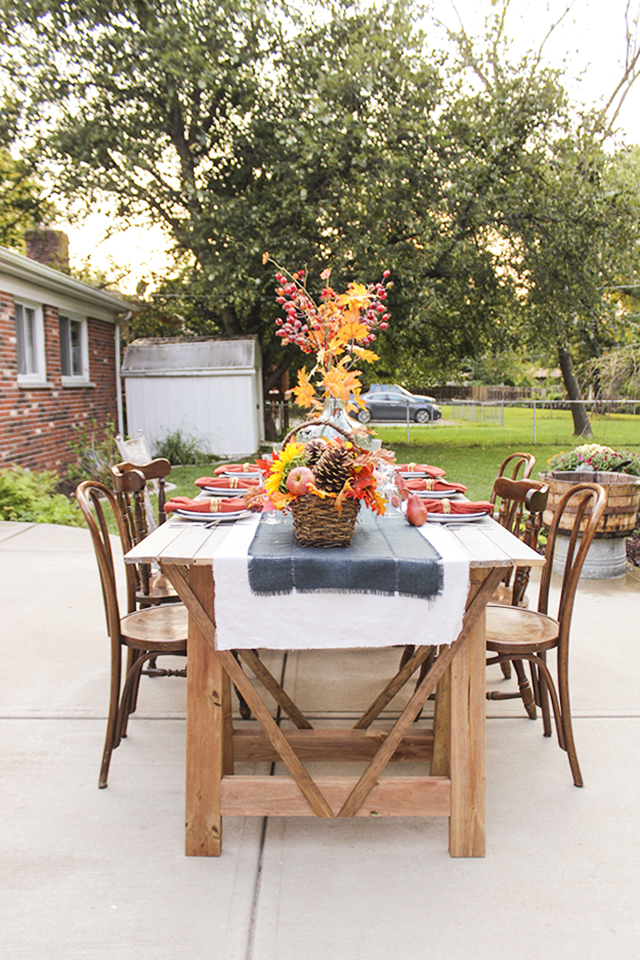
And here is the finished product!
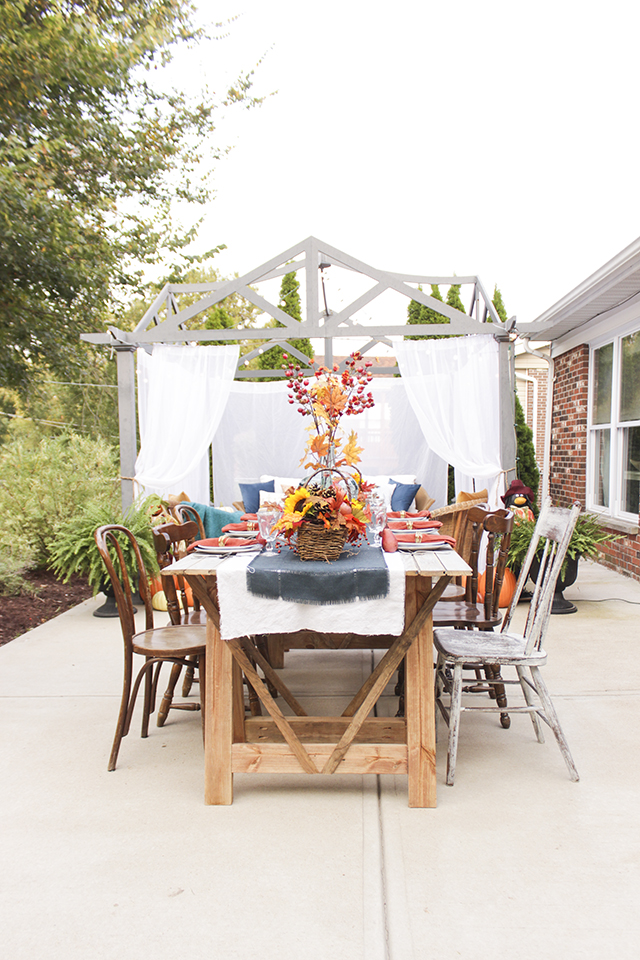
I kept the cedar tone and just put some mismatched vintage chairs around it.
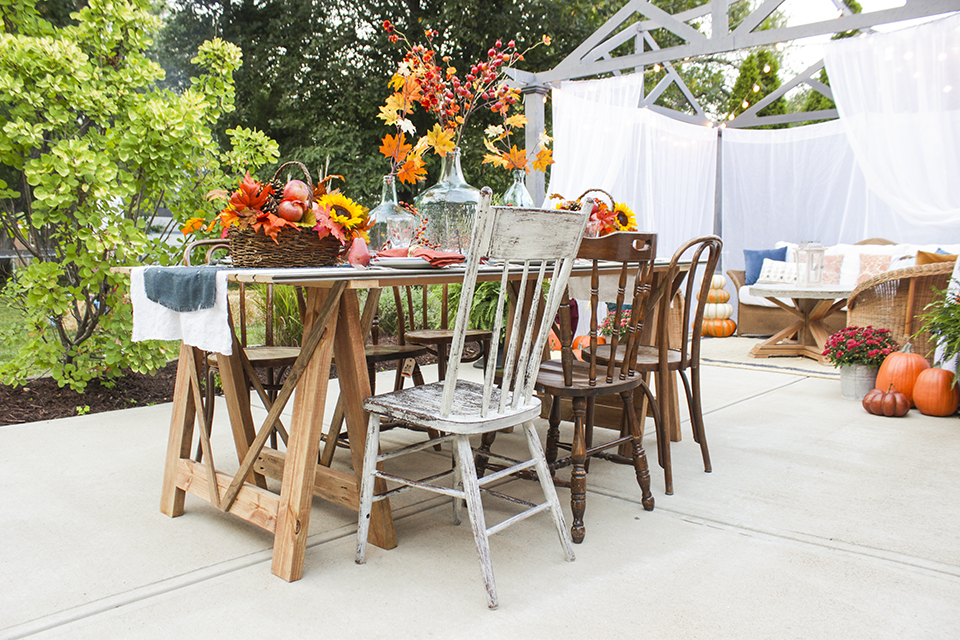
While I only have 6 chairs around it in the pictures, last weekend we had our actual fall party and I put 2 additional chairs on either end and they fit comfortably without feeling squished or cramped!
And since I used reclaimed wood for the top, my grand total expense for this table was less than $100!!
I love the vintage feel of this table and how easy it was to build. Please let me know if you give this a try and don’t forget, the tutorial and digital plans are in the link at the top!
Simply fantastic! Thank you so much for sharing your talent!