Ready for the next step?
This post will be dedicated entirely to showing how to REPAIR loose springs and putting all the burlap and batting back on.
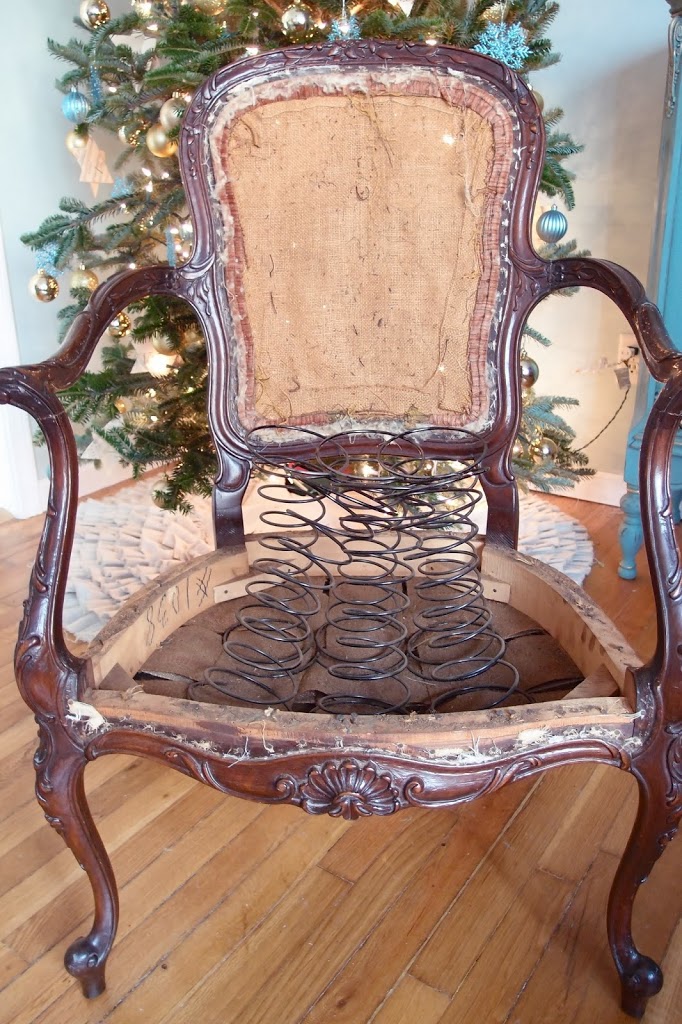
To refresh your memory, this is the condition of the chair, as we left it from the previous post on How to STRIP a french chair:
For this next step you will need the following:
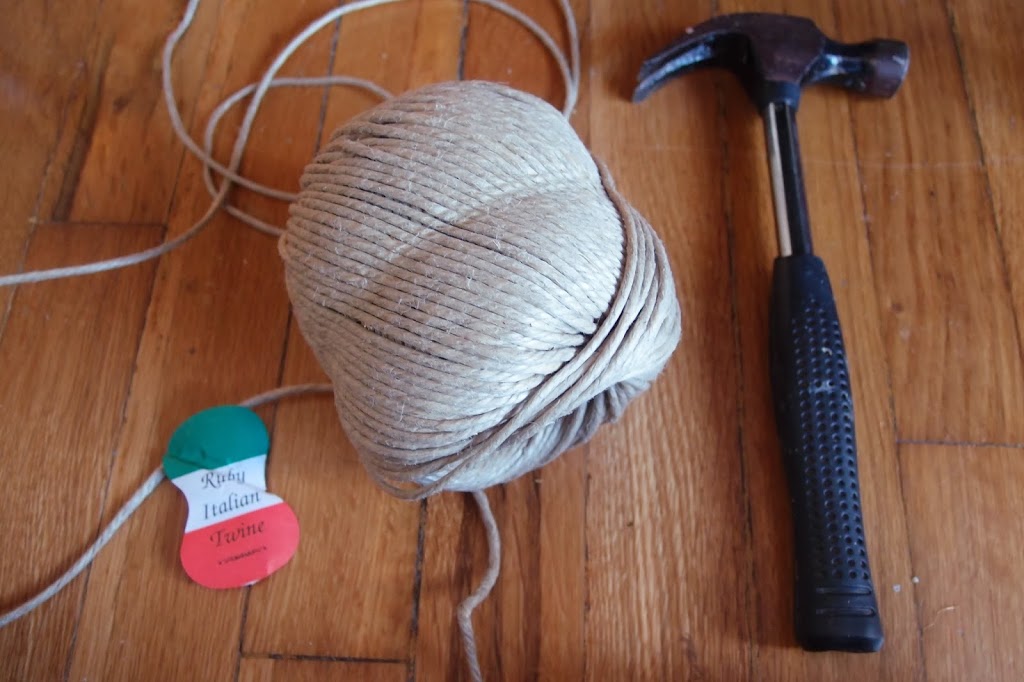
Italian Ruby Jute Spring Twine
(I purchased mine at Marscott Upholstery Supplies for only $11)
Small Hammer
(I started out using what was pictured above, but ended up buying a cheap tack hammer at Joanns for $8- after coupon)
Upholstery Tacks – about 20- 1/2 inch long ones and about 50 smaller ones about 1/4 inch long
(I reused ALL of mine from what was there previously)
Burlap – enough to cover the size of the seat
(I used a roughly 2′ x 2′ square, double thickness)
Ok NOW are you ready? 🙂
If you get stuck or frustrated, please DO NOT GIVE UP! Just watch some youtube videos or send me an email! I ran into a few hiccups which I didn’t address here, but might help if you run into any problems!
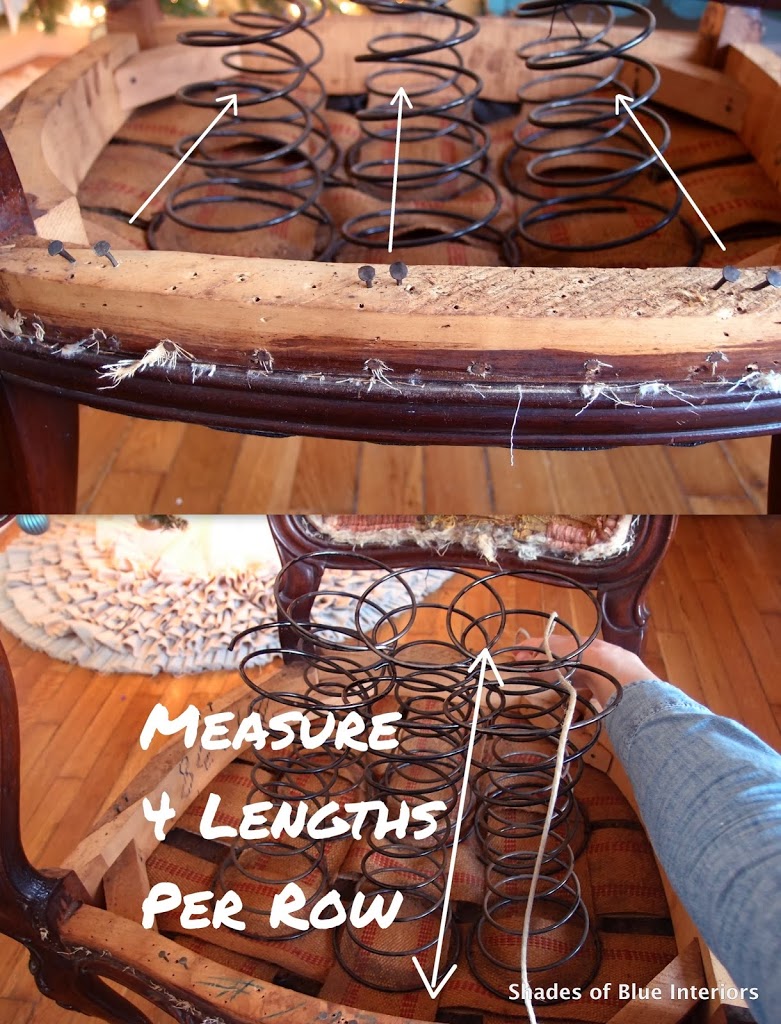
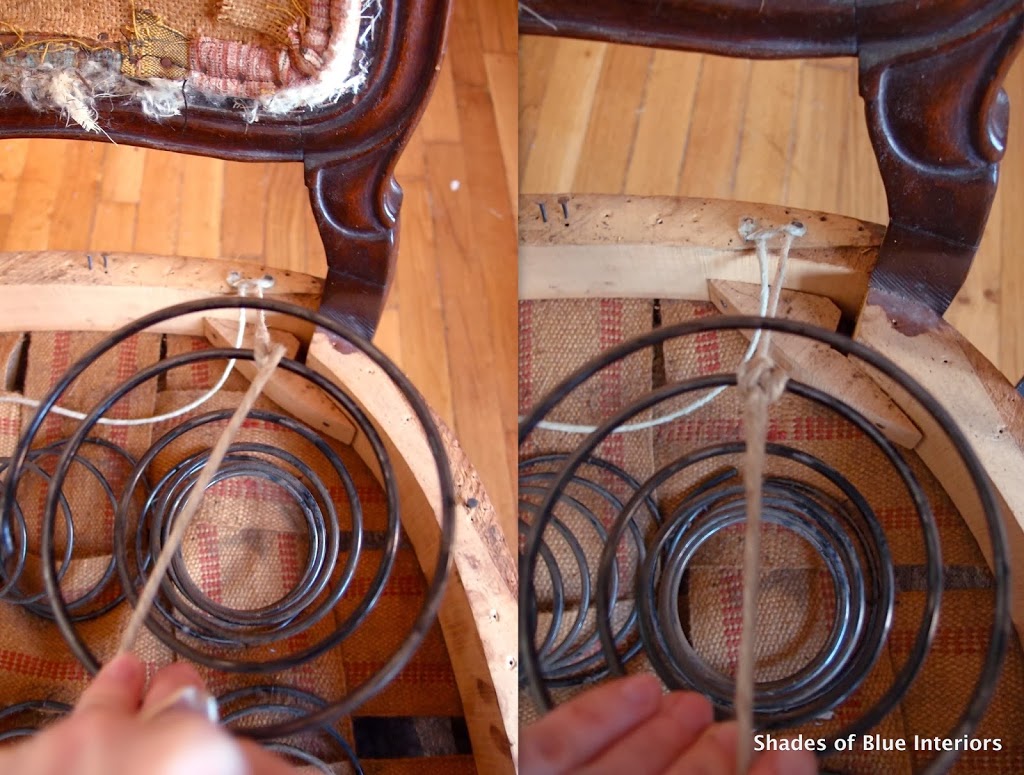
First, lightly hammer in – about half way) a pair of the larger size tacks, about an inch apart (or less) on either side of each row of springs. I had 6 springs, so on the front and back I hammered in 3 pairs each, then on the sides, I put in 2 pairs each.
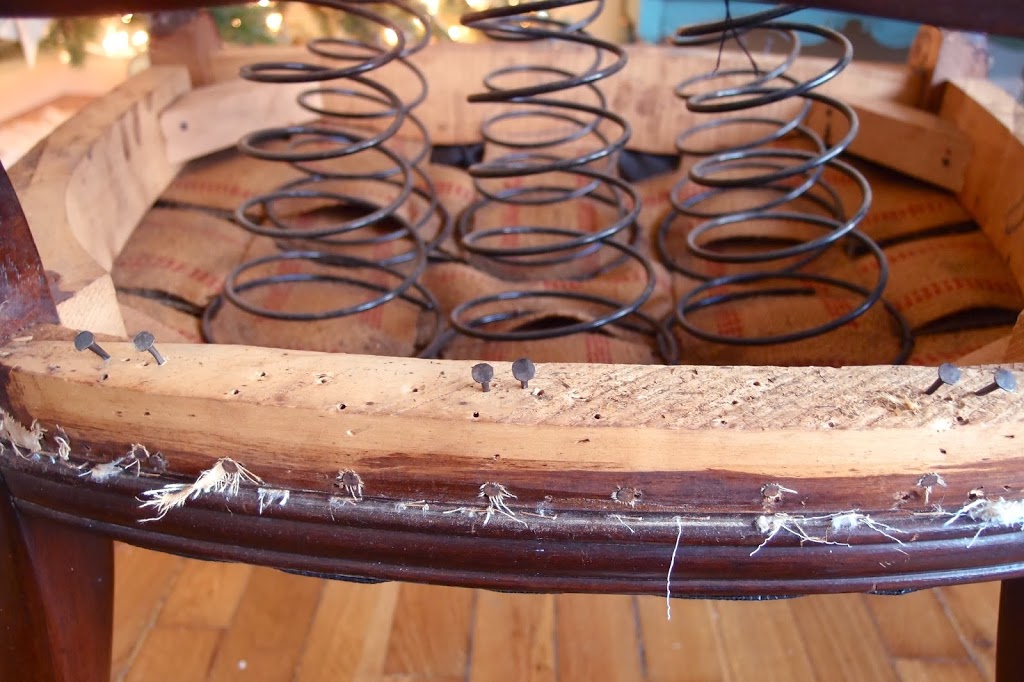
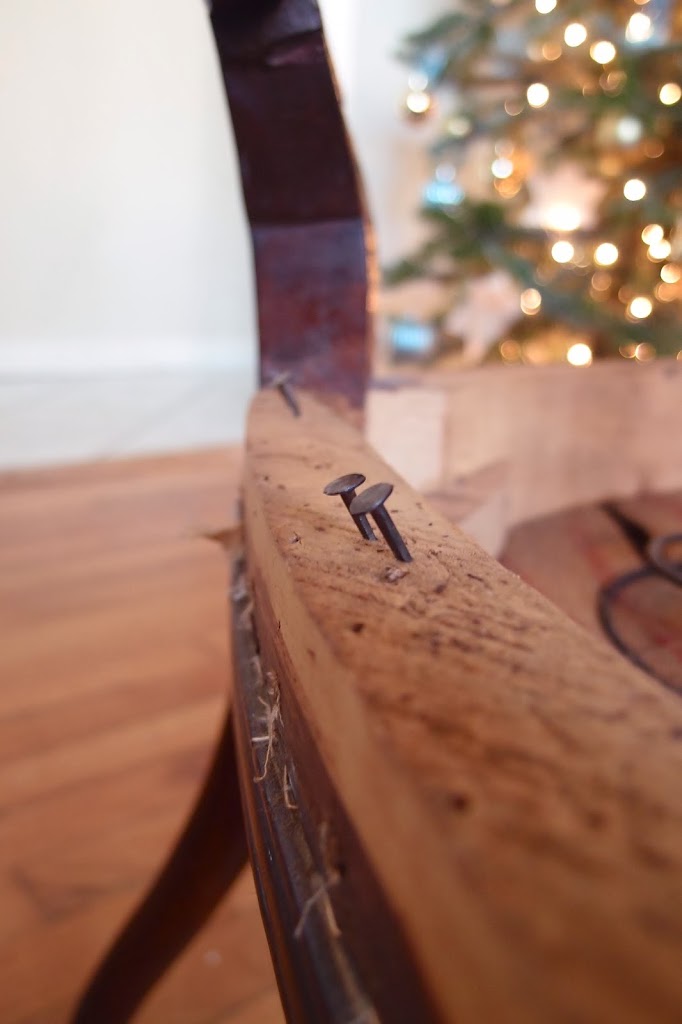
Make sure on the back side of the chair, you hammer the nails at an angle, so you won’t hit the underside of the chair-back.
Here you can see, the rows of springs with their corresponding tacks. Once you have the tacks in place, get your jute spring twine and measure about 4 lengths of the chair, for each row. So for me, I did this 5 times (front and side rows).
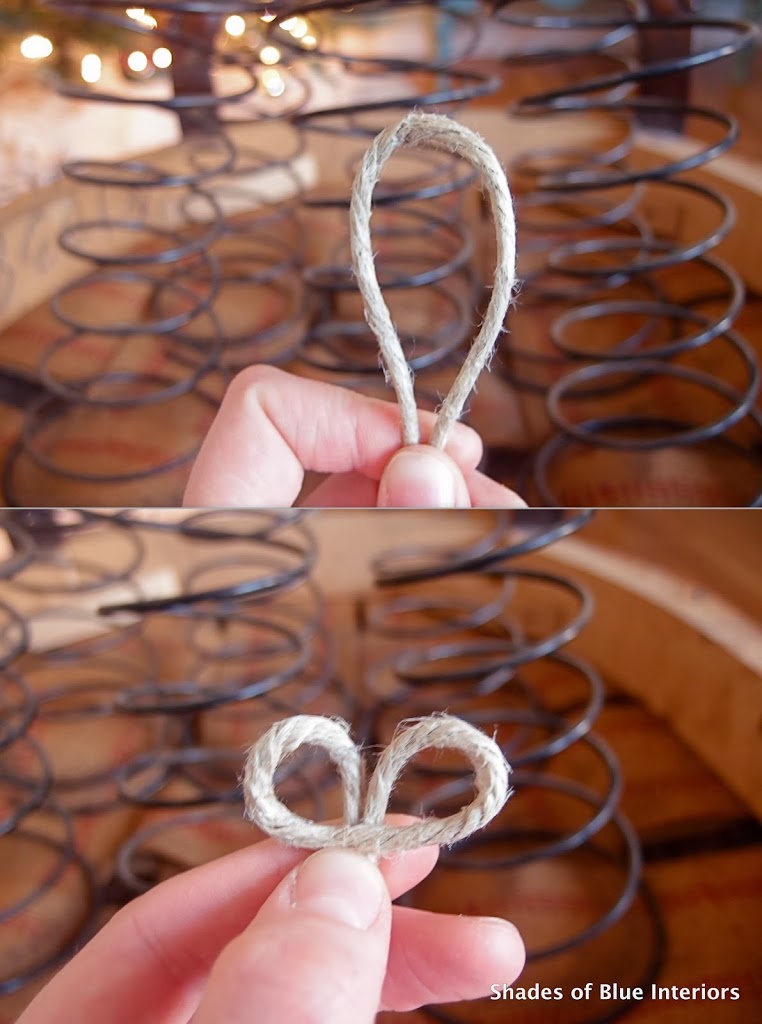
From one of the cut sections of twine, fold in half with about 12-18 inches on one side and the rest of the long length on the other. At the fold, push down the middle loop in front so that you have a pair of “eyeglasses”.
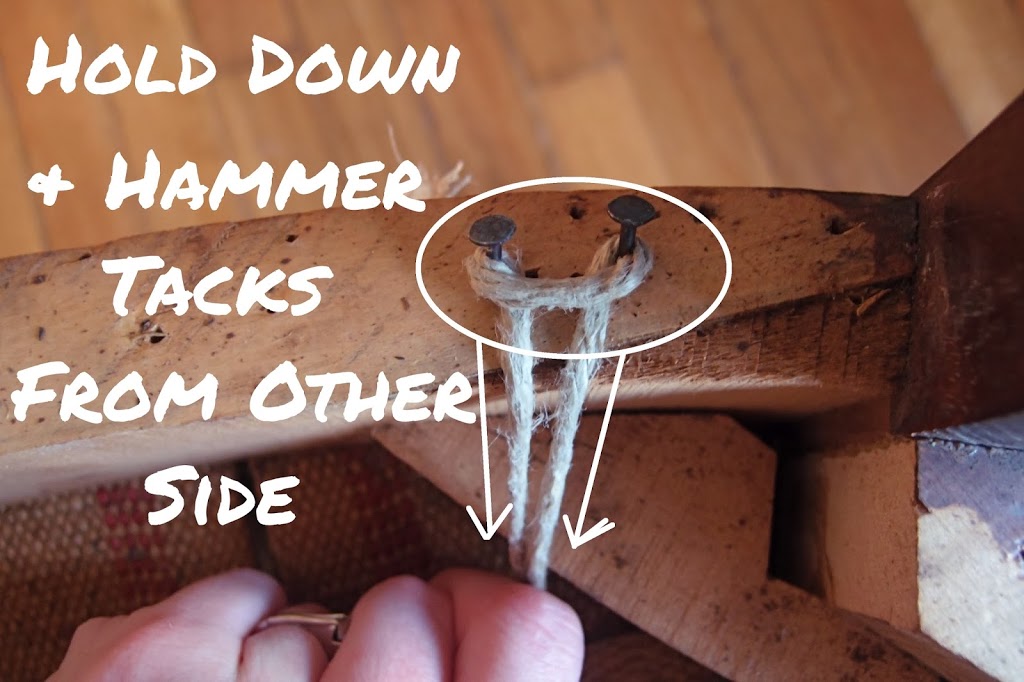
Place those little “eyeglasses” on the tacks, then once you hold down the twine firmly, hammer down the tacks from the back (so you don’t hit the underside of the chair-back).

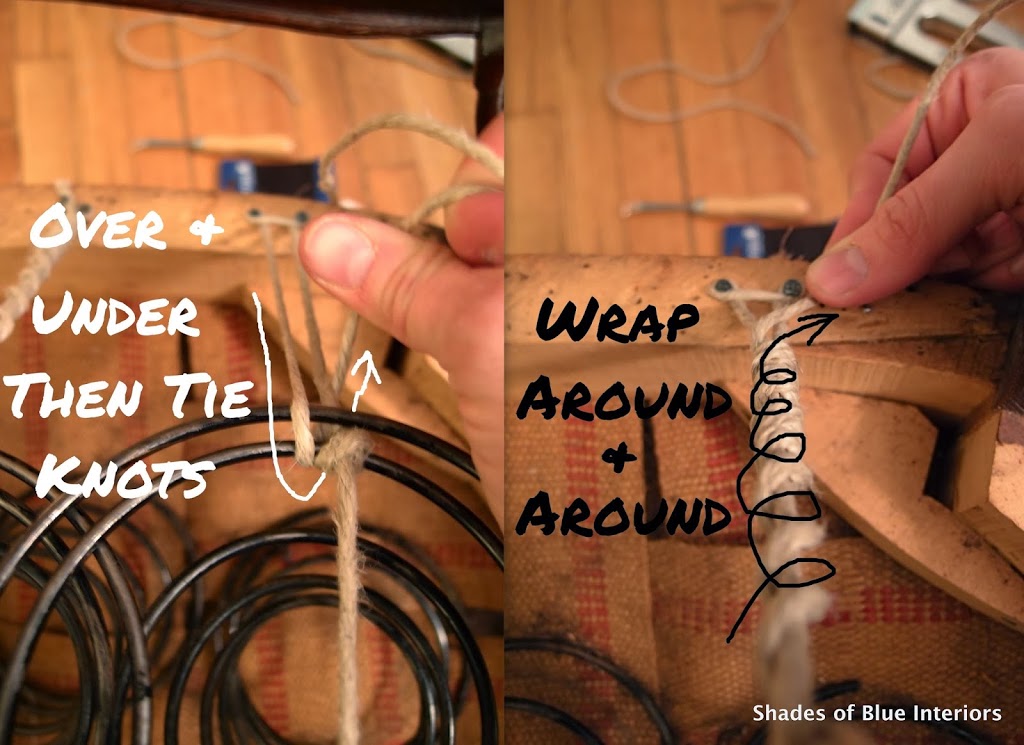
Wrap the twine around the 2nd coil down. This will keep the coil from getting off-center too much. Once you pull the twine tight (spring will be compressed a little), position the spring so that if you are looking directly above it, it looks like like a tunnel, with no bends in it.
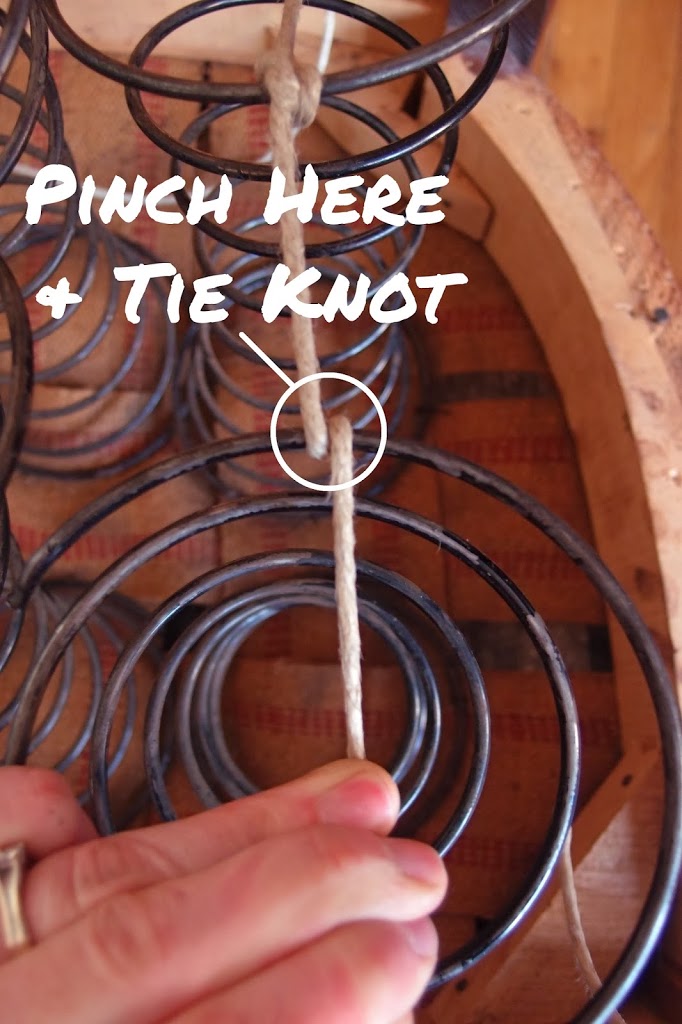
Once you have the spring in the right position, and the twine is taut, pinch the twine and coil, so that it doesn’t move, when you tie a knot on the coil. Any knot will do, nothing fancy! Do the same thing on the opposite side of the coil, but on the top coil, not the 2nd one down.
Wrap the twine around the next spring, top coil, make sure to position the spring in the same way you did the first, keeping it as vertical as possible. Again, pull twine taut and tight a knot on the opposite side of the 2nd spring in the row, but again going back down to the 2nd coil.
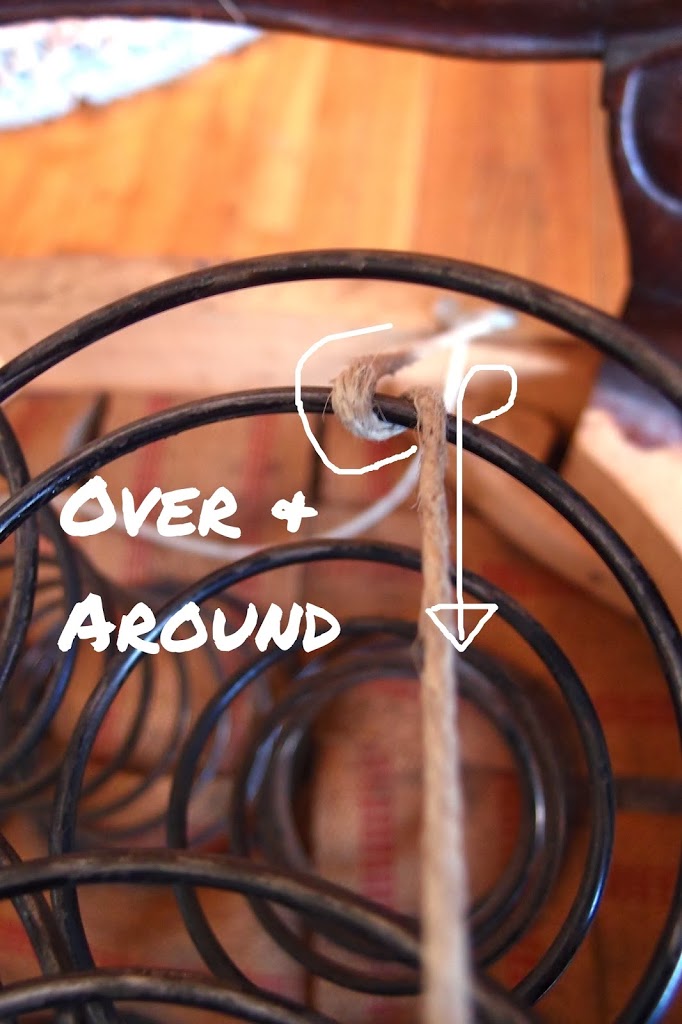
Once you have the remaining twine, you need to secure it to the frame again! Wrap it around the right tack, inside going outside, and cinch it tight. The top coil closest to you will bend slightly, but it not too much, and it definitely will still be mostly vertical.
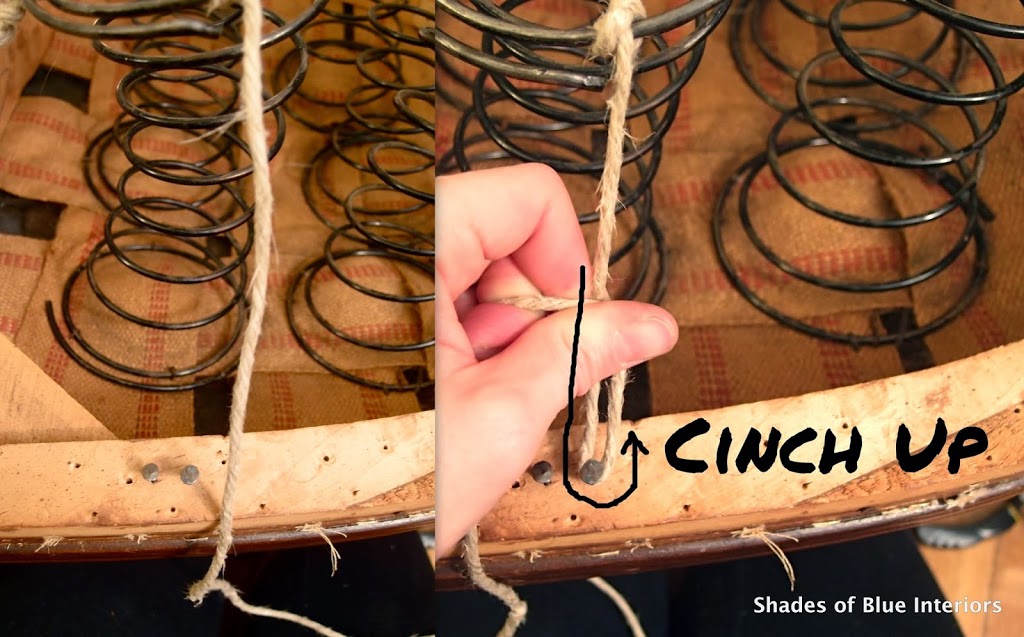
After you have cinched the twine to the right length, wrap it around the tacks, as shown below, and hammer the tacks down all the way, securing the twine.
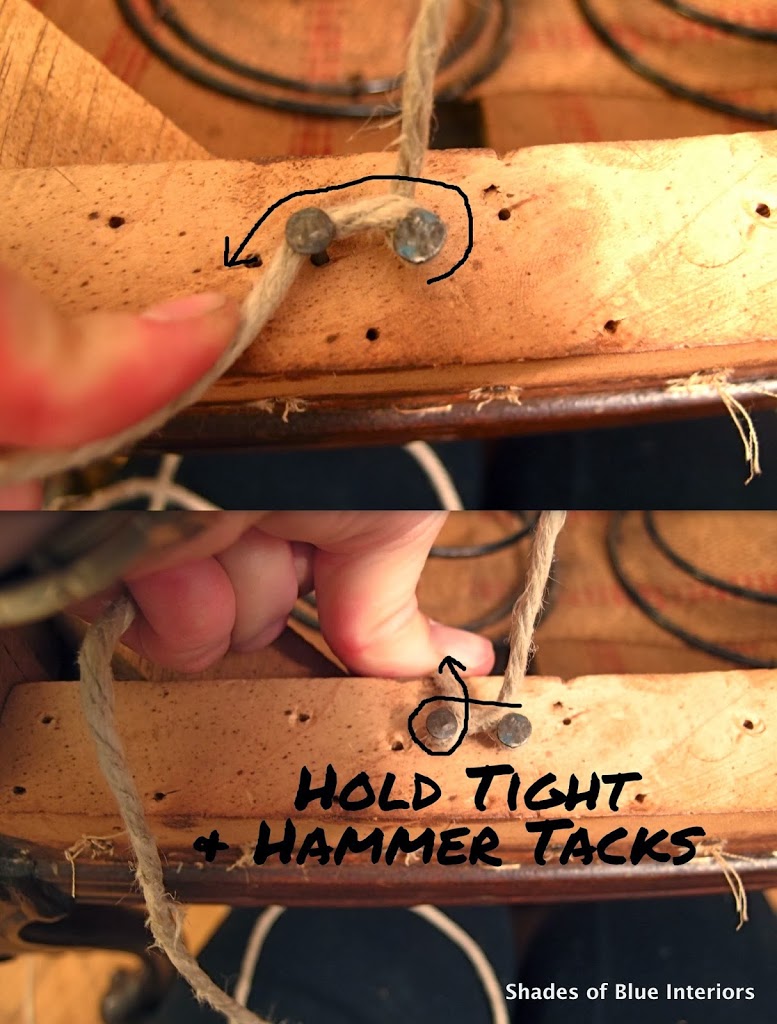
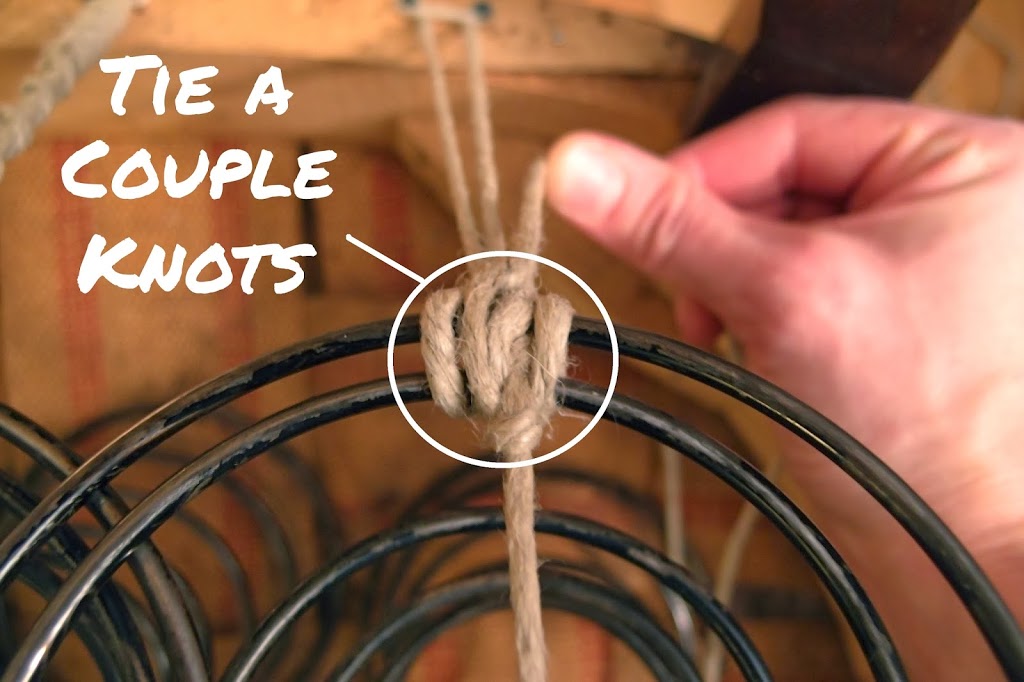
With the excess twin left over, run it back up to the top coil and wrap it around the top and 2nd coil (where the knot was) and tie a couple more knots, tying them together securely. Then wrap the rest of the twine around and around the 2 pieces of twine that connect to the frame, and secure the end with a small tack nail.
What the top and second coil should look like after you have tied a couple knots:
It should look like this:

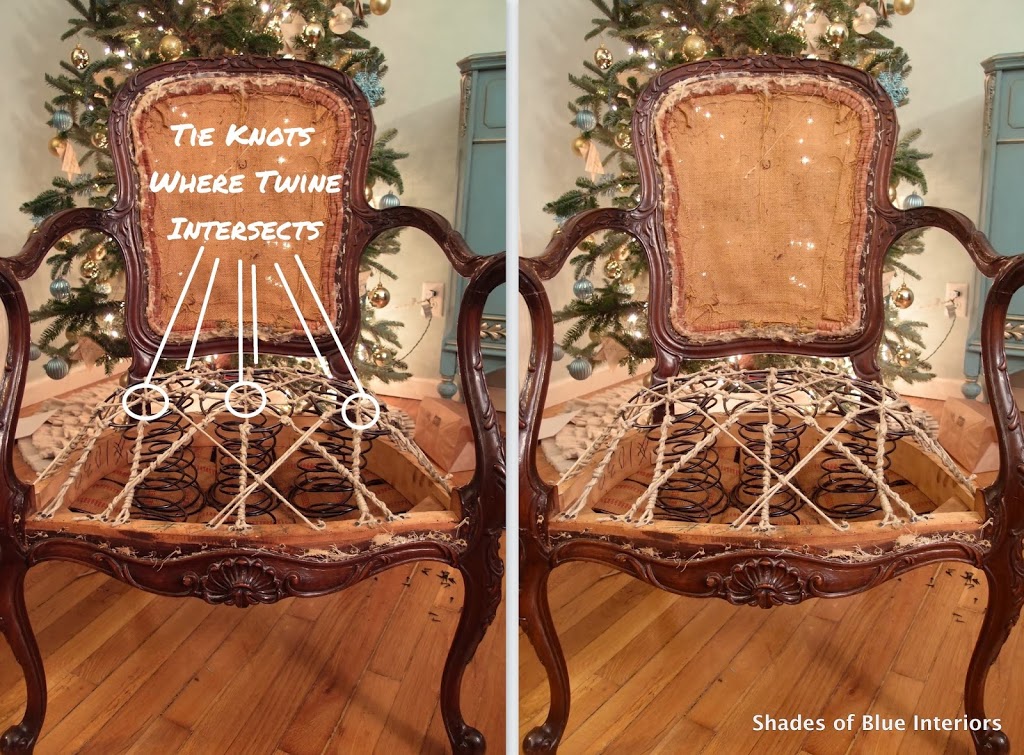
You are going to repeat the above steps 4 more times, then again 6 more times as you work diagonally, giving each spring 8 ties! THIS IS IMPORTANT! If you decide not to secure them diagonally, your work will not last as long. The whole reason I am having to repair these springs in the first place is because someone only tied the springs 4 ways. Not sufficient. Also, make sure you tie a knot at the intersection of all the twine in the center of each spring. I only did this when I worked diagonally, so I didn’t get too big of center knots. This is not only more secure, but it prevents the twine from rubbing together too much and wearing down.
Now. Admire your work and take a break!
*
*
*
Take a picture of how pretty it looks and post it on Instagram!
*
*
*
Now it time to cover those springs up!
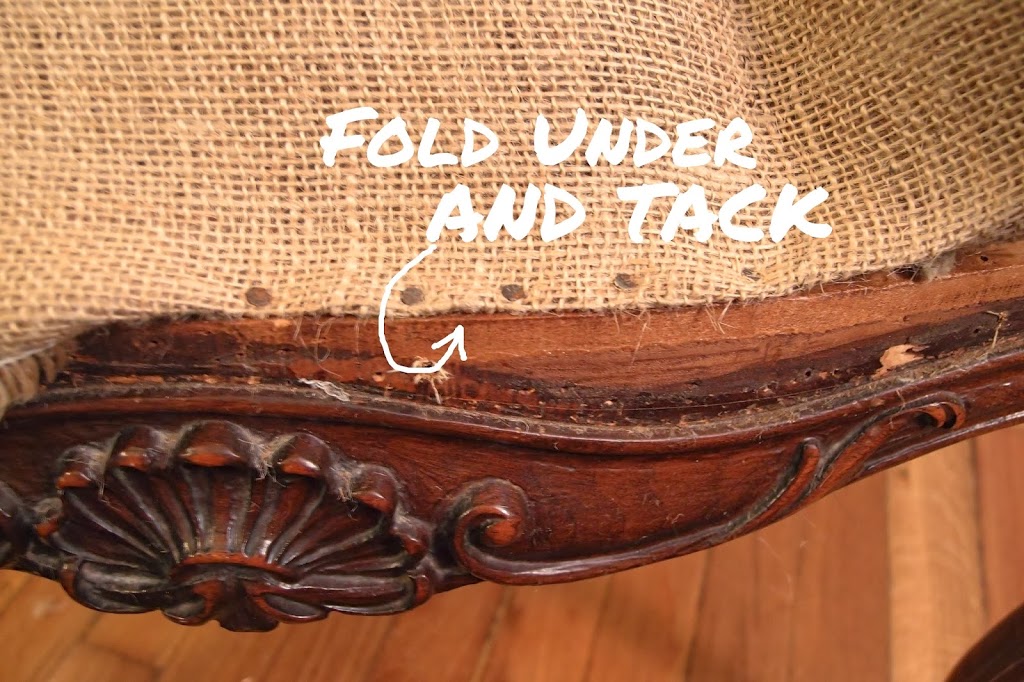
Get out your burlap and cut out a section big enough to cover the entire seat bottom, plus a little extra for folding under.
Start near the middle, fold under a bit of the burlap (I was using 2 layers) and tack down with the smaller tacks. Tack down a few inches then move to the back and tack down some so you are keeping the burlap tight and even. Once all 4 sides are even and in place, then go back and finish the corners.
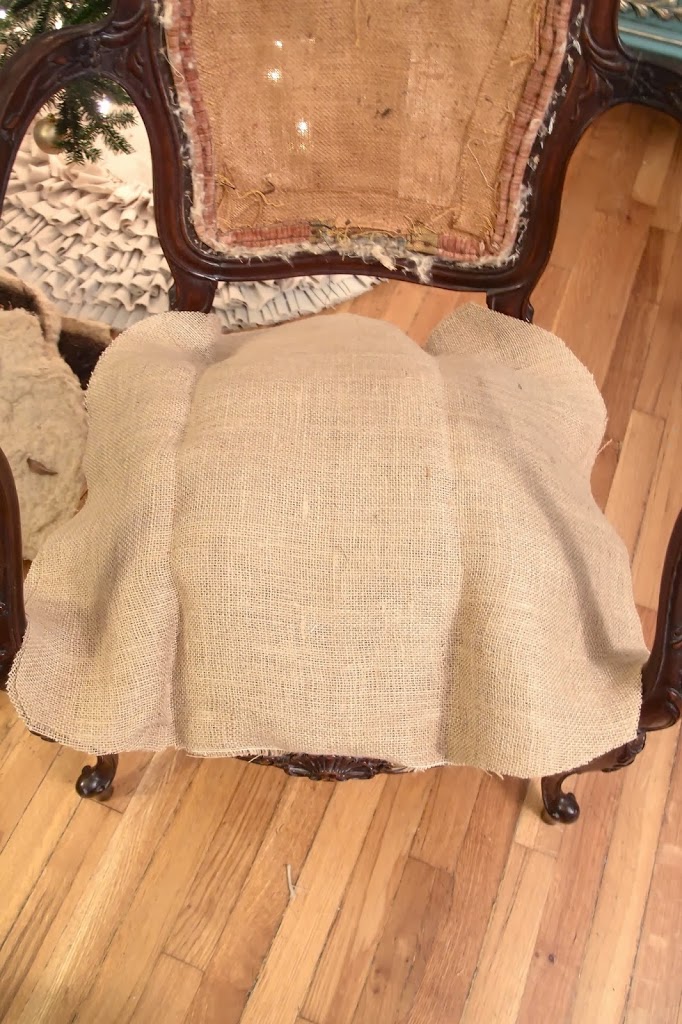
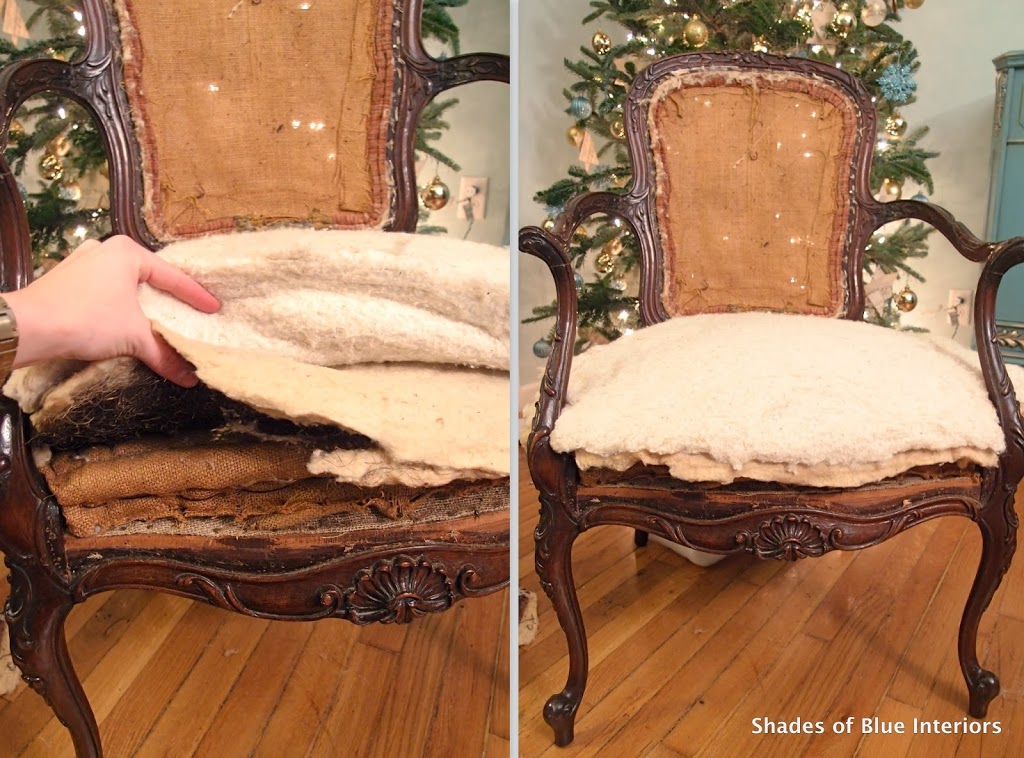
Yay! Now you are ready for the easy part! Put the burlap and hog-hair seat cushion layer back on and tack down in a few areas. I didn’t feel it was necessary to go along the entire thing and fill the frame with more tacks. I did enough to hold it in place. The thick “piping” in the burlap makes the seat-edge come up a bit, giving a more natural shape to the seat. The crown (or round part of the seat) became less prominent.

Layer batting back on the seat! I used both layers that I had, because why not? But probably only 1 would be necessary. I wanted it extra cushy, so I used both layers. Now you are ready for fabric!
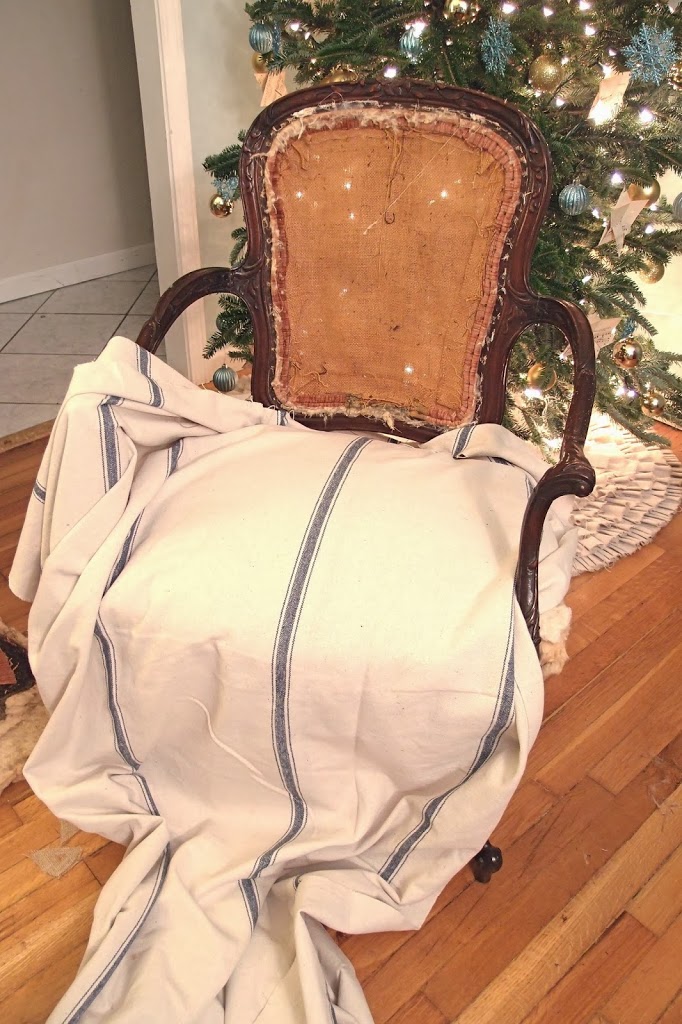
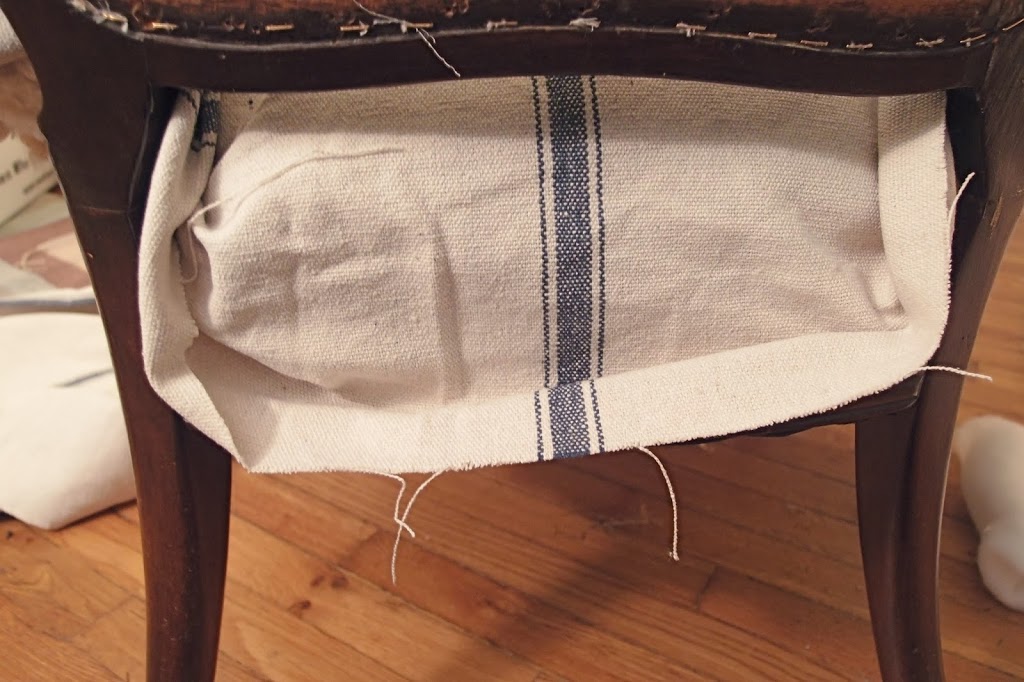
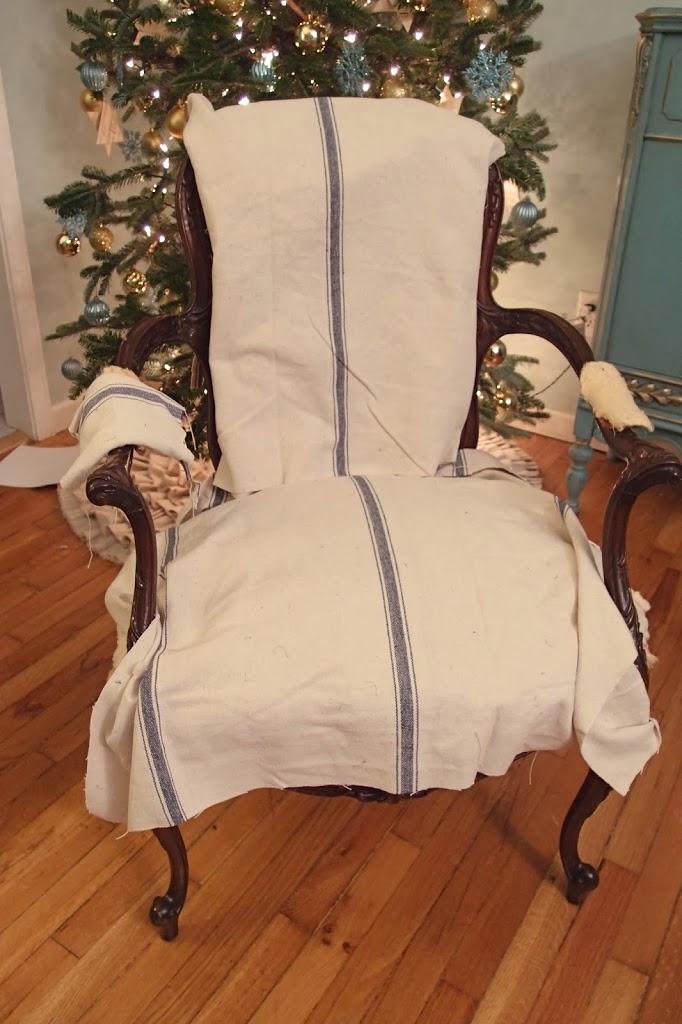
I recently got my order in of feed sack inspired fabric from DecorSteals, so I laid out the fabric, so a stripe was down the middle.
You want a rough square cut-out to begin with, and a little extra than the exact size. Feel where the edge of the seat is (or where you will be tacking/stapling it down) and give yourself an extra in and cut!
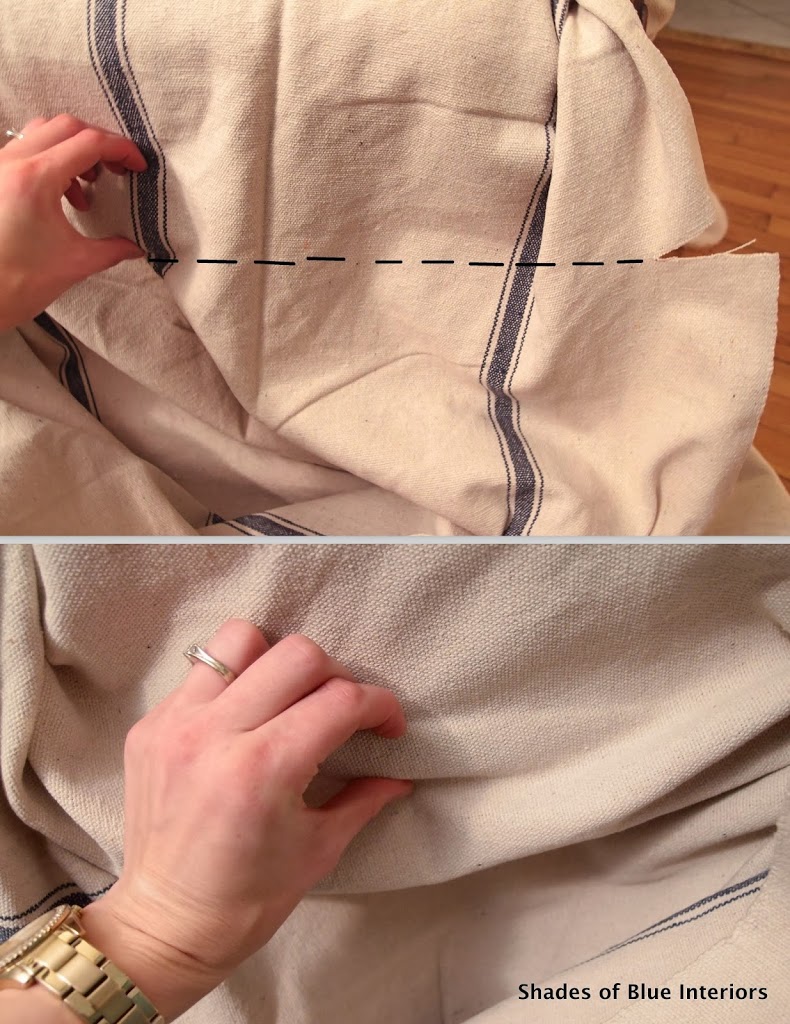
This is how much extra I am giving myself for the back.
I laid out all the cut sections (seat back pieces included) to see what it will look like (more or less).
To see the next step in the process,
How to Reupholster the fabric, and white wash the frame, CLICK HERE.
Thank you for the tutorial. It was very helpful. Yes I would paint white and distress.
Loving these tutorials. Your pictures are great and loving the step by step. I think if I find one of these chairs, I could try this. Pinning! Thanks, Rachel! x
Rachel, You did it! In retail furniture circles, being able to claim a piece is 8 way hand tied is hot stuff! It’s very cool that you stuck with it and taught yourself this craft. Making sure each spring is tied and pulled to the same tautness must be very labor and mentally intensive. It looks great and is so impressive.
Robin
We are leather-repairs.net Supply all kind of leather services for Leather Repairs, Leather Sofa Repairs and Furniture Repairs in u.k .We offer a Nationwide Service throughout England, Scotland and Wales and will not be beaten on price!
For more information kindly visit:- Furniture Repairs
I just gave a pretty small sofa a pass because I didn’t know what to do with the springs and felt overwhelmed at the thought of having to learn the trade. Thank you for this post! Now I know I could do it.
Hi there
I am just attempting to re-upholster my first chair, and have pretty much followed your instructions, but I am worried that I can still feel the springs even after adding two layers of batting, have I done something wrong? I’d be really grateful for an answer a.s.a.p, before I go ahead and add the final fabric.
Thanks so much in anticipation
Judi
Judy, it is normal for it to feel a bit bouncy, as that how the chair was originally. Now-a-days chairs are given an extra layer of thick FOAM in between the batting, to add extra weight and more cushy-ness. Another option is you can also remove the burlap layer that is directly on top of the springs and re-attach it even tighter, so the springs don’t have as much of a place to go. Try putting a board that covers all the springs (with the burlap on top but not attached to the frame yet) and something heavy on top to push the springs down, while you staple or tack down the burlap. Then put your batting back on and see if that feels better.
Thanks. Great tutorial. I want to join your site, but I am having a problem seeing where to join. I love your work, and would hate to miss out
I love all you pictures and will definitely help me tie my springs down. But instead of creating a seat crown I want to squeeze the springs down so that I can make a foam cushion. How do I get the springs down under the frame?
Replace the springs with smaller ones.
Hello, thanks for the tutorial! . I have been trying to tie springs but the string keeps breaking. Do i see here that its not necessary to put the springs under a great deal of tension? My springs look rather high, but i see yours do too! Thanks, catherine
Yes some chairs are intended to have higher springs. If your twine keeps on breaking I imagine you are pulling the springs too tight. Aim for a sort of rounded off shape, so it’s higher in the middle. It makes for a nice and bouncy chair. If you prefer the seat to be altogether lower, but shorter springs.
What a helpful tutorial! I am attempting to reupholster an antique side chair with a minimal original Crown. I’m doing it as a favor for a young mom. During the process of the eight-way hand-tie, are you compressing the springs in height? Or, do you just secure them together with the eight-way hand tie and then when attaching the burlap is that
when you compress the spri gs to the overall height that you need?