This post will be showing how to paint (white wash) the frame, & place, cut and staple fabric onto a chair.
I wanted it to also be showing the final finished product with the gimp trim, glued in place, however, after I went to Joann’s and Hobby Lobby this morning, I found they were COMPLETELY out of white gimp! 🙁
So on Thursday morning I will head back to Marscott Upholstery Supplies, since I noticed they had a lot of gimp trim in lots of colors.
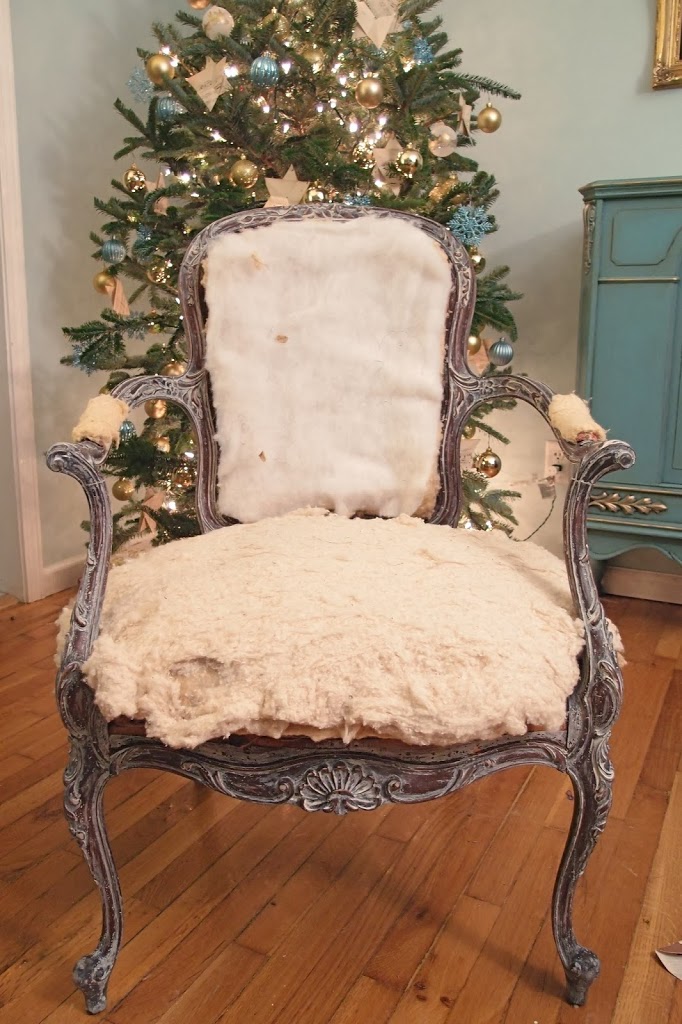
If you remember, this is where I left you, last Thursday:
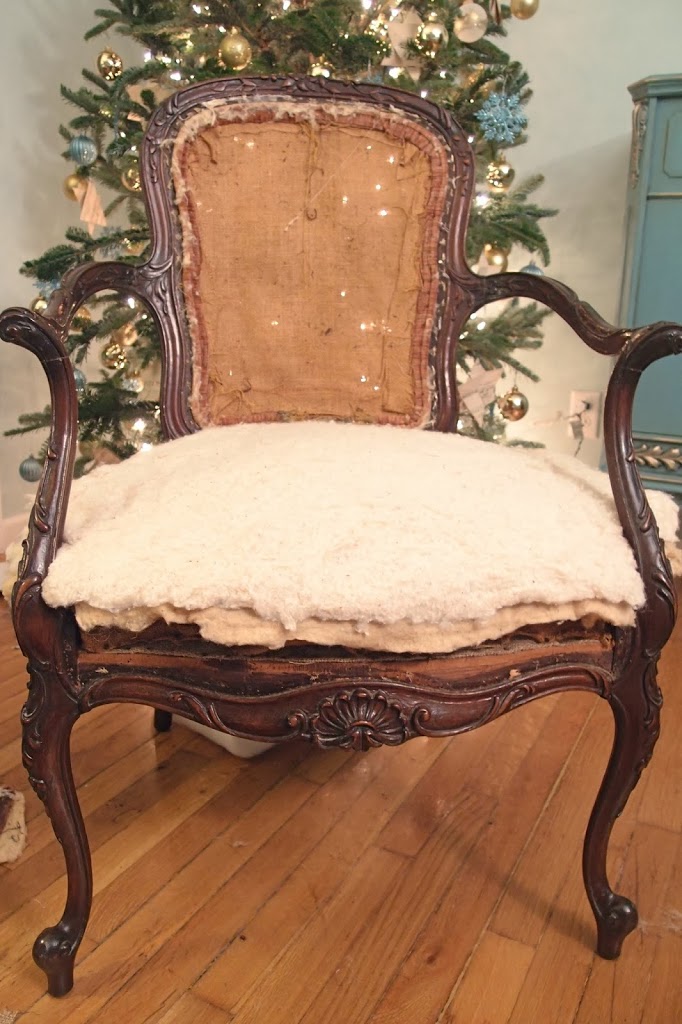
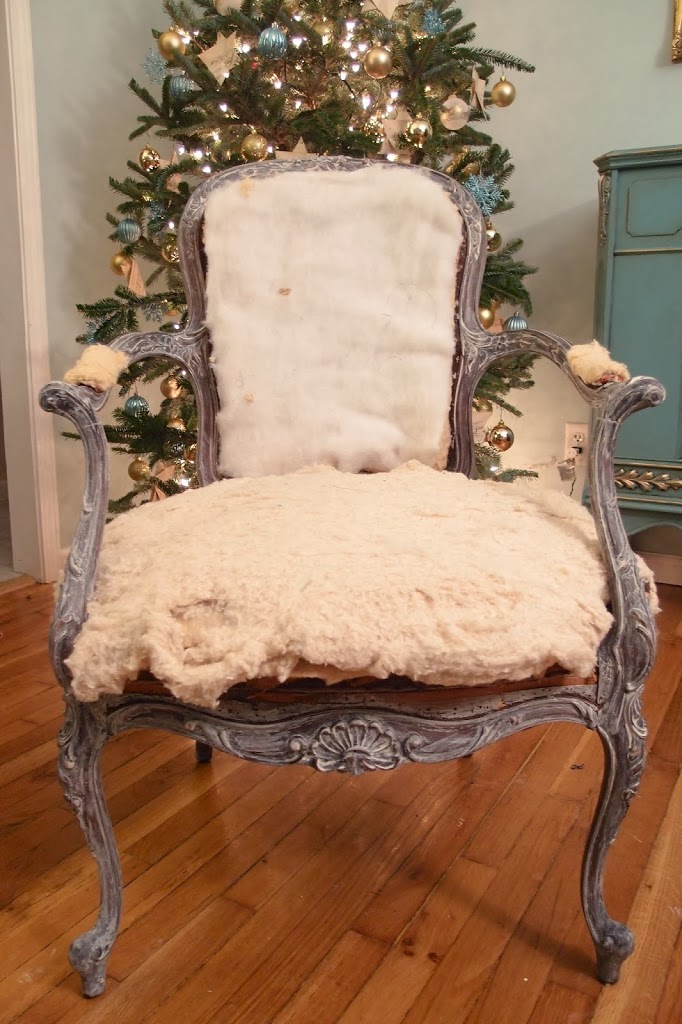
The chair had all the cushion and batting re-placed on the seat and I would have put it on the seat back, but it wouldn’t have stayed. Darn gravity! We also cut the fabric pieces that we would need to upholster it.
Before you staple fabric into place, if you are going to paint the frame, you do it first. I decided, ultimately to paint the frame, but in a different way than I have done previously.
I painted a wash with a rag!
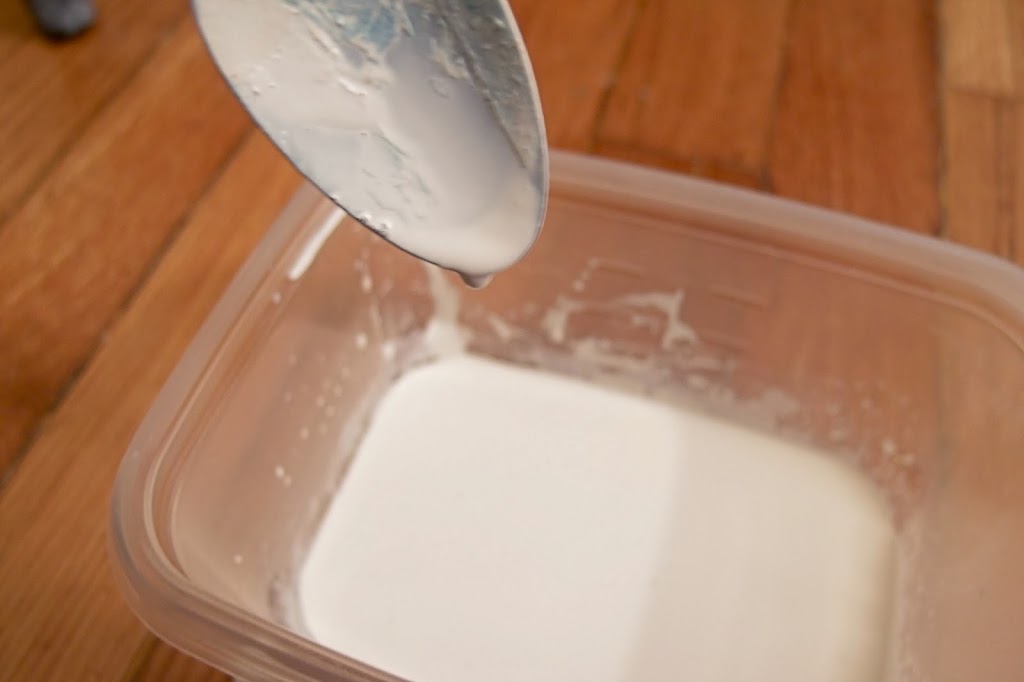
I first got out my Old White Chalk Paint by Annie Sloan and thinned it down with water so it was about 50/50 ratio. Pretty thin.
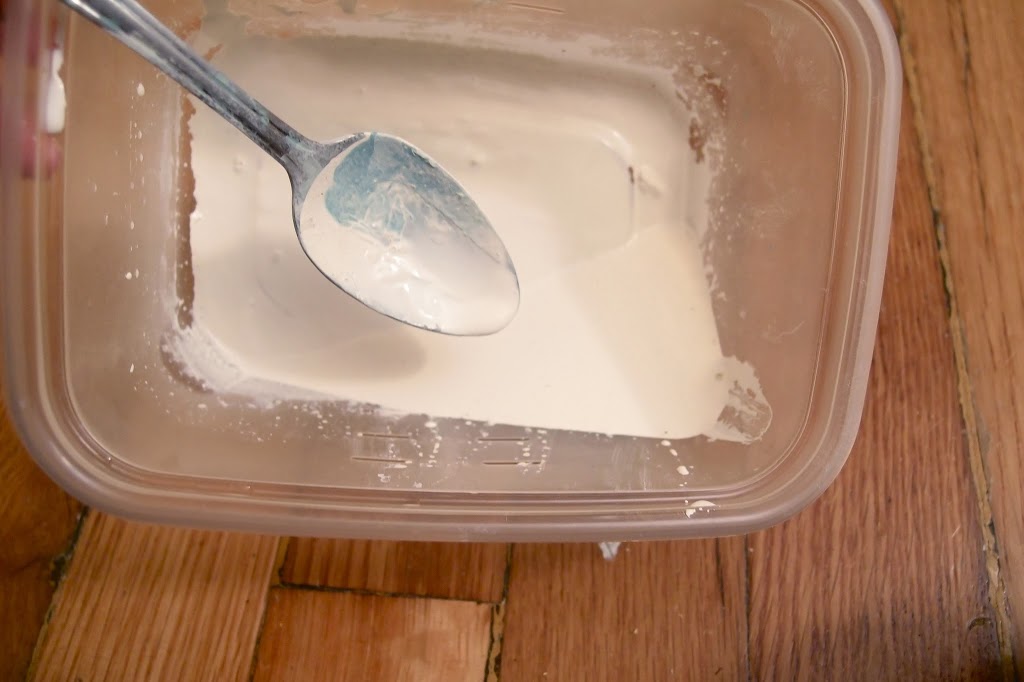
Because I only wanted a thin wash, but I didn’t want the exposed wood “high points” to be super shiny, I roughed up the entire frame with 120 grit sandpaper. This just gives the thinned paint something to cling to more (and be a little more saturated), besides recessed areas.
Then I got out a old t-shirt rag, dipped it in the paint…
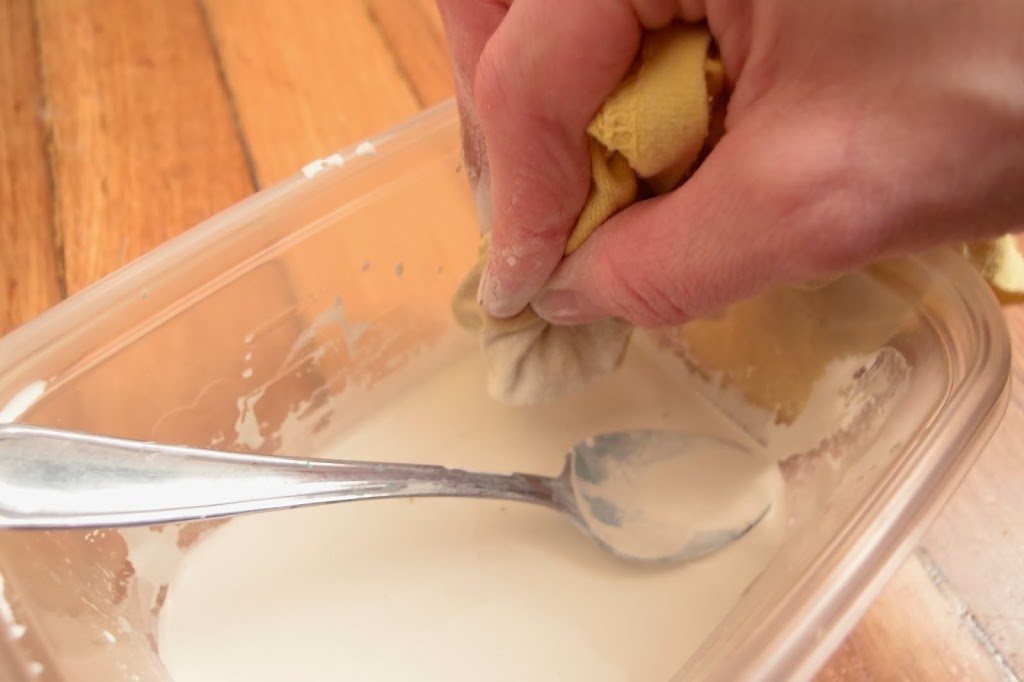
…And started rubbing it in!
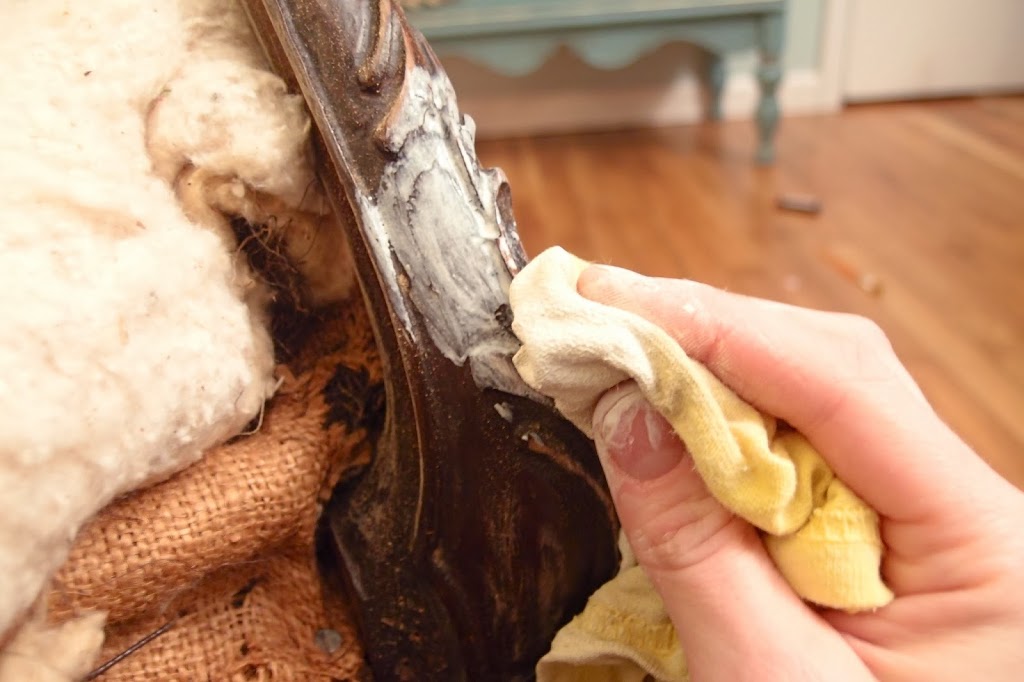
It was very easy and I made sure to get extra paint in all the little carved areas, because that is where I wanted them to stay.
Here is what it looked like after I gave the entire thing a wash:
Then I decided I wanted more of the wood to show through, so I took the same rag and the part that was still wet with wood, I rubbed over the high points:
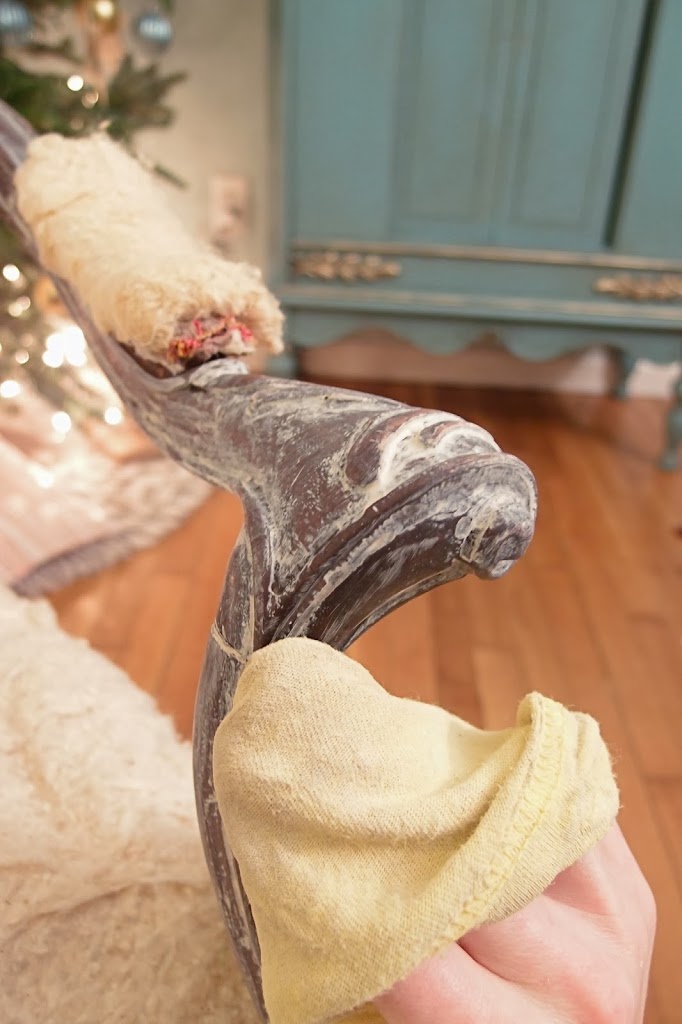
If I used a wet with water rag and wiped off paint on the high points, it would give me a more dramatic difference between the the wood and white recessed areas. I wanted the high points to retain some paint, and this technique did JUST that.
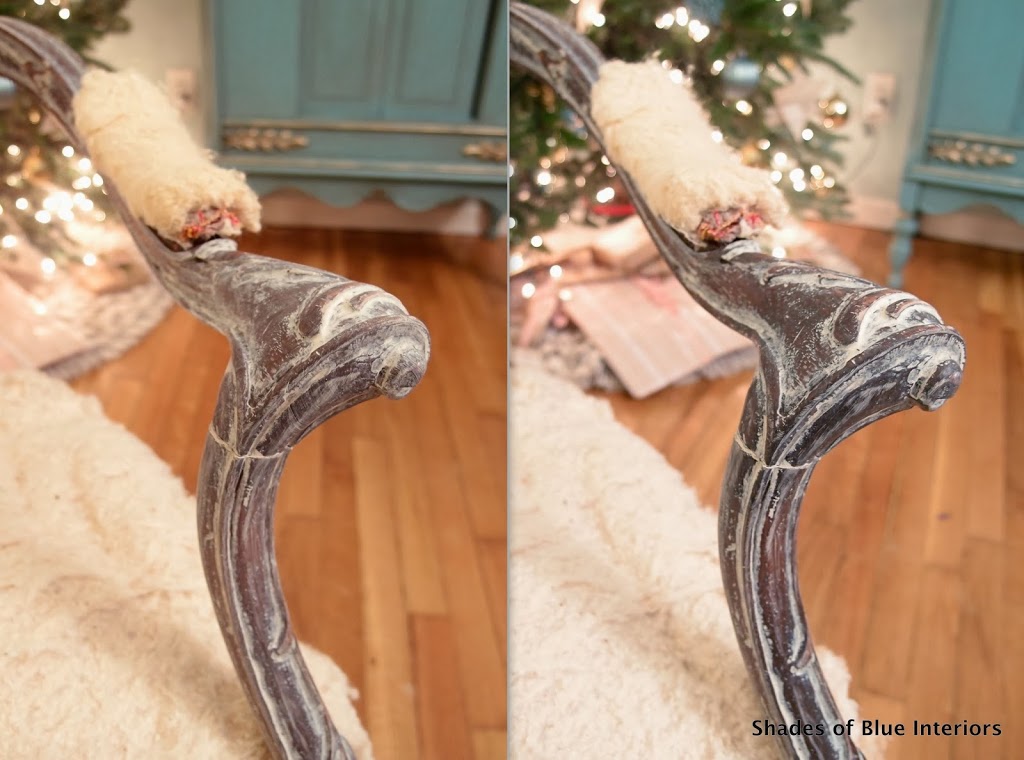
The left is the before, the right after:

Another look at the before and after on the arms:
I also, lightly sprayed the underside of the batting with spray fabric adhesive, so that they would stay put while I put the fabric in place.
I first did the seat backs, because it was easiest. I followed the same method that I gave instructions for when I re-did my dining room chairs HERE.
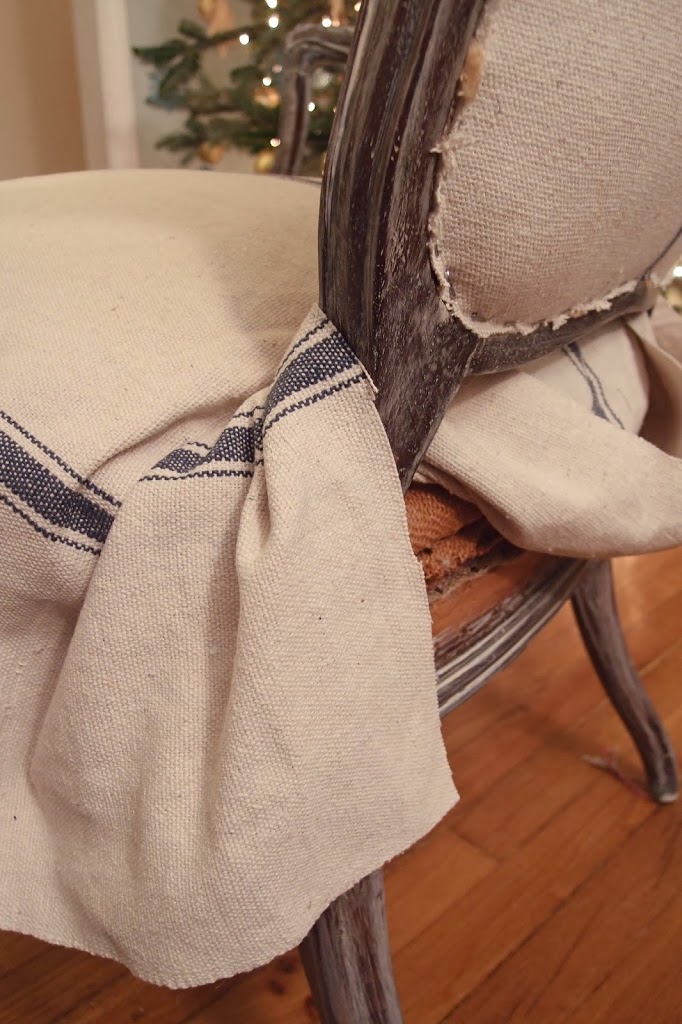
Then I took me seat fabric and laid it out exactly in the position I wanted it, with the stripe being centered. Then I started cutting space for the arms and seat back.
To do this, I started in the back and pulled the fabric so everything was completely even in the back opening, between the two legs. Then, I measured with my fingers, at what point the edge of the upper leg hit the fabric in the position I wanted and cut on that point. (Forgive me for switching sides!)
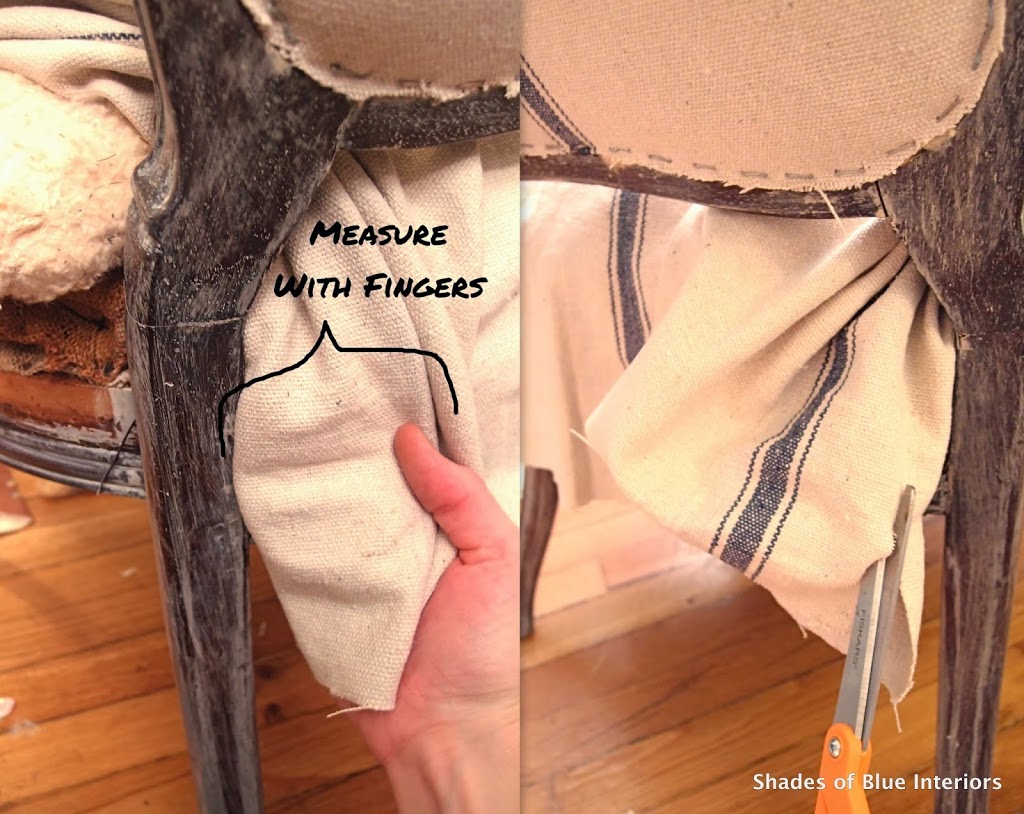
Once I cut that point and how high I wanted the slit, I cut perpendicularly to it. This is the leg cut-out. Then I put it back down to see how it would lay. Note there are still wrinkles, so more cuts are needed.
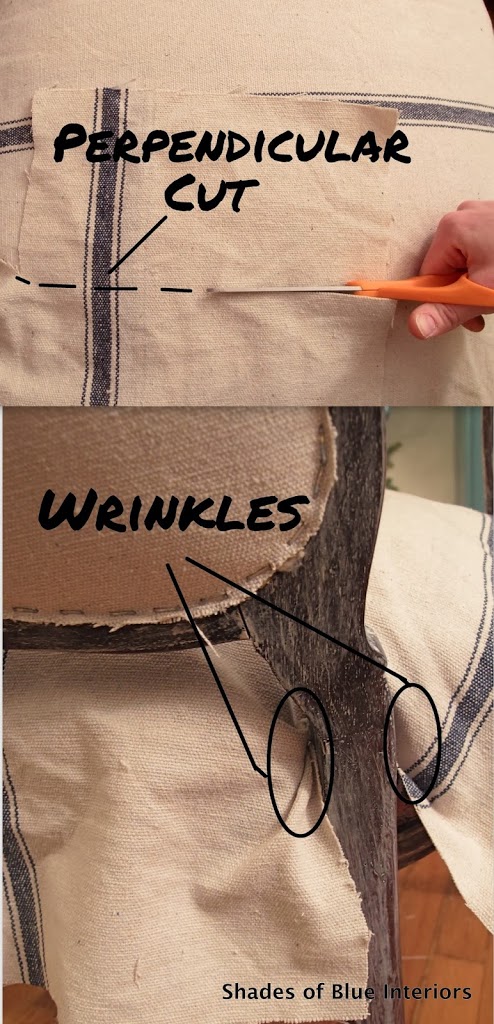
I pulled the fabric back out and noticing where those wrinkles were, I cut out a little section that resembles an arrow, to further give room for that leg.
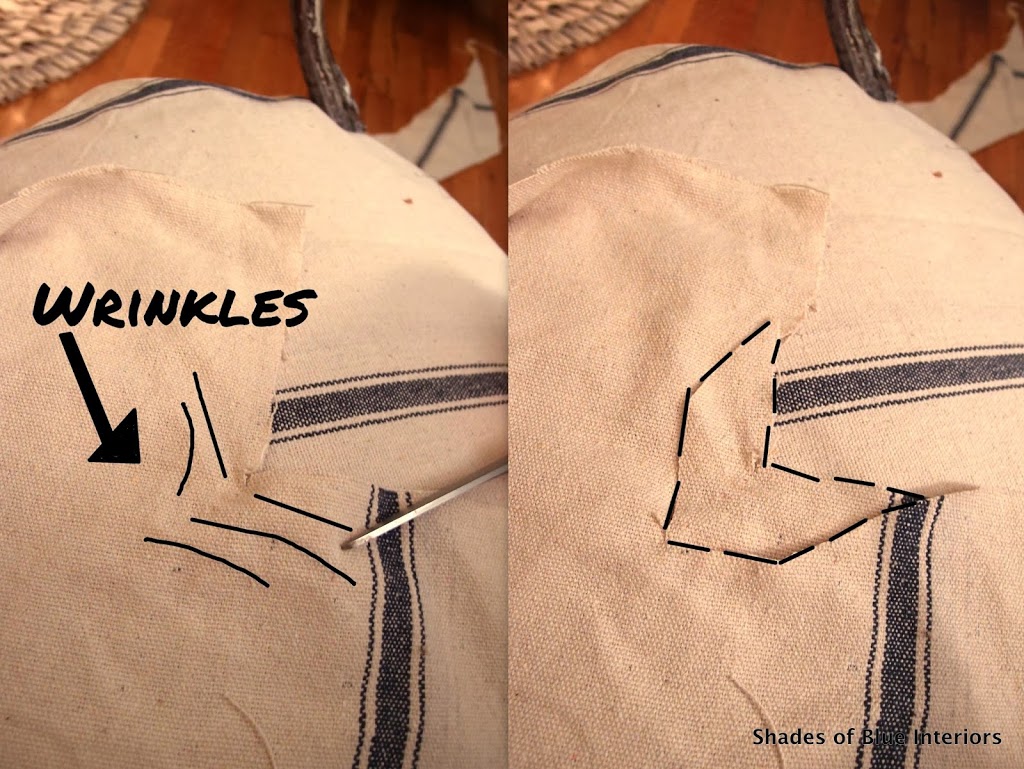
Here you can see what it looks like now when pulled down taut around the leg. Exactly what you want!
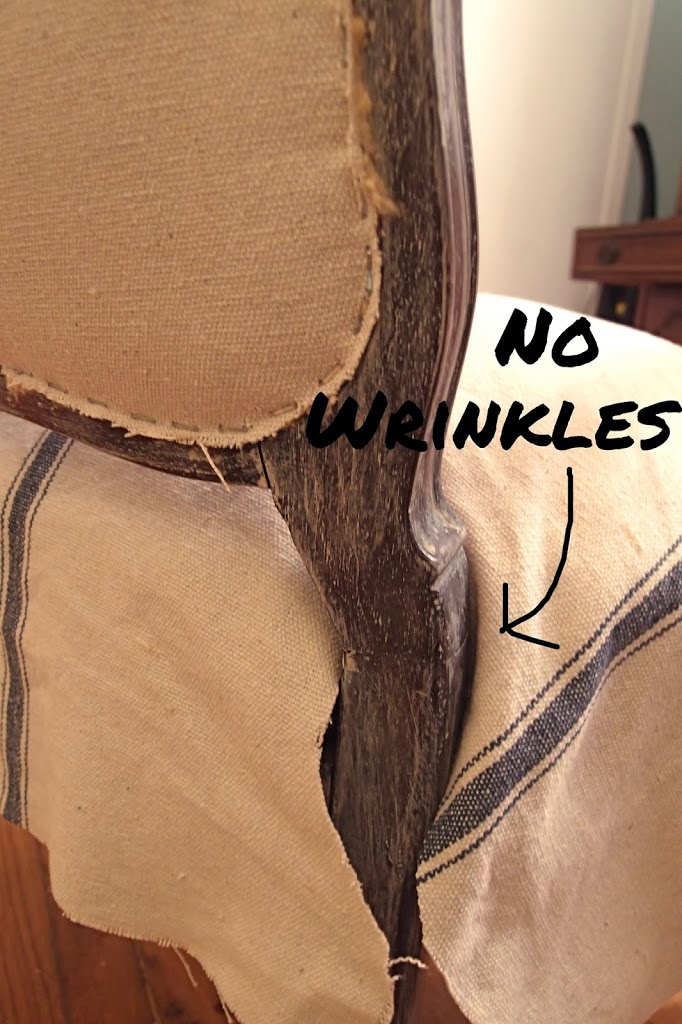
Repeat this process for all 4 legs and staple the fabric in place. I will give you a hint when stapling a seat. Start in the centers to get placement correct, making sure to pull it taut on the opposite side. Then when you finish stapling towards the corners, pull the fabric at a slight downward angle (since the seat is curved). This will make sure you don’t get any funky extra fabric tucked around the arms and legs (at the back).
So here it is! Minus trim, but still looking absolutely lovely!

And here she is WITH the trim!
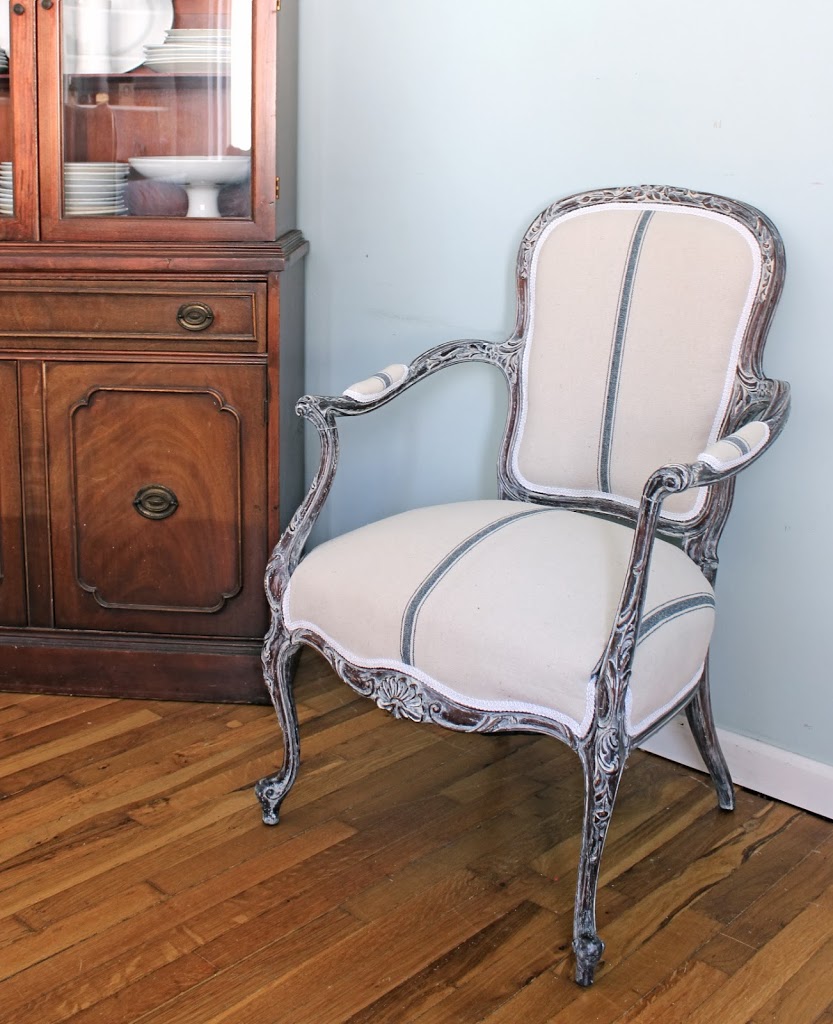
I’m so proud of this one! It was a lot of work, but so rewarding!
CLICK HERE To see the French Chair Final Final Reveal and see the history of this chair
LOVE the chair, Rachel! You did a beautiful job! Definitely pinning this for future reference!
Just stunning, beautiful work.
Anne
What kind of staple gun do you use ?
Great job!
Holy wow, this turned out so gorgeous :]
This is gorgeous! I’m so glad I found your blog 😉
Hugs,
Jamie @ somuchbetterwithage.com
Just what I’m looking for re: fabric. Where did you get fabric used on this chair? Thanks.
So glad I ran across your blog. Today I’m starting to redo a Victorian settee which I’m using black and white flour sack fabric. I just couldn’t decide on whether to paint the frame cream or charcoal but I love the whitewash finish, so decision made!