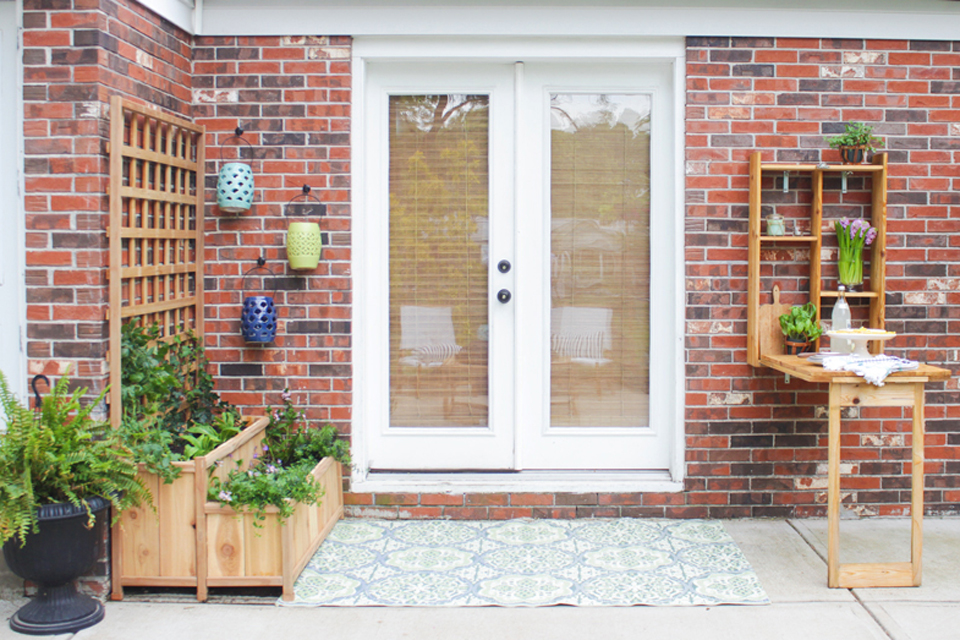
Last week when I shared my creative patio lighting ideas, I also shared a picture of a planter I built for a previously awkward corner on my patio. I had several of you interested in building one for yourselves, so I figured today I would share the tutorial on how to build this tiered planter with trellis.
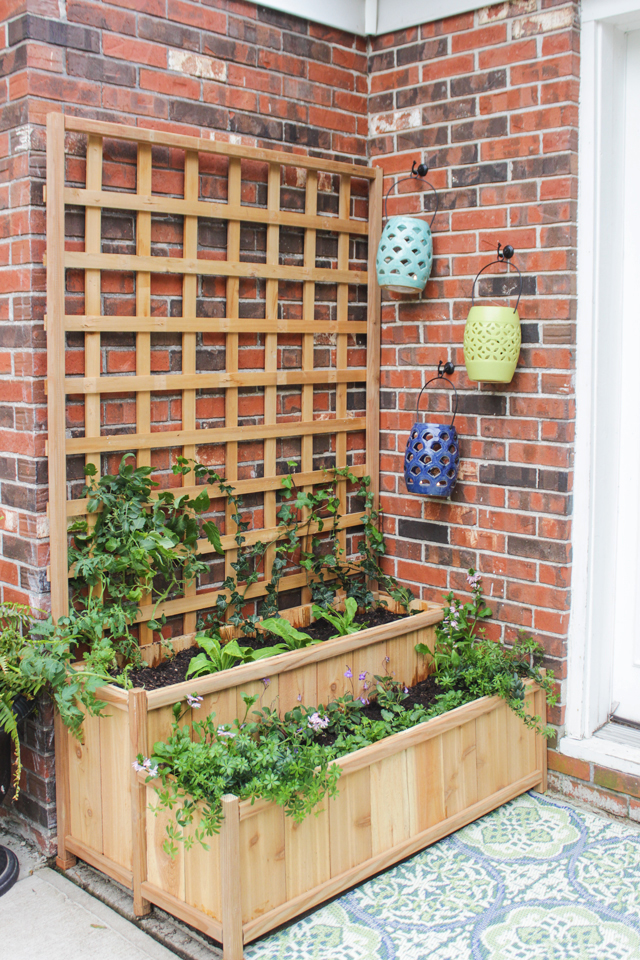
Planter with Trellis Dimensions: 4’ long, 2’ deep, 6 1/2’ tall (including lattice), with 14” height for first planter box and 18” height for second planter box
Shopping List:
11 cedar fence pickets (assuming 5 1/2″ wide), 6 feet long
5 cedar (or cedar-tone treated pine) 2x2s, 8 feet long
6 cedar (or cedar-tone treated pine) 2x1s, 8 feet long
8 cedar lattice strips, 4 feet long
7 cedar lattice strips, 4 feet long (or use 1 large folded garden trellis, 4’ x 3 1/2’ found in garden section)
2” exterior pocket hole screws, about 24
2” 18 gauge exterior nails
3/4” 18 gauge exterior nails
exterior wood glue
3/4” exterior wood screws
2 1/2” exterior wood screws
Tool List:
Electrical brad nailer or pneumatic nail gun
Kreg pocket hole jig
Cordless drill
Hammer
Wire-cutters
Cut List:
20 cedar pickets @ 18” (4 sides of large planter walls)
12 cedar pickets @ 12” (3 sides of small planter walls)
15 cedar pickets @ 11 3/4” (bottom slats — 1 cut a little less than half-width to fit)
9- 1x2s @ 45” (both planter long wall sides & inside supports)
12- 1x2s @ 11” (for both planter short wall sides & inside supports)
4- 2x2s @ 18” (inside large planter sides)
4- 2x2s @ 12” (inside small planter sides)
2- 2x2s @ 14” (small planter legs)
2- 2x2s @ 20” (large planter legs)
2- 2x2s @ 80” (sides of trellis frame/large planter back legs)
1- 2×2 @ 45” (top of trellis frame)
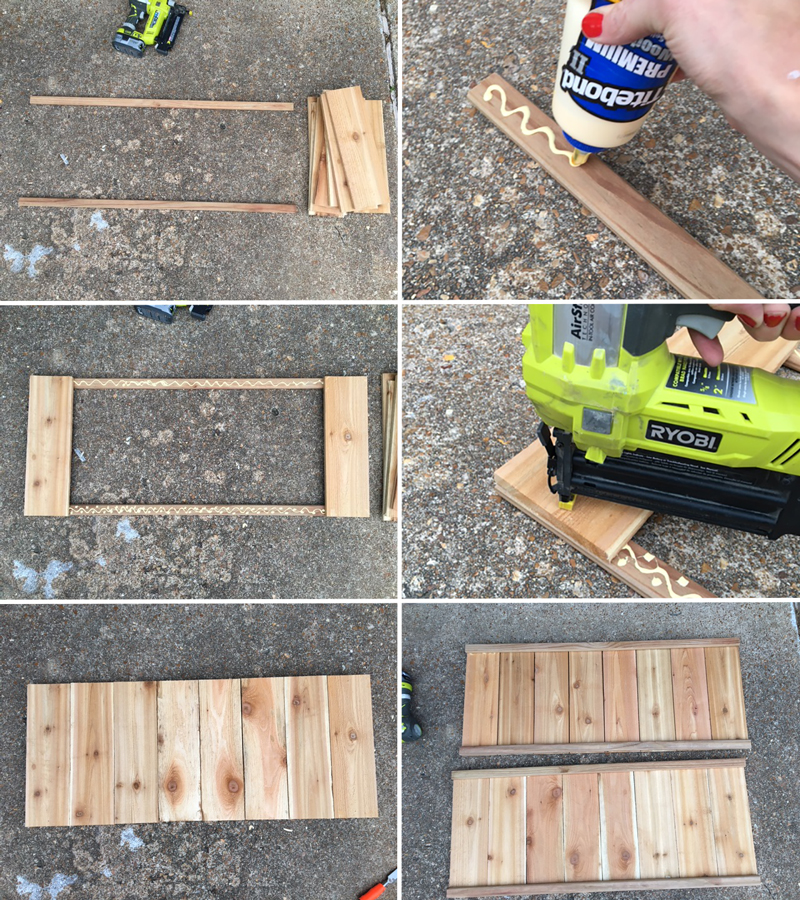
Step 1: Build Planter Walls
Place 2 of the 45” long 2x2s 12” apart and place a corresponding length picket on either end so the ends of the pickets are flush with the 1x2s on both sides. Attach pickets to 1×2 with exterior wood glue and 3/4” nails. Place the remaining 6 pickets in between the pickets on either end, allowing a thin gap between each picket (1/16-1/8”— doesn’t haven’t to be exact or perfect). This spacing will allow the wood to expand in heat/moisture without causing the planter walls to buckle. Repeat this process for both planter walls that are 18” tall, and for the 4 side planter walls that will only need 2 pickets each instead of 8.
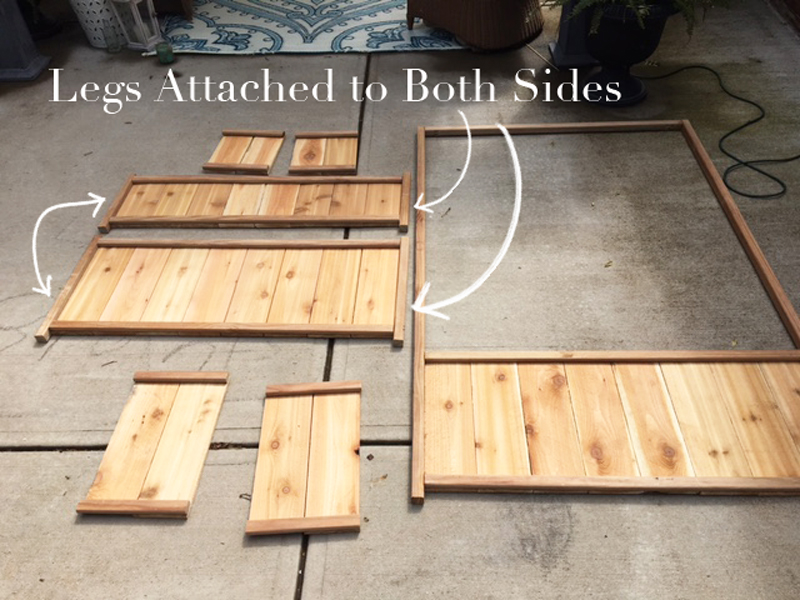
Step 2: Attach Planter Legs
Place the longest 2x2s on either side of the 18” tall planter wall, with the 1x2s facing down. Use a Kreg pocket hole jig to drill 2, 1 1/4” holes, close together on each corner, as close to the edge as possible so that the pocket holes are going through the pickets and the 1×2. Attach to the long 2x2s with exterior wood glue 2” exterior pocket hole screws, leaving 1- 1 1/2” space between the bottom of the planter wall and the bottom of the 2x2s (this allows for water to escape beneath the planter).
Note: Slow the torque down on the cordless drill so that the wood doesn’t split when driving the screw in. Also, don’t over-tighten the screws.
Repeat this process with the remaining 2- 45” long planter walls, but instead of using the long 2x2s, use the 20” -2x2s for the 18” tall planter wall, and the 14” – 2x2s for the 12” tall planter wall. Drill 1 1/2” pocket holes on either end of the 45” long 2×2, and attach at the top between the two 80” 2x2s, so the pocket holes are facing the back or down. This will be the frame for the trellis.

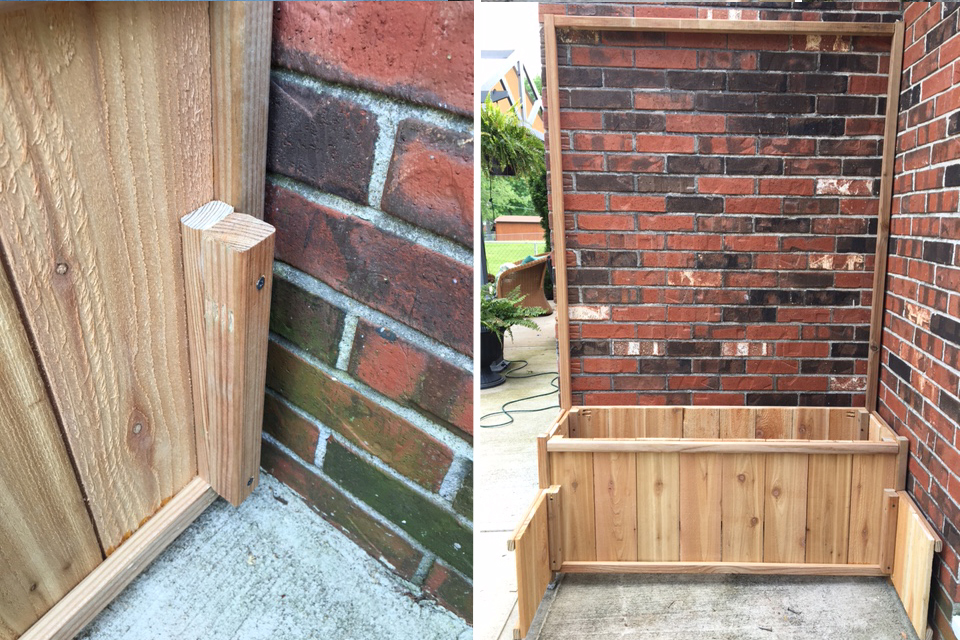
Step 3: Attach Planter Walls Together for Large Planter Box
Prop up the back of the planter with trellis frame against a wall. Use 2, 3/4” exterior wood screws to attach 1- 18” long 2×2 to one end of the planter wall, flush against the trellis frame. Make sure the screws are spaced down about 1 1/2-2” from the top and the same distance up from the bottom so that it doesn’t interfere with the pocket hole screws. The screws should be driving all the way through the 2×2 and through the picket. Place the side planter wall against the 2×2 that was just attached and drive a 2” exterior wood screw at the top and bottom so that the screw drives all the way through the 2×2, the picket, and part-way through the 1×2 on the other side.
Repeat this process for the other side. Attach a 2×2 in the same manner to the other (front) 18” tall planter wall, then use the 2” screws to attach it to the sides. The large planter box is now complete with the trellis frame.

Step 4: Attach Small Planter Walls to Large Planter Box
Because there is a 1×2 along the bottom of the front planter wall of the large box, you will need to drive a 2 1/2” exterior wood screw on the top and bottom of both a 12”- 2×2 AND 12”- 1×2. The 1×2 accounts for that space and then the 2×2 can be flush with the sides. Do this to both sides, just inside the 2×2 legs of the large planter box. Attach the side walls in the same manner that was done in step 3 for the large planter box, then attach the front short wall.
Note: Many patios are built at a slight slant so that water drains away from the house. This planter is build square and level, so you will need to use 2-3 wood spacers (2x2s) to put under the legs on one side to keep it level. Measure the gap you need and cut some scrap wood to fit.
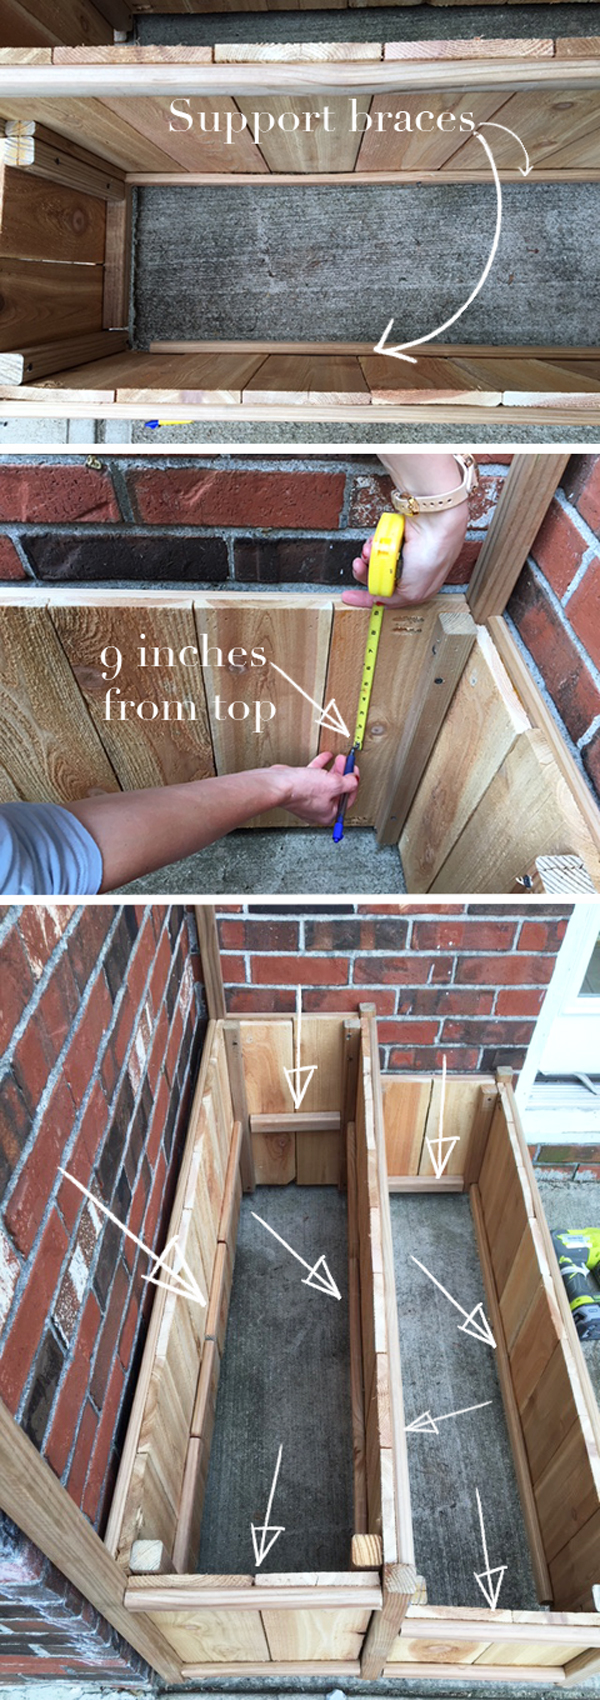
Step 5: Attach Support Braces Inside Planters
Use the 3/4” nails and cordless brad nailer to attach 1×2 support braces (45” long or slightly less) inside each planter box to support the bottom slats. In the large planter box attach them 9” from the top and on the small planter box attach them flush with the bottom of each wall, so that they are the same height as the existing 1×2 that is along the bottom of the front planter wall of the large box.
Step 6: Build Trellis
To build the trellis, you can either buy cedar lattice strips separate, with the lengths needed, or buy a pre-built large folded trellis in the garden section and take it apart. I bought 1 of them at Lowe’s for $25 and carefully pried them apart using a hammer, then snipped off the staples using wire-cutters. This allowed me to use their long strips for the width, and the short strips I used for part of the vertical strips and used shorter pieces cut from the excess to complete the vertical length needed. Once you have all the lengths you need, simply attach the 4’ lattice strips first horizontally starting 4 1/2” down from the top 2×2, nailing with 3/4” nails angling down on either side of the lattice frame. Work your way down making sure there each one is spaced 4 1/2” apart. Then attach the 5’ long lattice strips (or 2 shorter lengths for each vertical strip, joining them behind the intersection of a horizontal strip) vertically, stapling at each intersection, but make sure to change the nail-drive adjustment to the least amount possible, so it doesn’t go through the other side.

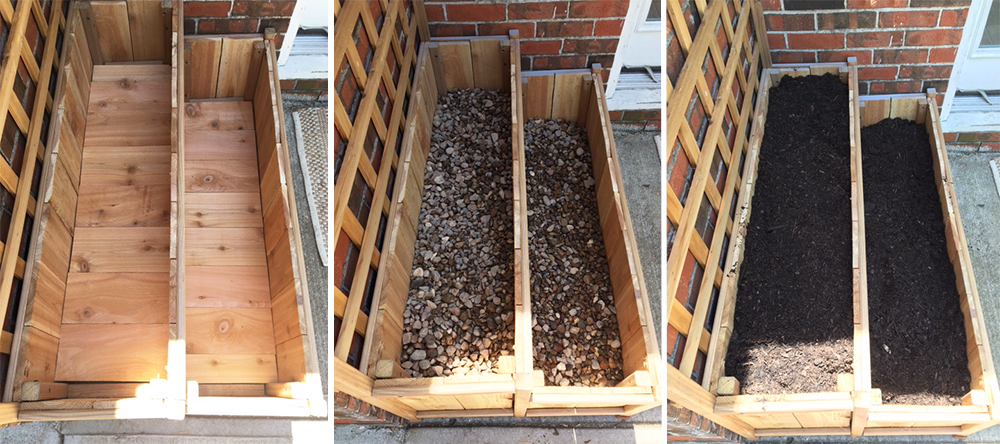
Step 7: Place Bottom Slats in Planters and Fill
Cut 14 pieces of picket fence in about 11 3/4” lengths and place them on top of the support braces. On one end you will need to cut one of the pickets in half, width-wise, to cover the space. The slats should have plenty of wiggle-room on all sides so the water can drain, but if yours are a little tight, then just drill a couple of holes. Add gravel and soil and you will be ready to fill with plants!
Voila! Isn’t cedar pretty? If you want to keep it looking like this, make sure to seal it with Thompson’s Timber Oil in natural… if you don’t mind, it will just slowly fade and turn gray with age, but cedar is naturally rot/mildew and bug resistant.
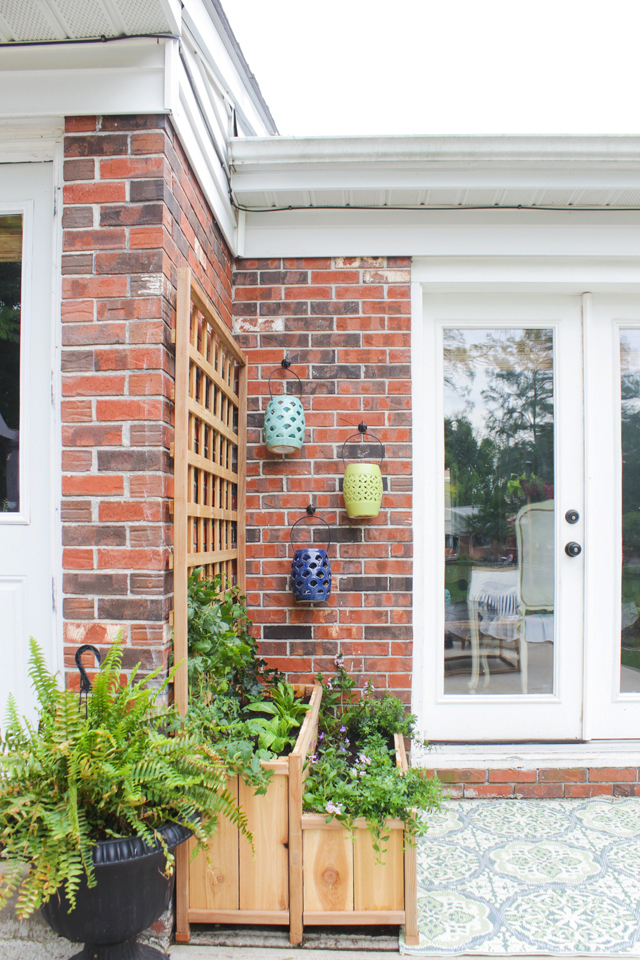
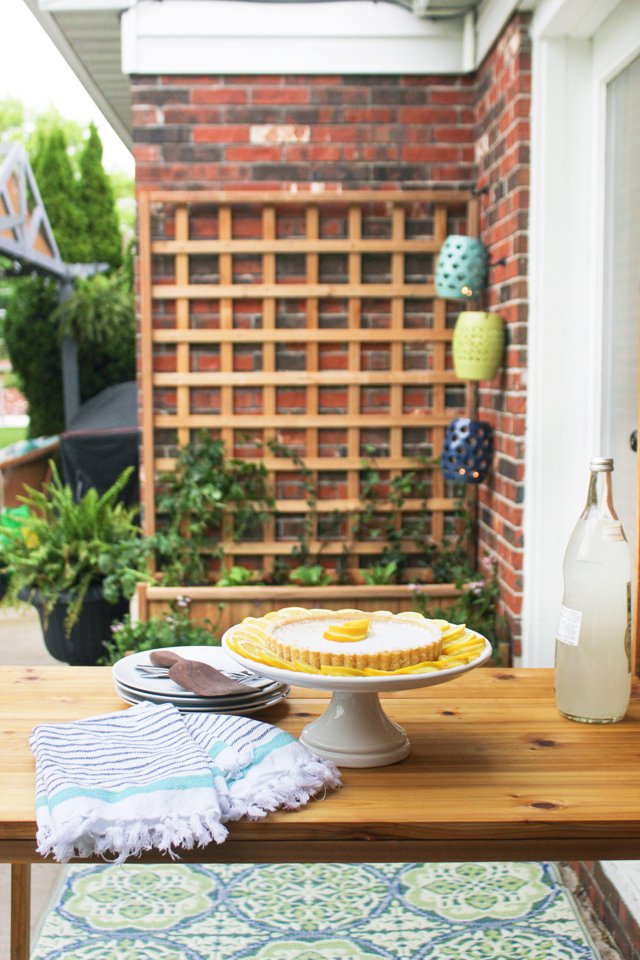
I think my most favorite part about this is seeing this little corner when I look out our patio doors from the dining room. It looks intentional and functional! Oh and in case you were wondering, that outdoor rug is from World Market for only $20 (cheaper with a coupon).
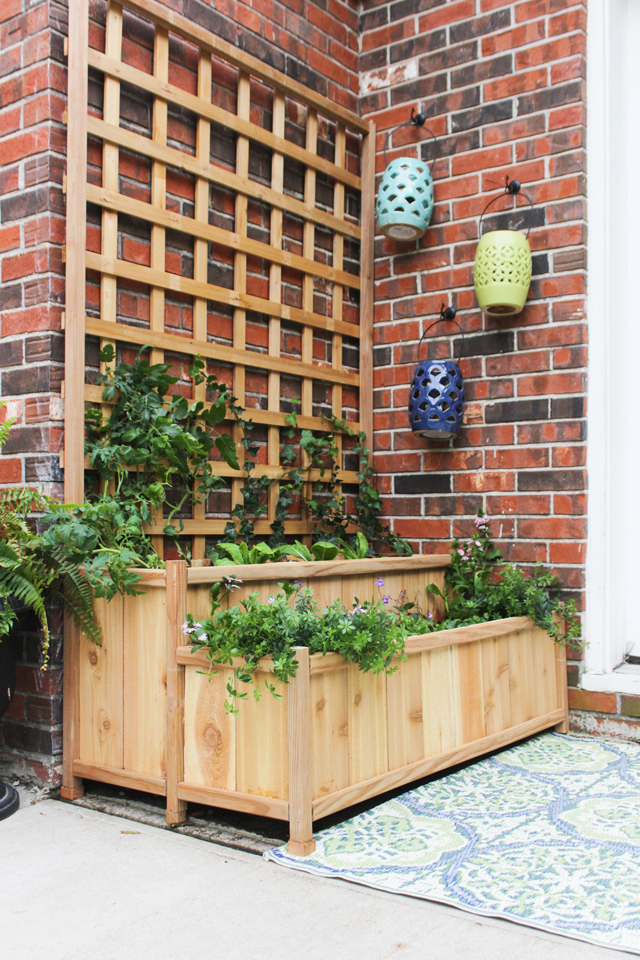
This planter with trellis would be great as a privacy divider… I can totally see a pair of these on either side of a patio walkway, so that vines could climb up and create a cozier space.
I originally hoped to find some shady veggies (because this corner sees a lot of shade), but it turns out they are few are far between, so the sunniest corner got a few tomato plants, and the rest of the planter I filled with different flowers. Fingers crossed I can keep them alive all summer! 😉
Thanks for visiting and let me know if you build one!

hi rachel..i just found you a few months, and seriously i love everything that you have done!
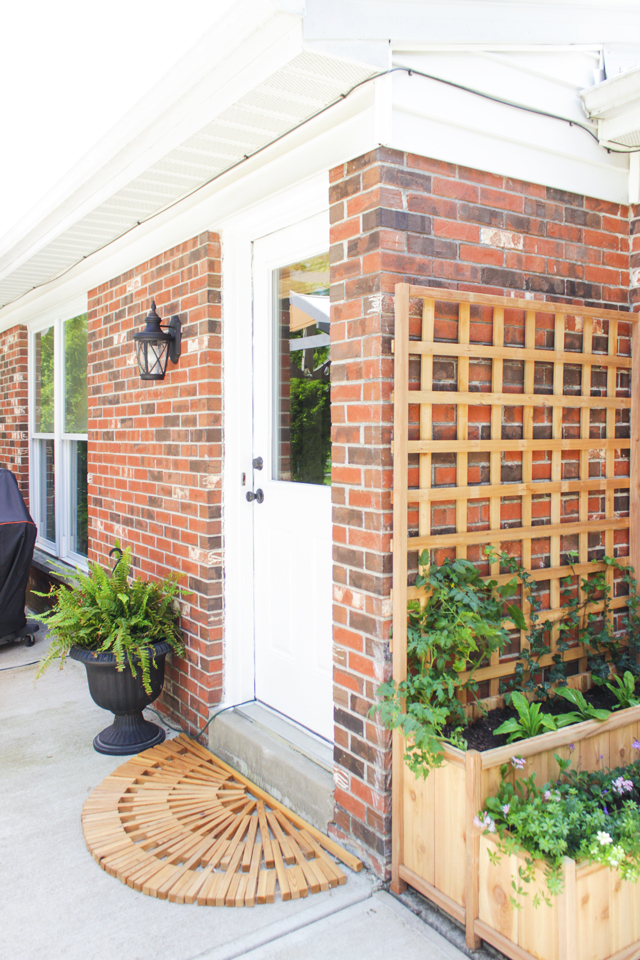
quick question, did you make the half moon wooden mat at your back door in the above pic. if so, do you have a tutorial for it.
i have so much scrap wood from projects… just cant throw anything out…this would be a great project to use up the scrap…and my front mat is ready for trash
Michele, Sorry I don’t know how I missed this earlier! Here is the tutorial for the mat: https://www.shadesofblueinteriors.com/diy-wooden-door-mat/
This looks great! Can’t wait to build this!
Thanks for sharing! I plan to build a slightly modified version. Just confused on step 3 where it notes to drive a 3/4″ screw through a 2×2 and picket. The 2×2 would be 1.5″ thick and I assume picket is 1/2″ thick, so is the support supposed to be a 1×2 with 3/4″ screw or is the screw supposed to be 1 3/4″, which would need to be added to shopping list? Then it notes to use a 2″ exterior wood screw to attach side but that wasn’t included in the shopping list, unless you just used the pocket hole screws for that.
Thanks again
Hi… love this trellis. I will not have access to my computer or phone when I go to build this. Is there a way to print these plans?
thanks……dg
Hello Donna – I’m not associated with the site, however there are a couple of ways to print, it just depends on the amount of paper and ink you are willing to use.
– Using the Print command – adjust the pages to print (such as to remove comments) and adjusting “Scale” will help to a minor degree.
– More labor intensive… select the items you want (text / pic’s) and Print – Print Selection.
-Even more labor intensive… Open some type of word processing program that accepts graphics (one of many example is MS Word). On the web-page select a segment you want (text / pic’s), select Copy (via Keyboard, or mouse, or Edit menu) return to the w.p. program and Paste into the document. Once you have everything you want – ( I add the web address as a reference / credit to original author…. because I will forget the name and website…. if I didn’t add site to Fav’s list (bookmark) then I still have a reminder… ) then Print the w.p. document.
Hope this helps.