Last week school started around these parts. I was super bummed because I felt like this summer went by TOO fast! I miss having all the kiddos home and the weather still feels like summer! So with school starting, I decided to get my second back-to-school project under-way: a desk for the boy’s room! I built a small desk from a kitchen cabinet face for my pre-school aged daughter HERE and we got a beautiful desk for our master bedroom HERE, so the boys were definitely deserving.
I saw a desk very similar to this one on Overstock, but decided to make my version of it. I think I spent a total of $50, not including cost of pulls on materials for this build!
This desk is exactly 3 feet across but the drawer is larger and it has the little bookshelf by the feet, so the size is PERFECT for a small space like a dorm-room!
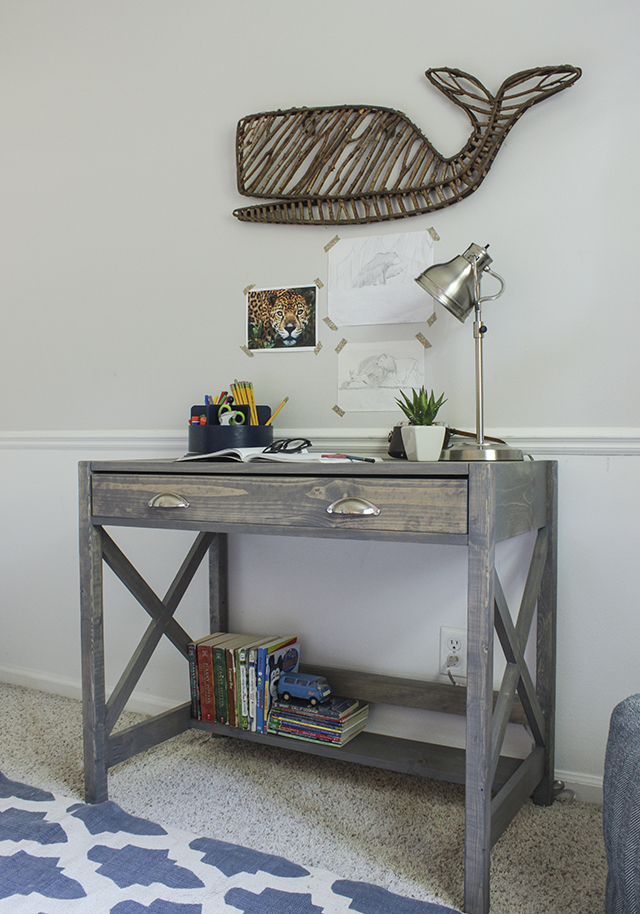
I’m really into the ‘X’ themed furniture lately and there is more coming!
The stain is mostly the Weathered Gray stain by Rustoleum, but it was just a tad too gray for me so I dipped the same rag that had the the gray stain on it, into a bit of Special Walnut stain by Minwax and rubbed it right on top. It added just the hint of warmth back to the wood.

I’m so proud of the desk mostly because it includes my first EVER drawer! I’m not a huge fan of metal glides, so I created my own wood glides for this, based on the same design that all the antique dressers that I have been refinishing for years, have. The silver cup pulls are from Lowe’s.
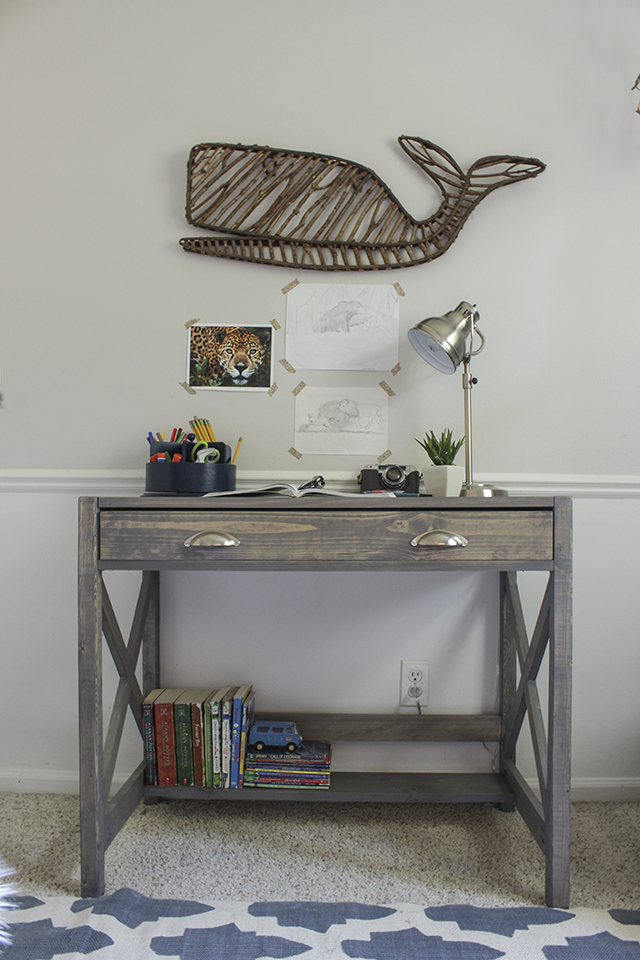
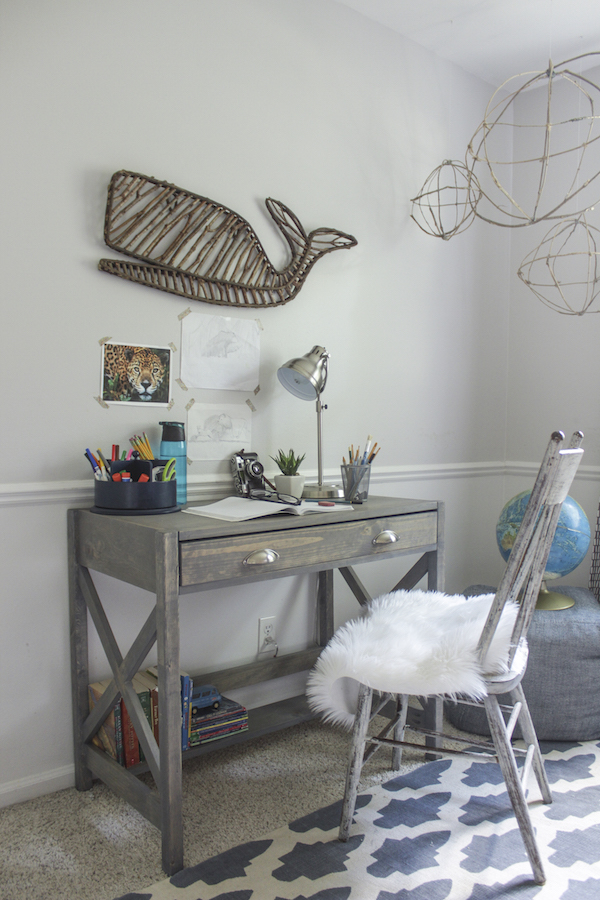
When I was setting the desk up in the boy’s room, I just got the Land of Nod catalog in the mail with all their back-to-school desks. So I actually studied their styling for a bit and was really digging how they made things looked a bit lived-in and almost messy, but in a beautiful way. So the styling I did for the desk is actually how it looks and is more real-life than a typical staged furniture makeover I have done in the past.
I also love the airy-ness of this desk and how visually ‘light’ it is for this small room, especially compared to the navy bookcase that was there before. I moved the bookcase into the closet and now the boys have a quiet place do to homework!
FREE downloadable digital PLANS HERE!

So, so, SO good, Rachel! I love X furniture too 🙂
You are absurd. 1. This is awesome. 2. I am taking your word that there will be a time when I will be sad about Back to School. I’m not there yet. 3. I want to build this baaaaaad. Thanks!!
You are just crazy talented.
It looks amazing, now I want to throw out my desk so I can build this!
Love the rug as well, was that a DIY from you?
Please share where the rug was from. Thanks
Thank you very much for this great idea for the children’s table. I think it would be very convenient for a child to do homework sitting at this table. In addition, it is very cool that this table really fit into any interior, and will look great in any room.
Great Project. My daughter and her grandfather would like to build it, but the digital download link isn’t working.
Here ya go: https://docs.google.com/document/d/1mXCnH1i5Nkoys7yg1J2IvCQOu82nj44jTbP_pfNyGlE
Nice post guys!
Can you share what size screws you are using ?
They are in the build plans! When I use pocket-holes I use the screw size recommended for the thickness of wood.
step 5 option 2 is very confusing – I wonder if the text got corrupted? I can’t figure out all the “up!” symbols or the part with the parenthesis “frame)when’s,” Here’s the text in full, hoping you can clarify please:
In order for the drawer to keep from wobbling back and forth, a center glide is needed. To make this, drill two ¾” pocket and u🆙 🆙 either end of the other 33” 1×2 board and all three 17 ¼” 1×2 u frame)when’s, attach one of the 17 ¼” boards with the other up, at the u mark, using 1 ¼” pocket hole screws. The center mark should be 16 ½” — so there should be 15 ¾” from one end of the long drawer frame to the 🆙 glide.
Offset the center glide so it is about ⅛- ¼” above the fronts of the drawer frame. This ⅛ to ¼” rise will be what the drawer glides over. Using wood glue and 1 ¼” pocket holes screws, attach the u frame with the center glide to the side frame, spaced 3 ¾” from the bottom of the 1×2 board that is a part of the desktop. This space will allow the
1×4 of the drawer face enough room with a ¼” allowance. The pocket holes on the 33” board (drawer frame) should be facing the ground if the desk were standing upright.
You are right, it did get corrupted. I tried fixing it, let me know if it’s clearer now.
You get what you pay for. These plans are garbage. I’m half way through building the desk as we speak and while the photos show that the desktop sits about 1/4 inch lower than the boards surrounding it, the plans make no mention of offsetting like this which causes mass confusion, waste of time and waste of materials. I can’t figure out if the plans are for a different version of this desk or if they’re just written poorly. Don’t waste your time.
Chris, I hope we were able to get this cleared up in our emails, but just so everyone else can see, the digital photo is, in fact, misleading– there is a 1/4″ lip on the underside of the desktop (so the 1×2 is flush with the 1/2″ top). If you used 3/4″ plywood instead of 1/2″ ply, it would be flush on both sides. However, even with the 1/4″ lip, it should not affect the construction or aesthetic– you don’t see it when it’s all together.
Questions when reviewing the plans.
Step 2.
a. Why is the bottom shelf 33 1/4″ and the back support 33″? All of the pieces on the side frames are flush on the inside edge of the 2x2s? I do not understand why there is a difference.
b. In the first paragraph you say to use an offset of 1/4″ to 1/2″ back from the inside corner of the rear 2 x 2 post to prevent the screws from going all the way through the wood? Why? How is it different from the pocket screws holding the side panels? Also, if 3/4″ board is going in a 2 x 2 post why would the pocket screw have any problem at all– it is meant to go into an even thinner 3/4″ board rather than the 2 x 2 posts?
c. If the back support is spaced rearwards 1/4″ to 1/2″ from the inside corner of the rear post then the top will not fit tight against the back support–unless it is back exactly 1/4″ to fit with the 17 1/4″ top depth, no?
Step 5.
a. First paragraph. What is the “1 x 3 back board” you speak of and where does it go, it is not pictured.
b. You mention offsetting the glide so it is 1/8 – ¼” above the front of the drawer frame. Why not give a specific measurement so the openings around the drawer front are equal on all side. In Step 9 you call for a 32 ¾” drawer front which would yield a 1/8” space on each side of the drawer front. With a ¼’ offset of the drawer bottom supports the spaces on the top and bottom of the drawer front would be ¼” versus the 1/8” on the side. With the smaller 1/8” offset this would result in a 1/8” space at the bottom of the drawer front and a 3/8” space at the top of the drawer front. Why not use specific measurements that would result in consistent gaps?
Step 11.
a. I believe your measurement in the cut list for the drawer rear should be 31 1/8”, 1/8” less than you show. The smaller measurement would account for the 1/16 offsets you show where the drawer sides meet the drawer front (32 ¾”’ less two 1/16” offsets, less two ¾” drawer sides equals 31 1/8”, no?)
b. Your cut list shows 18” length for the drawer sides. Adding the ¾” depth of the drawer front gives a total drawer depth of 18 3/4”, versus the depth of the opening of 18 ½”, before any setback as shown in Step 2 c. above. So it seems the ¼” setback is needed, although a large one, as mentioned, would result in the drawer being set back from the face of the posts and top unless small stops were used to space it forward?
You might caution people to avoid having the pocket screws hit each other in the corners of the posts.
It would be nice if you labelled the pieces in the cut list as to where they are used.
Your plans still have corrupted text.
Hi! I was wondering if you could go back into the document and clear up the instructions? The text looks like it has been corrupted. Also could not figure out but what is the lattice for?