Today I’m participating for the first time in a monthly series of Themed Furniture Makeovers with some of my favorite furniture refinishing blogger friends. Every month we have to refinish/build a piece of furniture that coordinates with that month’s theme and we share it on the same day! (Their links are at the bottom of this post).
Well, this month’s theme is RUSTIC and as soon as I knew the theme, I knew I wanted to hurry and finish a headboard I’ve had in my garage. So here’s the story…
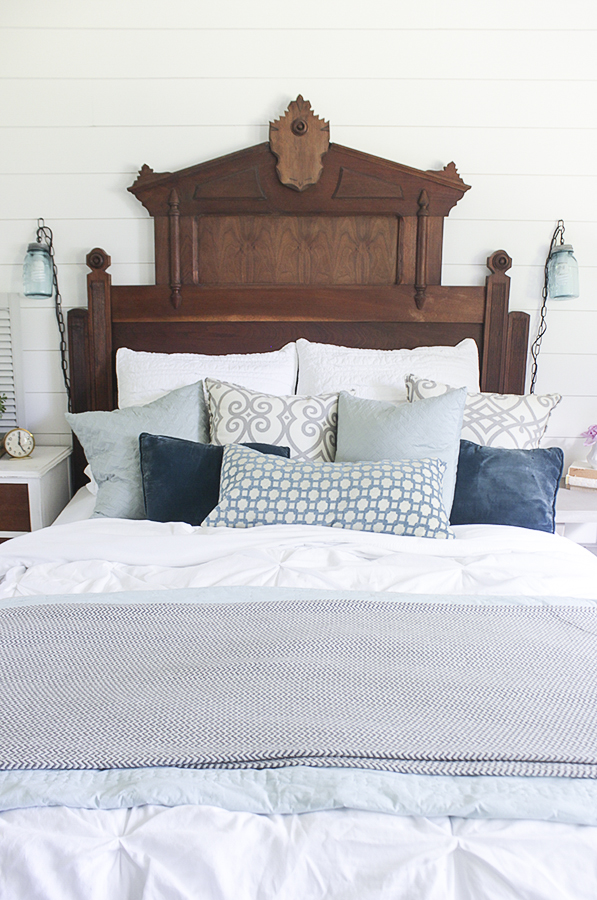
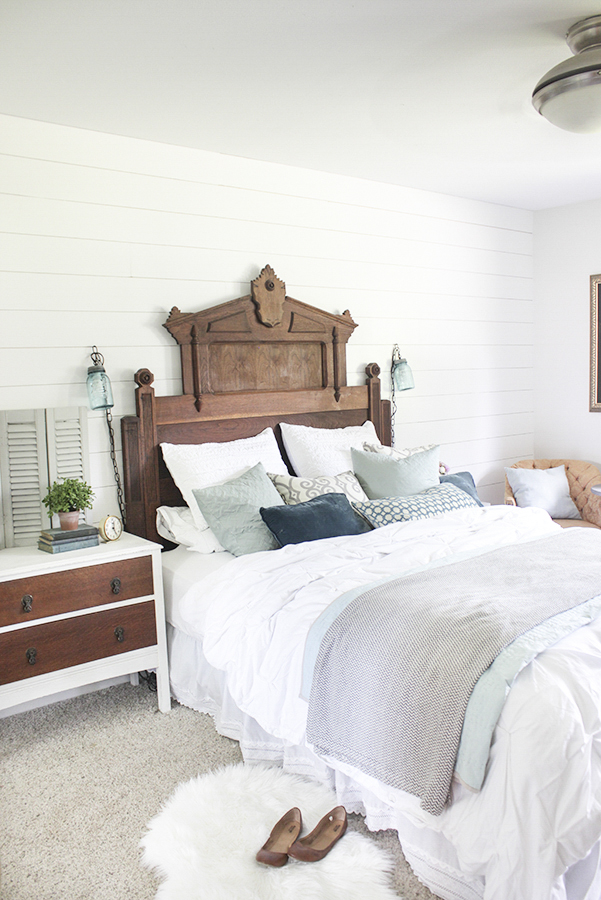
Last fall I posted my plans for the room and I wasn’t able to do much about it until recently, when this themed monthly project motivated me to finally refinish this fantastic Eastlake Headboard that I had sitting around for about a year. It used to have a dark dark glossy finish, so all the details were lost. I started stripping it, but it was taking forever, so it sat in my garage for nearly 9 months. Then, this past month I started making over my master bathroom, and well… once that room got to looking spiffy, I couldn’t just neglect the rest of the room! So I woke up early one morning and got to planking the wall behind our bed. Then I finished painting the walls. Then the trim. Then I calked. Then a few days later I finished stripping the headboard.
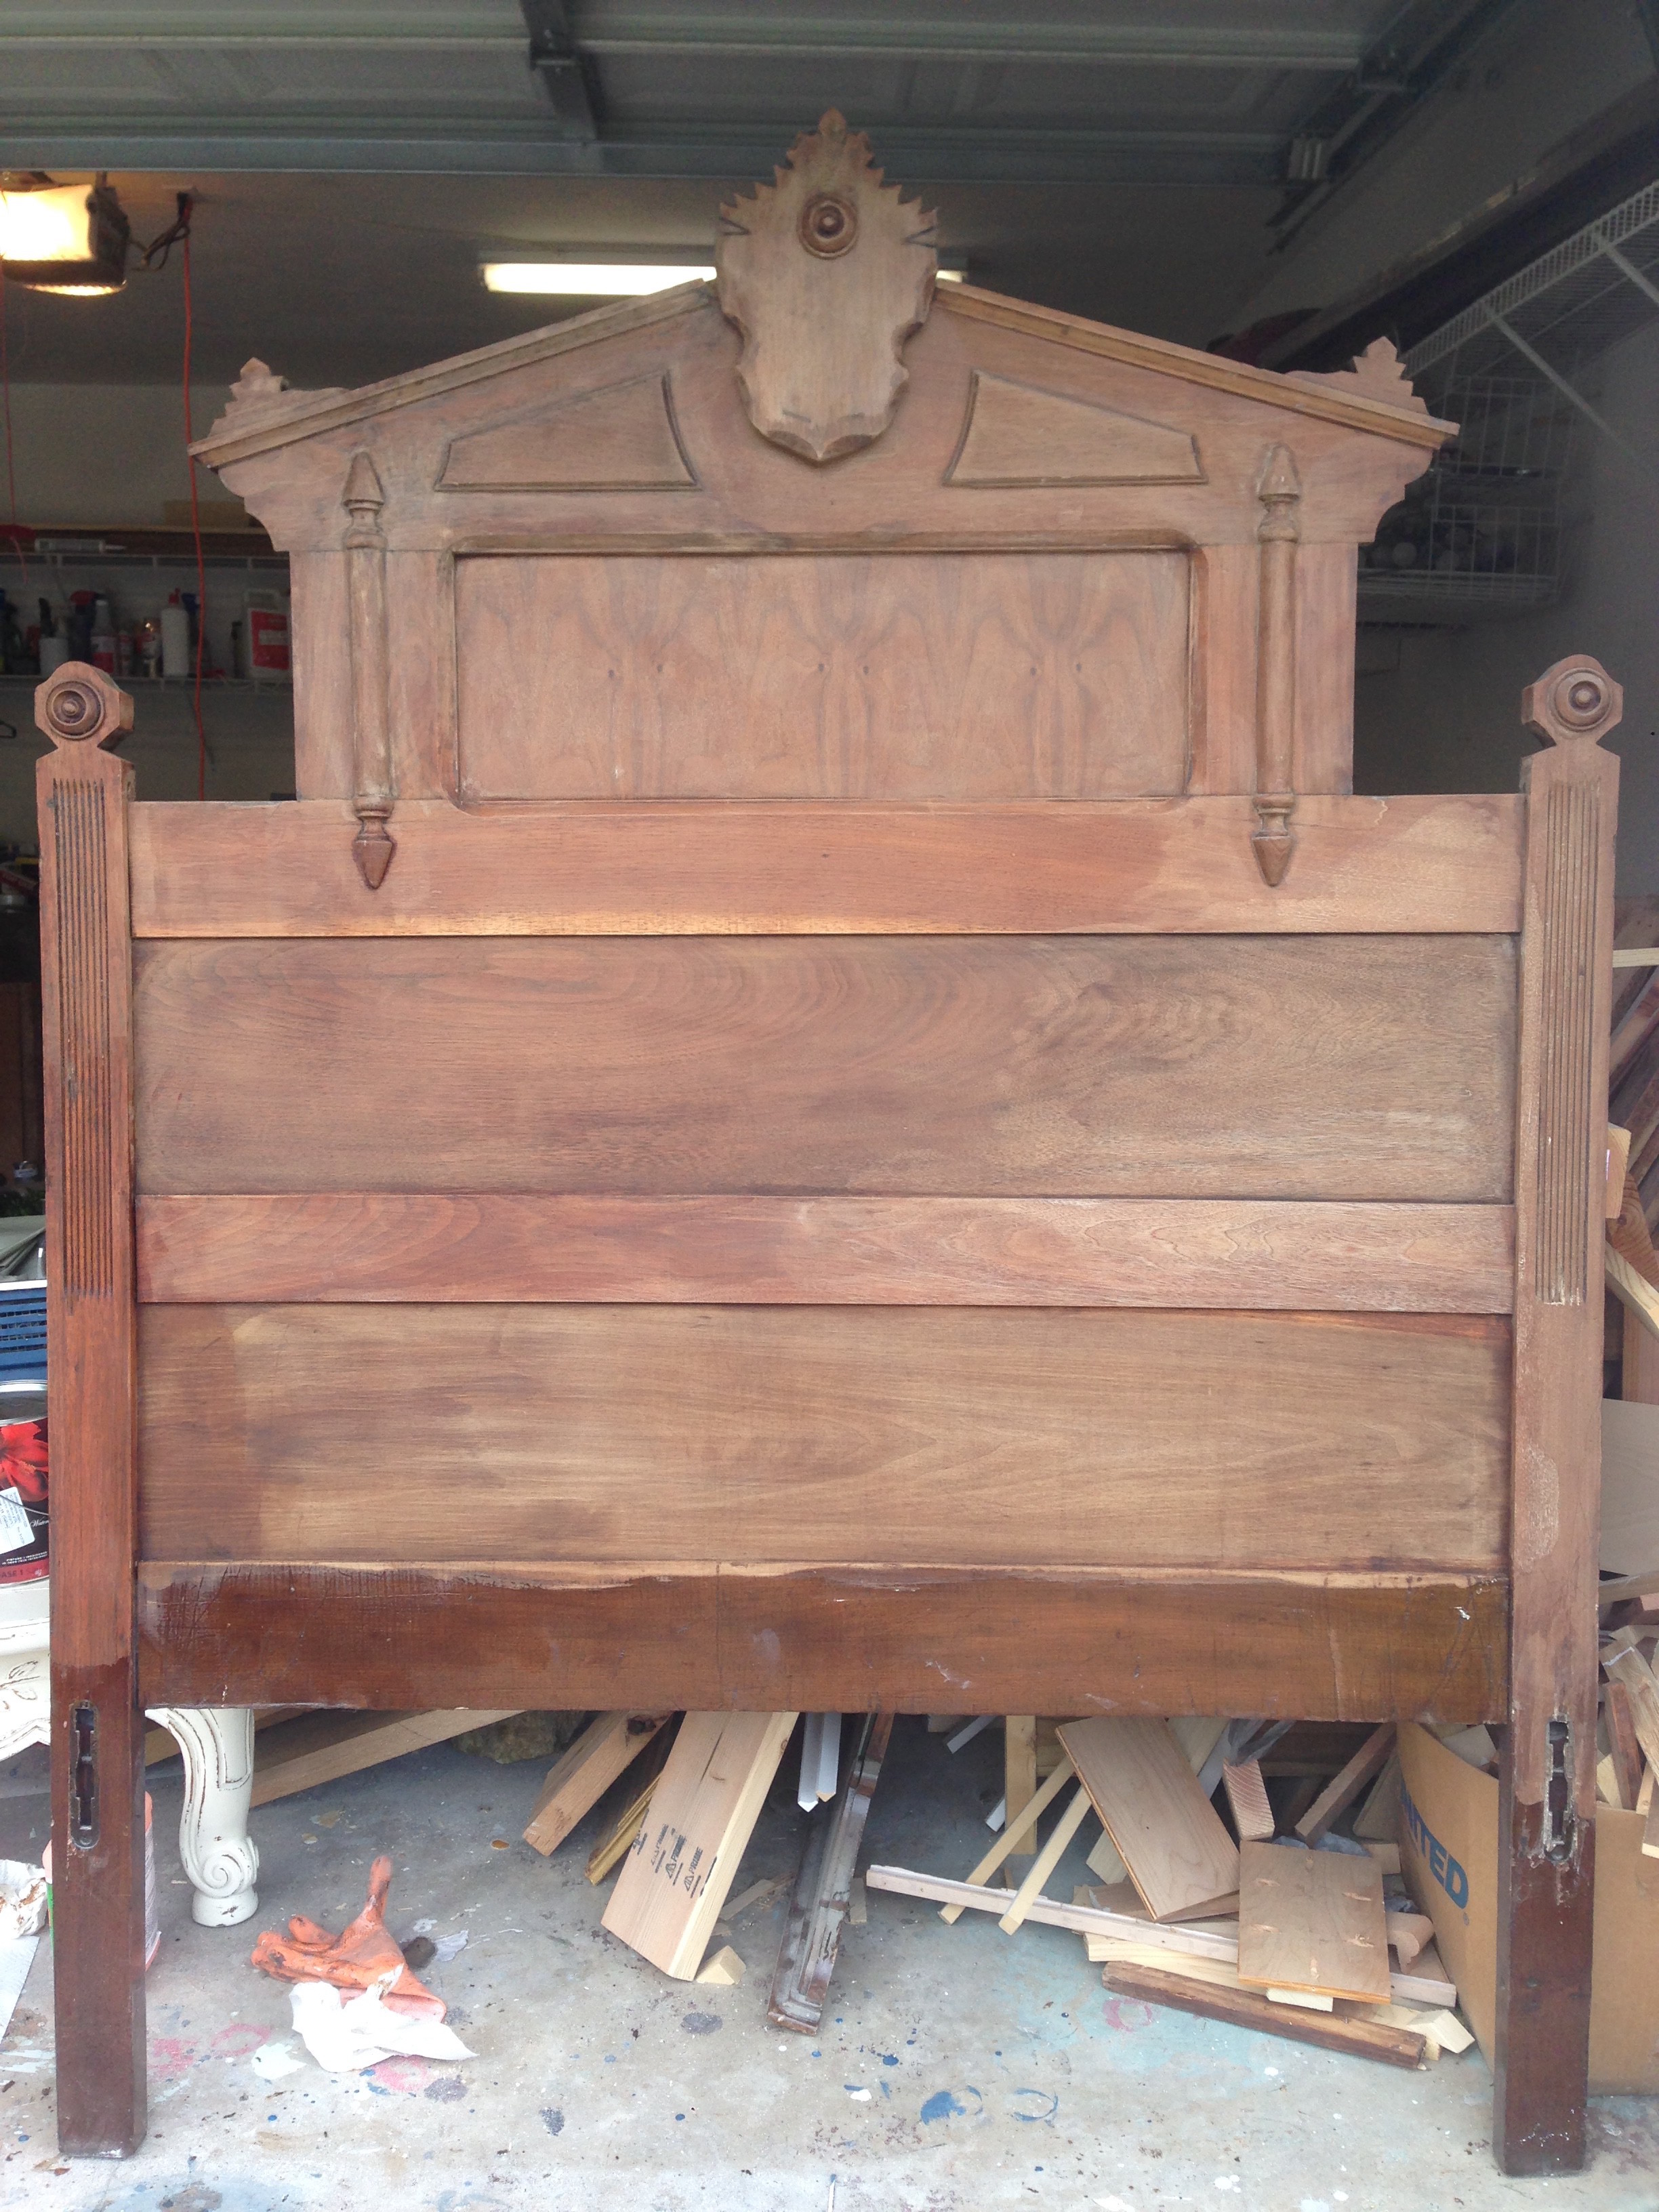
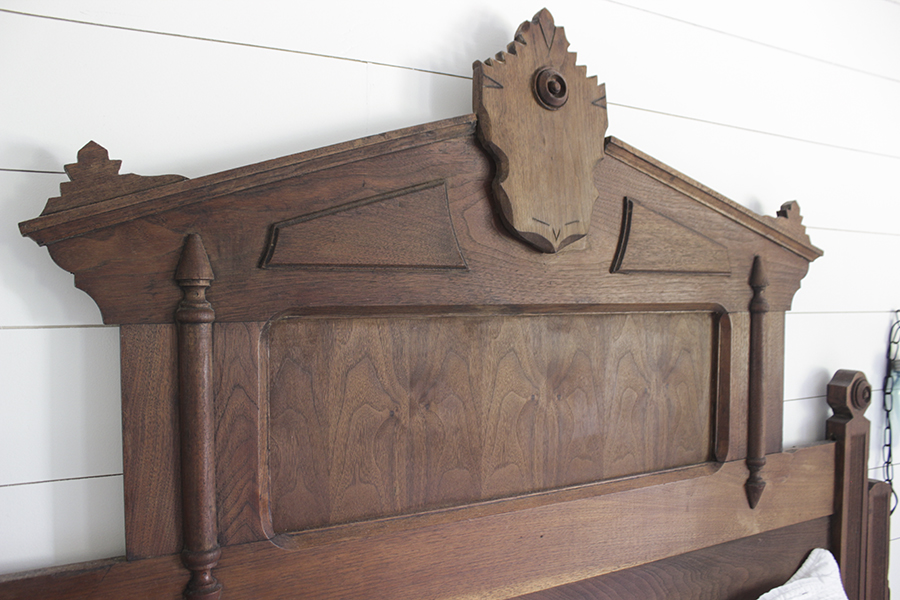
I cleaned off all the stipper, let it dry over night, then wiped the whole thing down with Danish Oil.
Ta da!
I should also mention that it started out as full size bed. As you may or may not know, antique beds didn’t have a larger size than full back in the day. They just didn’t. People were smaller or really liked to cuddle. Or something.
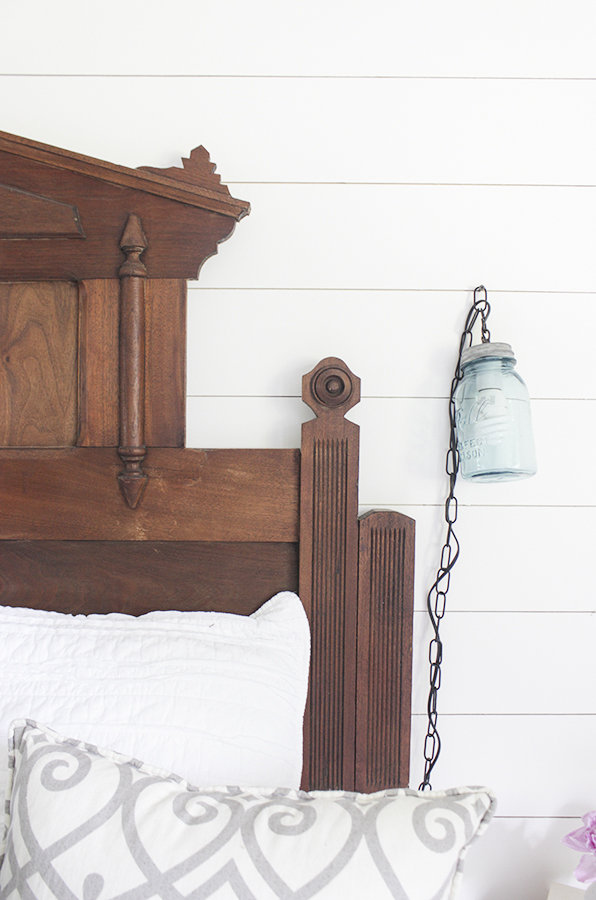
Our current mattress and boxspring was a queen and Bruno wasn’t willing to go down in size, so I cut off the decorative end pieces on the footboard, screwed them on the sides of the headboard, to add the 6 inches I was lacking before… and voila– I had a queen headboard! I’m so pleased that it looks pretty seamless with the design…
From that point I just screwed it into a 1×6 that was the width of the bed frame, then attached the 1×6 to the frame with some hanger bolts and nuts.
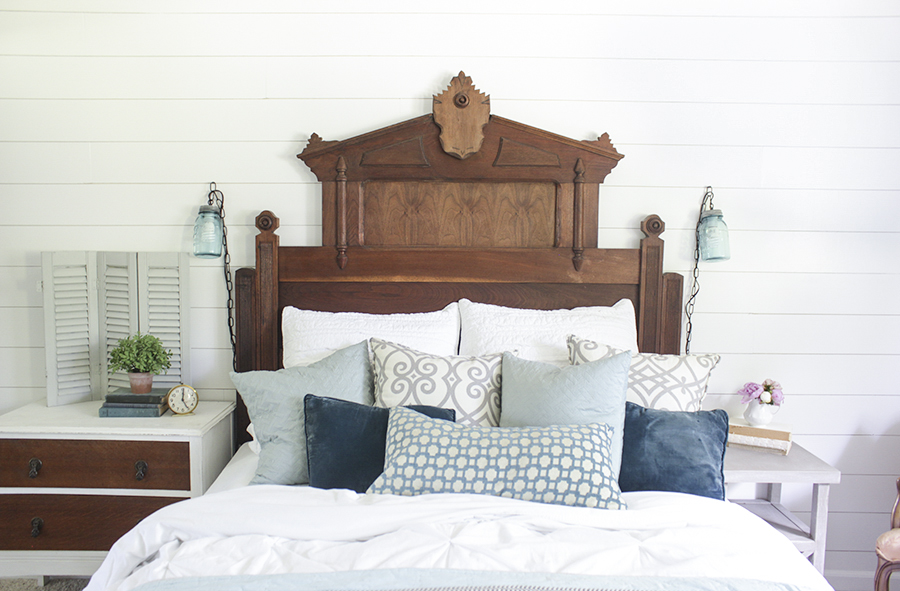
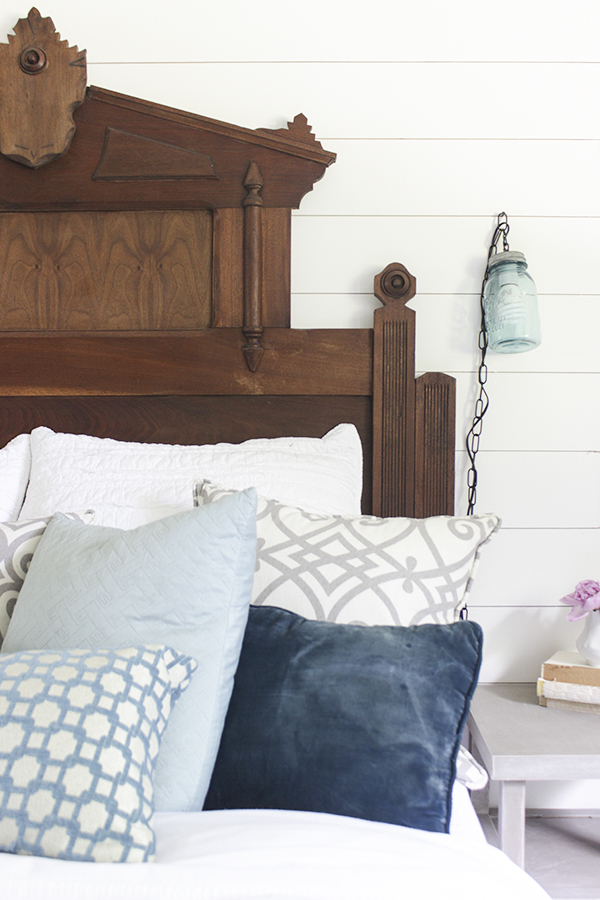
I love the natural walnut color of this headboard and the fact you can actually see the grain and it feels like wood! Lacquered wood is such a shame. I mean… I love painted furniture, don’t get me wrong… but some pieces look better natural, and if you are going to show off the grain, at least don’t put a shiny lacquer on it!
Before I was ready to show off the headboard I had to finish a couple other things too.
I hung my elephant painting on the wall… (I can never find the right place for my paintings… I always think they look ‘off’)
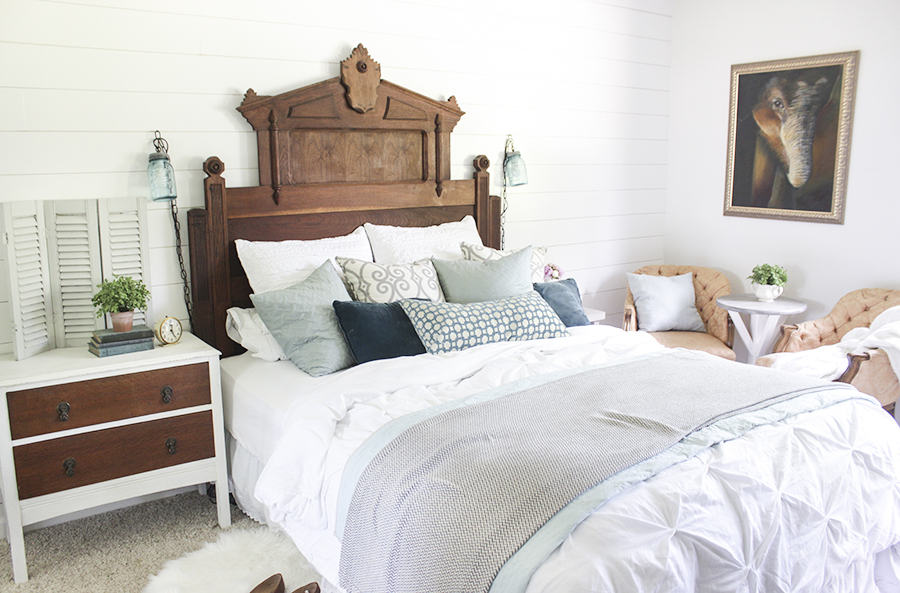
I made a couple of sconce/lanterns out of vintage blue Ball Mason Jars and hung them on either side of the bed…
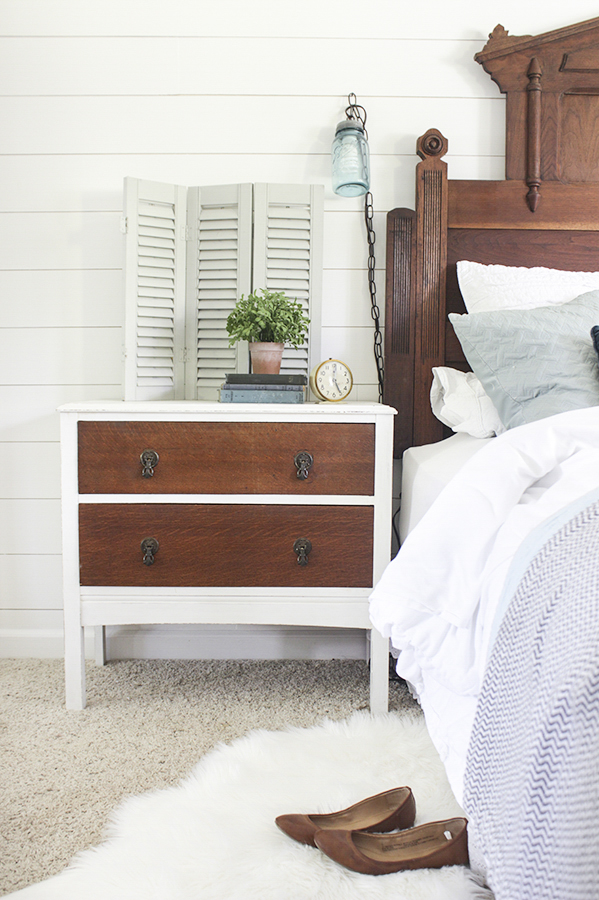
I repainted the shutters on the nightstand I painted last fall in my video tutorial…
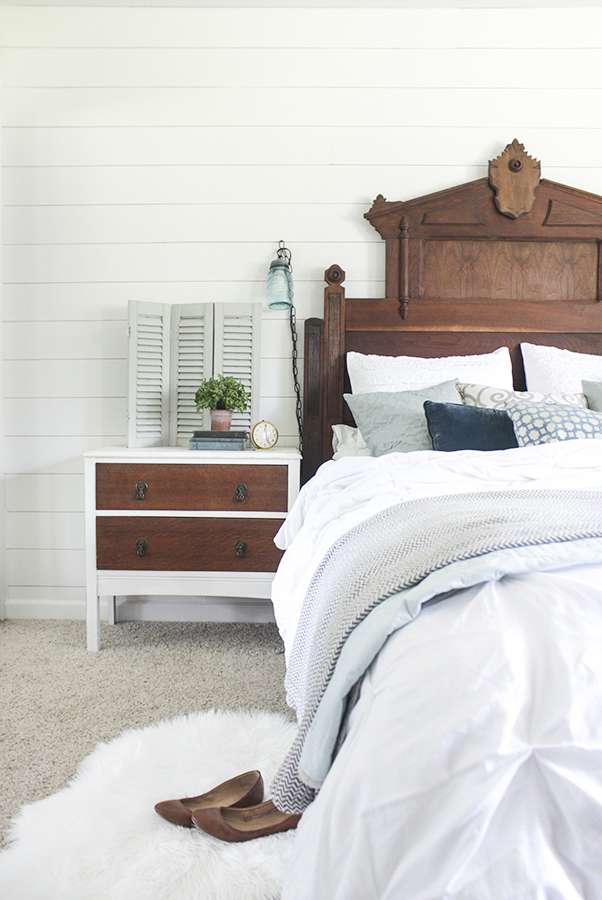
I added a nightstand I built on the other side of the bed and shopped my house for pillows that would coordinate…
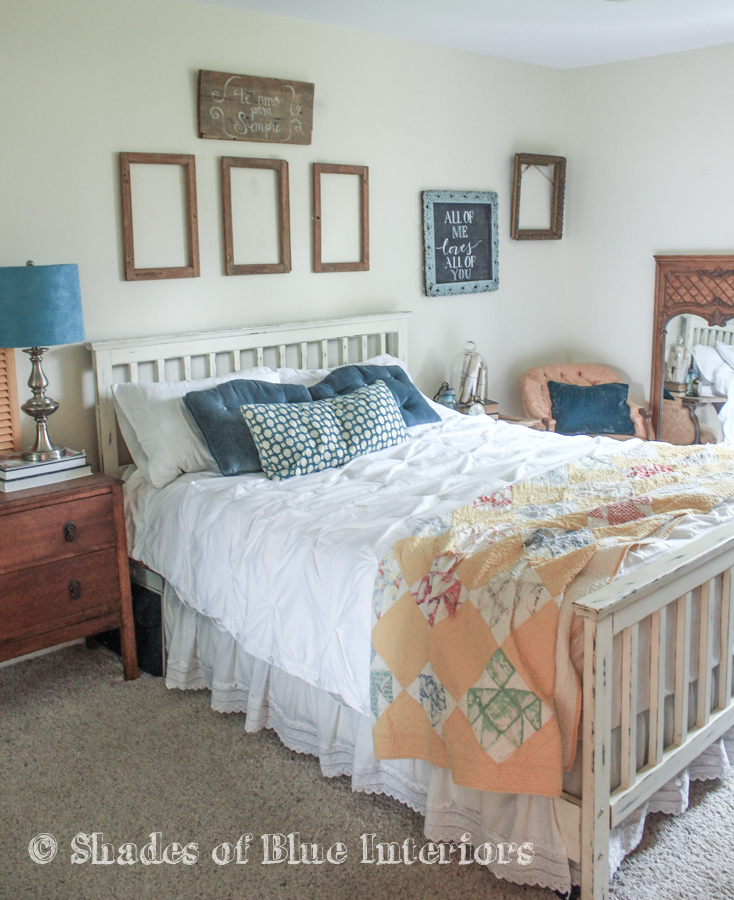
Quick reminder of what the room looked like before:
I still need to reupholster those peachy tufted chairs and I even bought the fabric and tufting buttons… Just waiting on time to do it! I also need a rug still, and I haven’t finished the other side of the room where the TV sits on an antique dresser… but I’m so excited about how this is looking so far!
So what do you think?
Beautiful headboard and I love that you can really see and enjoy the wood grain. I think that my mom has a dresser and nightstand that match your bed. 🙂 You were smart to figure out a way to make this old full bed fit a queen sized mattress.
I’ve not seen Mason jars used the way that you used them. Clever!
This is just lovely! You just want to sink in all of those pillows
I have that same white pin tuck comforter in my garage still in the package. I need to put it on my bed! Thanks for the inspiration !
Paige
I love that you refinished this awesome piece rather than painting it! It looks gorgeous and is such a good example of how to use an antique in an updated way. The mason jar sconces are just pure genius. Thanks so much for the inspiration; you are truly very talented!
first of all i feel like all the commenters are p names and i am the odd man out.
secondly, oh i LOVE LOVE LOVE and want it! can i come spoon you? it’s amazing!
Rachel, I LOVE it! That headboard is amazing and all your little touches. Also love how your elephant looks in there. Beautiful job. x
I LOVE that headboard. It makes such a huge statement in your room, too!
Welcome Rachel to the group. I’ve been snooping around your website and all the inspiring creativity. Very fun! It was a great idea to add the pieces of the footboard to widen the headboard. I could move right into your room! My favorite are the mason jars and how they are simply hanging. Great job and can’t wait to see the rest of the room. ~Jeanette
I love how you fixed the size problem, you cannot even tell that you changed anything. Your room is beautiful now and I love all your choices with furniture.
What a grand looking piece! It is so pretty! Those sconces you made are brilliant :0)
All you need now is the eastlake settee I refinished for the end of your bed! lol
Smiles!
Terry
If you’d like to peek at the settee here is the link :
http://thecuratorscollection.com/2015/04/02/eastlake-settee-reconstructed-finally/
I have what I BELIEVE is an Eastlake chair I feature just this week on my site. There is NO way I could wait that long to start on this chair…I just knew the wood under all the nasty old finish would be amazing…and I was not disappointed. BTW, I provide a good tutorial on getting all the old finish off without breaking your back or bank! At this moment in time, this “style” is not my thing but I am slowly falling in love with the Eastlake look….soooo different than my mid century crush but one thing in common…the amazing woods! Specifically walnut and mahogany.
LOVE your bed…I am so happy you refinished it and didn’t paint it. I can’t wait to get my chair stripped and oiled…
Looking through your blog and this post, I have fallen in love. Your work and design is simply beautiful. Thanks for being a part of such a great group of furniture enthusiasts.
LOVE your headboard and all the details in your room.
LOVE this. very nice 🙂
Sarah @ EDEA Smith
http://www.edea-smith.co.uk
Rachel everything is so gorgeous! The headboard looks fab with the way you refinished it – and I never would have guessed that you added the side pieces to make it wider. The whole room is coming along beautifully and I’m kind of jealous! 😉
Very nicely done. Now I want to see what you do with the footboard.
Absolutely love your bed! The matte, natural finish is an awesome update while keeping the integrity of the original design intact. You mentioned you have trouble with finding the right place to hang art– I would move your elephant painting down a couple of inches, until it’s about 6-8″ above your peach chairs and then it would be perfect!
Just found your blog today, I’m looking forward to reading more!
I think you’re smart for an additional reason. I own/use a GIGANTIC Eastlake headboard (7 ft. tall) in its original condition, with wide ornamental wooden siderails, and a large footboard. The width (a double bed mattress) is FINE for me, but modern mattresses are a tad too L-O-N-G for a Victorian bed frame, which is a major problem. Making up the bed, especially when using blankets or a comforter etc. in winter, is a nightmare, as I can barely fit my fingers between the mattress and the footboard, to JAM the covers down into that space. I wind up folding the covers back onto themselves at the foot instead of tucking them in, which means I often wind up with cold toes. Bravo to you for making a lovely Victorian piece work for YOU.
That headboard is ridiculously beautiful! The whole room is absolutely stunning too!
Gorgeous headboard and great work putting the room together! To the right and down with the elephant? Would he look good in a refined rustic beefed up frame? Just ideas, don’t take them too seriously because I’ve never put a room together as party as this one!
Wow, what an absolutely gorgeous room. I love the look of the headboard with the plank wall. And the colors. And the pillows. And EVERYTHING. 🙂
I Love this!!! If you wouldn’t have said that you attached the footboard and headboard together I never would have known. I thought it was an outstanding, unique piece all on it’s own!! Great job!
Don’t change the peach chair! It’s great already. 🙂
The color doesn’t bother me, but the foam is rock-hard… so I really HAVE to upholster it and since I haven’t been able to find similar fabric at an affordable price, I’m going to go with gray. But you are right! They do LOOK great… they just don’t feel great… 🙂
I love this master bedroom. Tutorial for headboard and sconces please!!
Your bedroom makeover is GORGEOUS! I love the colors, the wood, and your retrofit of the headboard to turn it into a Queen bed is lovely.
Rachel, that headboard is FANTASTIC!!! You did a great job refinishing it. Your master bedroom looks terrific:)
Gosh I love your room! The headboard is stunning! Oh that planked wall! Love it all, but feel the lights aren’t beefy enough with that headboard. But, that’s just me. Otherwise, I think it’s terrific!
That is such a unique and wonderful headboard and you made it come back to life! Nicely done!
Did you ever make a tutorial on creating the sconces? They are amazing!!
Your headboard is awesome too, I would have never known you added the side pieces – but that was a great idea!!
Love your style and blog, definitely coming back for more. I see looking back through the archives how your style has evolved and I love it!! I was already following you in IG, LOL!
Hi Rachel!
What brand of wood stripper to you recommend for a piece like this?