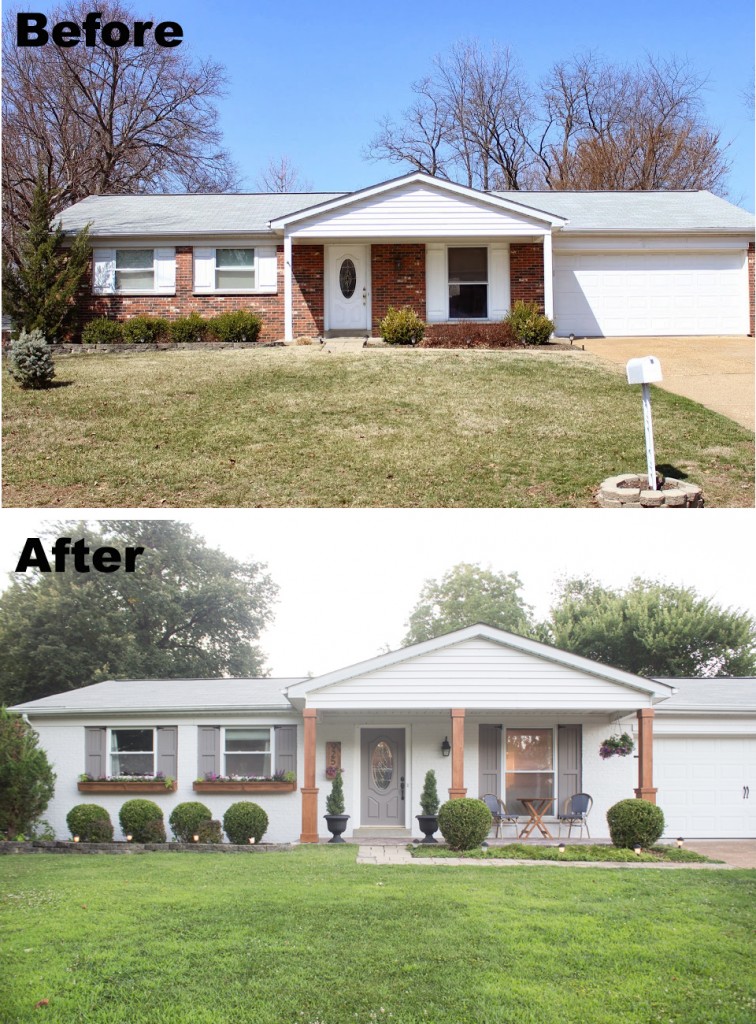
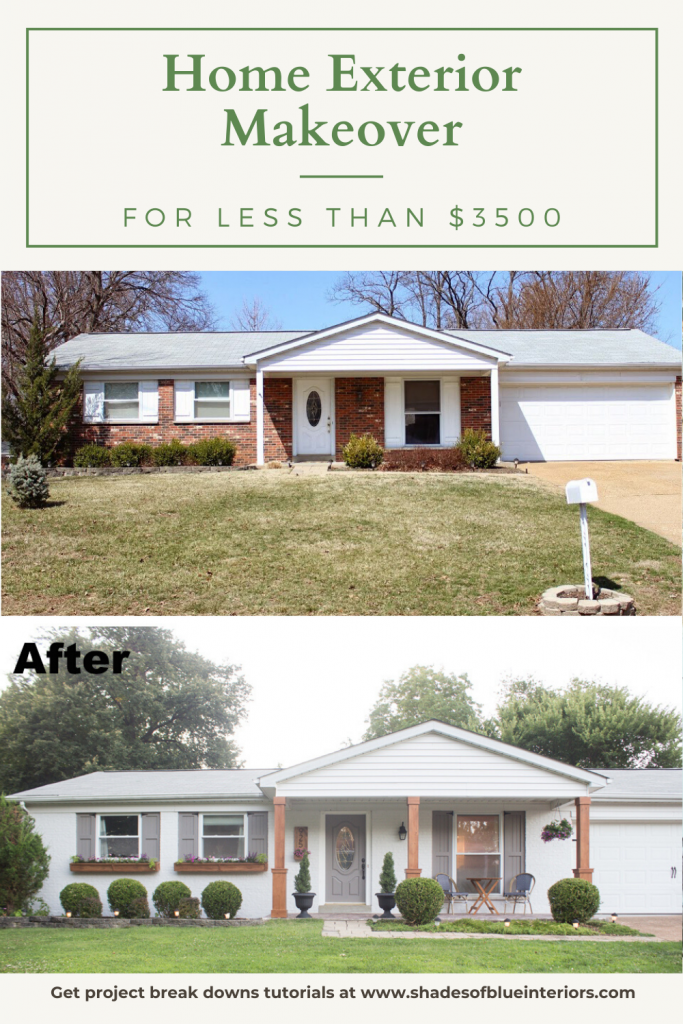
A home exterior makeover doesn’t have to be done all at once and it can be done on a tight budget if you are willing to put in some sweat equity. Today I’m sharing how we gave our home a major upgrade by doing a home exterior makeover over the course of several years, all for under $3500.
Our home is a 60s brick ranch located in the suburbs of St Louis. This is what our home looked like almost exactly 6 years ago when we first bought it.
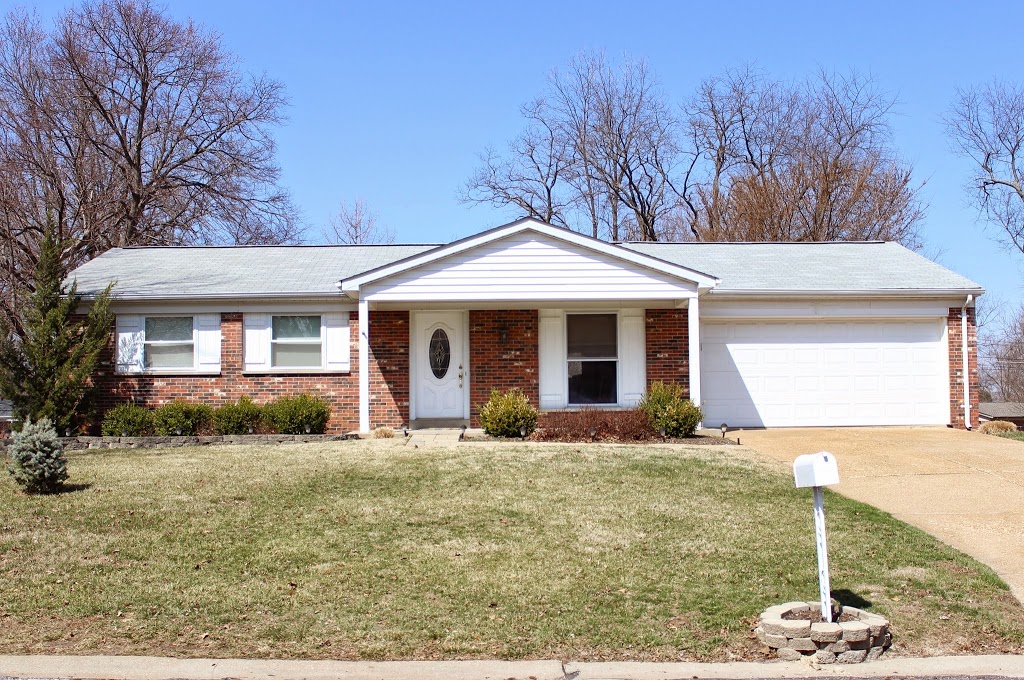
There is nothing bad about this ‘before’ in my opinion, which is why we bought it in the first place, but it does lack some character in my opinion.

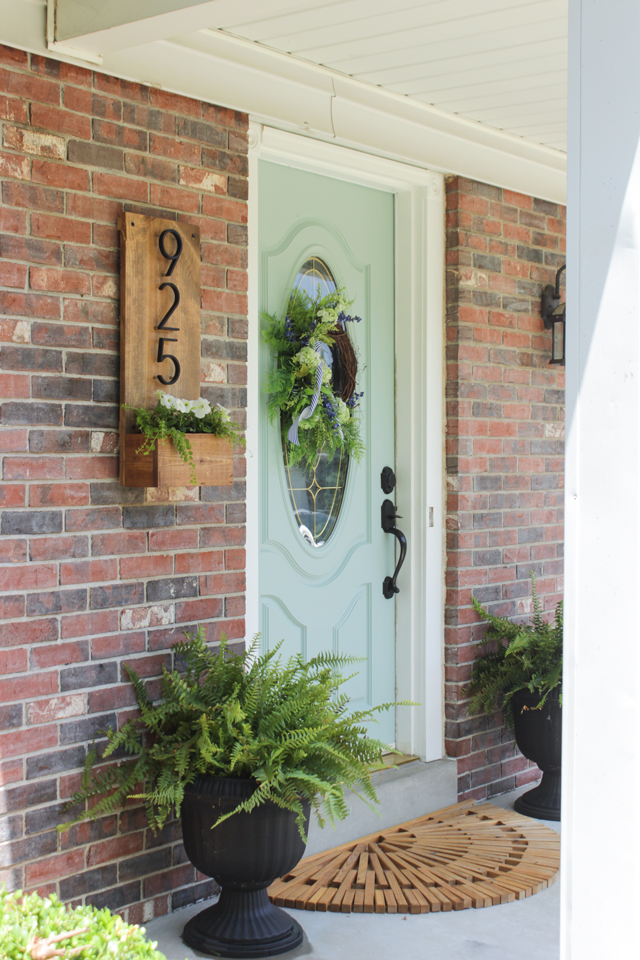
The first summer after we moved in, I set out to make small, more temporary improvements. I painted the front door and shutters, and did a very light white-wash on the brick, just to tone down the orangey-red tone. I’m not counting those paint projects in the total cost of this, because I changed it later, but it just shows what you can do with a little paint.

Front door color: SW Meander Blue
Brick white-wash: Annie Sloan Chalk Paint in Old White, watered down and applied with wet rag
We did our home exterior makeover in increments, as our budget allowed, so here are the steps we did.
Affiliate links are used in this post.
1. New Porch Furniture
We added a bistro table and chairs, a cute yellow rug, a garden stool and accessories to create a welcoming spot for about $500. See more of this spring porch refresh here.
Folding Bistro Table: $100
Cafe Chairs (similar here, here or here) : $150
4 x 6 Yellow Outdoor Rug (similar here or here): $75
Garden Stool: $50
Accessories: $125

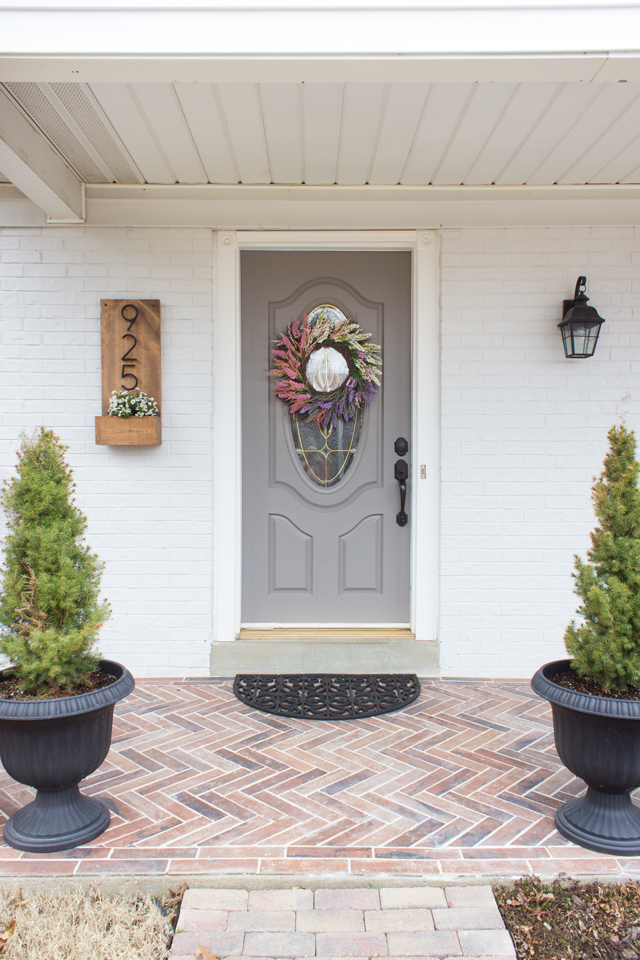
2. House Number Sign
To add a rustic modern touch to our brick ranch home, I built this house number sign for about $65. See the DIY house number sign tutorial here.
Cedar lumber: $10
3- 5″ House numbers: $25
Stain (Minwax Special Walnut) and Exterior Wood Sealer: $15
Masonry screws, Silicone caulk and misc supplies: $15
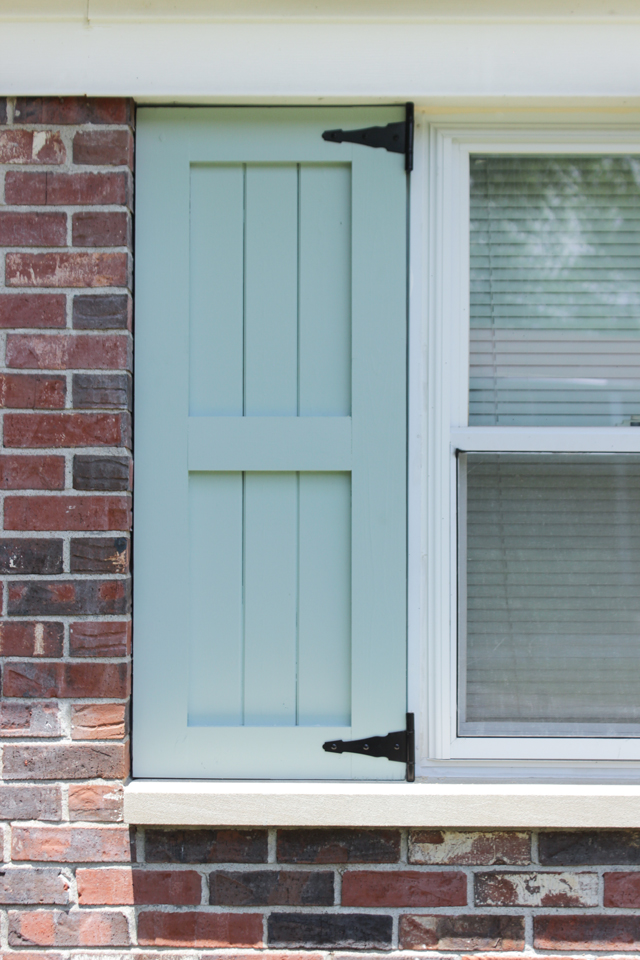
3. New Shutters & Hardware
Our old shutters were dating our home, so I removed the rails and installed new shutters right on top of the old. By building them myself, I saved quite a bit of money and was able to add additional hardware to go along with their craftsman style look. Each shutter cost approximately $50, so the cost for all 6 for the front of our house cost was about $300. See the tutorial for these craftsman style shutters here.
Lumber for 6 shutters: $100
12- 6″ Decorative Gate Hinges: $100
Exterior Paint (Behr Marquee Exterior Satin Enamel color matched in BM Wythe Blue pictured below): $50
Exterior screws, wood filler, paint brush and misc supplies: $50

4- Painted Brick, Door & Shutters
Over the course of a few weekends, we painted the brick exterior of our home. This was a big job and it really paid off to do it ourselves. I opted to roll the entire thing to make sure we would get a nice even coat over all the nooks and crannies, and it cost around $400 for paint and supplies. To read the details on what we did to prep and how we tackled it, go to this post.

I will add, we painted the front exterior in 1 weekend, which required 1 day of prep work (pressure washing using this), 1 day for the first coat, and 1 day for the second coat. We used this same method for the other 2 sides of the house that had brick (the third side has vinyl siding). The front door and shutters were painted after the brick was finished but was a quick job with 2 coats. All of this can be completed on weekends and in 1 month you will be done.
8 gallons of Behr Masonry, Stucco, & Brick Paint in Dove Gray: $200
1 Gallon of Behr Marquee Exterior Satin Enamel in Creek Bend for Door and Shutters: $50
Prep & painting supplies (rollers, brushes, extension sticks, paint pans, tape, drop cloths) : $150

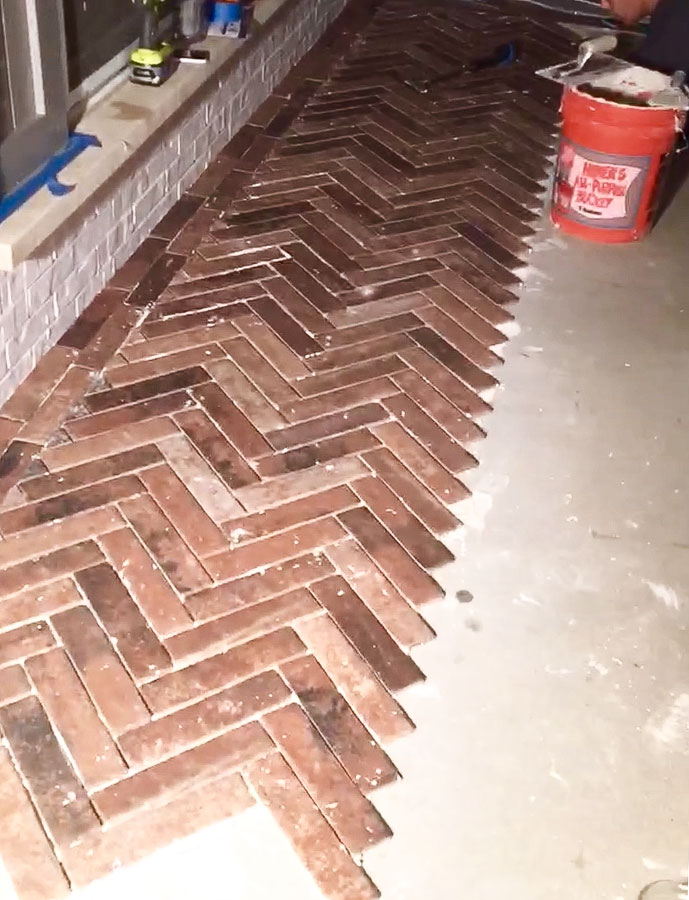
5- Installed Porcelain Tile on Porch
After the front of the house was painted, we started on installing porcelain tile on our front porch. This was a huge undertaking and it would have been much easier if we had chosen a different pattern and if it hadn’t stormed in the middle of the project. We had to put up plastic sheeting around the entire porch so it could dry without getting wet from the rain. If you choose a dry couple of days where it isn’t too hot, this is definitely a do-able project for a DIYer that has tiled before. Total cost was about $1200.
I have been asked many times about how we tiled the cement porch and before you start, you need to consider a few of things.
1- Make sure there are not cracks in your cement. If so, this might not be the project for you. Cracks in cement indicate the ground is shifting, so unless you resolve that issue, the crack will continue to grow even after you install tile, which will ruin all your work. If the cracks are old and the shifting has been resolved, then fill the cracks using a tutorial like this one FIRST.
2- Make sure to use flexible mortar, flexible grout and porcelain tile (which is safe for outdoor temps). The reason why you want flexible mortar and grout is because the temperature changes will require some flexibility and if you use the same mortar or grout that is only intended for indoors, then it will crack.
3- Use a grout that has a sealer built-in so that you don’t have to worry about sealing it later or forgetting and getting dirty, stained grout. I use Fusion Pro grout because my brother, a professional tile installer, prefers it.
Tip:
To remove the grout sealer haze from Fusion Pro quickly when working outside in the heat, it is important to work in very small sections (like 2 ft x 2 ft). This is because this grout’s top layer dries fast. After you apply the grout with a float, loosen up the grout film with the wet sponge, then wipe it with paper towels instead of over and over with the wet sponge. Use several paper towels and wipe it until you don’t see any more residue. This method leaves little if any haze once its completely dry.
4- Dry-fit your design (we chose herringbone) for about 1/4 of the project at a time. It is important to NOT start in a corner, but in the center of the edge you are working on first. Work your way to the sides so you have the same cuts on both sides. That way, you can make most of your cuts ahead of time and few if any cuts have to be made while actually laying the tile.
5- Allow a full 24 hours of dry time for the mortar, and another 24 hour dry time for the grout before walking on it. The tile can’t get wet during these dry times either, so make sure to cover it if rain is suddenly forecasted.
For my porch I used:
28 cases of Brick Porcelain Tile (our porch is 21′ x 6′): $850
2- 50 lb bag of Flexible Thin-Set Mortar: $40
3 gallons of Flexible Fusion Pro Grout in the color Bone: $150
Sponges, spacers, 1/4″ notched trowels, floats, paper towels, bucket, diamond blade for tile saw: $150
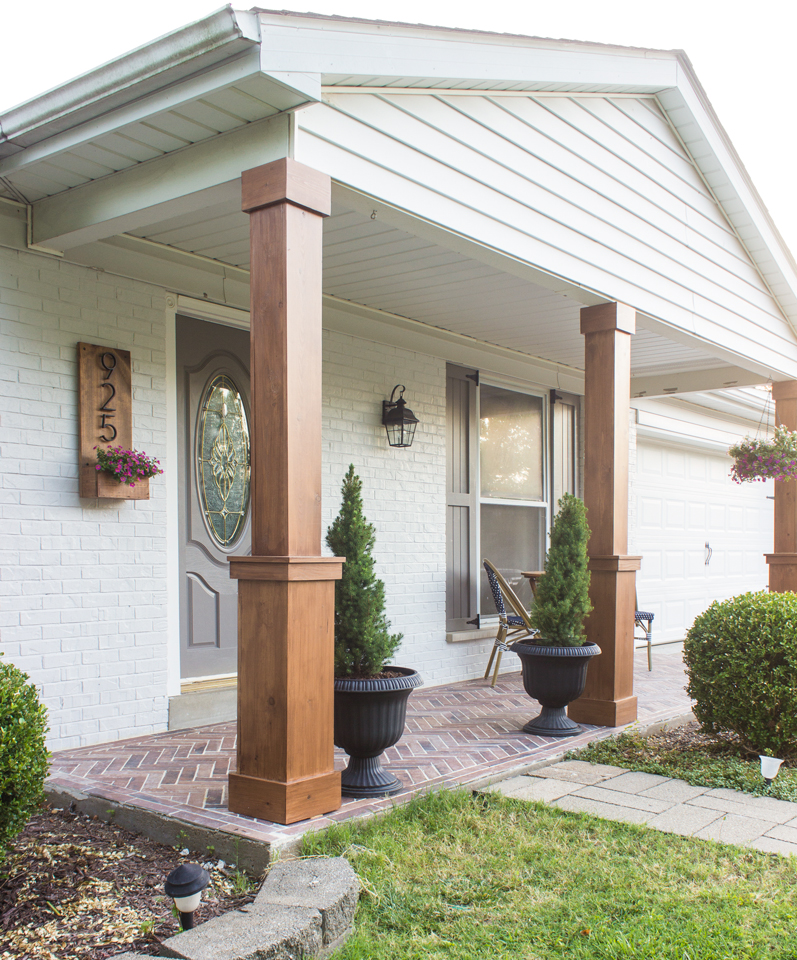
6- Added Stained Wood Columns
To boost the craftsman style look of our home exterior, we removed the white aluminum covers from the columns, and added stained wood column surrounds. Additionally, we added 1 faux column (not load-bearing). The total cost of the lumber and stain for these columns was about $300. To find the tutorial to build these DIY Craftsman Style Porch Columns go here.
Lumber: $150
Prep, build, and stain supplies: $75
1 gallon stain for inside and outside of columns (Behr Semi-Transparent Waterproofing Sealer and Stain in Chocolate): $40
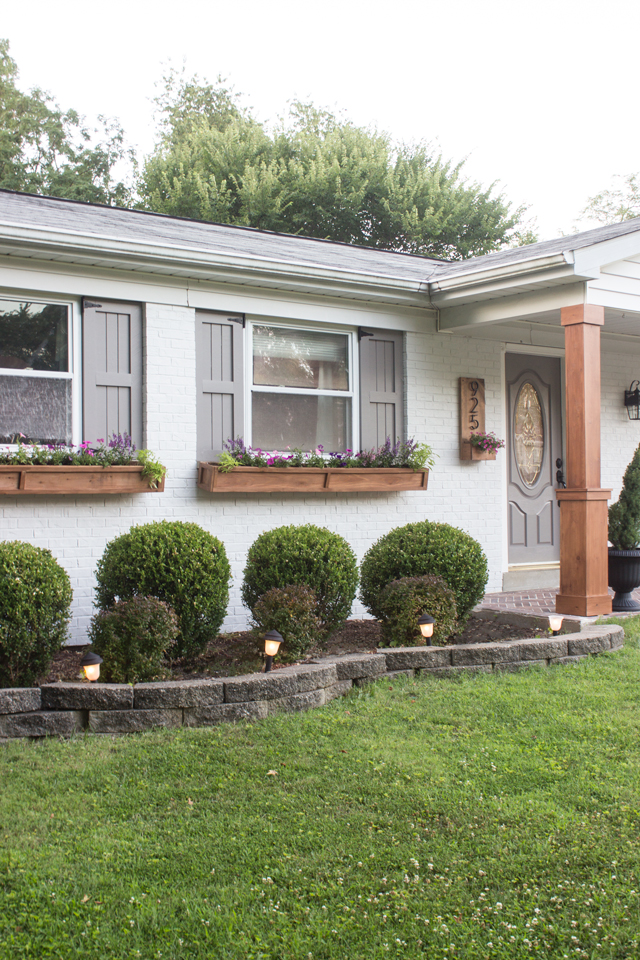
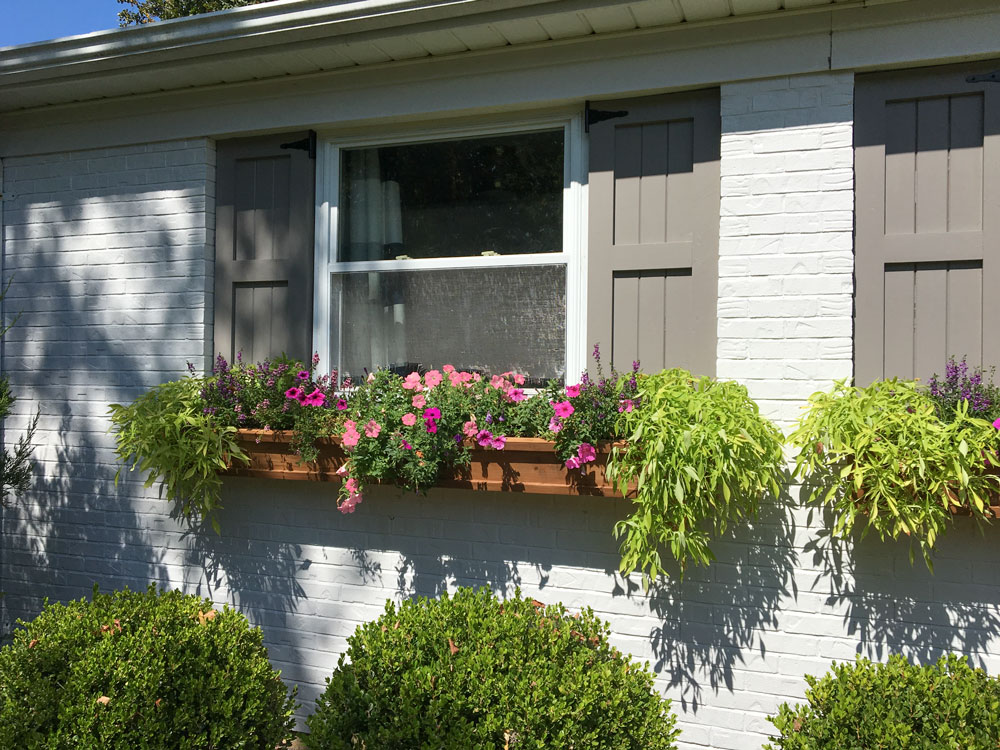
7- Built Cedar Window Boxes
The final touch of character on our home exterior makeover was these cedar window boxes. I chose cedar since they would have dirt and plants in them, I wanted to ensure they wouldn’t rot. The cost for the window boxes was about $200 for both. To get the tutorial for these DIY Cedar Window Planter boxes go here.
Since building them, I wish I would have added a few extra screws into the cleats (piece of wood attached to the brick that the window box screws into) because the weight of the rocks I put in the bottom (for drainage) caused one side of the wood to split. I was able to repair it quite easily though with some wood reinforcements and several more screws into the cleats. I recommend using the Miracle Grow Moisture Control Potting Soil because it allows you to water less often.
Lumber: $170
Build and stain supplies: $30
1 gallon stain (Behr Semi-Transparent Waterproofing Sealer and Stain in Chocolate): $0 (I still had plenty from the columns, so didn’t need to buy a new gallon)

As you can see, we spent less than $3500 for the main components of this makeover in supplies only. We would have spent more than double that if we hired out the work. None of these DIY projects were extremely difficult, but some were definitely more physically taxing than others. If you break up the home exterior makeover projects over time, then you will be able to do a lot if not all of the work yourself, and you will be able to work within a tight budget to get the look of your dreams!
Thank you! This was very helpful! And inspiring.
It turned out beautiful. Good job
Love this makeover. You are talented beyond the average for sure.
Your “Before” looks very similar to our house, in fact, the most similar to any I have been able to find, although our brick is a solid red brick. Seeing your makeover has been a wonderful encouragement to us. It is quite a bold change, so seeing a beautiful result like yours helps tremendously. We are planning to use limewash instead of paint, using a solid application rather than washing any back off, so the finished look should be quite similar. While your house appears to be white with white trim around the windows, eaves, etc., I noticed the color was called Dove Gray.? It can be hard to notice subtle shade differences in photos. In person is the gray/white contrast more noticeable? Our gable, eaves, etc. are white vinyl siding & our windows are trimmed in white. Romabio limewash comes in 3 shades of white & a light gray. We are trying to decide if we should go totally white or whether we would prefer a slight shade difference. I love the shutter & door colors you selected. (BTW…Our door looks just like yours too! Perhaps an 80s-90s update.) Thank you so much for sharing. There are so many small brick ranch houses from that time period all over the US. I’m sure your makeover has been helpful to many! 🙂
Thank you, thank you, thank you! We have a very similar ranch house style and are about to paint our brick. Your post has been the most comprehensive and helpful I’ve found! Looks amazing!
Oh my goodness; beautiful! So talented!
This is great. Looking for a painted brick ranch illustration that wouldn’t require replacement of brown(ish) roofing tiles. The craftsman columns will tie in nicely. Plenty of examples online for houses with black asphalt, but this is what I’ve been searching for. Thank You!
Fantastic makeover!!! Thanks for all the helpful resources and tips.