Today I wanted to share a quick recap of a project I tackled last weekend and completed in a couple days: a guest bedroom refresh. For this project, I installed floor-to-ceiling battens, painted the room, replaced light fixtures, and brought in new furniture.
I never took a proper before but this is what is basically looked like when we moved in, and we hadn’t changed much:
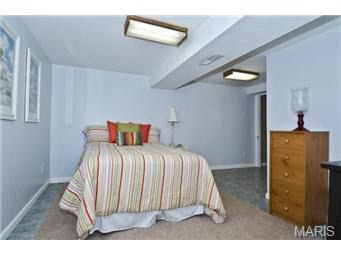

A few years ago, we installed new luxury vinyl plank flooring on top of the tile, and I had installed a thicker baseboard a couple years ago, but other than that, the wall color remained the same, and it had the same fluorescent light fixtures. The bathroom in here is one we updated a few years ago and I shared in this post.
The furniture here was always a mix of pieces I was no longer using in other parts of the house so it became a bit crowded with a desk, bookcase, boxspring and mattress, and bedside table.
Here is a video I quickly put together from my IG stories sharing the progress of what I did:
The Prep
To prep the guest bedroom for the refresh, I needed to take everything out of the room and scrape and patch the walls. In this room, part of the walls and ceiling were peeling paint because whomever painted it before us, didn’t use a primer. So I had to use a metal scraper to remove any loose and bubbling paint, then I used a joint compound to apply a skim coat on top of the areas that were missing paint. This seals the edges of the paint so it won’t peel further.
While I was waiting for the join compound to dry, I started installing the battens.
Installing Battens
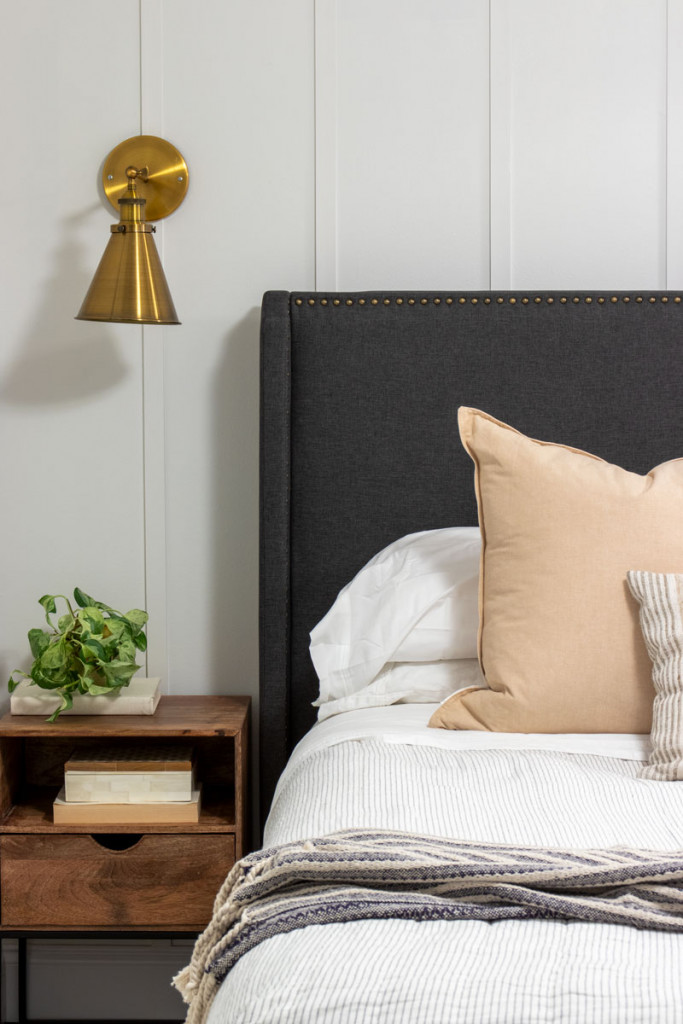
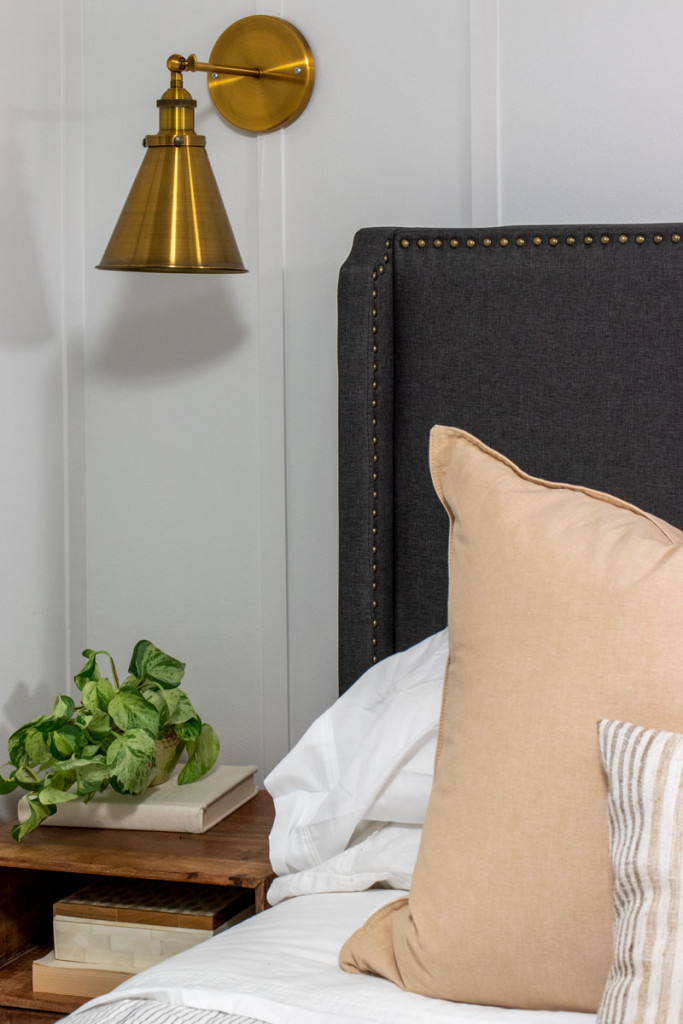
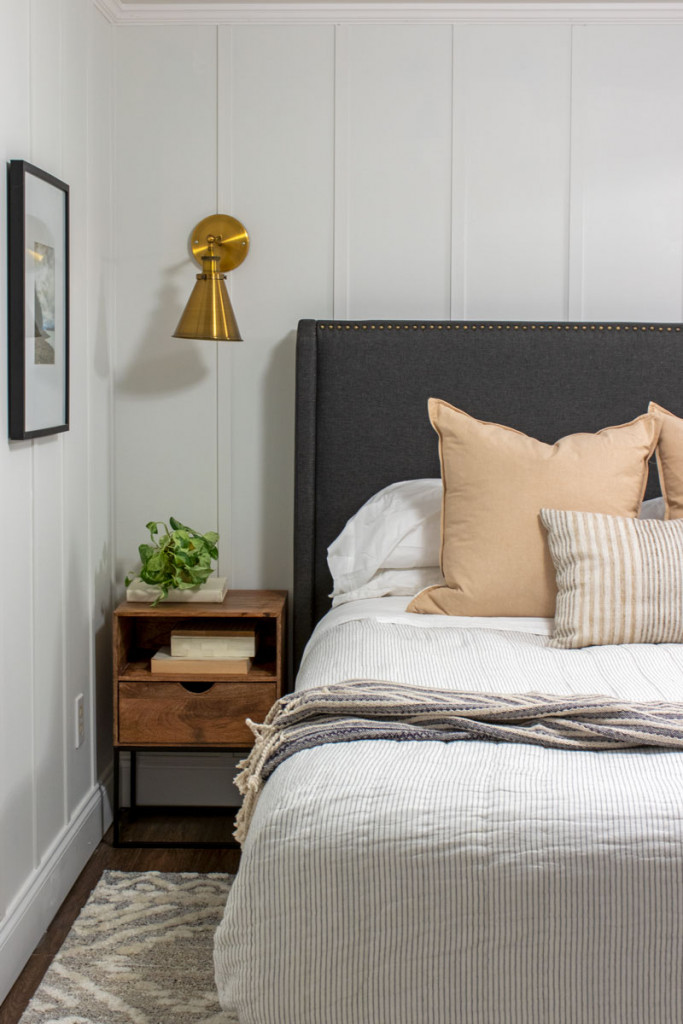
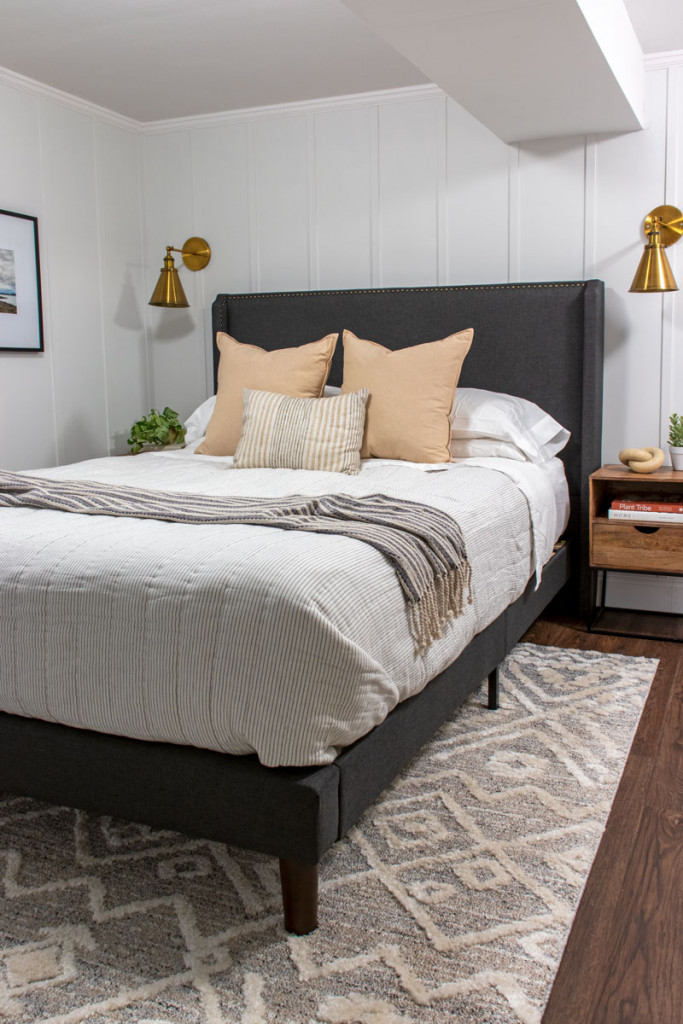
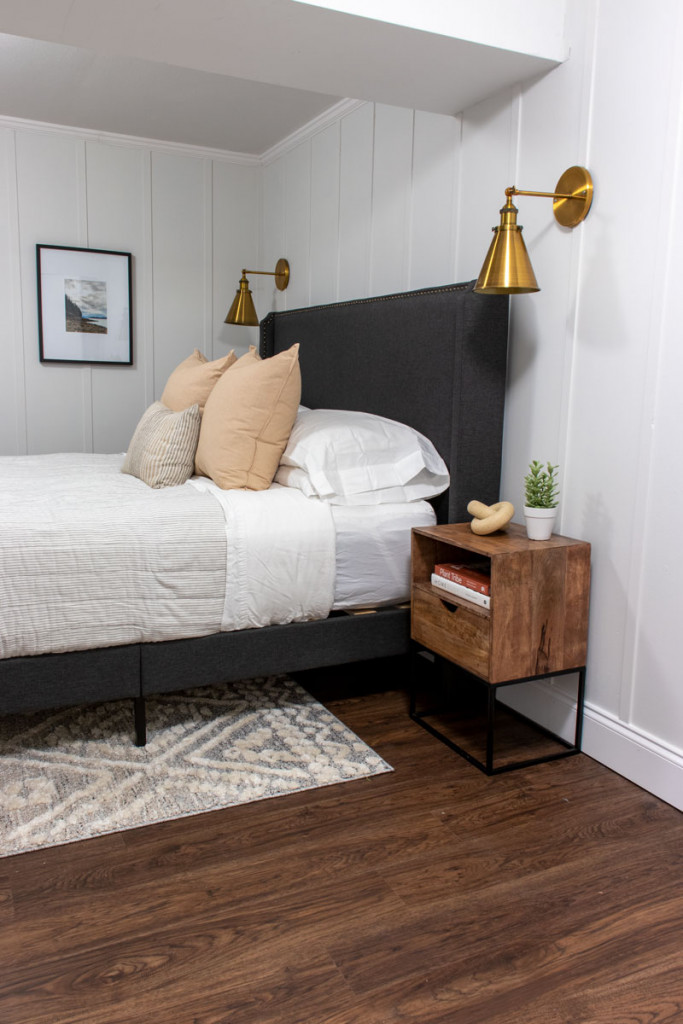
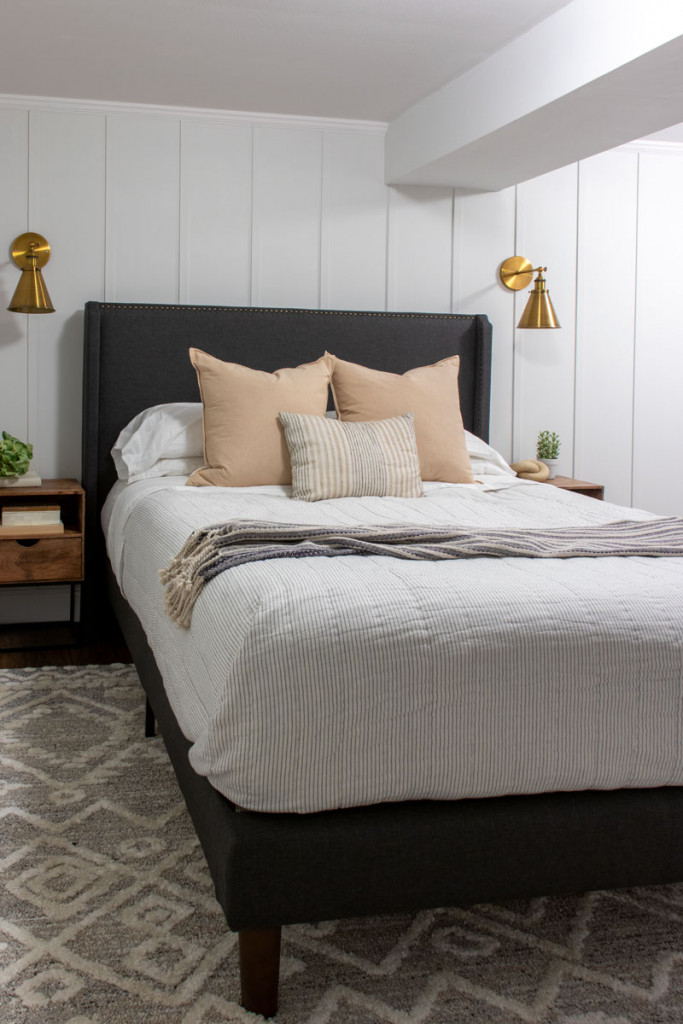
To give the walls some texture and character, I chose to install floor-to-ceiling battens made from lattice moulding. I chose 1 1/2″ wide lattice moulding because it is thin (1/4″) and easy to install. The 1/4″ thickness is important because that means it will not overlap the crown moulding or the baseboard– it meets them flush! I had already done this in the adjoining basement bathroom, and wanted to continue the look around the room.
I started at the bathroom door and installed the 1 1/2″ wide lattice battens with 10 1/2″ space between each one. Our ceilings are pretty low in the basement so my pieces ranged between 74 1/2-76″ long. I bought these at Home Depot and had them all cut to 78″ in the store, so that when I got home, I could measure each one and cut it to fit. I own a chop saw so the cuts were fast, but you could definitely use a fine-toothed hand-saw (that’s what I used to cut them in-store before I brought them home).
I installed them by using Liquid Nails for Paneling, and my cordless brad nailer (no need to worry about them going into studs– the liquid nails provides a strong adhesion once dry).
After the battens were installed around the room, I filled the nail holes with white wood filler, and while I was sanding them smooth, I also sanded the patched areas of the walls smooth. Then I caulked the edges of all the battens, and primed the patched walls and the wood battens using this primer.
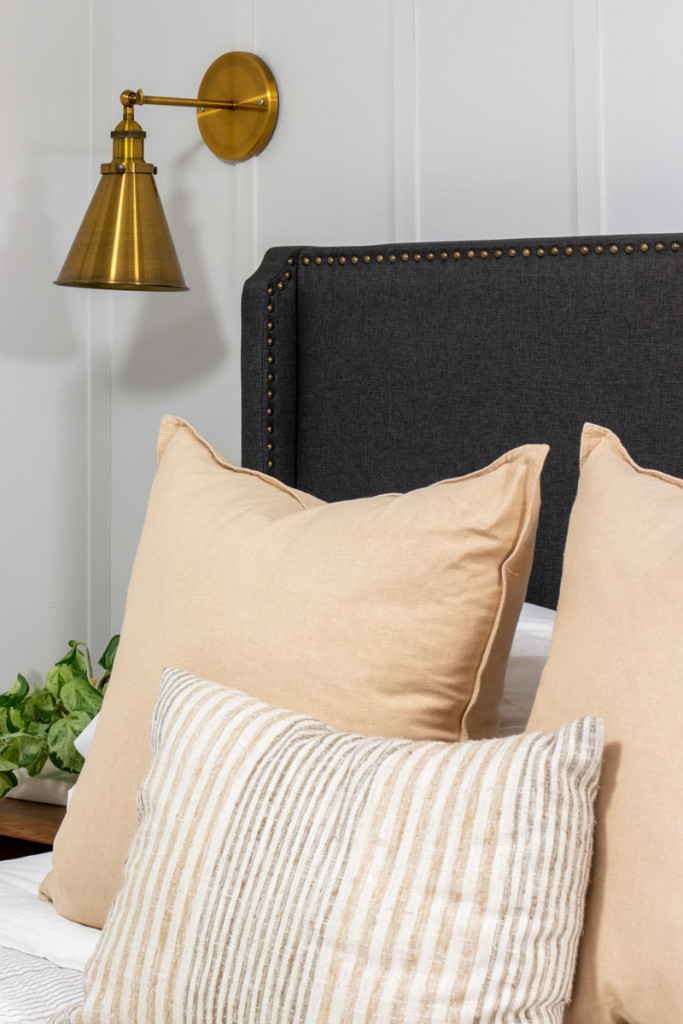
Finally, I painted the walls and battens using Magnolia Paint by Kilz in the color Shiplap, and painted the ceiling using Behr Marquee Ceiling Paint in the color Cameo White.
Replacing Lights
Because our ceilings are only 7′ tall, I needed new flush-mount lights and was happy to find this cost-friendly option at Lowe’s for about $60 a piece.
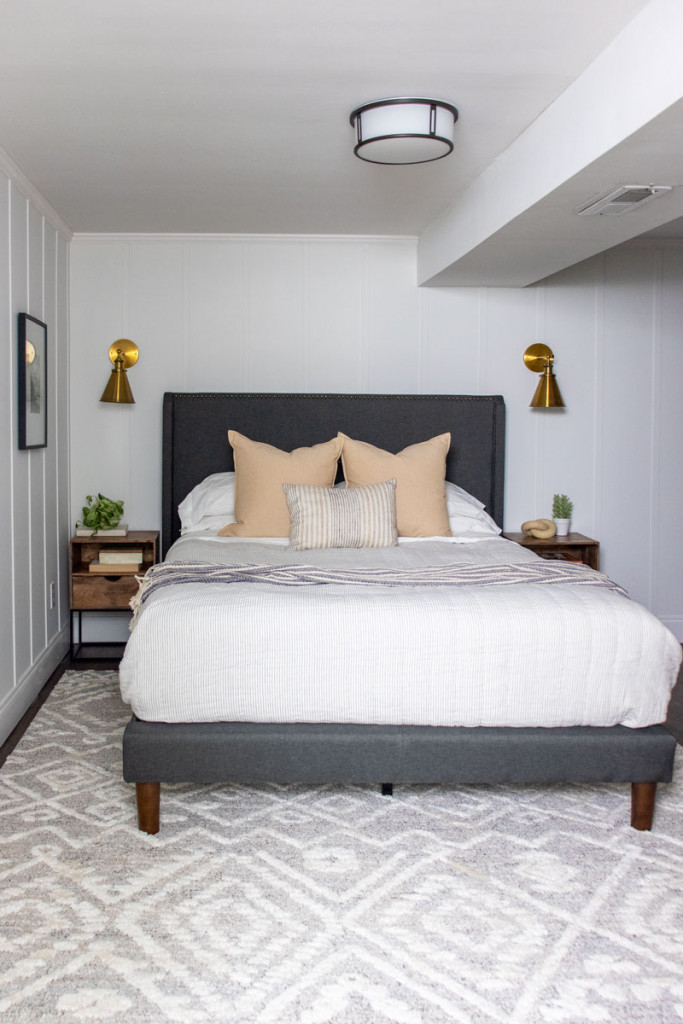
I also stole these brass sconce lights (less than $60) that were in our living room and put them above the night-stands (with the magic light trick). Perfect alternative to lamps for tight spaces!

New Furniture
We didn’t have a big budget for this room, so I was happy to discover this bed from Zinus for $350 (free shipping too) and I picked up the pair of nightstands from HomeGoods for $80 each (similar here).
Linens & Textiles
To finish off the room, I purchased a new 8×10 rug from Home Depot (they had this one in-store for $169), and a new striped quilt from Target.
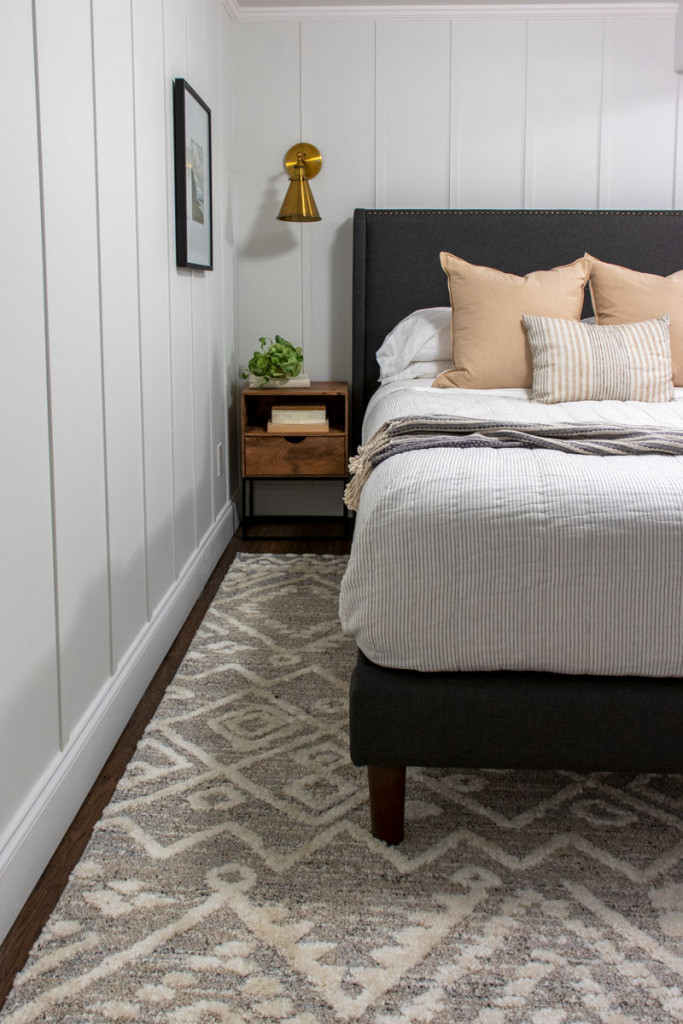
The rest of the items were things I already owned, like the white sheets, light terra-cotta/tan colored pillows (from HomeGoods), striped lumbar pillow (from Tonic Living), and throw blanket.
When I styled the bed, I used my no-fail method from this post: 3 Things Your Bedding Needs, except because it’s summer I opted for a throw at the foot of the bed instead of a duvet.
I’m so happy with how this room turned out! We decided to only bring back in the desk (in the opposite corner), which make the room feel larger and best utilizes the space.
The bed was gifted to us by Zinus, but if we had purchased it, the breakdown cost for this guest room refresh is as follows:
Lattice battens (.83/linear foot): $300
Wood filler, caulk: $20
Paint: $0 (I already had leftover from other projects)
Queen Platform Bed: $329
Nightstands: $160
Flush-Mount Lights (2): $125 for both
Area rug: $170
Quilt: $80
Linens & Pillows: $0 (already owned)
Sconce Lights: $0 (already owned)
Rough Total: $1200
With this room finally being “done”, the last room in the house that is unfinished is our kid’s upstairs bathroom. We will be ripping everything out to the studs this year, and I can’t wait to share the plans!
Have a great weekend!
Great job!
Thank you. I will definitely make it.
The guest bedroom refresh is delightful! The soft hues and thoughtful accents bring a serene vibe. The choice of furniture and decor is tasteful, creating a cozy haven for guests. Great job on the makeover!