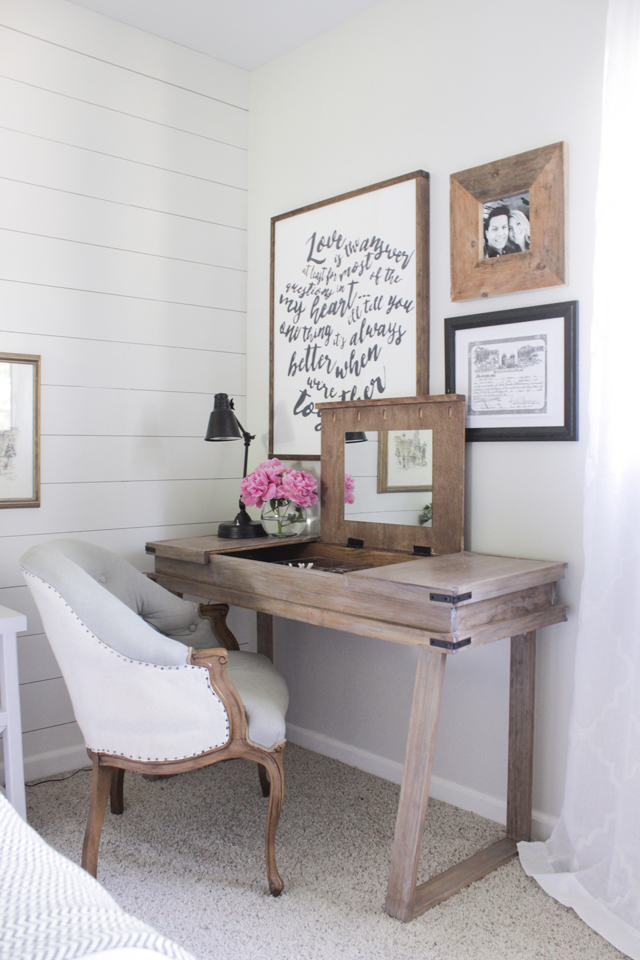
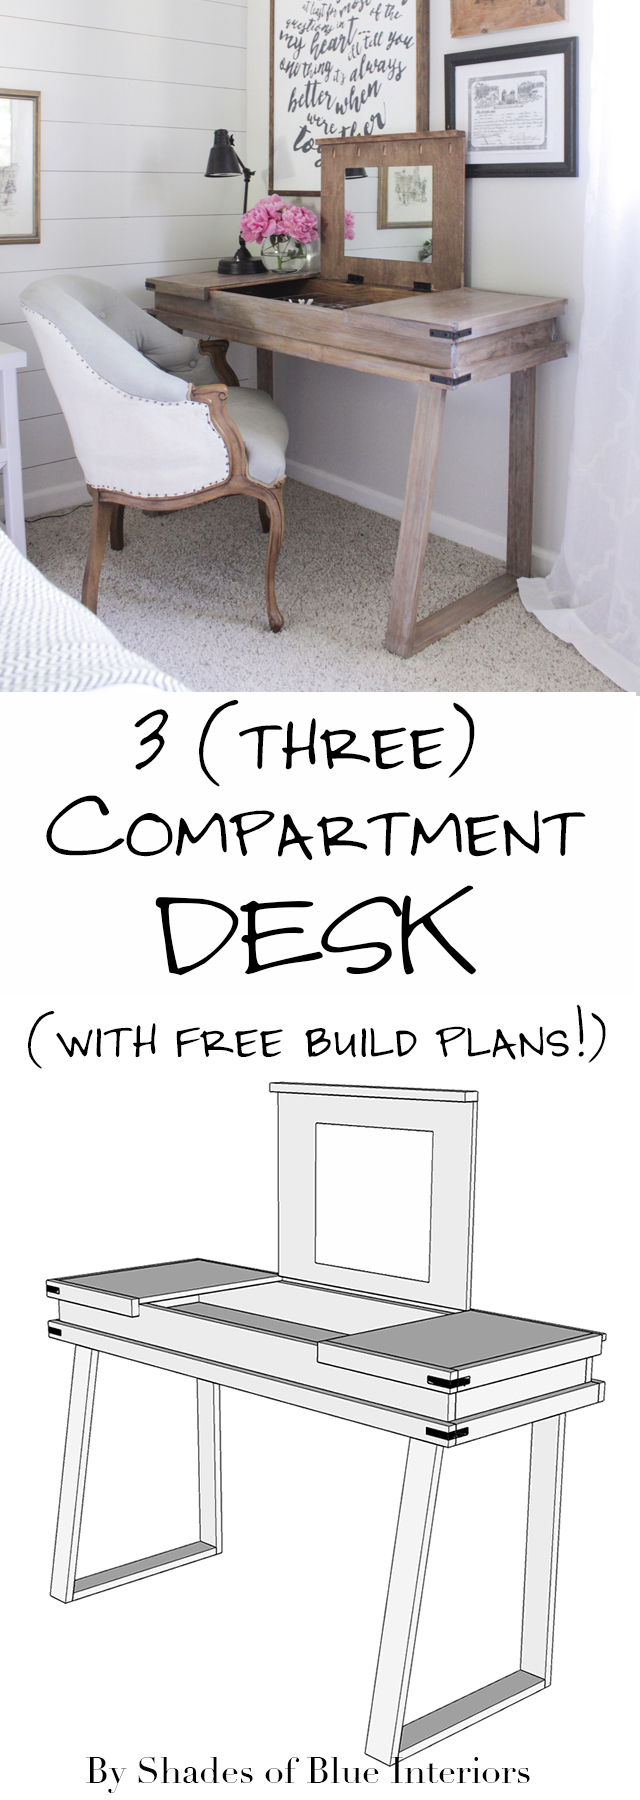
It’s been awhile since I shared a new build with ya’ll, so today you are in for a treat! I designed and am offering free build plans for this THREE COMPARTMENT DESK that is perfect for a small space that need a little extra storage and even perhaps… a vanity! That is what I was needing, at least, when I created this beauty for my master bedroom:
For the White-Washed Weathered Oak Finish Video Tutorial CLICK HERE!
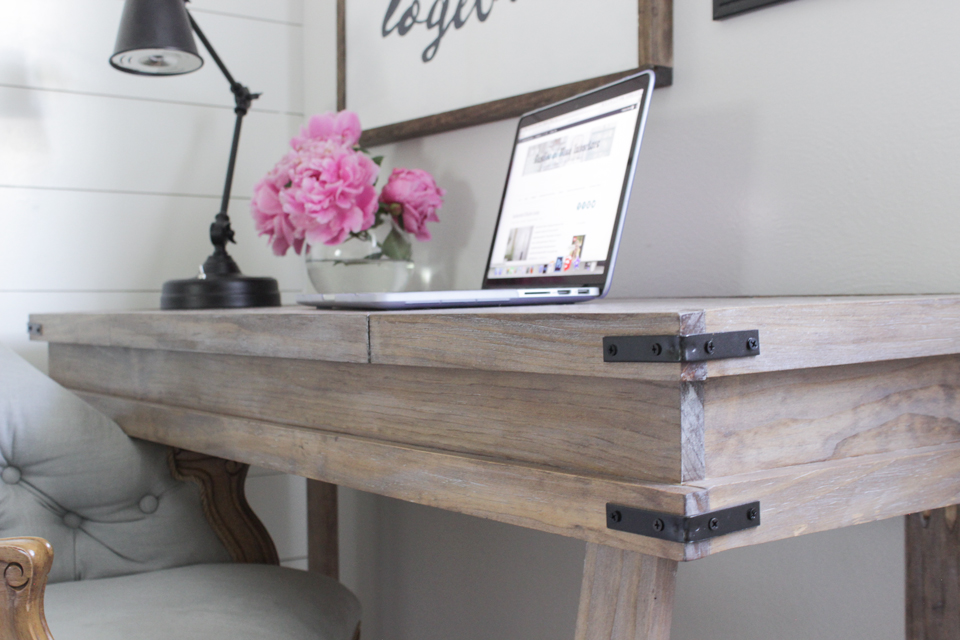
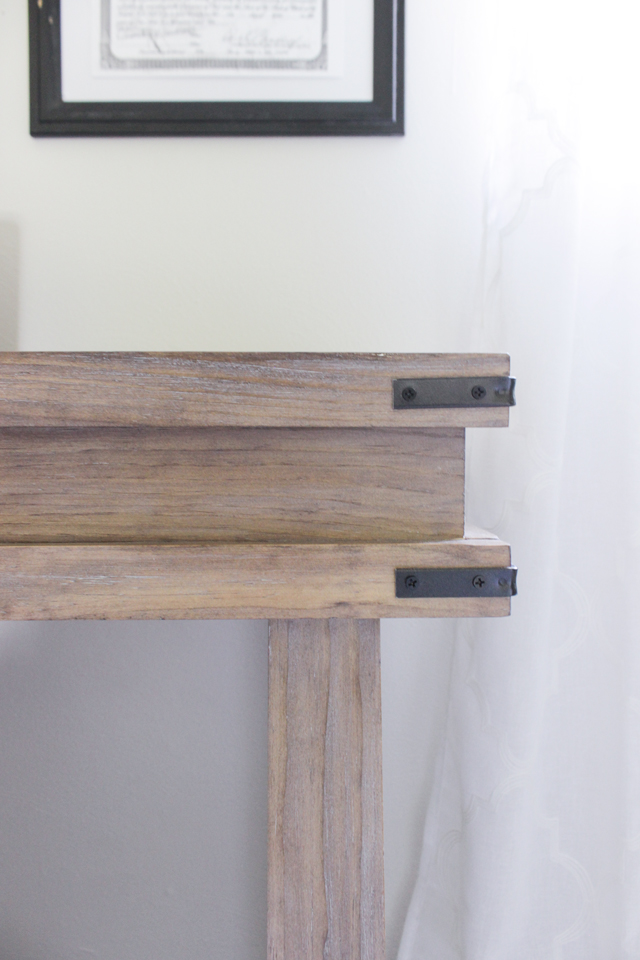
I was inspired by a desk I saw Elisha from Pneumatic Addict build last year, her Hairpin Makeup Vanity, but I chose to make the edges of the base and lid a little chunkier and more industrial, and the legs are obviously different.
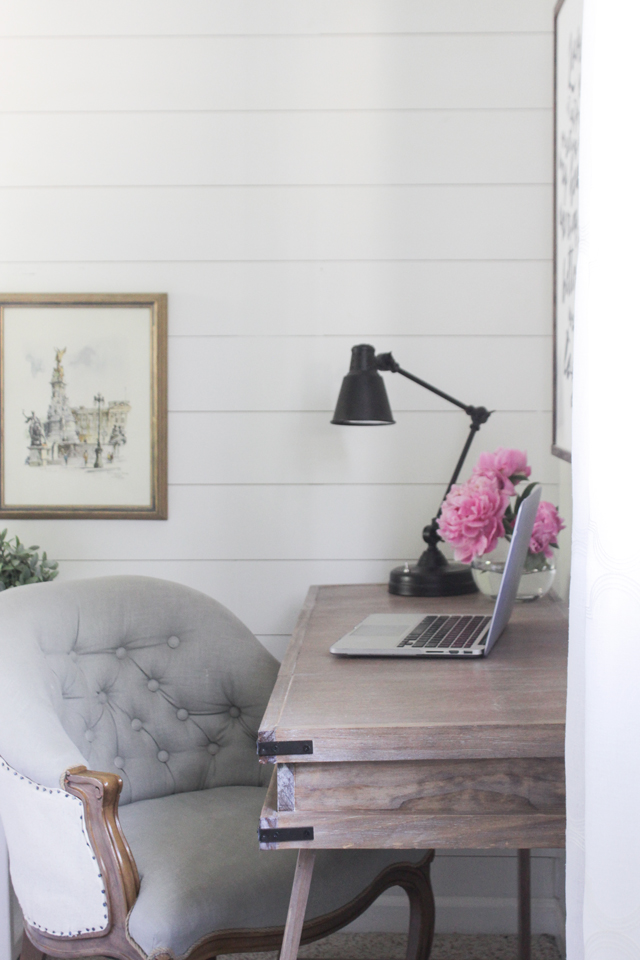
The design is a little rustic, a little modern, a little vintage and beachy (with the white-washed weathered oak finish), and super functional.
If you remember, at the end of last summer I put a desk in here from World Market. Well, after a few weeks, we realized the desk was a little too large, so we tried having just a couple of chairs here for a sitting area. Only problem? The chairs became a dumping ground for clothes and other miscellany we didn’t want to put away. Sorry if that makes me a slob, but hey– we are lazy sometimes. So I kept thinking about that desk, but I needed something that wasn’t so long or wide, so I could fit a normal chair and a nightstand on my side of the bed. I also needed extra space to hold my makeup and hair stuff. Our bathroom is pretty small (albeit stylish) and I love makeup.
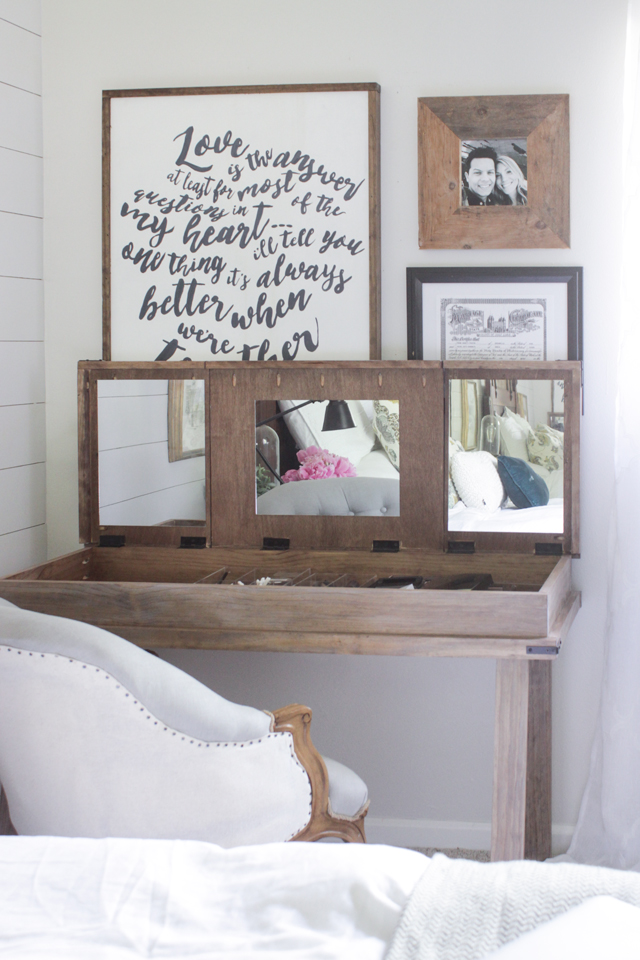
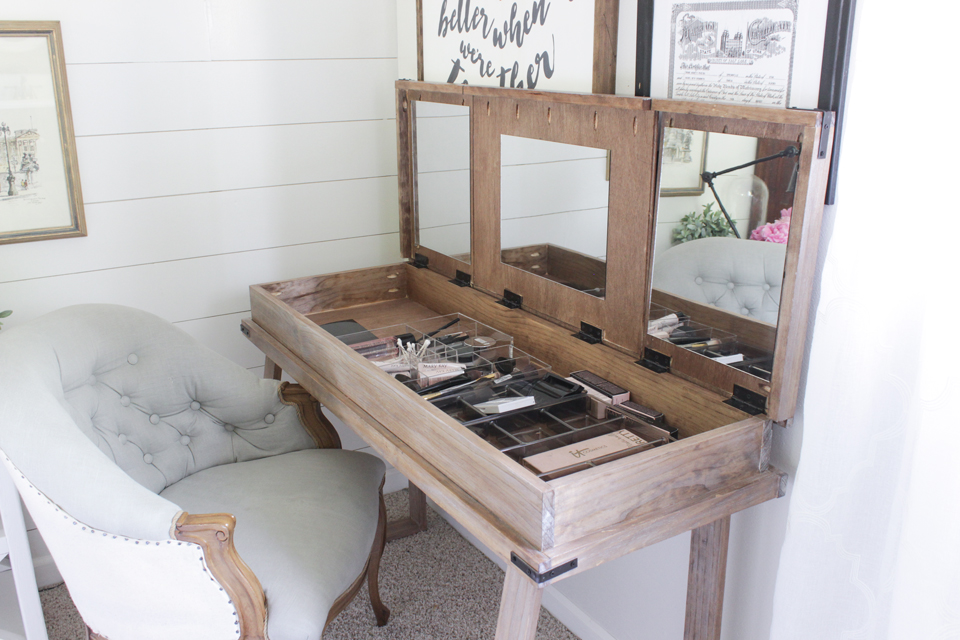
This desk is 4′ long, 18″ deep, and 29″ tall. And the top opens in 3 parts to a compartment inside. Boom! How awesome is that?! Well, I love it!
So friends, here is how I built it…
DOWNLOAD FREE PLANS HERE
Above has the digital, detailed, step by step plans, and I’m going to show you some progress shots I took to give you the basic idea.
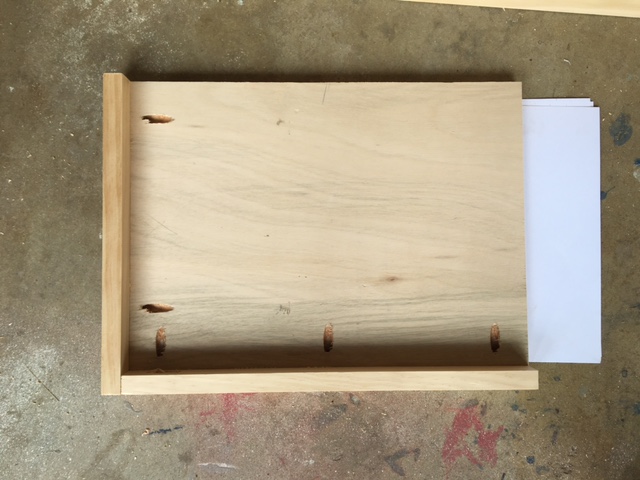
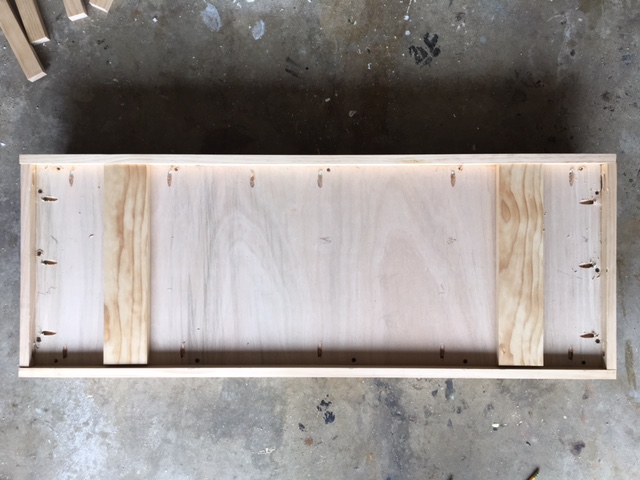
First I built the bottom by attaching a 1/2″ piece of plywood to a frame of 1x2s. I used very thin 1/4 plywood pieces to give it a little space when attaching the plywood so the screws don’t split the wood.
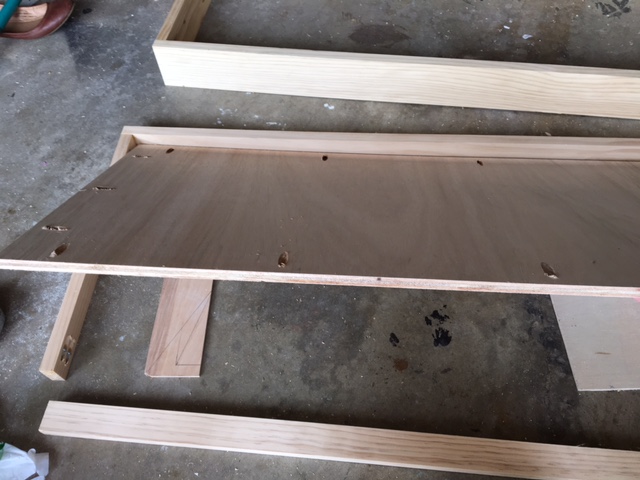
Then I made another frame piece out of 1x4s but one that would fit on the inside of the 1×2 frame on the base.
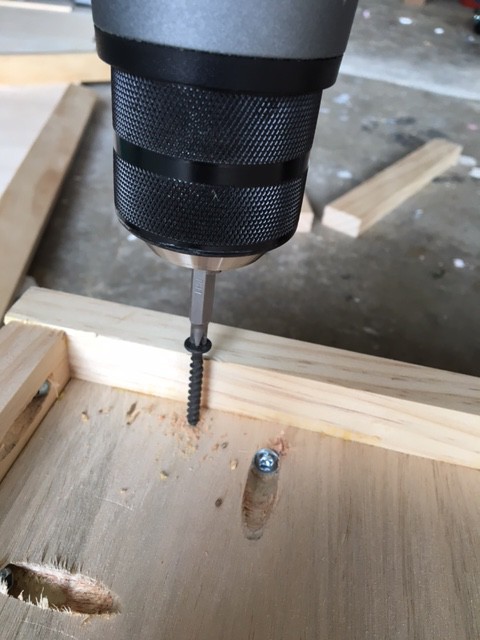
I attached this 1×4 inner frame that is actually the sides of the desk, to the bottom plywood by flipping it over, pre-drilling some holes…
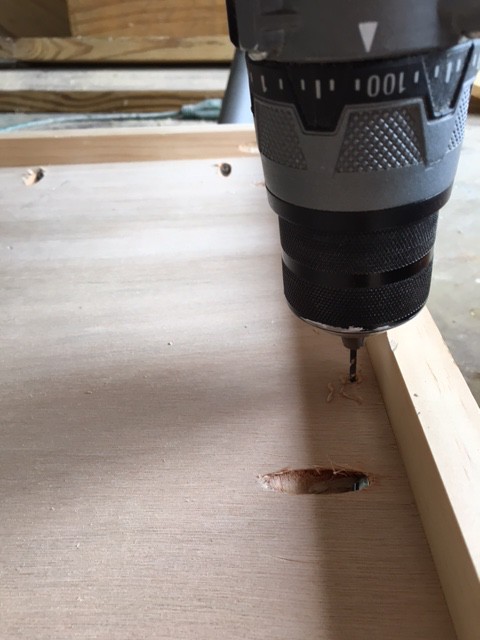
….And attaching some screws from the underside into the 1×4 sides.
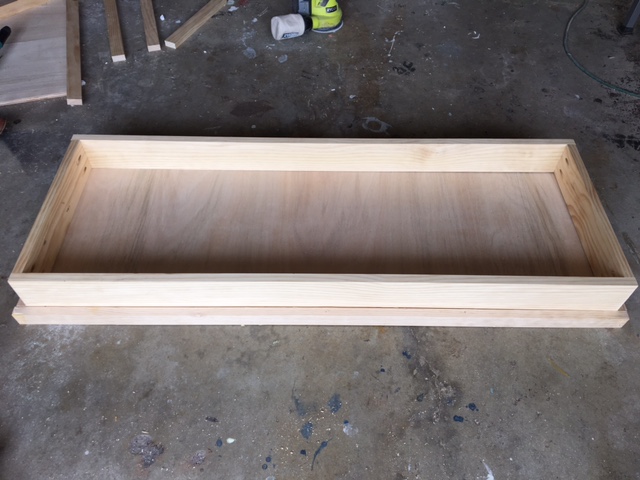
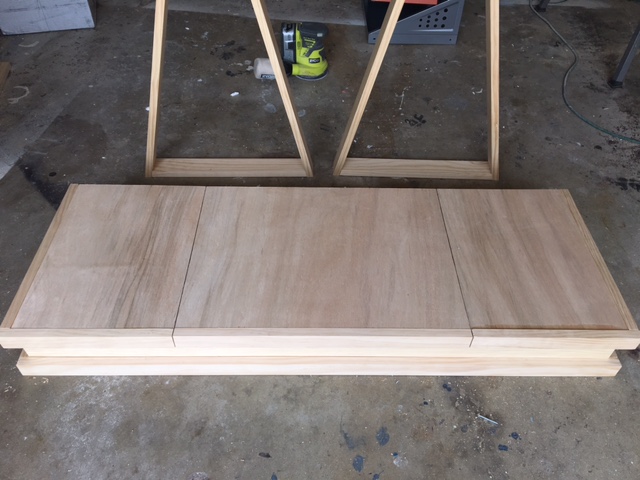
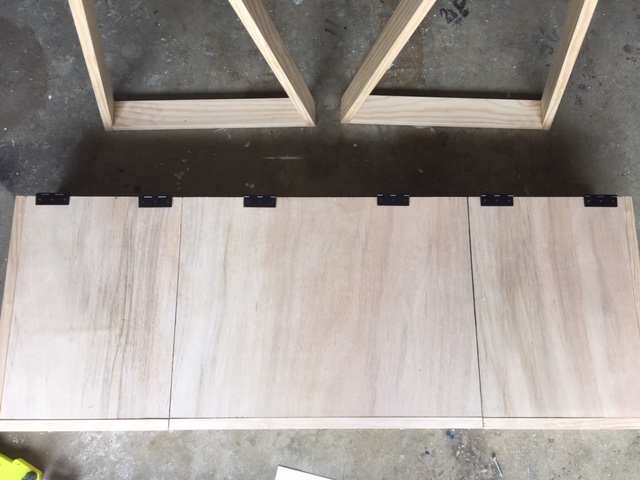
Next up was the 3 part lid. Each piece fits together to make up just a tiiiiiiiny bit bigger than the 1×4 sides –so that there isn’t too much wood rubbing against each other (there’s a joke in there somewhere…). Attach 1×2 frame pieces to the lids as well (but only on 2 sides for the left and right lids and only on the front for the middle lid. OH! And I used a few pieces of cardstock under the plywood so there would be the tiniest bit of lip when I attached it to the 1x2s.
Once all three lids have their 1×2 trims attached, you put them together and make sure they fit!
Notice the legs above? They are super easy– just a perpendicular joint on one side and a 10 degree off center angled joint on the other. Use regular pocket holes to join them from the underside of the leg base.
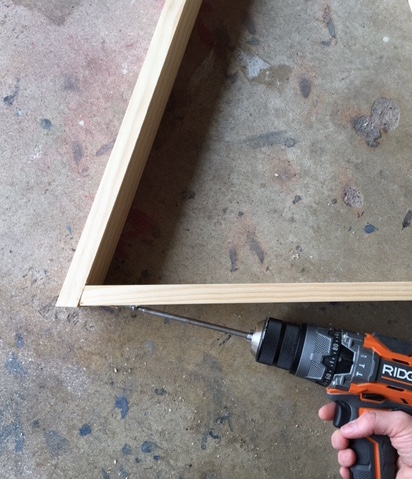
Attach the legs to these two leg supports on the underside of the desk, then attach the leg supports to the desk using regular wood screws!
Since attaching the legs comes last, you will want to measure and attach the lids using flat hinges. Biggest pain in the butt, but so so necessary.
The end result? Fantastic.
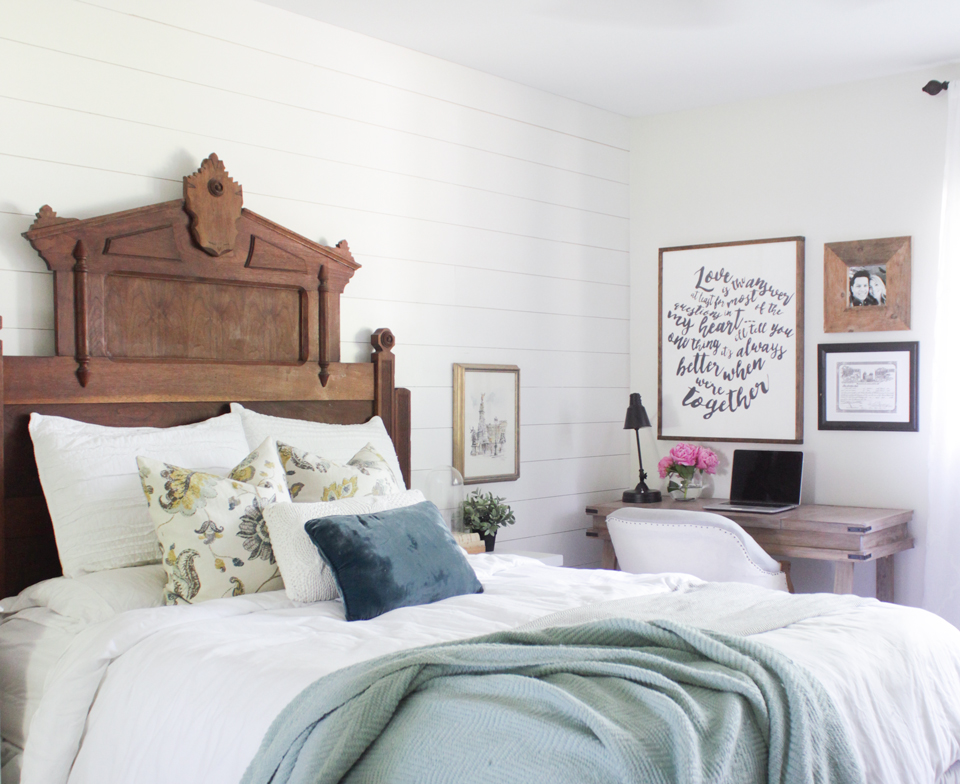
To read about my rustic Eastlake headboard makeover, go HERE.
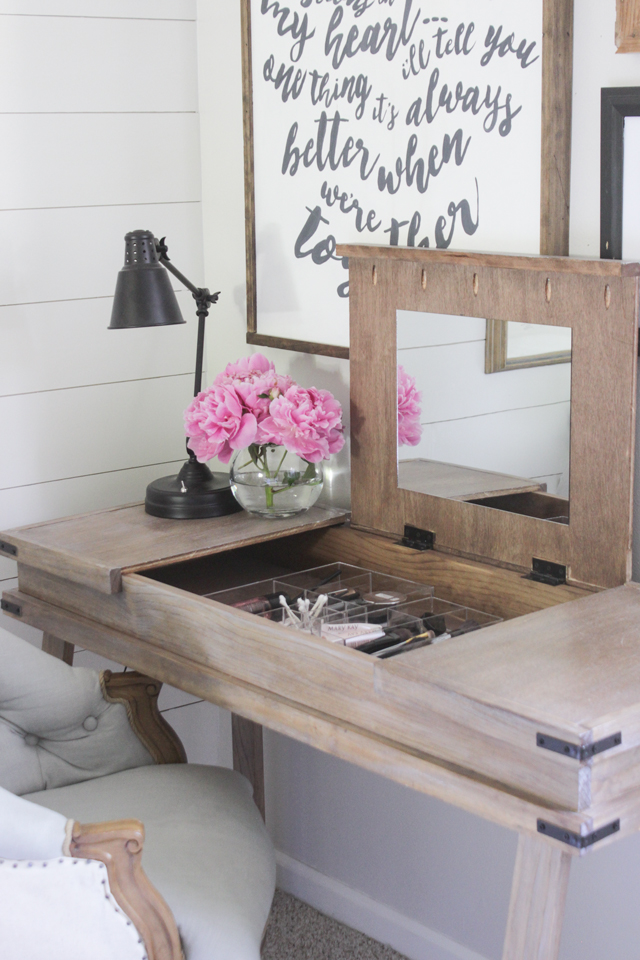
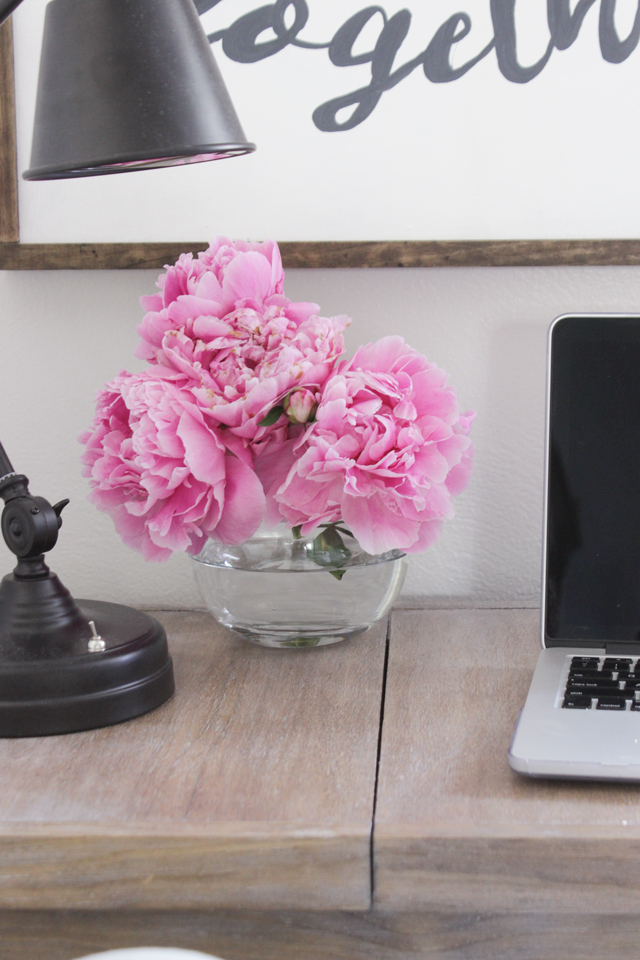
You might be wondering, why 3 separate lids? Well, when you have a multi-use desk, you don’t want to have to clear everything off when you need something out of it. I can have the lamp, a vase with flowers on one lid, my laptop on the middle lid, and then open the other lid to access my makeup and have a handy mirror to use while I’m at it!
To see the tutorial for that Wood Framed Word Art go here.
You actually can hold quite a lot– I got these clear organizers from Home Goods and they hold all my stuff and room for more! The mirrors I got from the Dollar Store and just took their cheapy-plastic edges and cardboard backs off and glued them to the underside of the lids. Because- hello! You can never have enough mirrors! 😉
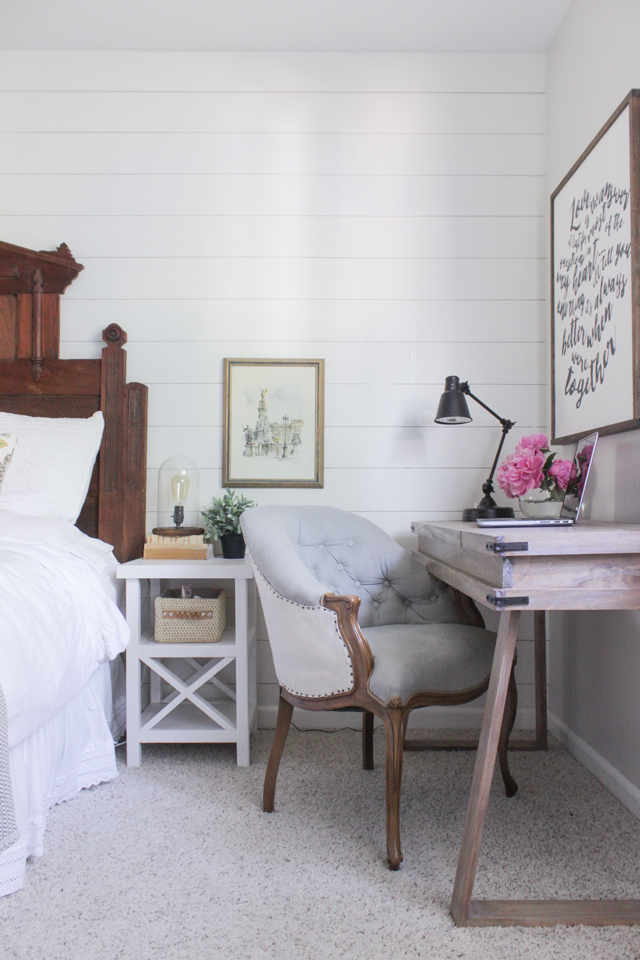
I’m pretty much obsessed with this corner now. I built another of my Small X End Tables… it is the perfect night stand!
Peonies, fresh from my garden! I swear it’s first fruits of 2 years of gardening. I’m exaggerating but it feels like it’s true.
If you are new here and love this word art on I made, I created a tutorial and free printable of what I used HERE.
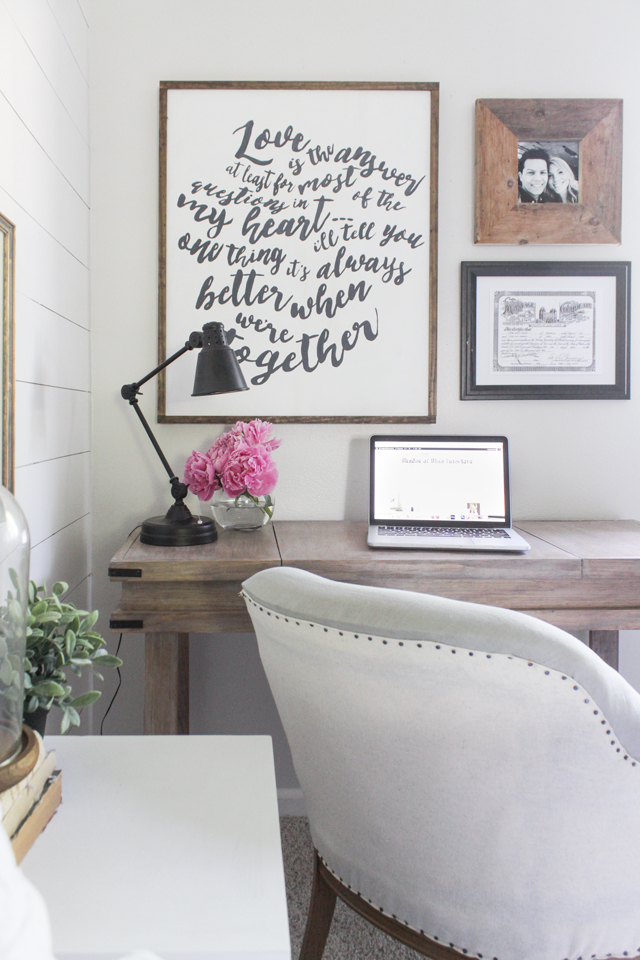
Just in case you were wondering, the french chair is one I reupholstered…. it was a bit of a learning curve so don’t look too closely. 😉 I’ll share more of that next week.
I made another Industrial Cloche Lamp to go on my side of the bed and after not having a bedside table for 2 years, boy does it feel good to have a place to put my watch/jewelry at night.

Speaking of my watch… this one is new and I’m obsessed. Bruno got it for me for Mother’s Day. It’s the first leather banded one I’ve had in a loooong time and it feels so nice.

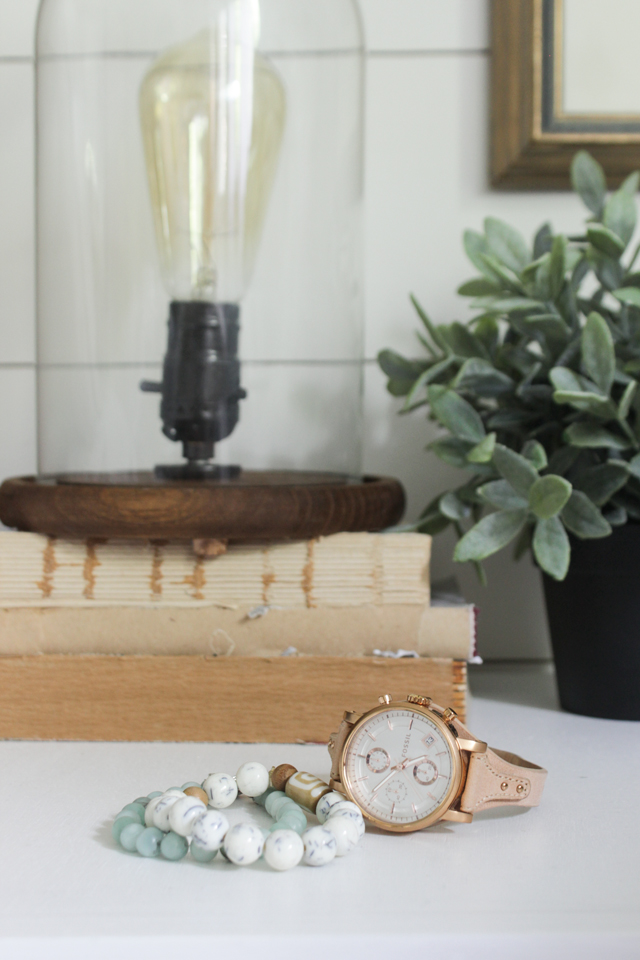
I love watches– especially ones that I can wear on a date but also is durable enough to use every day– which is totally this one.
My next post will be a video tutorial I put together on how to create the same wood finish I used on this desk– a White-Washed Weathered Oak Finish. It’s legit.
Pin this for later!
Awesome. Thanks for sharing!
It is so fun to make your own custom built for your spaces! It is perfect and stylish as well. Well done!!
It’s beautiful! You really did a great job with the finish. I made a vanity almost exactly like this last year but didn’t get to keep it since it was part of a giveaway. http://m.pneumaticaddict.com/54uqg52/articles/86715/Hairpin-Make-up-Vanity-Building-Plans-and-GIVEAWAY-
Oh my goodness! Elisha! I remember seeing that desk last year!!! It totally inspired me for this desk, but I couldn’t remember where I saw it! I’ll go and fix the post to include your desk as my inspiration– I hope you saw my video that I posted today on the stain finish of this desk— I gave you a shout out for the raised grain look that I learned from you and I linked to you in my youtube video description.
You are amazing! This is such a versatile vanity and I really love the style. Beautiful Rachel ~
This is gorgeous. But I have a question. Wouldn’t it be easier to stain & paint all the wood PRIOR to building it? If not…then please explain why, b/c my brain is always thinking of shortcuts. Thanks!!!
Ani, when building furniture all the experts and even amateurs build with raw lumber first, then finish however they want because it is a waste of time and stain/paint. You don’t need to stain every single side of a piece of wood, since not every single side is exposed (like where two pieces join). Also, sometimes there are gaps or cracks or screw holes/nail holes, etc, that have to be filled with wood filler. If you stain or paint first, then build, and fill areas as needed with wood filler, then you have to sand the wood filler smooth, removing all that work, then re-stain/paint in those areas that have wood filler and were sanded. With stain, especially, it would be difficult to get an even, professional finish if you are touching up areas, vs. waiting until the piece is completely finished, sanded smooth, then stained. I hope this makes sense. Once you start building, you will understand why this makes sense.
This is gorgeous! I’m hoping to convince my dad to help me make a modified version of this. Thank you for the plans and inspiration!
Do you have an estimate of how much it cost you to make this??
I think around $50-60?
This desk is great! I love the color, the functionality of it, and chunky wood look. Great job!!!
Love your desk! Awesome build and finish.. Hope to try this someday!!
Love the desk and especially LOVE the finish. I am currently building a bed for my niece and plan to use this finish. When you stain with the special walnut, do you let it dry before applying the weathered oak? Thanks for sharing your work!!!!
Did you watch my video tutorial on this? Pretty sure I mentioned it– but I didn’t wait 6-7 hours for it to completely dry but it was completely soaked in and dry-ish to the touch. When you are layering stains it doesn’t matter if it is dry or not. Makes no difference on the final look.
Love this!! What grade/kind of ply wood did you use?
I used Purebond Hardwood Plywood– a bit pricier than the underlayment type of plywood, but the finish is beautiful.
Perfect! My husband and I are building this for my office right now! Where did you get that light blue chair? It’s gorgeous!
Beautiful! I also love the desk lamp! Where did you purchase?
where did you find the hardware for the desk, Dan
They are just regular corner brackets that were silver and I sprayed them with 2 coats oil rubbed bronze metal spray paint.
Awesome girl… so talented !!!! U inspire me??
I love the look of the white wax in the grain… do you know by chance if the wax will work over polyurethane instead of shellac?
Probably just make sure the poly isn’t thick snd fills in the grooves.
This is beautiful! I’m just curious how sturdy it is. The legs don’t seem like a lot of support. Does it wobble after a while?
No it doesn’t wobble at all actually. It is very sturdy and we use it all the time.
Love the desk! Everything about it!! So inspiring. I am not sure where to get the lumber from. Any recommendatiions?
Great looking desk. Can you tell me where you got the L brackets?
I just finishing building your desk for my daughter to take back to college. She loves it. Your plans were great. Did it in a day. The hinges were the most difficult part. Took a few times to get all three doors lined up and square. The Kreg is great. I never used one before. I bought a Kreg just for this project. Great tool! I see some of your other plans use a Kreg so I’ll get more use out it. I’m doing one of your end tables next. I also did the white-wash oak finish you showed. Looks awesome. Thanks for the plans!
Wondering if/how you can adjust the flip tips so that you don’t have to stoop to see yourself in the mirrors.
Love the idea of makeup in the center and desk supplies in the sides!
Where is the desk chair from? It is absolutely gorgeous!
Have you ever worked with Miniwax finishing paint? Wonder if it would work the same as Annie Sloan?
Paste**
This is a great post! I was hoping you could provide an update on the chair featured in the pictures that you reupholstered, specifically what was done to the wooden arms! I love the way it looks! I know this is an old post but would love a reply so I can recreate this look on my own chair!
I don’t have closer pictures of the arms. I didn’t really do anything special specifically to the arms… just regular reupholster with exposed upholstery nail “trim”.
This is AMAZING!! And I couldn’t help but notice you use Mary Kay!! I’m a Pink Caddy driver … it’s a sign! I NEED THIS DESK!!
Beautiful room! Love the colors. What color are your walls?
About how long did this take to build?
About how long did this take to build?
What products can I use instead of the ones you have used? As i can’t get those products in Australia. Mainly the minwax walnut and the weathered oak?
Hi,
A friend gave me your plans and I built four of them for kids in our school district who didn’t have desks. So your plan paid it forward….
Hi! I LOVE the finish on their desk. Can I ask, why did you stain with walnut before the weathered oak and not just do one layer of the weathered oak?
Layering stains is a technique to get a different look on wood. Experiment on scrap wood! You’ll see it looks different if you layer vs just using the 1 stain.