The long anticipated (by me at least) reveal of our tiny master bathroom makeover is here! If you want to refresh your memory of my design plans for the room, you can go HERE, and see our mid-way progress HERE, and I shared the build plans for the vanity HERE. I also revealed the new (old) barn door we installed for this bathroom HERE creating so much more usable floor space.
I’m really proud of this room. We (my husband and I) did everything, and several of the projects were ones we had never attempted before.
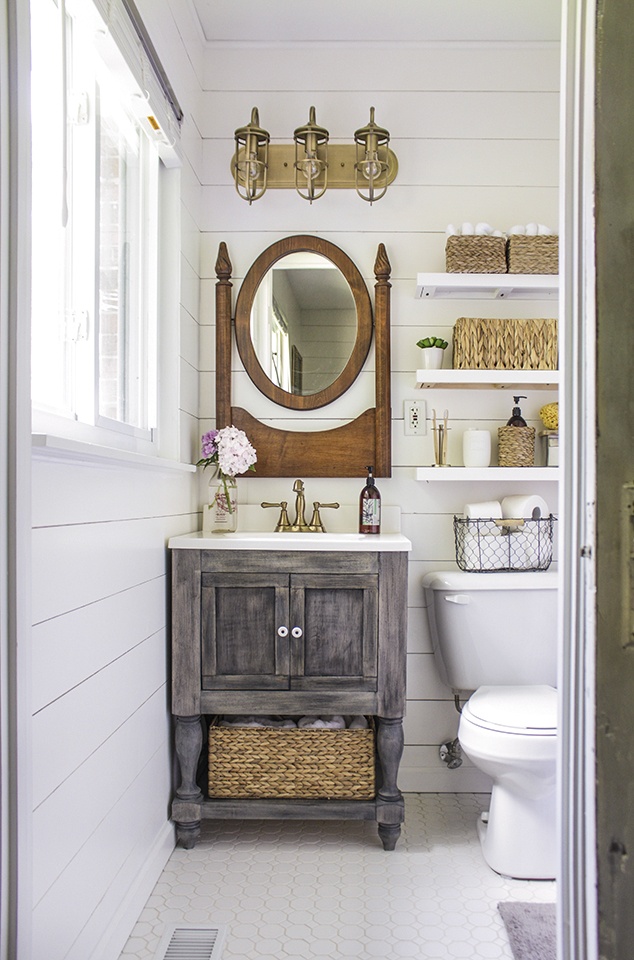
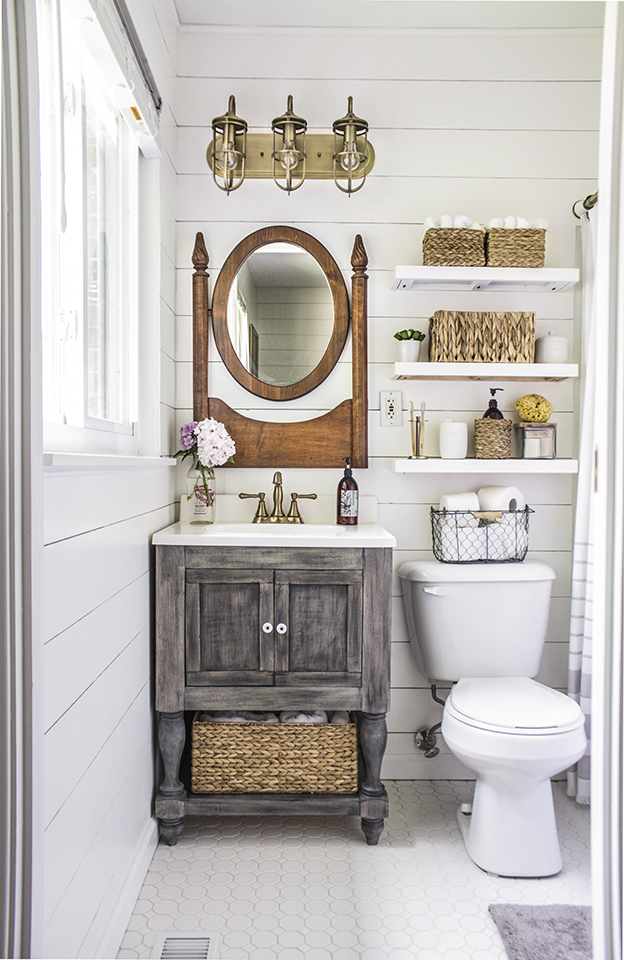
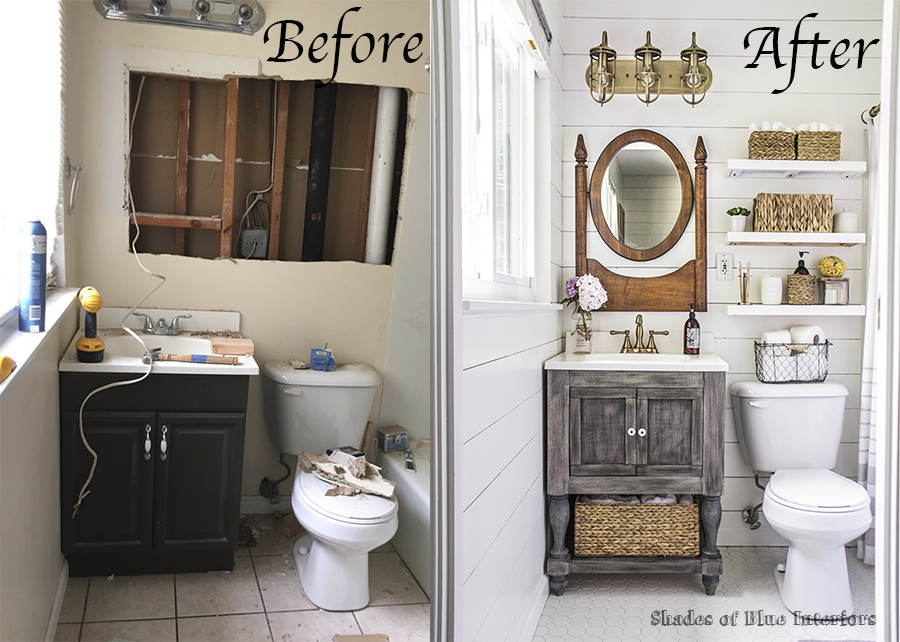
As I described in my progress post, we opened the wall so we could move the outlet and extend the studs (so we could reinforce the floating shelves), re-sheetrocked, then installed the faux shiplap over the entire room. After painting, we installed the octagonal tile, built the vanity, and built floating shelves. The entire room, including floating shelves and trim was painted with Benjamin Moore Aura interior paint in Simply White Satin. The Satin adds just enough sheen to reflect more light, which helps the room appear larger.
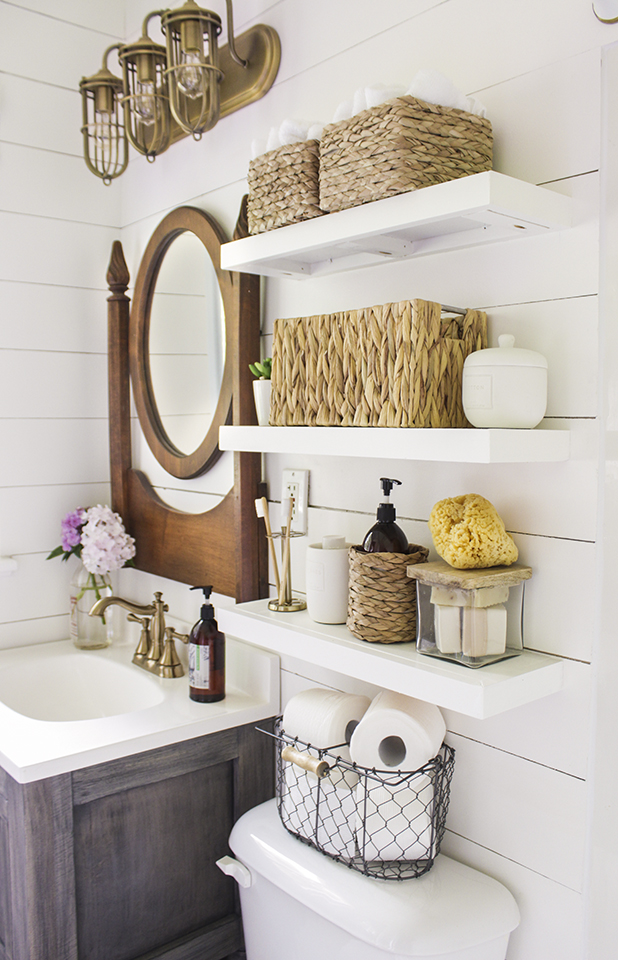
I recruited my kids (ages 9, 6, and 4) to help me build these floating shelves. My oldest drilled pocket holes and helped screw them into the wall, the 6 year old marked which board was for what, and placed the pocket hole screws in the holes, and my youngest sanded all the edges of all the boards. They really enjoyed being a part of a quick project that had a big impact!
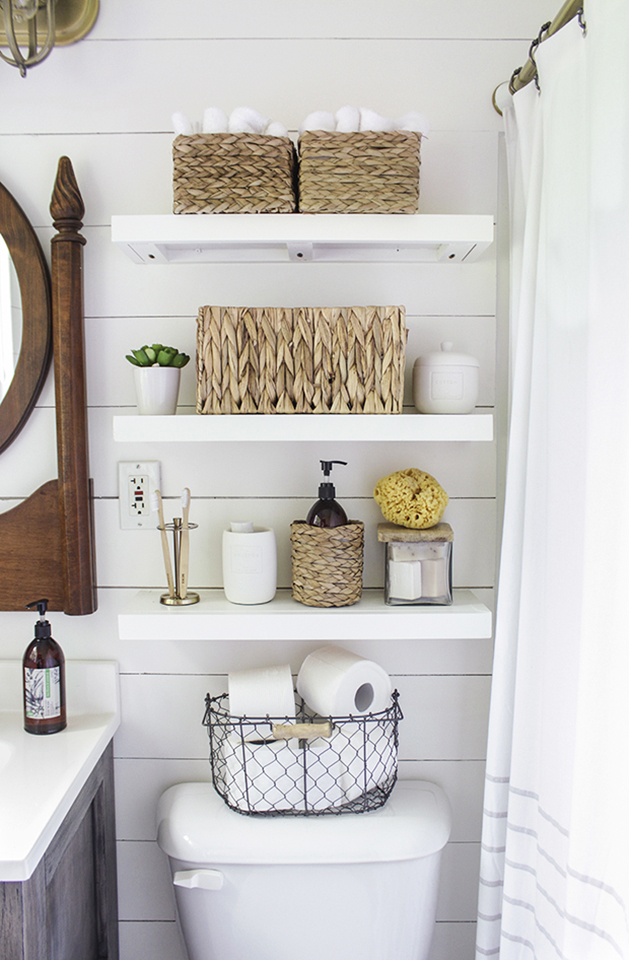
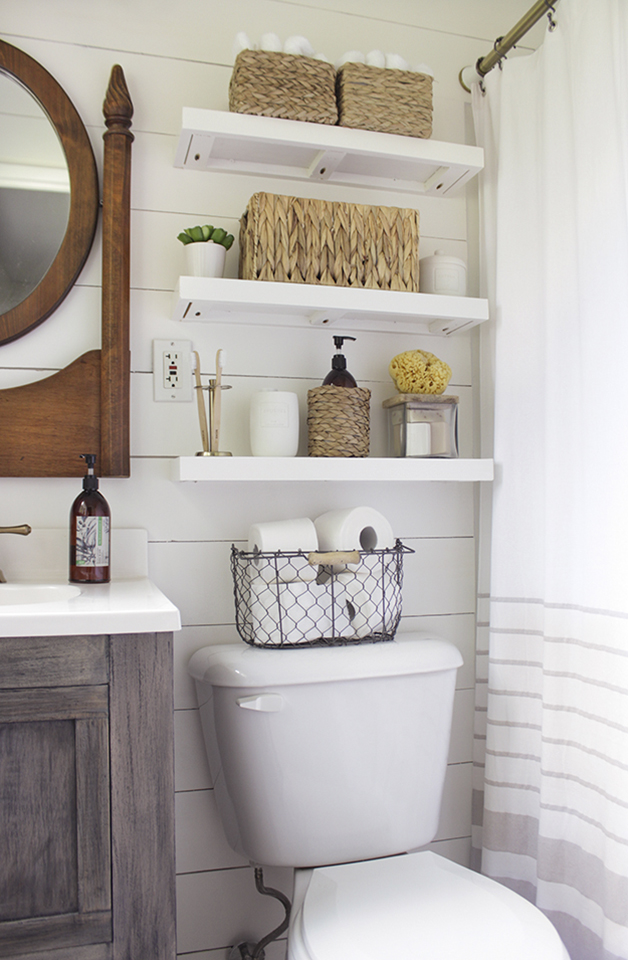
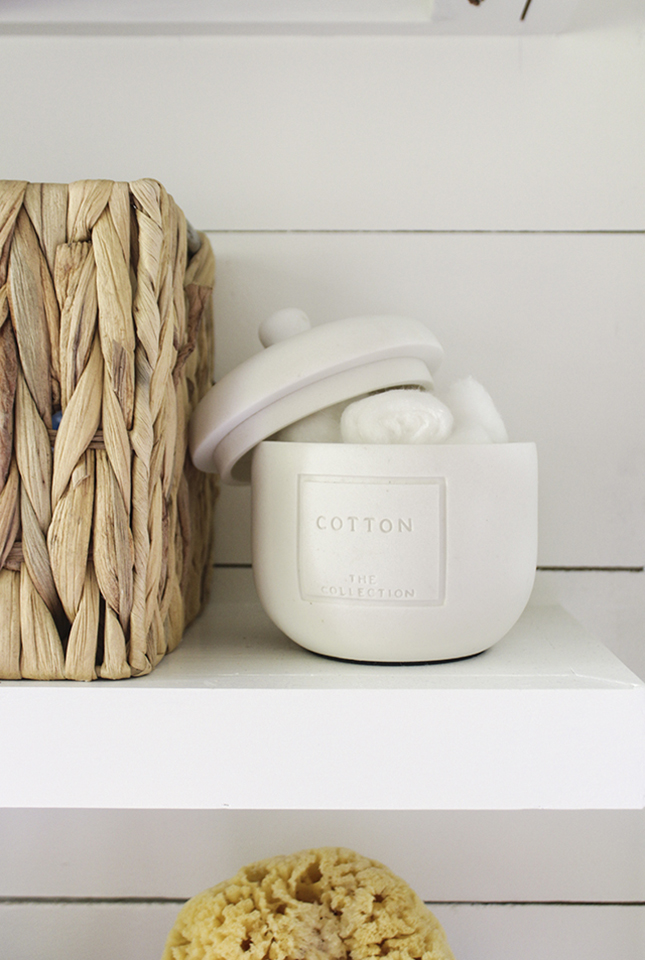
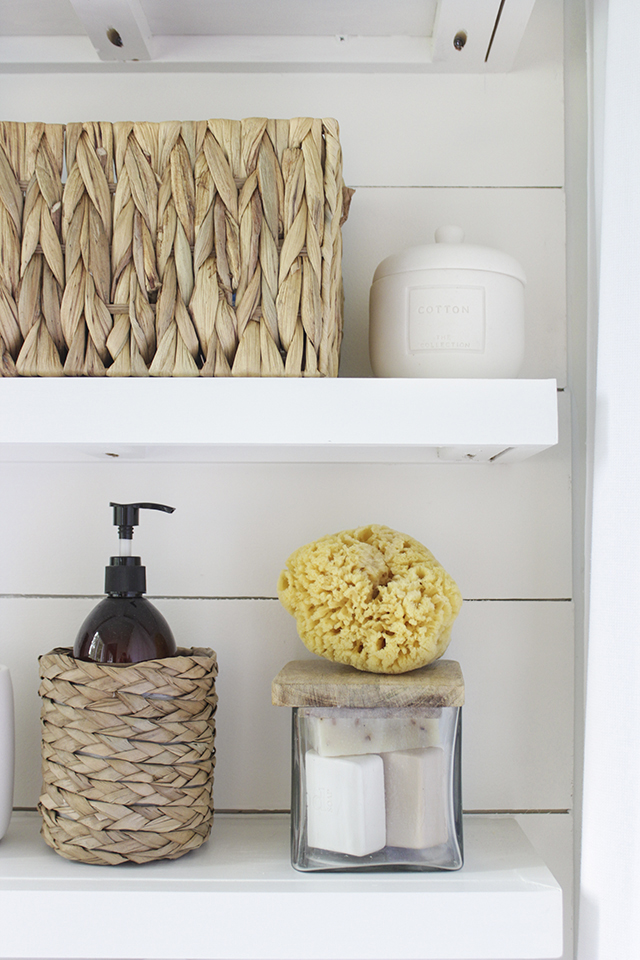
I enjoyed accessorizing the shelves with both pretty and functional things.
Sea sponges, natural soaps…
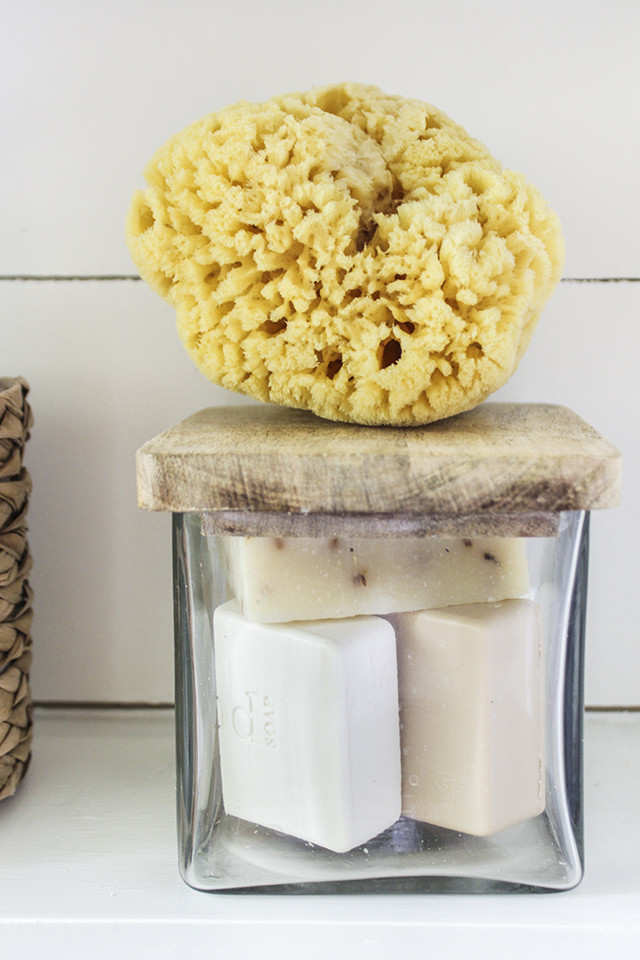
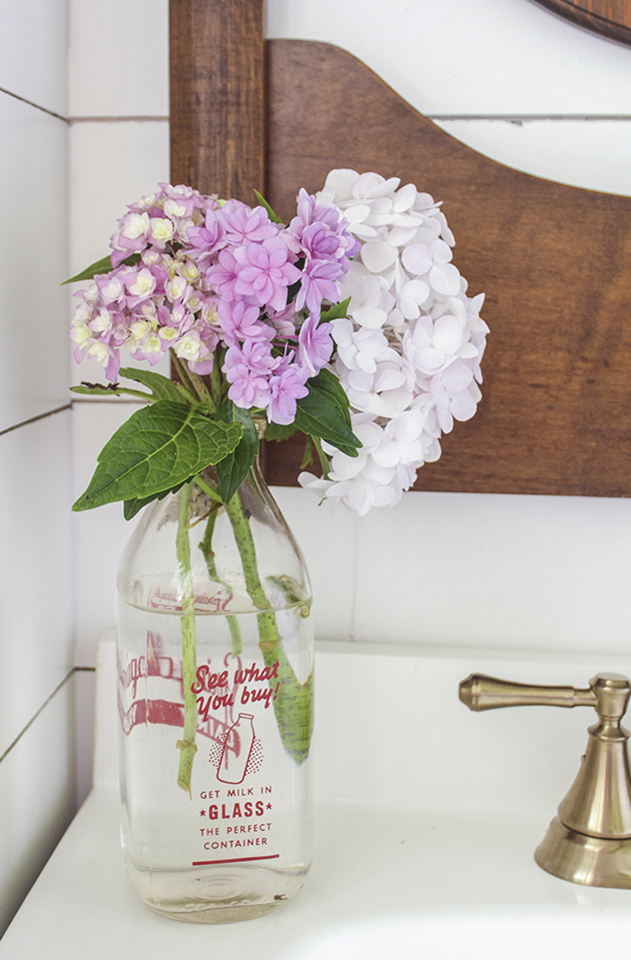
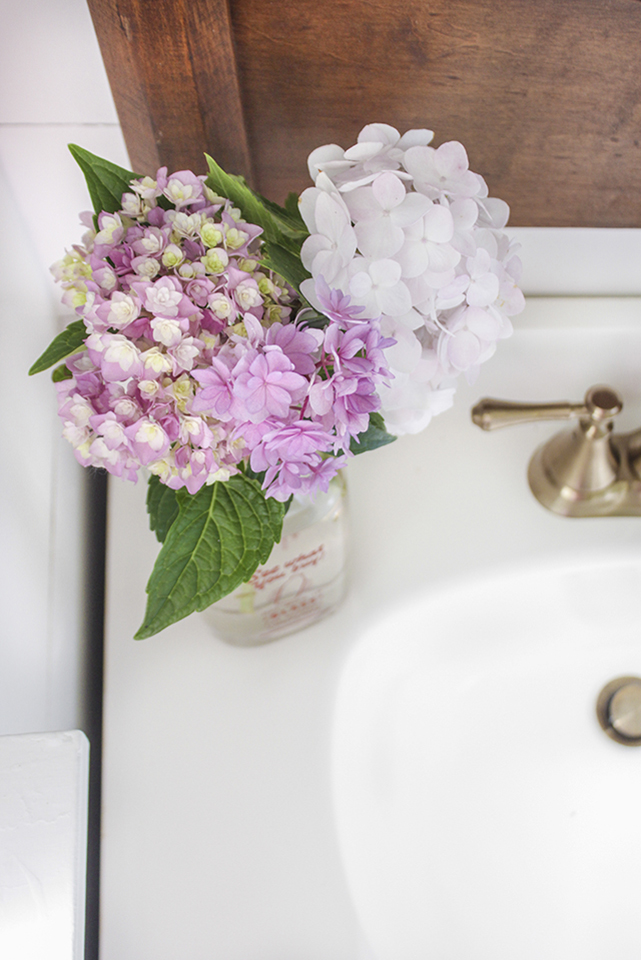
..and pretty jars and sea-grass baskets…
I also was searching EVERYWHERE for some wooden toothbrushes and ended up having to buy them online.
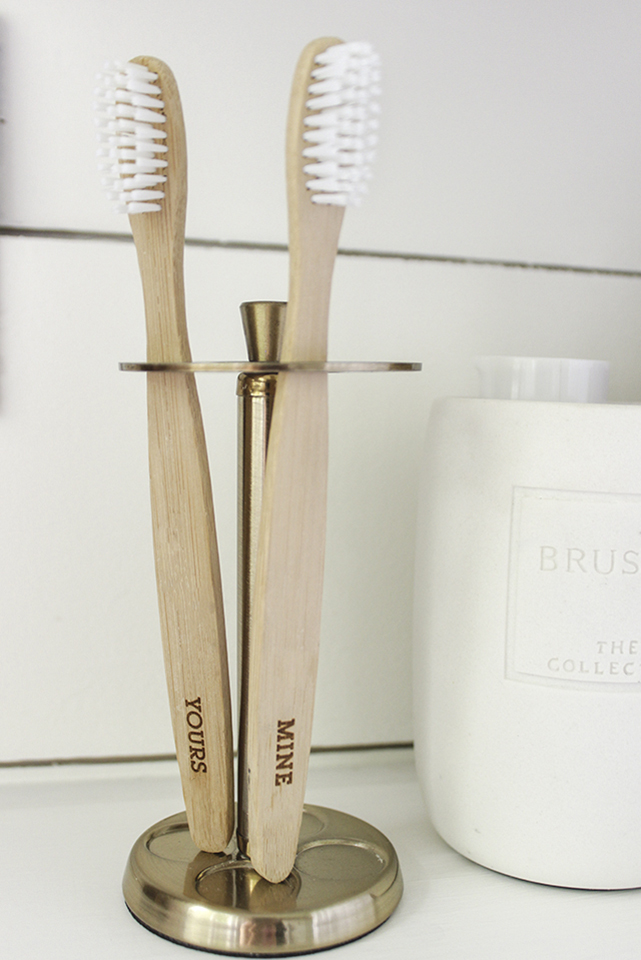
Let me tell you, these “yours” and “mine” toothbrushes spur the funniest conversations. Ours went something like this:
“Which one is yours?”
“Mine is ‘yours'”
“I don’t want to share toothbrushes!”
“I know. You get ‘mine’ and I’ll take ‘yours’.”
“No. I don’t want yours! Mine is mine. Yours is yours. No sharing toothbrushes.”
“Correct.”
It felt a little like that “Who’s on First” joke by Abbott and Costello. 🙂
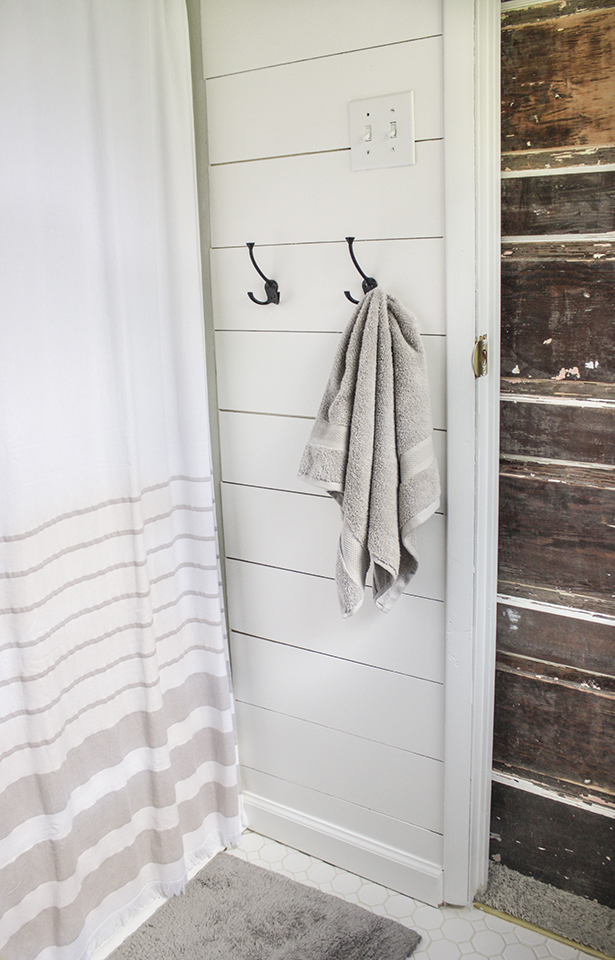
Here is a peek of the other side of the room… I put up hooks instead of using a towel bar, and you can see the other side of the door that I stripped. I really like the contrast it adds. The shower curtain is one I found at HomeGoods and is one of my favorite finds. It is cotton towel material with fringe at the bottom and perfect warm-gray stripes.
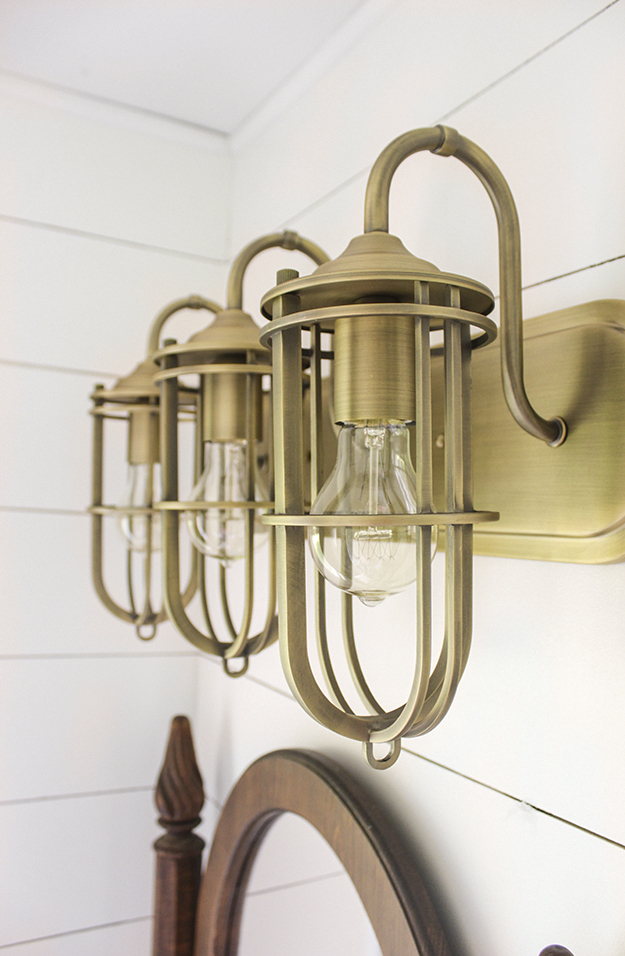
Part of the reason I had to wait so long for this reveal was the light fixture I chose from Lamps Plus was back-ordered until a couple weeks ago. It was SO worth the wait though.
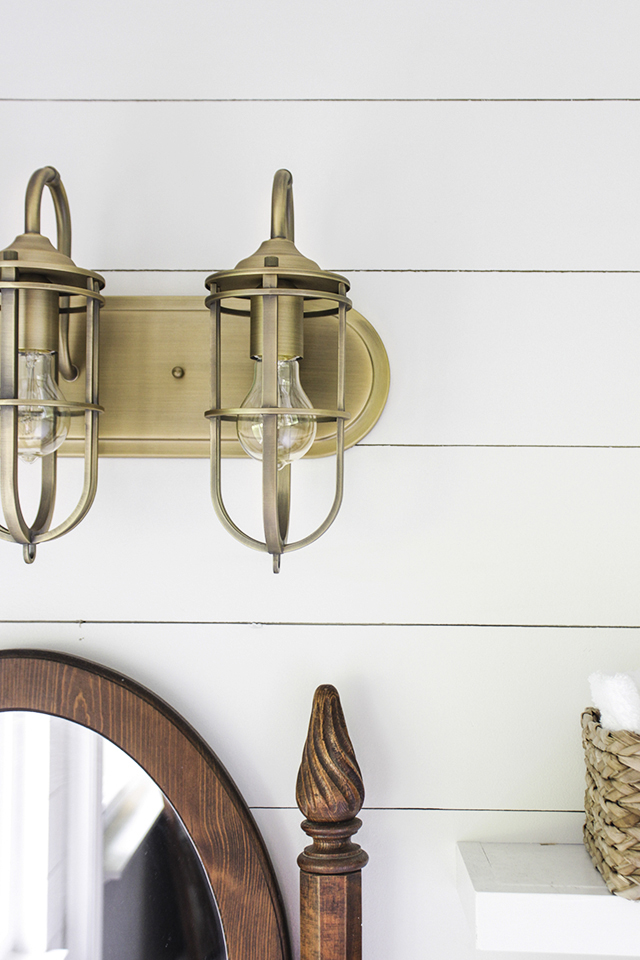
It adds just the right amount of vintage industrial flair. This is the Urban Renewal 3 light Vanity Light by Feiss in Antique Brass.
My love for this light fixture rivals that of the Champagne Bronze Delta Faucet. I have a thing for gold… have I told you that before? 😉

What a difference, right?
Lamps Plus, Delta Faucet, and Osborne Wood Products all provided me with products I used in this makeover in exchange for mention in this post. All opinions are my own and I would not recommend them if I didn’t absolutely freakin love them and feel honest about partnering with them.
Source List (Affiliate links included):
Light fixture: Feiss Urban Renewal 21 1/2″ 3-Bulb Vanity Light in Antique Brass
Faucet: Delta Faucets – Cassidy Centerset 2 Handle Faucet in Champagne Bronze
Vanity Turned Legs: Osborne Wood Products – Marshall Island Legs
Seagrass basket under vanity and on middle shelf
Seagrass baskets on top shelf & bottom shelf
Mirror – Vintage
Tile – Ceramic Octagon Dot Mosaic Tile
Paint – Benjamin Moore Simply White OC-117, Aura Interior, Satin Finish
This was certainly worth the wait!! My favorite part is that mirror! Great choice of accessories as well.
I don’t see a link to the shelves?
What an amazing job you have done! I love your tooth brush story and that you included your kids in the shelving creation. Enjoy your beautiful new room!!!
That light! Swooning! Congratulations – y’all should be incredibly proud. That’s one heck of a makeover!
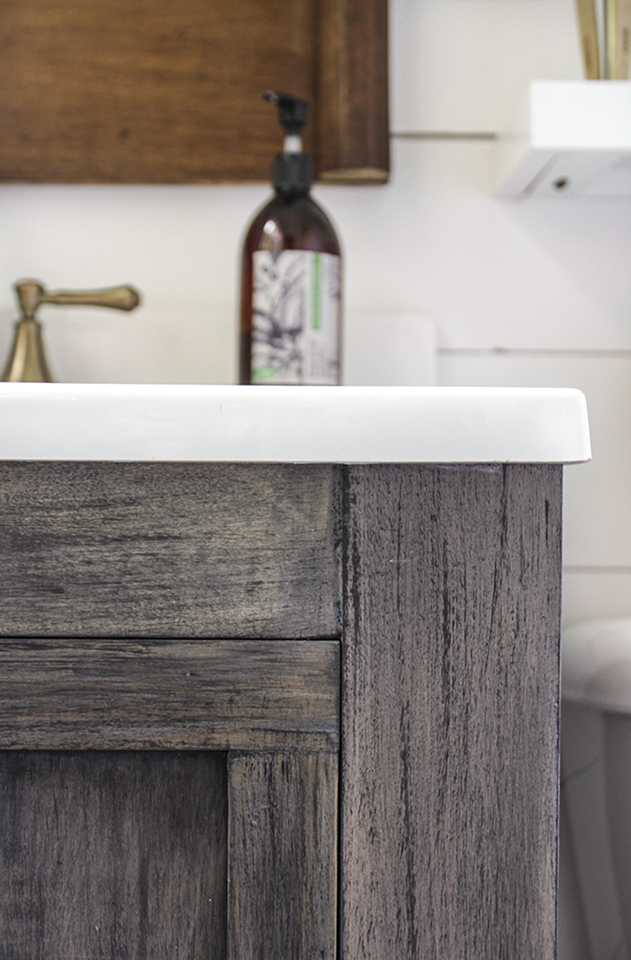
Hi. I love the finish on the base cabinet. Do you mind me asking what you used for that color and look? Thanks!
Hi there! Thank you so much! I described how I achieved this finish in the post I did for the vanity actually! Check it out here: https://www.shadesofblueinteriors.com/small-master-bathroom-vanity-free-plans/
Hi, can you please tell me how you made the floating bathroom shelves and from what.
Thanks
The bathroom is beautiful btw
Where did you purchase the wooden shelves? This looks amazing.
Hi Rachel, did you make the complete cabinet? My powder room is so small, but I really would love a small cabinet so I have some storage
Love, love, love this! Especially that mirror…stunning!! I will definitely be pinning this one to my bathroom inspiration board 🙂
Wow Rachel!! This is stunning and I am in LOVE with it all…down to every last accessory!!! So perfect!! I was recently looking for wooden toothbrushes as well…glad you did all the searching for me!! Lol!! Looks amazing!!!
I am in love with this bathroom! We have a small master bathroom and we just redid it with light tones, tiles, and paint. It made the space feel brighter. I wish I had a little window in mine. I am loving that light, and good on you for waiting for it. I almost always pick something else if it is not immediately available. I am a impatient person. I love the floor in the bathroom, nice mix of texture, pattern with subtle colors!
This is so gorgeous, Rachel! I love the accessorizing you did and the amazing light fixture!
Good gracious! My head is about to explode from the awesomeness of this room. It is so gorgeous! Everything! The faucet, the lighting, the styling, the floor! More exclamation points!!! Beautiful photography too 🙂
This is absolutely gorgeous! Your bathroom brings me so much inspiration. My husband and I have a great house built about seven years ago. Everything is perfectly functional and updated. BUT, it’s not how we like it. Do you know what I mean? We want to make it ours. And, while the granite in our bathroom is perfectly fine, black is not our first choice right now. You bring so much inspiration to keep making our home our home.
I am OBSESSED with this bathroom! Everything is so dreamy and perfect and I think I could stare at these photos all day!
gorgeous! I love your mix of new and old.
Hi Racheal!!Love this bathroom. The detail is perfect. One question, did you have to prep and prime the walls a certain way for the moisture you get from a shower in that size of a bathroom?
Hi Sarah, Good questions. I used BM Aura paint which is a paint and primer in one and is mold/mildew resistant. It is more expensive that a regular line of paint ($70 per gallon), but after 2 coats with the semi-gloss we only needed 1 gallon for the whole bathroom. We do have a good fan in the bathroom, but I felt confident before we painted, that this paint would hold up beautifully and safely to the small bathroom. Thank you for asking!
You indicate that you used a ‘ faux shiplap ‘ what was your source? as I love this look and want to use it, too. Thank you
Hi! Thanks for the question! I rip cut 1/4″ plywood to about 5.5″ widths and used liquid nails and regular nails to attach them on top of the Sheetrock (nailing into studs). Before attaching each one to the wall I made sure there was a thin gap between each one by using a quarter (coin) to put between the planks to give them that 1/16″ space that gives that same look as shiplap.Then I filled all the nail holes, sanded, and painted.
Oi Rachel! I love how it turns out and loved your posts how you love Brazil and is married to a Brazilian! My husband and I are Brazilian leaving and loving California for many, many years ?
We do most of the projects ourselves and I always wanted to do faux ship lap in the bathrooms, but worried about mildew. Did you prime and paint the walls then attached the wood? Also, did you prime and/or paint the back of the wood as well? ☺️
Obrigada, beijo
Maira, Thank you so much! Yes we primed and painted the walls before we attached the faux shiplap and we used BM Aura paint which is mold and mildew resistant on the wood afterward. We haven’t had any problems and I don’t imagine you will either as long as the room as good air flow (a fan and/or a window).
Hi, Rachel! I love this bathroom, so pretty! Could you tell me how wide and long the shelves are above the toilet? I want my hubby to build some just like this. 🙂
Mirror, mirror, mirror. Did I say mirror? Did you make it? I am in love!
haha! Thanks Patti-Ann! It is vintage from an old dresser that I redid awhile ago… I just stashed the mirror away for awhile and pulled it out when I needed something for the bathroom! Thank you!
I absolutely love love this bathroom. I would like to know where can I find that vanity and sink?
Hi Celia, not sure if you read the post but I said at the beginning that I built the vanity, and I linked to the build plans for it. The sink was older and we reused it.
Thanks for the shiplap tip! It looks great. Where did you get the barn door hardware? Could you maybe post a tutorial?
yes! here it is: https://www.shadesofblueinteriors.com/master-bathroom-barn-door-the-new-vanity/
I love love love this! I haven’t found a bathroom I love more so I’m following your lead. Ship lap is complete along with the tile. I’m starting on the vanity today and am so excited! What are the exact detentions of your vanity top? I don’t want to start my cuts until I know I can find a top that looks as great as yours.
Thank you SO much for making printable instructions for the vanity! It’s been so nice to head to Lowe’s and Home Depot with a plan in hands.
The sink top is old but the dimensions are 25″ by 19″. 🙂
Thank you!
I couldn’t find one that was REALLY that size! I purchased two different vanity tops that said 25×19 but were really 24 1/4 x 18 1/2. Unfortunately I had already built the vanity and the sink top is not quite big enough. I’m giving up on looking for one like yours because shipping them back when the don’t fit is not fun! Oh well, I’m buying remanent quarts and will love it in the end.
I’ll send you a photo of my bathroom when it’s complete. Thanks again for your inspiration and direction!
Silly question…..what exactly are the dimensions of your bathroom? We want to remodel our master bath but only have a 6′ square to work with and this layout looks better than how it’s set up currently…if it would fit…
Our bathroom including the tub is 59″ wide by 81″ long.
I love this shower curtain! Any idea the brand?
This is a great little bathroom. I am copying some of your ideas for my makeover bathroom
I looooove your makeover, and am totally OBSESSED with that light fixture, lol…….
Hi Rachel!!! Love this bathroom!! I have been searching for floating shelves to go in mine and love the ones you have!! Where did you get them?? I have been searching everywhere for some like this!! Thanks!
Where did you get the shelves?
I made them! They are just simple floating shelves that basically follow same tutorial from Shanty2Chic (except I didn’t use a bottom piece)– but I used 1x2s and 1/4″ plywood.
I have been trying to do my tiny bathroom for ages and you have really inspired me as my bathroom is exactly the same layout. I am now so excited. Thank you! I too, love the mirror!
I love the shipman walls. One Question! Why didn’t you center the light Fixture? I hate to be picky, but being a decorator, I am a little OCD about things like that. LOL
I meant shiplap. I hate Autocorrect!
I just love everything if you’ve achieved in this bathroom and the fittings, the tapware the lightfittings are just perfect to finish the look……well done and I’m looking forward to seeing more of your work…..Gail
Did you put the faux shiplap in the shower area too? I do not see any reference to it.
What a great job! I am in the midst of a remodel and have to make a quick decision on my vanity. It looks like you have a very tight fit between the tub and vanity. I’m wondering if it’s 30″ between them (code around here is 15″ from center of toilet plumbing). If so, do you find it a pain not to have a toilet paper holder? If I get a larger vanity, I know there won’t be room, but I also don’t want to get rid of my counter space by switching to a 24″ vanity from a 30″. I would love your perspective!
We have 27″ between the edge of the vanity and the tub. There is 15″ between center of plumbing and tub edge. It’s a small bathroom so we honestly prefer the toilet holder in the basket– it makes it feel less crowded when sitting on the toilet. It’s not inconvenient or uncomfortable we have found and we’ve been living with it like this for a year and a half. For counter-space… we have a 25″ wide sink top and even though there isn’t much, we still can fit the necessities. The shelves above the toilet make up for lack of counter space, because we use the shelves for anything that would have been normally put on the counter. My makeup and hair stuff did not fit on the shelves, so I built a vanity desk in our bedroom that holds everything inside with mirrors. We’ve found it’s been the best way to make use of a small space, which we can’t really change.
Thank you so much for your insight. I think I will stick with my larger vanity and try your toilet paper basket idea! We will have about 28.5″ between tub and vanity with 15″ from toilet plumbing to edge of tub, and it sounds like you made that work just fine!
Where did you purchase the white shelves over the toilet?
I made them using a slight modification in size from the Shanty2Chic bathroom floating shelves (I used 1x2s and 1/4″ plywood).
After a year, how has everything held up? Especially the shelves and the vanity?
They are still as good as day 1! They get a lot of use but still are as sturdy as ever. I’m probabaly going to be putting similar shelves in my kids bathroom when we give it a makeover next year.
Where did you get the wire basket for toliet paper? love that idea!
And the shower curtain? 🙂
I got both the basket and shower curtain at HomeGoods.
What is the spacing between each of the shelves? I’m thinking of doing maybe 12″ and trying to decide between 2 and 3 shelves high. Mine will go over the toilet between wall and 25″ vanity. I will have a hand towel bar underneath as my toilet tank is very low profile.
How did you make the mirror or where did you buy it? Thanks
I love your bathroom! We just remodeled our master bath & used the delta champagne bronze fixtures. I have been looking for a vanity light that will blend with the fixtures. I was so excited to see what you used. Are you happy with the color of the light fixture? Does it match well?
Such a beautiful job!
Where did you get the glass jar with the wood top?
Thanks!
Kim
Where did you get the vanity from or did you build it?:)
Hello, I tried to go to the link for the wire basket but it is not working. Would you provide it again please? Thank you.
Your bathroom looks wonderful! I know you are so proud of it! you did an amazing job.
Do you have a tutorial video of how you did the walls?? With the wooden planks?
Looks great quick question what is the overal sq footage of your bathroom.
What’s the sq footage of your bathroom
THIS TURNED OUT SO BEAUTIFUL! (I made sure to click through HomeTalk to your website so you get credit for such an awesome makeover!). Very inspiring!
How did you hang your mirror? We have an old mirror very similar to the one you used that we are wanting to hang in our bath. We are trying to figure out the best way to hang it.
I just used a couple screws! I also love monkey hooks— they make a small hole and can hold up to 50 pounds!
Looking gorgeous. I have been thinking to remodel my bathroom and i found your blog with inspiration also informative. I am so excited to see what you used in your bathroom. I wanna also ix some of these when i remodel my bathroom. Thanks for the sharing your experience with all of us.
Love this bathroom. Can you provide the source for the cotton ball holder and brush one. They say collection on them and cotton and brush? Im not finding the souce. Thank you so much!
Love the barn doors! dIY? Or where did you get it? Thanks!
I never comment on these things, but yours was over the top. I’m so taken with the wall treatment, but didn’t really understand exactly how you did it. I’d like to do something like that on my horrible parched popcorn ceiling. Can you please advise me where to go?
Hi Rachel,
I love everything about this bathroom! For the floating shelves, how far do they extend out from the wall? Thanks!!
About 12 inches. The tutorial for them is found here:https://www.shadesofblueinteriors.com/diy-floating-bathroom-shelves/
How you hang shower curtains? Do you use tension rods? If yes then please let me know you had tiles in your bathroom then you utilize tension rods???
This is absolutely mind blowing. Thanks for sharing
Thanks for sharing this precious information with us, this is really helpful for me and also for my upcoming project as well
This is mind blowing information, thanks for sharing this precious information with us,
This is sensational thanks for sharing this precious information
Thank you, RACHEL , for putting together everything in master bathroom makeover reveal. I think you have covered all the major points in this article, I will share this with my network as well.
This is mind blowing, thanks for sharing this precious information with us.
I love your interior design ideas. Thanks for sharing.
This is the Dream bathroom that everyone wants to be in their bedroom. This white color gives a modern look to your bathroom, and the selection of the lamp is perfect. Follow this post if anyone wants to renovate the bathroom and doesn’t know how to renovate it. I will share this post with my friends also. Thanks for sharing.
Thanks for sharing the information. This Forum is Very helpful, people can share there information here very easily.
Amazing steps. I want to decor my living room, working area & kitchen areas. Through this blog. I got lot of inspiration from decor ideas. Thanks for sharing. Please share more blogs.
This blog contains really valuable information. Thanks for sharing.
Thanks for sharing