Today I’m excited to join 16 of my favorite bloggers in sharing a cozy spring home tour. We are each sharing 1 or more room decorating for spring in a simple but inviting way, but in addition to giving some inspiration, we really wanted these tours to not be a “show-off” post– but also helpful! So we each are including a small DIY or helpful decor tip.
I hope you enjoy perusing through all the tours and feel excited and inspired for this new season of re-birth. I also hope you don’t ever feel discouraged or play the comparison game. I feel like my house is a disaster most of the time, and it certainly isn’t this clean all the time. I have 3 kids people! haha! Life happens! BUT– It IS fun to bust out some fresh flowers, change up some pillow covers, and maybe paint a wall or two to fall in love with a space again.
If you saw my post on Monday, then you are familiar with the DIY sunburst cedar wood door mat I made (pictured below) and shared the tutorial for. If you are interested in making a wooden doormat for FREE at a Home Depot DIY Workshop, click here to register for the workshop this coming Saturday (3/26).

The spring hanging basket is something I added a couple weeks ago and shared a tutorial for.
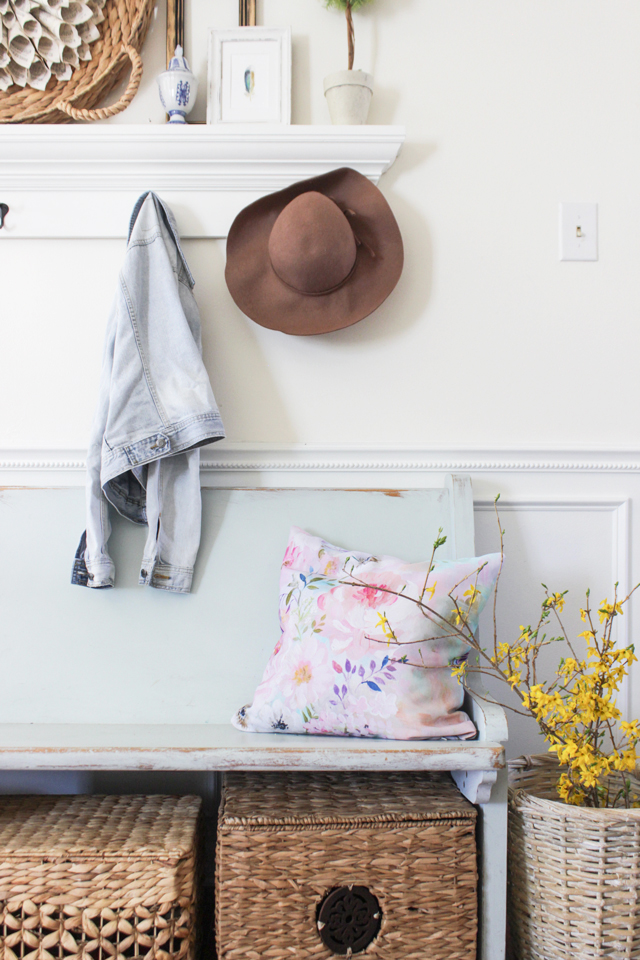
When you walk in, you are greeted by this vintage church pew I painted a couple years ago. I used to have a stained mantel/shelf but right before Christmas I made a new one and painted it white. I LOVE it.
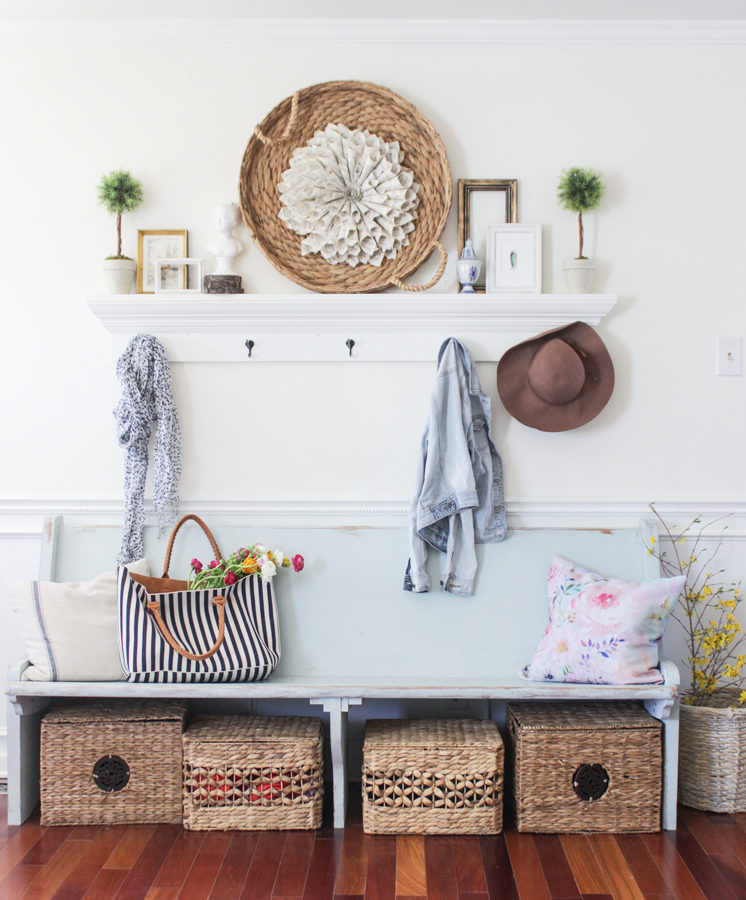
Seagrass tray, blue and white striped bag, jean jacket, scarf, and hat: Target
Seagrass baskets under bench: HomeGoods
Shelf frames and topiaries: thrifted
You will see a few flowering tree branches throughout my home, but I didn’t pay for them! I went outside with pruning shears and clipped some! Flowering branches are a great way to add fresh color without spending money. 🙂
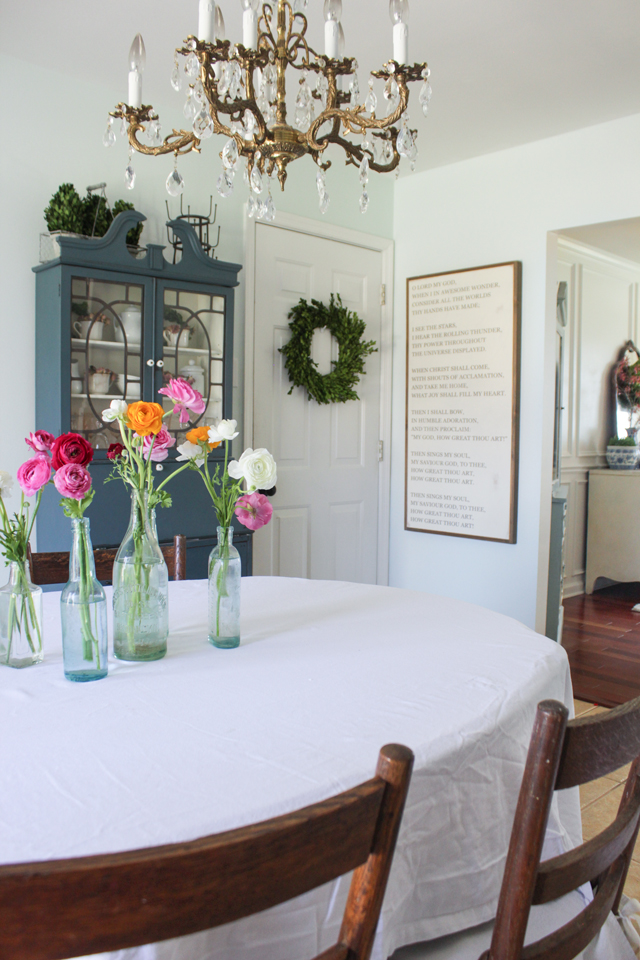
But sometimes, if I see fresh ranunculus at Trader Joe’s for $5 a bunch, I can’t resist. They are just too pretty!

Just opposite of the bench is our front room sitting area. I recently put up wainscoting trim all the way up the wall and painted it white… although this white isn’t quite right for the room and I will be repainting it a TRUE white very soon. I love how the trim really makes the ceilings look so much taller (they are only 8′ tall).
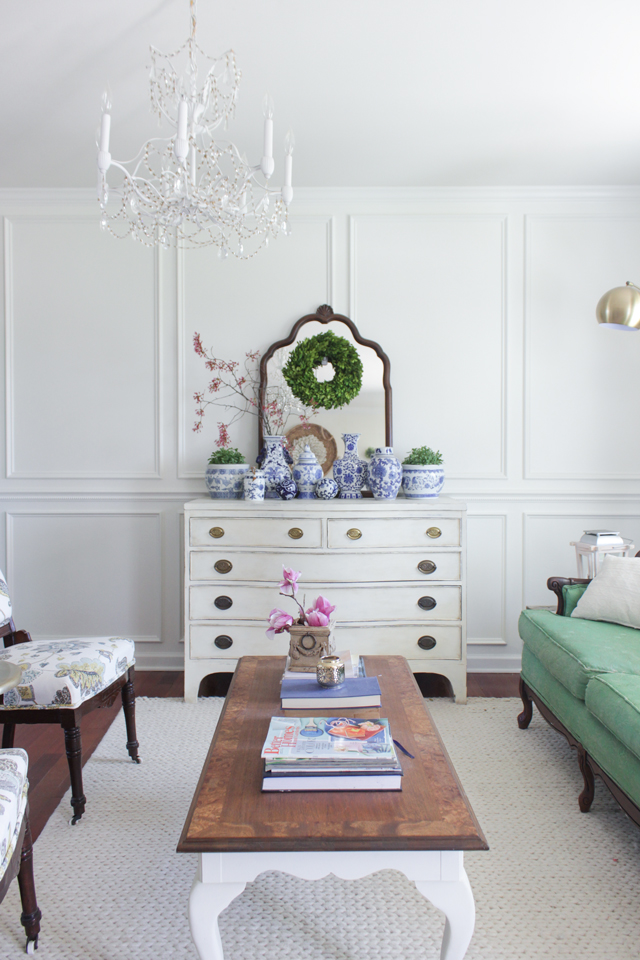
I grouped my collection of blue and white chinoiserie vases and such together to make a bigger impact and added preserved boxwood, faux boxwood, and a real flowering tree branch. I use all types of greenery/flowers in my home and I think you should too! 😉

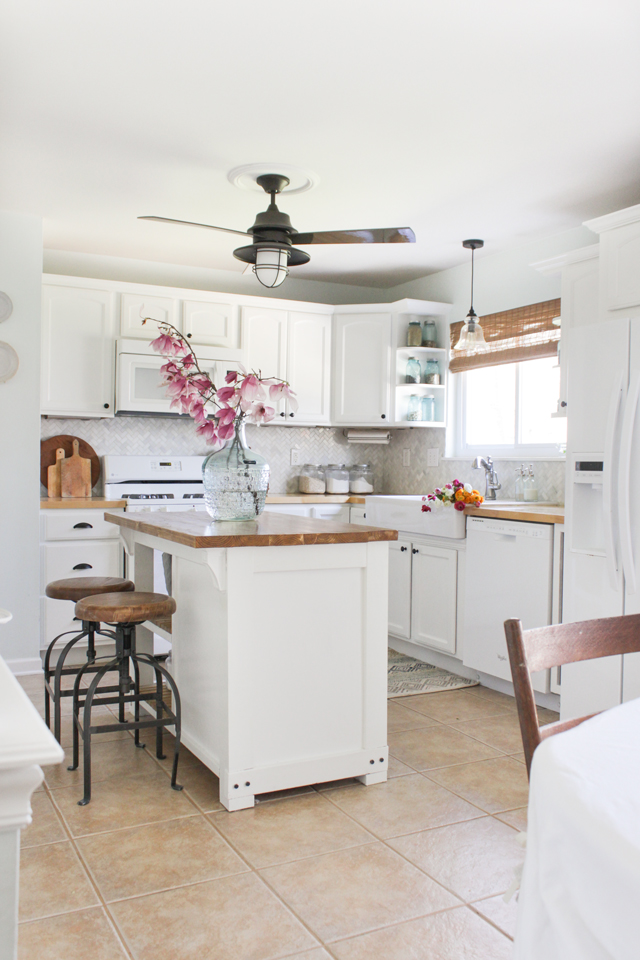
In the kitchen, I didn’t do much. I mostly just cleaned it and then added a big jug with a blooming magnolia. Clean is totally springy ya’ll ;)…. sometimes simplifying and decluttering is the best way to ‘decorate’ for spring.
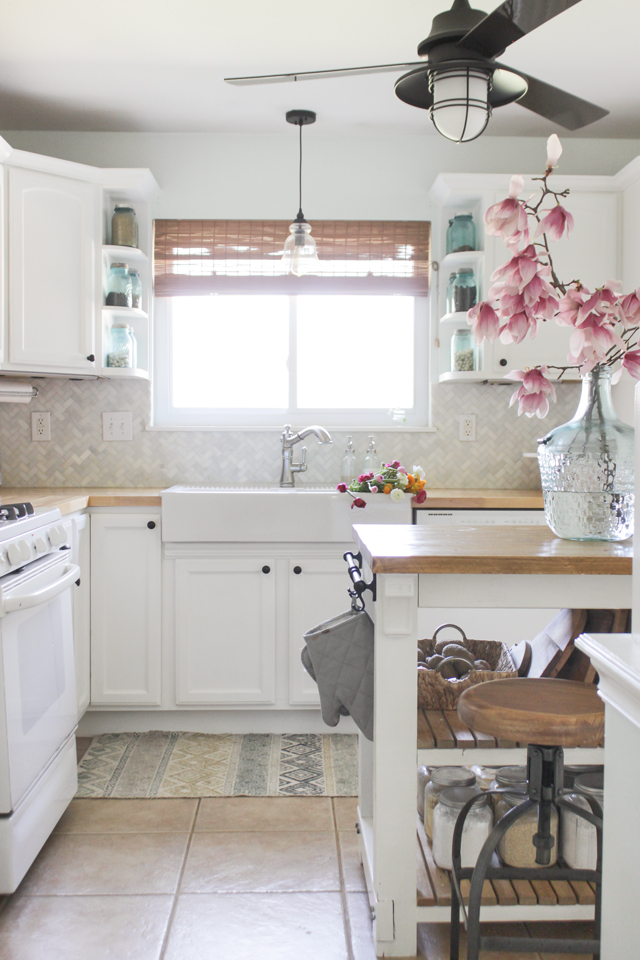
I’m slightly obsessed with magnolia. It doesn’t even seem real with the size of those flowers.
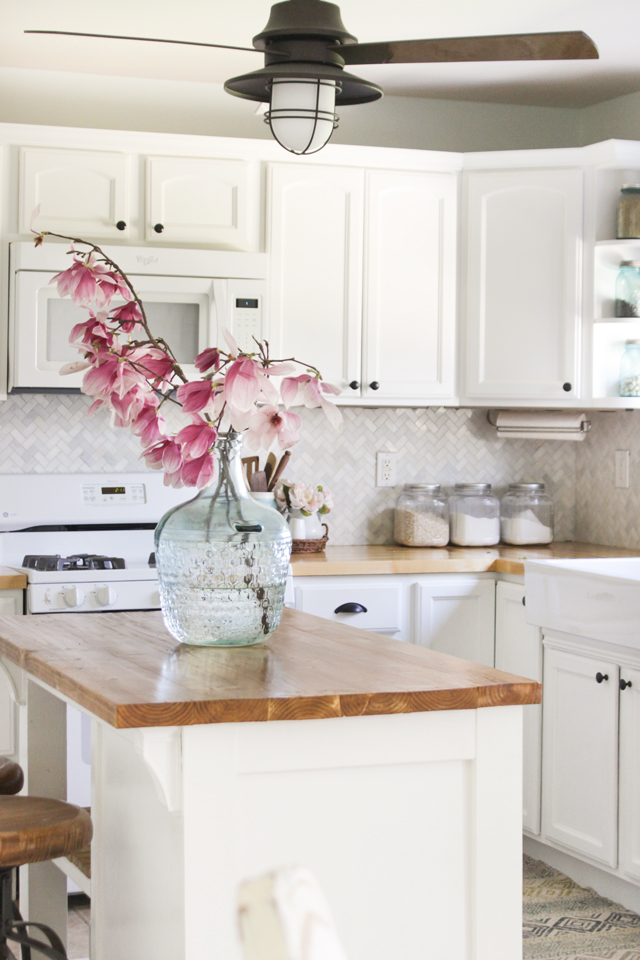
See my fairly recent kitchen makeover HERE.
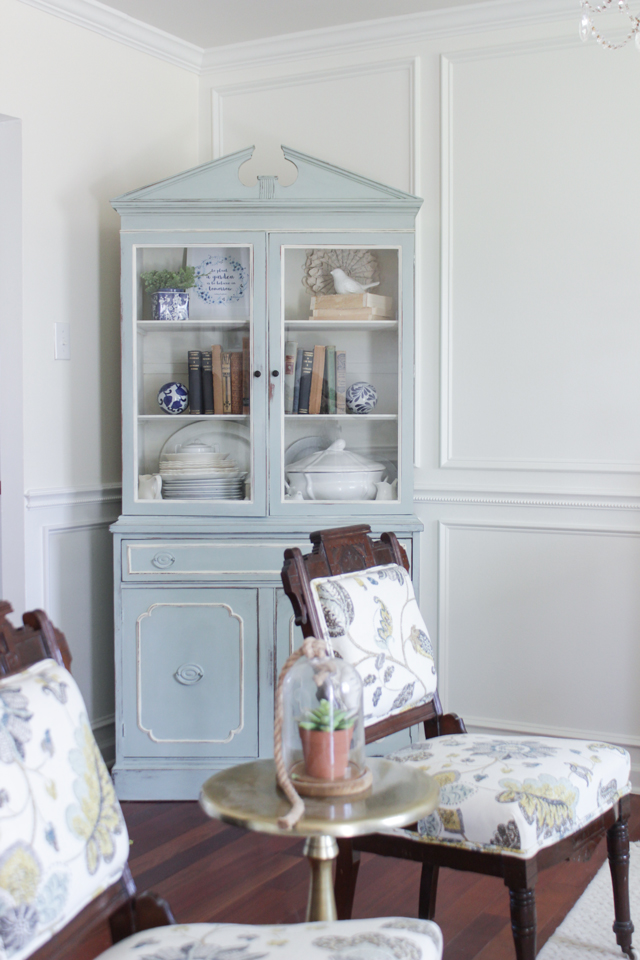
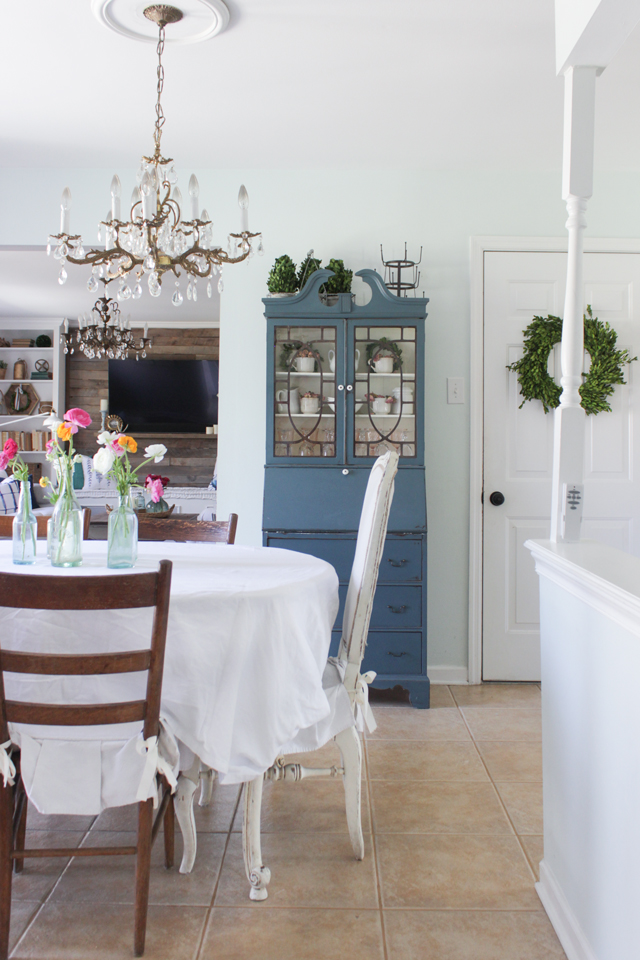
Turning the other direction you see the dining room and into the living room. The dining room didn’t have much changes take place… I just added some pops of color to the table and called it good!
Our living room is getting closer and closer to where I want it to be. I added a cushion to the bench, and freshened the room with new pillows and throws (some recycled from other parts of the house).
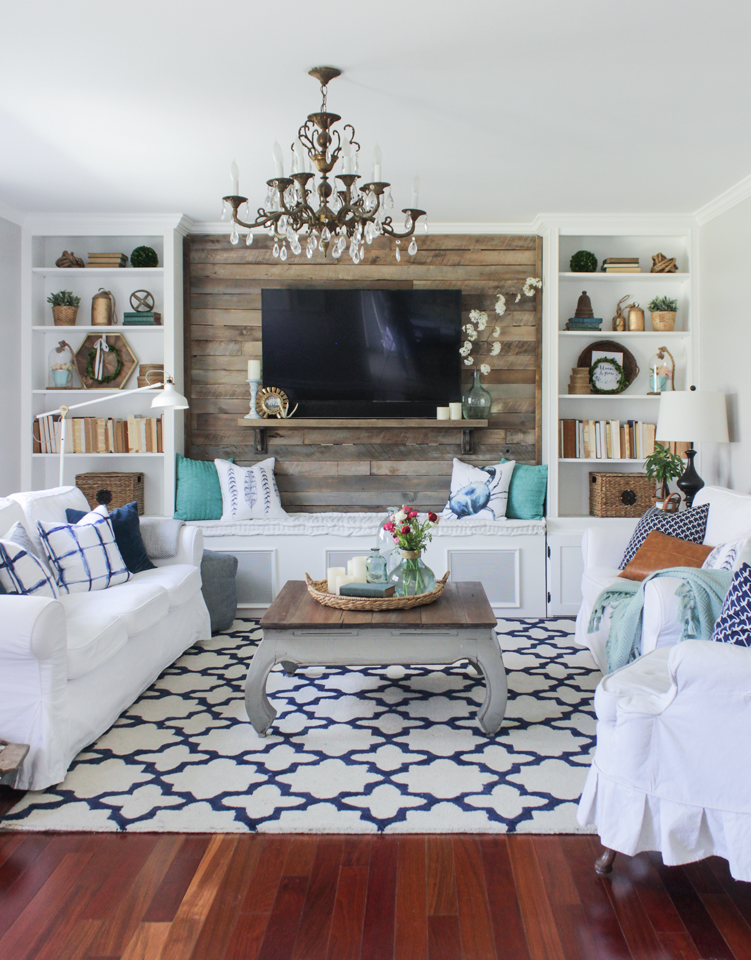
Area rug post , Pallet Wall Tutorial, Converting Bookcases into Built-ins, Coffee Table Makeover

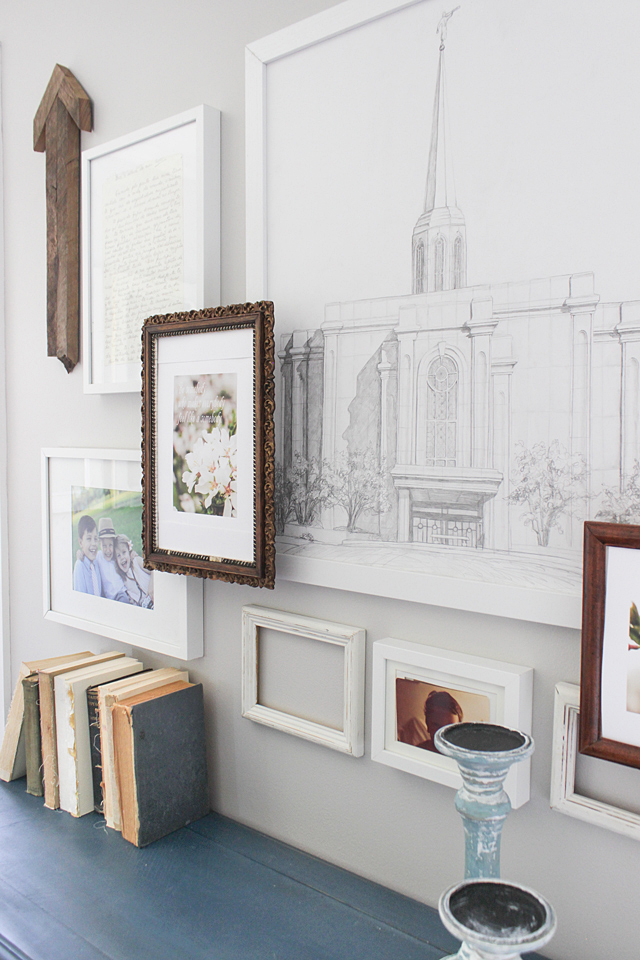
As you can see, the living room got a little switcharoo with furniture and wall decor. Reason? I painted the walls. 🙂 They are now Cornforth White by Farrow and Ball (color-matched). This is now my only gallery wall and it is filled with things I love: a letter from my husband’s grandmother, a picture of my kids, a picture of my husband as a child, some photos I took (and are available as a free printable), and a large drawing I did.
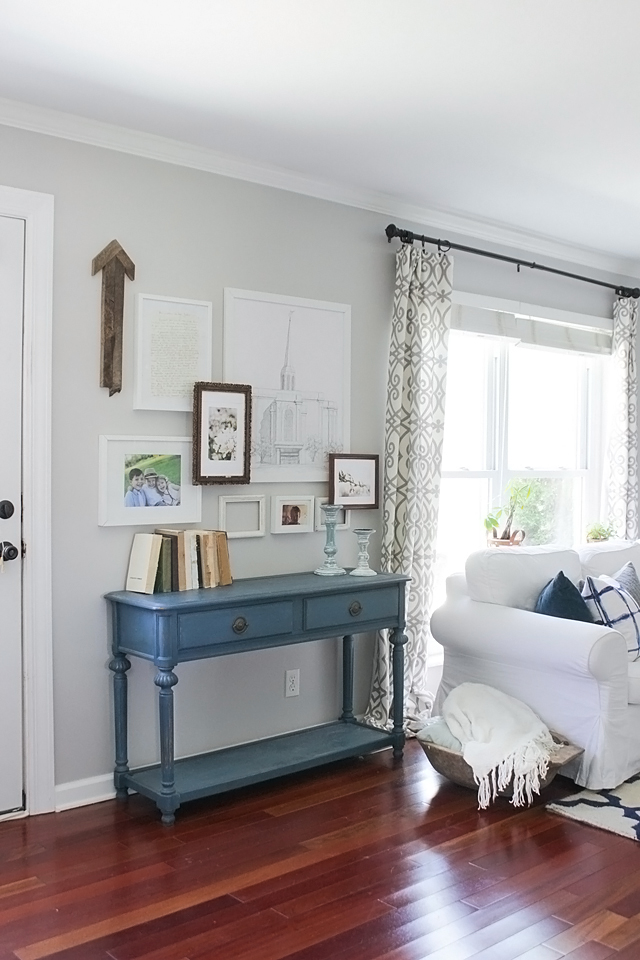
Console table makeover, No-sew Curtains Tutorial
The drew the large drawing of the St Louis Temple from my church last year but it was a size that didn’t fit in a standard frame. I looked into a thin white frame at Michael’s and it was $100 ON SALE. uhhhhh nope. I didn’t want to spend that much! I also didnt want to make one from scrap wood because I wanted the routed groove on the other side (which I didn’t want to bother with) and those little metal tabs that hold it in place take forever to get just right. Essentially I was lazy. So, I picked up a frame that was too big for $17 at Michael’s and made a custom frame from it. Want to see how I did it?

My art was 28″ x 24″ and the frame I bought was 36″ x 24″. It is for sure easier if you have at one side that matches the dimension of your art.
1- I measured and cut off the extra length. Pictured you see the long edges of the frame I already miter cut both sides to a 45 degree angle. You will want to add 1″ to the long side of the art (if it is a 1″ wide frame) or picture you want framed and then cut at that measurement.
2- Cut the top of the frame at 45 degree miter angles on both ends. Basically you will cut exactly where the joint is on both ends, cutting through the staples.
3- Add wood glue to both sides of the joint and join the top of the frame to the sides by using a heavy duty staple gun on the back side of the frame. This is basically the same method used originally to make the frame.
*Make sure you work on a very flat surface or the seam of the joint will open a little and won’t look good or be durable.*
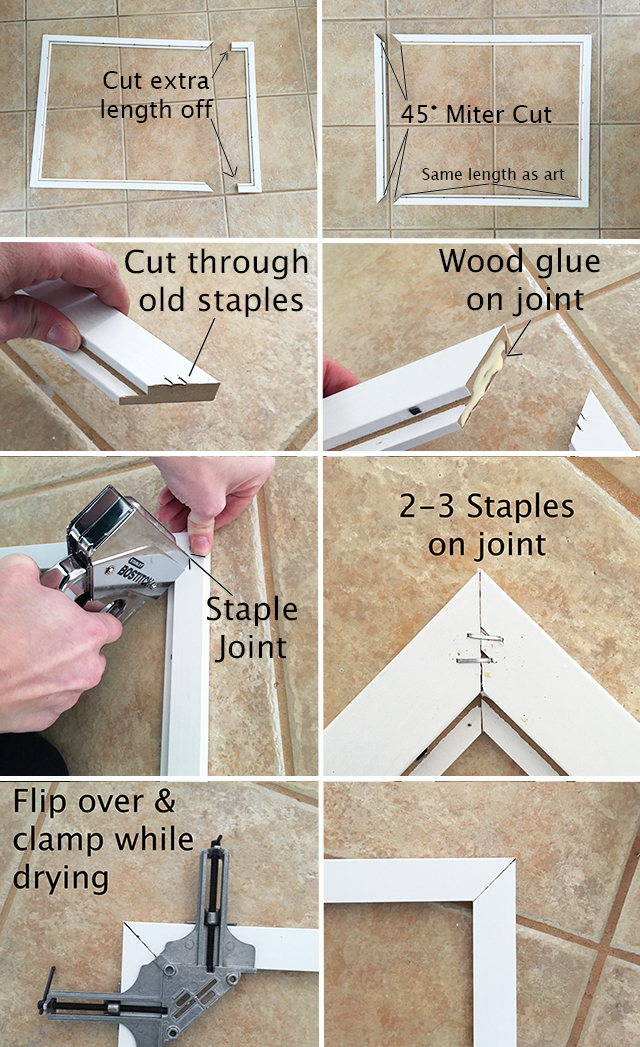
4- Use a corner or frame clamp while the glue dries so that the seam doesn’t open.
5- Once dry, place your art in on the other side, add the hardboard backing that comes with the frame (you can cut off the excess to make it fit) or use cardboard for the backing, and push down the tables to hold everything in place.

I also used the same method as The Lettered Cottage and added some layered frames with risers to the gallery wall.
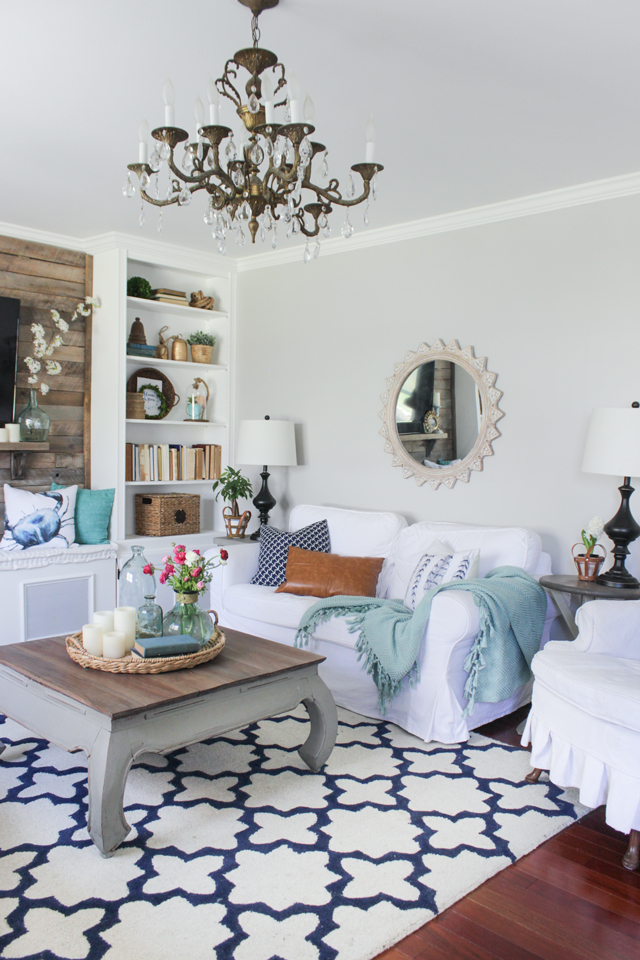
Our large sofa is now in front of the window and I love it so much more there. Part of it is switching things around always makes me happy, but also because it feels more balanced with the wing chair on the other side of the room now.
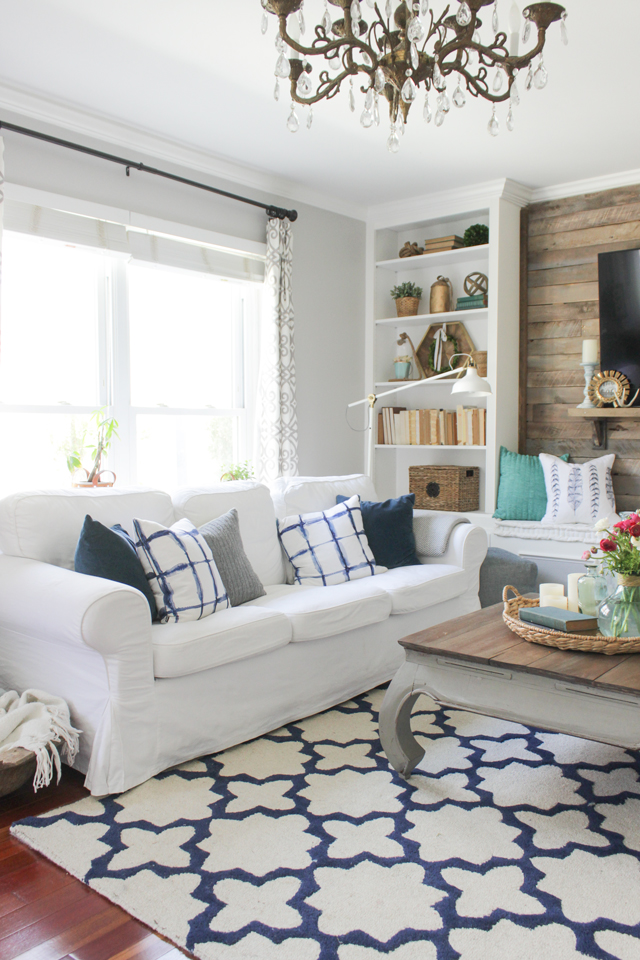
Navy velvet pillows HERE, Indigo Grid pillows HERE
I copied Bre and used the Target kitchen towels to make some pillows. It really was brilliant of her, wasn’t it? I’m also not quite done with the bench cushion. My mom helped me get started on it while she was visiting last week, then I sewed the edges and I still need to do the tufting in the middle like the french mattresses have.

With this cleaner simpler decor I’m gravitating towards, I removed the gallery wall above the couch and hung a round white-washed sunburst mirror from World Market.

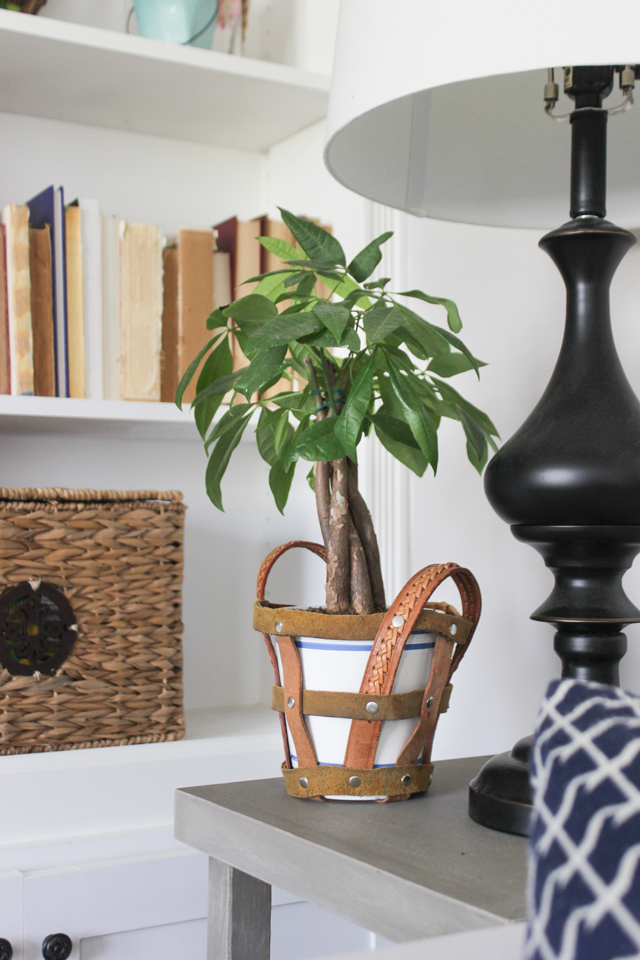
I moved the leather belt planter holders I made with these little plants that are STILL SURVIVING (miraculous!) into the living room and I love the life they add to the room.
This is my favorite angle in this room. This is fought-over seat by pretty much everyone in our house. That aqua chenille blanket is super warm as nights are still chilly here, so curling up there to watch TV is the best spot in the house.
Whew! You made it through! What was your favorite part? Let me know if you have questions or tutorial requests!
Be sure and check out all the tours of my friends below!
Jen, House of Wood — Emily, The Wicker House — Ashley, Cherished Bliss
Jennifer, Town and Country Living — Beth, Unskinny Boppy — Annie, Zevy Joy
Allison, The Golden Sycamore — Bre, Rooms FOR Rent — Rachel, Shades of Blue Interiors
Jennifer, Clean and Scentsible — Beth, Home Stories A to Z
Kristen, Ella Claire Blog — Lucy, Craftberry Bush — Danielle, Finding Silver Pennies
Alicia, A Burst of Beautiful — Rachel, Maison de Pax — Cami, TIDBITS
your living room is just so awesome! and i love the bottles of ranunculus on the dining table!
Ah! Everything is SO pretty, Rachel! Thank you so much for hosting all of us on this fun tour. I’m gonna go on a pinning spree today with all these pretty houses! 🙂 LOVE your DIY frames those ranunculas- WOW.
So so beautiful as always!
Enjoyed your gorgeous home tour. So springy!
I love love LOVE those layered frames! And this whole tour. Your style is always so beautiful, Rachel. P.S. I’m super jealous of your ranunculus. I haven’t been able to find any in my area at all this year.
I love all of your shades of blue! It’s beautiful how you make them all work together. ? Do you recall the shade you used on your church pew?
Thanks Jen! Yes, it was a 50/50 mix of Annie Sloan Chalk Paint in Duck Egg and Pure White.
Hi Rachel, this is the first time that I have commen ted on your blog. I just love your entire tour!! You are very talented! I would like to know the paint color and brand of the paint on your front door- it”s beautiful! Thanks! Sandee from Fairfax Va.
Hi Andee! Thanks for commenting and thanks for your sweet words! The front door is SW Meander Blue.
Rachel I loved this tour and your home is just beautiful! The grouping of the vases, the blooming branches and magnolias (amazing by the way) each and every detail. Thank you so much for hosting as you are an inspiration (I appreciated what you said at the start of your tour – great reminder). xo!
You DREW that?! You never cease to amaze me. What custom frame? 😉 All I could see was the art. That magnolia in the kitchen looks amazing. Love your entry too, ranunculus are one of my favorites. And the blue and white pottery collection!! I want one!!! I could clearly go on and on…
Gorgeous, Rachel! ALL of it! I love the magnolia branch in the big jug. It’s the perfect spring touch! Thanks so much for organizing this inspirational tour. I’m so honored to be a part of it!
Absolutely stunning! I loved every single thing!
In love with your home Rachel! So so stunningly beautiful! Your entryway is killing me. LOVE!
Thank you for the tutorial that told us how to cut down a frame. I bought a wonderful picture for $17.00. It is 9″ X 33.” The only frame I can get is a custom made frame for over $100.00! Well, as soon as I saw this post, I knew what I was going to do (and it’s not to buy the custom made frame.)
Thanks for saving me money!
Goodness. Too many beautiful things. The mat! The pew! The pallet wall! Everything is absolutely stunning – I just love your home, Rachel. Your chinoiserie vase collection is to die for – I’m so jealous. And those magnolia blooms are unreal! Clever tip on those DIY frames – I never would’ve thought to cut them down – so smart! Thanks for inviting me along for your Spring home tour blog hop – it was so much fun! xoxo
Your home is absolutely AMAZING!! I admire all of your decor and your talent. Just wanted to note though, the “pin this” links on the pictures in the post above are linking to the Rooms for Rent blog site, not back to your page, when I view the pin on Pinterest.
Katie, thank you SO much for the heads up. I’ve been having problems with the pin it button and am getting someone to look into it right away! Thank you thank you!
Rachel, your home is so bright and happy! I can’t decide which room I love the most! I love how you use so many beautiful colors and the wood accents keep everything warm and inviting. xo
Your living room is awesome, Rachel! Everything is so pretty. Enjoyed your home tour.
Hi Rachel,
Do you have a list of paint colors that you have used on your home, anywhere on your blog?
Best,
Shannon
I haven’t yet but it is on my to-do list! The rooms featured in my home tour have the following colors: entry- BM Mascarpone with BM Simply White on chair rail. Front room – BM Simply White on wainscoting wall. Kitchen – SW Timid Blue. Living Room – Cornforth White by Farrow and Ball.
Hi Rachel – Love the driftwood wall behind the tv. Where did you get the wood planks for that?? I am thinking of doing the same thing on my living room wall! Thank you 🙂
Nevermind, I found your post about the shipping pallets. Very intimidating DIY. Very impressive but I am going to try and find some wall paneling that looks like all the hard work you did. 🙂
OKay where are the curtains from? I have that exact same rug in my living room. Would love the curtains!
I loved the rug where can I purchase one what size does the rug come in. Your room was awesome.
Thanks! It is the Tuscan Terali Trellis Rug from RugsUSA in the color, Ivory. I know it comes in multiple sizes, you will have to check their site!
Where did you get the White Sofa and chair covers, please ?
Hey! I’m building a house and I want a wood plank wall in my living room like yours. Are the shelfs and bench built in or did you buy them separately? If you bought them, where? Thanks! Everything is so beautiful!!
Gorgeous! How did you make the bench seating on the pallet wall and the shelf under the tv?
I haven’t posted plans for them yet, but basically it is two long pieces of 1/2″ plywood with cut-outs in them for the metal screens. The inside I just took 4 pieces of plywood the width of how wide i want my bench, and about 1 inches shorter as the two long pieces and attached them. Then I attached them with pocket holes, evenly spaced (one on each end, and 2 spaced inside so there are 3 compartments). The lid is another piece of plywood cut to fit the top. I cut out a couple of notches for handholds so the lid could be easily removed but i haven’t put on hinges or anything. After that I just made a cushion to go on top and that was it!
I have a question. I was curious as to the width of your living room from built in to built in. We are finalizing home plans and I’ve been desperately trying to find a way of focal pointing a living room with out a fireplace and this is perfect.
The room width is 13’4″ (including bookcases) and each bookcase is 3′ wide.
Hi Rachel
Soo in love with your home especially living room. Are the bookcases built in or purchased??
Thanks!
The bookcases were just regular 6′ tall bookcases that we built cabinet bases for (https://www.shadesofblueinteriors.com/custom-cabinet-base-for-bookcase-with/) and then trimmed them out to make them built-ins (https://www.shadesofblueinteriors.com/how-to-convert-bookcases-into-built-ins/). I got my bookcases at home depot a while ago (they no longer sell what I bought), but you could use ikea billy bookcases and do the same thing! I have several friends who have done the same with great success and it looks amazing.
We are using your pallet wall/bookcases for our living room wall transformation..we love it!! Could you please share where you got the wooden shelf and brackets for below your tv?
Thanks in advance
The wooden shelf was reclaimed Barnwood but is a 2 x 6. The wooden brackets supporting it were from Lowe’s
Ty
Everything is 100% Fabulous. I love it all. Thank you for sharing.